
How to Drill Into Concrete: The 3 Keys to a Successful Job
This post contains affiliate links. As an Amazon Associate, we earn from qualifying purchases.
To drill into concrete successfully, you need three things: a drill with a hammering action (hammer drill or rotary hammer), a carbide-tipped masonry bit sized for your anchor, and a technique that controls heat and clears dust. The tool’s impact energy breaks the aggregate; the bit’s carbide teeth grind it; your job is to keep both cool and the hole clean.
That split-second impact is what separates concrete drilling from any other material. Wood fibers tear. Metal shavings curl. Concrete doesn’t give—it shatters. Your drill doesn’t cut; it pounds a chisel-edged bit into the matrix until the sand and stone give way as dust.
What follows: a breakdown of exactly how a hammer drill works versus a rotary hammer, the one visual cue that tells you a bit is right for concrete, and the step-by-step method that prevents the bit from snapping in the hole.
Key Takeaways
- A standard drill will overheat and stall. You need a hammer drill for holes under 3/8″ or a rotary hammer for anything larger or for more than a few holes.
- Carbide-tipped masonry bits are non-negotiable. The black or gold carbide tip is visibly different from a standard HSS bit’s silver point.
- Heat destroys bits. Drill in short, 10-second bursts and pull the bit out to clear dust and let it cool.
- Hitting rebar will instantly dull a standard bit. Have a rebar cutter or a multi-material bit ready if you suspect steel.
- Silica dust is a serious health hazard. Use water, a vacuum with a HEPA filter, or at minimum a well-fitted N95 respirator.
The Right Tool for the Job: Hammer Drill vs. Rotary Hammer
A cordless drill spins. A hammer drill spins and taps. A rotary hammer spins and drives a piston.
The difference isn’t academic. It’s a matter of impact energy, measured in joules. A hammer drill uses a mechanical clutch system to generate a rapid, low-force tapping action—great for brick, block, and the occasional 1/4″ hole in a slab. A rotary hammer uses an internal electropneumatic mechanism to drive a piston, delivering fewer but much more powerful blows. The DeWALT D25333 rotary hammer, for example, delivers a single impact energy of 3.5 joules (per its EPTA 05/2009 rating).
The vibration emission value for drilling into concrete with the DeWALT D25333 is 6.9 m/s². This isn’t just a number on a spec sheet. After 30 minutes of continuous use, that vibration travels through your hands and arms. It’s why gloves matter, and why taking breaks isn’t optional.
When to use a hammer drill: Anchoring a shelf, hanging a picture, installing a small light fixture—any job with holes under 3/8″ in diameter and fewer than ten holes total.
When to step up to a rotary hammer: Drilling for pipe penetrations, installing deck footings, setting large concrete anchors, or any project requiring more than a dozen holes. The tool does the work; you just guide it.
For the one-in-a-million scenario where you have no hammering tool, our guide on how to drill into concrete without a hammer drill covers the last-resort techniques. It’s slow, it’s hard on tools, and it’s only for very small holes.
The Anatomy of a Concrete Drill Bit
A concrete bit doesn’t cut. It grinds. The business end is a carbide tip, usually black or gold, brazed onto a steel shaft. This tip is harder than the sand and stone aggregate in concrete. The flutes behind the tip are deep and wide, designed to channel dust out of the hole as you drill. A standard twist bit for metal has sharp, spiraled edges for slicing; a masonry bit has paddles for debris removal.
| Bit Type | Best For | Visual Identifier |
|---|---|---|
| Carbide-Tipped Masonry | General concrete, brick, block | Black or gold chisel-shaped tip |
| SDS-Plus Rotary Hammer | Dedicated rotary hammers only | Grooved shank, no chuck teeth |
| Diamond Core Bit | Large, clean holes (2″ and up) | Hollow cylinder with diamond segments |
| Multi-Material Bit | Concrete with known rebar | Carbide tip with a different flute design |
The shank tells you what tool it fits. A round shank goes in a standard chuck. An SDS-Plus shank has grooves and fits only into an SDS-Plus rotary hammer, locking in with a twist and a click. This system allows for faster bit changes and transmits the hammer blows more efficiently. Trying to use an SDS bit in a standard chuck is impossible; trying to use a round-shank bit in an SDS chuck requires a special adapter, which adds slop and reduces impact transfer.
If you’re unsure what you’re holding, our article on what a concrete drill bit looks like breaks down the identifying features.
Gearing Up: Safety Before the First Spark
Concrete drilling creates two immediate hazards: silica dust and projectile fragments.
Silica dust comes from the crushed sand and stone. Inhaling it can lead to silicosis, a serious lung disease. Water is the best suppressant. If you’re drilling indoors or can’t use water, you need a vacuum with a HEPA filter attached directly to the drill or a well-fitted N95 respirator. A dust mask from the hardware store isn’t enough.
Eye protection is not optional. The bit can shatter, or a piece of aggregate can shoot out of the hole. Wear safety glasses with side shields. Gloves dampen vibration and improve grip, especially when the drill wants to torque.
Before you start: Always scan for pipes and wires behind the wall. Hitting a live electrical line or a water pipe turns a simple project into an expensive emergency. Use a stud finder with AC detection or assume utilities are present and drill with caution.
Ear protection is often overlooked. A rotary hammer operates at about 104 dB, which is enough to cause hearing damage with prolonged exposure. Basic foam earplugs are sufficient.
Step-by-Step: The Concrete Drilling Process
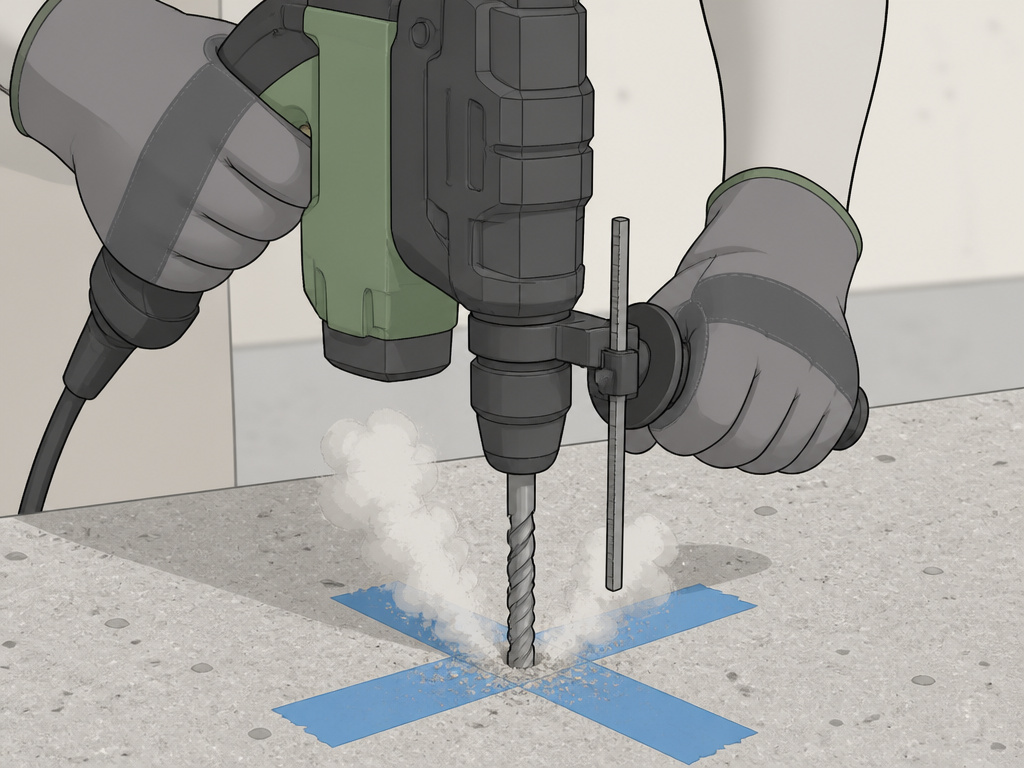 This process assumes you have the right tool and bit. If you don’t, stop and get them. Forcing the wrong gear will end in a broken bit, a stalled drill, or a cracked concrete surface.
- Mark and Secure. Use a permanent marker or a center punch to dimple your hole location. Place a piece of masking tape over the mark. This gives the bit tip some initial grip and prevents it from “walking” on the smooth concrete surface.
- Set the Depth. If your drill has a depth stop, set it. If not, wrap a piece of masking tape around the bit at your desired depth. Drilling deeper than needed weakens the concrete and wastes time.
- Start Straight. Position the drill perpendicular to the surface. Start at a slow speed without the hammer action to establish the hole. Once the bit has made a shallow groove, you can engage the hammer function and increase speed.
- Use Burst Drilling. Drill for no more than 10-15 seconds at a time. Apply firm, steady pressure, but let the tool do the work. Do not lean on it.
- Clear the Hole. After each burst, pull the bit completely out of the hole. This clears the flutes of dust, allows the bit to cool, and lets you see your progress. Blow out the hole or use a vacuum.
- Repeat to Depth. Continue the burst-and-clear cycle until you reach your tape line or depth stop. If the bit stops making progress, it’s likely overheating or has hit rebar.
- Final Cleanout. Before inserting your anchor, vacuum or blow out the hole one final time. Any loose debris left inside will compromise the anchor’s holding power.
For the specific technique of using a dedicated rotary hammer, our guide on how to use a hammer drill in concrete covers the finer points of stance and pressure.
When Things Go Wrong: Hitting Rebar and Overheating
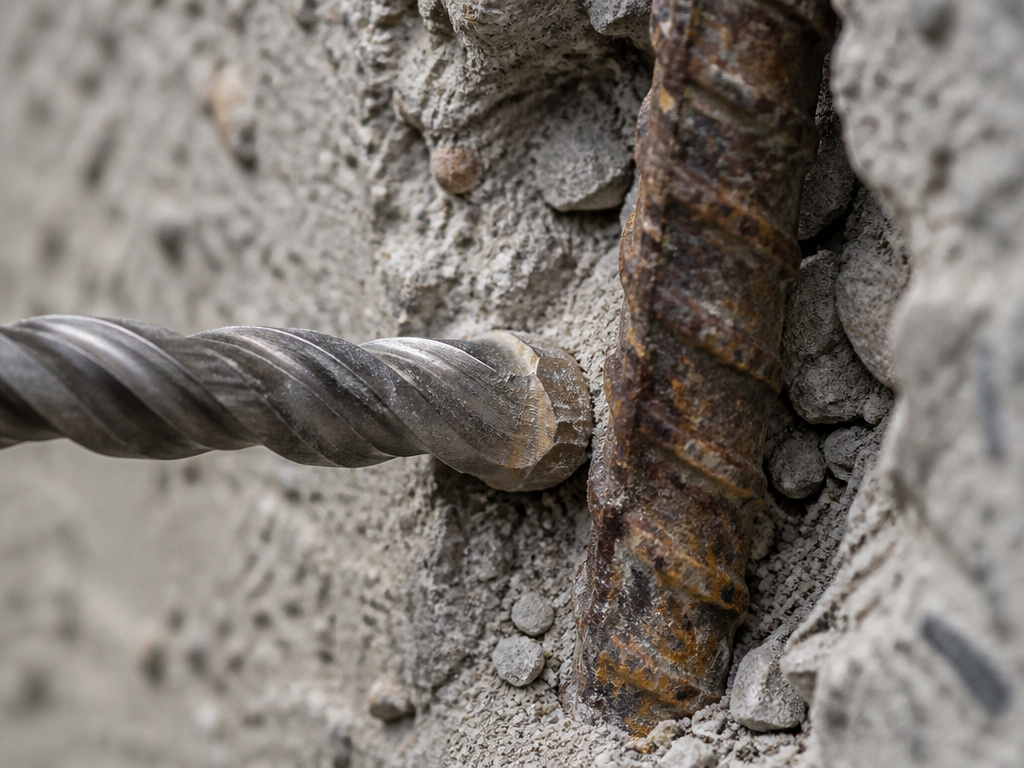 The drill stops. You feel a metallic grind. You’ve hit rebar.
Stop drilling immediately. A standard carbide masonry bit will be instantly dulled by steel. You have three choices: abandon the hole and drill a new one a few inches away, use a dedicated rebar cutter attachment, or switch to a multi-material bit designed to cut through steel and concrete. The last option is slow but effective if relocation isn’t possible.
Overheating is a quieter failure. The bit tip turns blue from heat treatment, the cutting edges glaze over, and progress slows to nothing. The cement binding the concrete aggregate can actually melt and re-harden around the bit, gluing it in place. If the bit is stuck, do not force it. Switch the drill to reverse (if available) while gently wiggling. Sometimes applying a drop of penetrating oil around the bit’s shaft can help. Prevention is straightforward: shorter drilling bursts and active cooling with water if your tool and bit allow it.
For large holes where rebar is a near-certainty, like for a 4-inch pipe, you need a different approach entirely. The process for how to drill a 4 inch hole in concrete involves diamond core drills and often a dedicated rig.
Drilling Large Diameters and Special Surfaces
The rules change when the hole gets bigger. For holes over 2 inches in diameter, you move into core drilling territory. Tools like the Husqvarna DM 200 drill motor are designed for this. It’s a handheld diamond core drill with a serious limitation: the maximum handheld drilling diameter in concrete is 80mm (3.1 inches). Beyond that, the torque reaction if the bit binds can injure the operator, so a stabilizing rig is mandatory.
Where this goes sideways: Using a core drill dry without a dust extractor. The Husqvarna manual explicitly states dry drilling in masonry is only acceptable with a dust extractor connected. Without it, the machine overheats, the diamond segments clog, and you create a toxic silica dust cloud.
Wet drilling is standard for core drills. Water cools the diamond segments and flushes the slurry out. It keeps the dust down and extends the life of the expensive core bit. The DM 200 recommends a water flow of 1.7-2.4 liters per minute in its low gear.
For other cementitious materials, the bit choice is key. Drilling into a smooth cement patio requires the same basic tools as concrete, but the surface is often harder. Start with a sharp, high-quality carbide bit. The process for drilling into cement is identical, but expect slower progress and more bit wear.
Bit Selection Deep Dive: Masonry vs. Everything Else
People ruin drill bits by using them on the wrong material. A wood bit has a sharp, pointed spur for clean entry. A metal bit has a 135-degree split point for precise cutting. A masonry bit has a blunt, chisel-shaped carbide tip for abrasion.
The confusion often happens with “multi-purpose” bits. They’re a compromise. They’ll drill wood, metal, and plastic adequately, and they might seem to work in concrete for a hole or two. But they lack the robust carbide tip and the debris-clearing flute design. They’ll overheat, lose their edge, and bend.
Common mistake: Assuming a “concrete drill bit” and a “masonry drill bit” are different. They’re the same thing. The terms are interchangeable in the hardware aisle. The real difference is between masonry bits and bits for every other material.
If your project involves both wood framing and concrete anchors, you need two bits. Don’t try to make one do both jobs. The wear from concrete will render the bit useless for clean woodworking. Our comparison of concrete drill bit vs wood details the structural differences that make each one specialized.
Similarly, the difference between a dedicated masonry bit and a regular HSS bit is night and day. For a clear breakdown of when to use which, see our guide on masonry drill bit vs regular.
Frequently Asked Questions
Can I use a regular drill to drill into concrete?
You can, but you shouldn’t. A regular drill lacks the hammering action to fracture the aggregate. It will rely solely on friction, generating extreme heat. You’ll burn up bits, stall the motor, and achieve maybe one or two small holes with heroic effort. For any legitimate project, use a hammer drill.
What size drill bit do I need for a concrete anchor?
The anchor packaging will tell you. Typically, for a plastic sleeve anchor, you drill a hole the same diameter as the anchor body. For a concrete screw (Tapcon), you drill a hole slightly smaller than the screw’s diameter. Always follow the manufacturer’s drill bit specification for the anchor. A hole that’s too large means zero holding power.
Why is my drill bit not going into the concrete?
Three likely causes: a dull bit, a tool without sufficient power/hammer action, or you’ve hit rebar. Inspect the bit’s carbide tip for rounding or chipping. Ensure your hammer drill’s selector is on the hammer-and-drill setting. If you feel a metallic vibration, you’ve found steel.
How do I prevent the concrete from cracking around the hole?
Start with a small pilot hole, especially near edges. Use sharp bits and avoid excessive side-to-side wobble while drilling. The hammering action itself is a controlled crack propagation; a blunt bit or erratic technique makes those cracks less controlled. For critical applications, you can also use a lower speed setting.
What is the white dust from drilling concrete, and is it dangerous?
The white dust is pulverized concrete, which contains crystalline silica. Yes, it is dangerous with repeated, unprotected exposure. Always use dust control: water suppression, a vacuum with a HEPA filter, or as a bare minimum, a properly fitted N95 respirator. Do not rely on a simple fabric dust mask.
What’s the difference between drilling into concrete and brick?
Brick is softer and more porous than structural concrete. You can often get away with a hammer drill and a masonry bit for brick, even for larger holes. Concrete, especially high-PSI mix with hard aggregate, demands more impact energy. The technique is the same, but concrete is less forgiving of underpowered tools.
The Bottom Line
Drilling into concrete isn’t about muscle. It’s about mechanics. Match a tool with genuine hammer action to a genuine carbide-tipped masonry bit. Control heat with short drilling bursts. Control dust for your long-term health. And when the project calls for a hole bigger than your fist, rent the right core drill and rig—the Husqvarna DM 200’s 80mm handheld limit isn’t a suggestion.
For the majority of home projects, a mid-range hammer drill and a pack of name-brand Bosch or DeWALT masonry bits will see you through. Keep it cool, keep it clean, and let the tool’s joules do the work your arms can’t.
