
How to Drill Into Drywall Without Hitting Wires or Studs
This post contains affiliate links. As an Amazon Associate, we earn from qualifying purchases.
Drilling into drywall requires matching three things: the right drill bit, the correct anchor for your load, and adherence to building codes that dictate hole placement. The most critical rule is keeping any hole for electrical cable at least 1-1/4 inches from the edge of a stud; closer requires a protective steel plate. Ignoring this code risks driving a drywall screw through a live wire.
That 1-1/4 inch setback isn’t a suggestion. It’s the National Electrical Code’s buffer against the 3/4-inch penetration of a standard drywall screw. Electricians drill 3/4-inch holes dead center on a 3.5-inch stud for a reason, it leaves 1-3/8 inches of wood on each side, a safe margin. Your project isn’t just about making a hole; it’s about making a hole in the right place without compromising the wall’s structure or your safety.
What follows is the sequence that separates a clean, secure installation from a call to an electrician or a structural repair. We’ll cover the mandatory pre-drill safety scan, the mechanics of bit selection, the step-by-step drilling technique, and how to handle two high-stakes exceptions: load-bearing walls and possible asbestos.
Key Takeaways
- Locate studs and utilities first. A quality stud finder with AC wire detection is non-negotiable. Drilling blind is how you hit plumbing or electrify your drill bit.
- Respect the 1-1/4 inch setback. Any hole for cable or pipe within 1-1/4 inches of a stud’s edge must be covered by a 1/16-inch thick steel protective plate to guard against fasteners.
- Use a brad-point or spade bit for clean holes. These bits shear drywall cleanly. A standard twist bit will tear the paper face and create a ragged, weak hole for anchors.
- Never notch a stud if you can drill it. A hole weakens a stud less than a notch of the same size. In bearing walls, holes cannot exceed 40% of the stud’s width.
- Suspect asbestos in pre-1990 homes. Drilling into possible asbestos-containing drywall requires a full containment procedure with wet methods and HEPA filtration, this is not a DIY task.
The Non-Negotiable Safety Steps Before You Drill
The National Electrical Code (NEC) requires holes containing non-metallic cable (Romex) to be set back 1-1/4 inches or more from the edge of a stud. If a hole is closer, a 1/16-inch thick steel plate must be installed over the stud face to protect the wire from drywall screws and nails.
You do not drill first. You scan first. The cost of skipping this is a punctured water pipe, severed electrical cable, or a weakened load-bearing wall. The tool for this is a decent stud finder with deep-scan and AC wire detection modes, like a Zircon MetalliScanner or a Franklin Sensors ProSensor. Run it over the entire work area, marking the edges of every stud.
Why the edges matter more than the center: Knowing the stud’s exact boundaries lets you calculate the code-mandated setback. It also reveals where previous trades may have already drilled. Electricians often stack multiple 3/4-inch holes vertically in the center of a stud. If you need to run a new wire or pipe, you can use an existing bore path instead of creating a new weak point.
Common mistake: Assuming a wall is empty between studs. HVAC vents, plumbing runs, and old cabling often live there. A deep-scan mode finds these objects.
Your scan has two goals: confirm the wall is hollow where you want an anchor, and confirm the stud is solid where you need structural support. For heavy items like televisions or shelving, you must drill into the stud. For medium loads, a hollow-wall anchor in the drywall itself is sufficient. There is no third option.
| What You’re Hanging | Support Method | Critical Check |
|---|---|---|
| Picture frame, small shelf (< 20 lbs) | Hollow-wall anchor (plastic toggle, molly bolt) | Confirm hollow space with stud finder. |
| Medium shelf, mirror (20-50 lbs) | Heavy-duty toggle bolt | Verify drywall is 1/2″ or thicker, not cracked. |
| TV mount, large cabinet (> 50 lbs) | Lag screw directly into stud | Locate exact stud center; check for existing holes/notches in that stud section. |
Drill Bit Selection: What Actually Works
The wrong bit makes a mess. A standard twist bit, designed for metal or wood, will grab and tear the gypsum core and the paper facing of drywall. The result is a crater, not a clean cylinder, and your anchor will have nothing to grip.
You need a bit that shears the material cleanly. For holes under 1/2 inch, a brad-point bit is the best choice. The sharp central tip prevents walking, and the outer spurs score a clean circle before the flutes clear the dust. For larger holes, for running cable or installing a low-voltage ring, a spade bit or an adjustable drywall hole saw works.
Why a brad-point beats a twist bit: The cutting action is a slice, not a grind. The brad-point’s spurs act like a tiny hole saw, cutting the paper face cleanly so the core crumbles away without tearing. A twist bit relies on friction and will wrap the paper around the shaft, pulling it away from the gypsum.
- Brad-Point Bit (1/4″ – 1/2″): Use for pilot holes and anchor holes. Provides the cleanest finish. Stop drilling the moment the bit penetrates the back of the drywall to avoid damaging whatever is behind it.
- Spade Bit (1/2″ – 1 1/2″): Use for larger holes for cables or pipes. Start slow to establish the edges, then increase speed. The flat blade can be aggressive.
- Adjustable Drywall Hole Saw: Use for precise, large-diameter holes (for electrical boxes, speakers). It’s essentially a guided spade bit. Set the diameter, drill a pilot hole, and rotate.
Keep a vacuum nozzle or a helper with a shop vac near the hole. Drywall dust is fine and gets everywhere. Drilling through the paste in the asbestos procedure? That’s a different world.
The Step-by-Step Drilling Technique
You have your target marked and your bit chucked. Now the drill itself matters. A cordless drill like a DeWalt DCD800 or Milwaukee M18 Fuel gives you control and variable speed. Set it to the drill setting (not hammer) and a medium speed.
The sequence is non-negotiable:
- Don your safety glasses. Drywall dust in the eye is a guaranteed trip to the sink.
- Place the brad-point tip exactly on your mark. Apply very light pressure.
- Pull the trigger to a medium speed and drill straight in. Let the bit do the work; forcing it causes blowout on the backside.
- The moment you feel resistance drop, stop. You’ve broken through the drywall. Do not keep drilling “just a little more.”
- Reverse the drill out while it’s still spinning slowly. This helps clear the dust from the hole.
Where this goes sideways: Drilling at an angle “to be sure” you hit the stud. If your bit isn’t perpendicular to the wall, your screw will enter at that same angle. The threads won’t engage properly, and the holding power drops by half. Use a square if you have to.
For hollow-wall anchors, the hole size is specified on the anchor’s packaging. Match it exactly. A hole that’s too large renders the anchor useless; a hole that’s too small can crack the drywall when you force the anchor in. If you’re drilling into a stud for a screw, your pilot hole should be slightly smaller than the screw’s shard diameter (not the thread diameter).
When the Rules Change: Studs, Load-Bearing Walls, and Asbestos
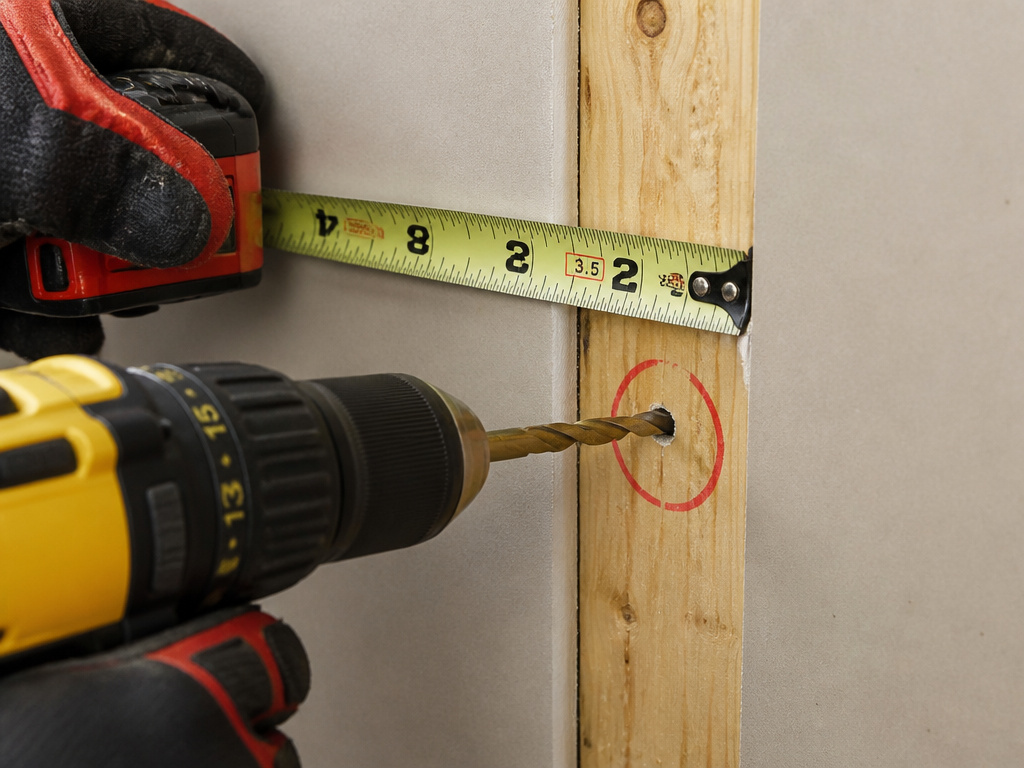
This is where commodity advice stops and the building code takes over. Drilling into the stud itself is often necessary, but you cannot treat it like solid wood. It’s a structural component.
The code dictates hole and notch sizes based on whether the wall is load-bearing:
- Bearing Wall: Maximum hole size is 40% of the stud’s width. Maximum notch depth is 25%.
- Non-Bearing Wall: Maximum hole size is 60%. Maximum notch depth is 40%.
A 2×4 stud is actually 3.5 inches wide. In a bearing wall, your hole cannot exceed 1.4 inches in diameter. The edge of any hole must also be at least 5/8 inch from the edge of the stud. This is separate from the NEC’s 1-1/4 inch rule for cables.
Easy to miss: Avoid drilling or notching near large, loose knots in the stud. The grain distortion around a knot creates a natural weak point, and a hole there can cause a split to run the length of the board.
The other exception is historical. Homes built before 1990 may have drywall containing asbestos. Drilling into it is a Type 1 asbestos operation with a formal safe work procedure. It involves sealing the area with plastic, covering drill points with a thickened paste (like shaving cream), drilling through the paste, and meticulous HEPA vacuum cleanup. This is not a casual DIY project; the asbestos-containing drywall safe work procedure from the Manitoba Heavy Construction Association outlines the required containment. If you suspect asbestos, you stop and call a professional.
Choosing and Setting the Right Fastener

The hole is clean. Now what goes in it? Your choice determines whether your shelf stays up.
- For Hollow Drywall (No Stud): Use a toggle bolt or a snap-toggle anchor for heavy loads (over 20 lbs). The wings spread behind the drywall, distributing weight across a larger area. Plastic expansion anchors are only for very light duty.
- For Studs: Use a wood screw or lag screw. The length should allow the screw to penetrate at least 1 inch into the solid wood of the stud after passing through the drywall and any baseplate.
The installation rhythm matters. For a plastic anchor, tap it in gently with a hammer until it’s flush. Do not drive it in with your drill; you’ll strip the internal threads. For a toggle bolt, insert the bolt through your fixture, attach the toggle, fold the wings, and push the whole assembly into the hole. Pull back gently to seat the toggle against the back of the drywall, then tighten.
What most people get wrong: Overtightening. You tighten until the fixture is snug and the anchor or toggle is fully set. Cranking it further crushes the drywall core, creating a cone of failure that lets the anchor pull straight out with minimal force. You’ll feel the resistance spike, then get soft. That’s the drywall failing. Stop at the spike.
Frequently Asked Questions
What if I hit something metal while drilling?
Stop immediately. You’ve likely hit a protective plate covering a wire or pipe, a nail, or a metal stud. Do not force through. Investigate with a stronger magnet or an endpoint inspection camera. If it’s a plate, you cannot drill there, the code placed it for a reason.
Can I use a hammer drill on drywall?
Never. A hammer drill is for masonry and concrete. Its percussive action will shatter the drywall around the hole, creating a massive, unusable crater. Use the standard drill mode on your tool.
How do I drill a large hole (over 2 inches) in drywall?
Use a drywall hole saw or a rotary tool with a circle-cutting guide. For large holes, the research shows a pro tip: cut horizontally first. This lets you immediately check for studs or pipes in the path. If you hit one, you can adjust the hole’s vertical placement before committing to the full circle.
My drill bit keeps “walking” on the drywall surface. How do I stop it?
This is why you use a brad-point bit. Its sharp center tip digs in and prevents walking. If you only have a twist bit, create a small starter dimple by tapping a nail into the drywall paper at your mark. This gives the bit tip a place to seat.
Is it safe to drill above an electrical outlet?
It is a high-risk zone. Wires often run vertically up and down from outlets. Your stud finder’s AC detection mode is critical here. Assume there is a wire within 6 inches above or below the outlet box unless your scanner clearly shows otherwise.
Before You Go
Drilling into drywall is a test of patience, not force. The right sequence, scan, select, drill straight, fasten snug, beats muscle every time. Remember the two numbers that matter most: the 1-1/4 inch setback for wires and the 40% hole limit in load-bearing studs. Get those right, and the hole itself is the easy part. Your cordless drill and a brad-point bit will handle the rest. Now go mount that shelf.
