
Using a Step Drill Bit: Master Speed, Pressure & Technique
This post contains affiliate links. As an Amazon Associate, we earn from qualifying purchases.
To use a step drill bit, match three things: the bit’s flute type to your material, the drill’s RPM to the bit’s diameter, and the correct lubricant for the metal you’re cutting. Run a 7/8-inch bit in mild steel at 650 RPM or slower, use cutting oil on aluminum, and ease off pressure just before the step breaks through the back side. Skip the lubricant on aluminum and the bit loads up with galled metal within three holes.
That 650 RPM ceiling comes from the Ideal Spiral Step Bits data sheet. It’s not a suggestion, it’s the speed where the bit’s titanium nitride coating stops burning off and the cutting edges last for dozens of holes instead of a handful. Go faster and you trade a few seconds per hole for a dead bit by lunch.
What follows is the operator’s manual the bit never ships with: the two flute designs, the four material-specific RPM charts, the one wind-down move that prevents snagging, and the three mistakes that burn out a step bit before its first coffee break.
Key Takeaways
- Spiral flute bits eject chips efficiently for metals; straight flute bits are cheaper but clog faster in steel or aluminum.
- Set your drill to 650 RPM or lower for bits 7/8-inch and under in steel; for aluminum, you can run up to 2000 RPM if you use lubricant.
- Always use cutting fluid on aluminum. Dry drilling loads the flutes with galled metal, jamming the bit and ruining the hole finish in 2-3 holes.
- Ease off pressure just before the step you’re using fully penetrates the material to prevent the bit from snatching and deforming the exit side.
- Step bits are for sheet material up to 3/8-inch thick. For thicker stock, use an annular cutter or hole saw.
The Two Flute Types That Decide Cleanup
Head design changes the entire process. Look at the business end of your trimmer.
That’s a joke. Look at the flutes on your step bit.
You have two choices, and this isn’t a minor preference. A straight flute (flat-sided) bit is the budget option. It works for occasional holes in plastic or thin wood. The problem is chip evacuation. In metal, the shavings have nowhere to go but straight up the groove. They pack in, create heat, and gall against the bit’s sides. You’ll feel the drill bog down, smell hot metal, and see a ragged, work-hardened hole.
A spiral flute bit has a helical groove. Think of it as a screw conveyor for chips. As the bit turns, the spiral actively pulls cuttings up and out of the hole. This keeps the cutting edge cooler and the hole cleaner. For any regular work in steel, aluminum, or electrical enclosures, the spiral flute is the only correct choice. Brands like Sutton build their entire range, like the D504 model, with spiral flute geometry.
The part nobody mentions: A straight flute bit in 16-gauge steel will overheat and dull after about 15 holes. The same job with a spiral flute bit like the Ideal 36-705 leaves the bit cool enough to touch and ready for 50 more.
What’s the Right RPM for a Step Drill Bit?
The number on the side of your drill is a suggestion. The number in the manufacturer’s manual is a limit.
Step drill bits have a maximum effective speed, and it’s almost always lower than you’d run a standard twist drill. The larger the step diameter you’re using, the slower you must go. Centrifugal force wants to throw the heavy outer steps apart; too much speed overheats the cutting edge and degrades the coating.
| Bit Diameter | Material | Recommended RPM | Source |
|---|---|---|---|
| ≤ 7/8 inch | Mild Steel | 650 RPM | Ideal Spiral Step Bits Datasheet |
| > 7/8 inch | Mild Steel | 470 RPM | Ideal Spiral Step Bits Datasheet |
| 4–12mm | Aluminum | 2000 RPM | Alpha Onsite+ Guide |
| 4–20mm | Stainless Steel | 1300 RPM | Alpha Onsite+ Guide |
Why such a hard ceiling? The titanium nitride coating on bits like the Klein Tools QRST03 or the Ideal series starts to break down around 700°F. At 3000 RPM in steel, you’ll hit that temperature in under ten seconds. The coating blisters, the underlying high-speed steel softens, and the edge is gone. Run at 650 RPM with cutting oil, and the same bit stays below 400°F.
For aluminum, the rules flip. You need speed to prevent material from welding to the bit. The Alpha Onsite+ guide calls for 2000 RPM on aluminum up to 3.5mm thick. But, and this is the critical clause, you must use lubricant. WD-40 or a dedicated cutting oil keeps the aluminum from galling.
Ideal Spiral Step Bits data sheet specifies 650 RPM for bits 7/8-inch and under, and 470 RPM for larger diameters. This is the sourced-number benchmark for steel.
Matching Lubricant to Material (And When to Use None)
Cutting fluid isn’t just for cooling. It’s a barrier that stops metal from fusing to the bit’s cutting edges.
For steel, a general-purpose cutting oil is fine. For stainless steel, you need a heavier, sulfur-based oil to handle the material’s tendency to work-harden. The fluid must be present before the bit touches the metal and reapplied every few seconds if the hole takes longer than five.
Aluminum is the tricky one. Its soft, sticky nature means it wants to weld itself to the tool. A light lubricant like WD-40 works because it penetrates and provides a slippery layer. Drilling aluminum dry is a guaranteed way to load the flutes with a solid aluminum plug. You’ll hear a screech, see smoke, and the bit will stop cutting entirely. You’ll then spend twenty minutes picking aluminum out of the flutes with a scribe.
Where this goes sideways: Drilling PVC or polycarbonate plastic with cutting fluid. The fluid makes the plastic gum up worse. For plastics, run dry at a medium speed, if the bit loads up, your speed is too high.
The one universal rule: apply lubricant to the bit and the workpiece before you start drilling. Adding it after the bit is hot is like putting a fire extinguisher away after the flames are out.
The 5-Step Process for a Clean, Accurate Hole
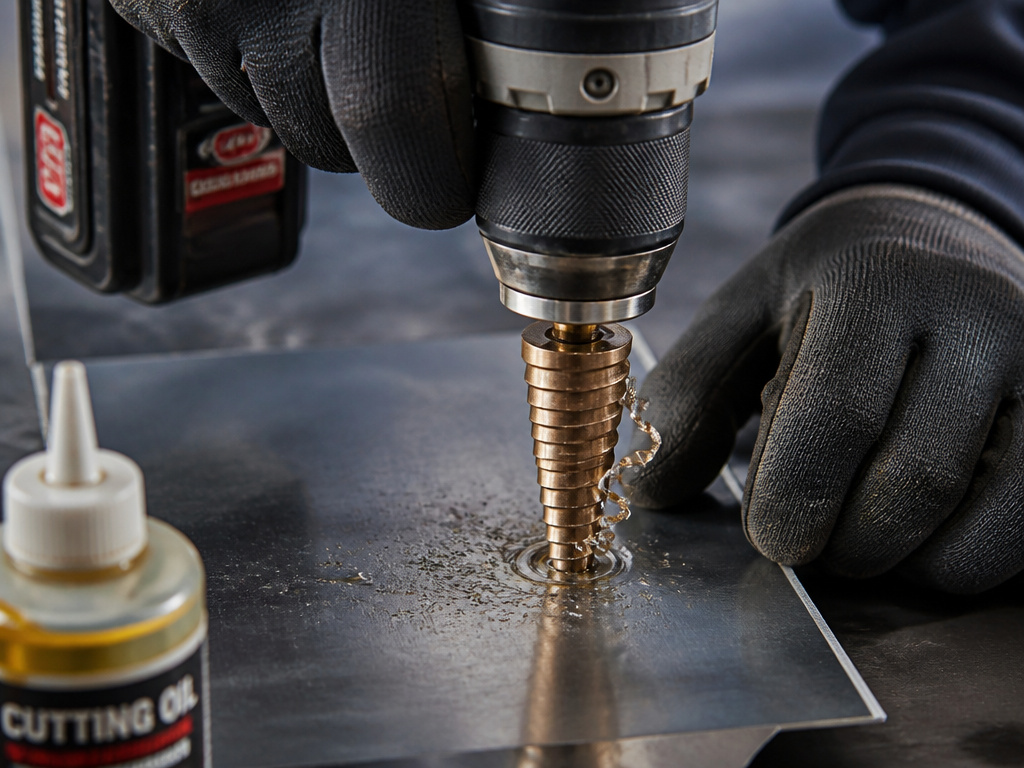 The technique matters more than the tool. Here’s the sequence that prevents walking, snagging, and blown-out holes.
- Punch or center-punch your mark. The split-point tip on most step bits reduces walking, but it’s not a magic bullet. A solid dimple gives the point a home. Skip this on curved surfaces and the bit will skate across the metal.
- Set your drill to the correct RPM and apply lubricant. Consult the table above. If your drill doesn’t have variable speed, use a slower trigger squeeze. Flood the area with oil.
- Start perpendicular with firm, even pressure. Let the bit’s geometry do the cutting. Don’t lean on the drill. You’ll feel a steady resistance as each step engages.
- Clear chips frequently. For deep holes in thicker sheet, pull the bit out halfway to let the spiral flutes eject the ribbon of metal. This keeps the hole clean and prevents binding.
- Ease off before breakthrough. This is the step everyone misses. Just before the step you need disappears through the back of the material, reduce your feed pressure by about half. This allows the step to cleanly shear the last bit of material instead of grabbing and tearing it. The exit hole will be clean, not ragged.
What happens if you skip step five? The bit snatches. It can jerk the drill, and your wrist, forward. On thin sheet metal, it creates a bent, distorted exit that’s sharp and out-of-round.
The Three Mistakes That Burn Out a Step Bit Fast
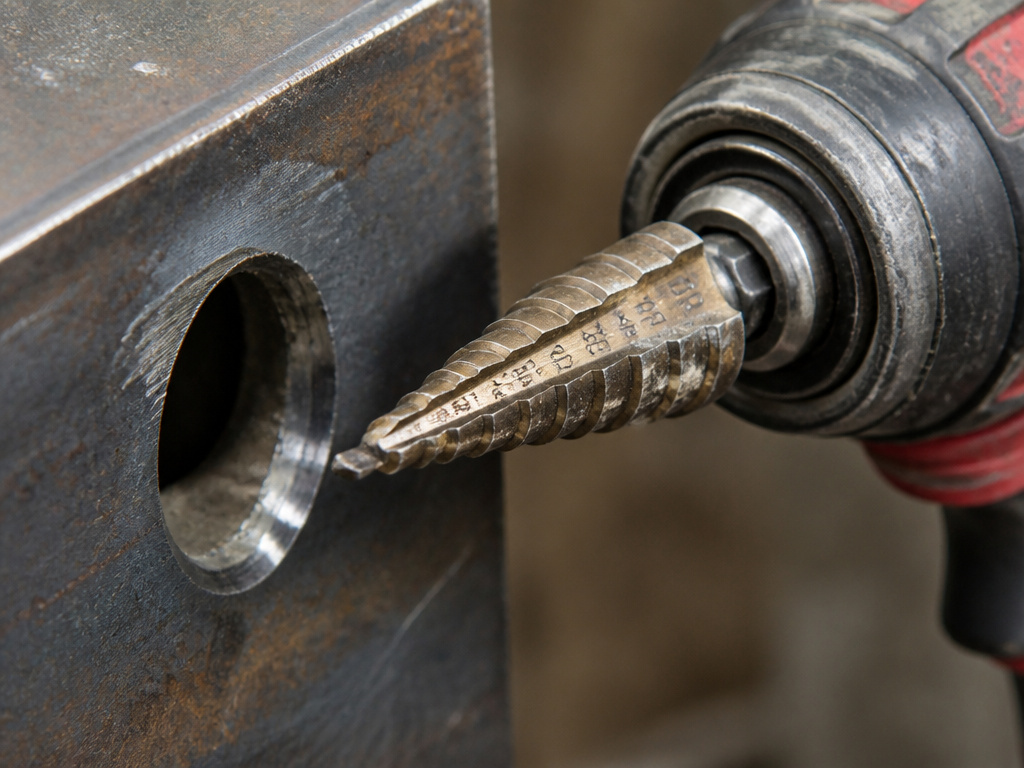 Chatter isn’t just annoying noise. It’s the sound of your bit dying.
Mistake 1: Using an impact driver. Unless the bit has a hex shank and is explicitly impact-rated (like the Alpha Onsite+ series), keep it in a standard drill. The hammering action of an impact driver will chip the stepped cutting edges. A round-shank bit will also spin in the impact chuck, grinding away the shank and ruining its grip.
Mistake 2: Drilling material that’s too thick. Step bits are designed for sheet metal, not plate. Their capacity is typically 3/8-inch (9.5mm) in mild steel. Trying to drill a 1/2-inch thick block of steel will overheat the bit, flex the steps, and produce a tapered, ugly hole. For thick material, you need an annular cutter or a hole saw.
Mistake 3: Letting the bit dwell at the bottom of a hole. When you reach your desired depth, pull the bit out. Leaving it spinning at the bottom of the hole with no forward motion creates friction heat and dulls the edge. It’s like holding a grinding wheel against the metal without cutting.
Easy to miss: The trailing edge of the next step can deburr the entry side of the hole as you pull the bit out. But this also slightly enlarges the hole, the next step’s diameter is what contacts the edge. For a precision fit, use a dedicated deburring tool.
Step Drill Bit vs. Other Hole-Making Tools
This is where you choose your weapon. A step bit isn’t always the right answer.
For one or two holes of the same size in thick wood, a standard drill bit is faster. For a perfectly flat-bottomed hole in wood for a hinge, a Forstner bit is mandatory. For large-diameter holes (over 1-3/8 inches) in masonry or concrete, you’re in core drill bit territory.
The step bit wins on thin metal where you need multiple, clean, burr-free holes in quick succession. It’s the electrician’s and metal fabricator’s first choice for a reason. It’s also invaluable when you need to enlarge an existing hole to a precise, larger diameter, each step acts as a pilot for the next.
Understanding what a step drill bit is and its primary uses helps you deploy it where it’s strongest.
Can You Use a Step Bit on Stainless Steel?
Yes, but it demands respect. Stainless steel work-hardens when drilled incorrectly.
You need an HSS Cobalt step bit (M35 or M42 grade). The extra cobalt content resists the heat and abrasion of stainless. Run it slow, between 200 and 400 RPM is a safe range. Use a generous amount of heavy-duty cutting oil, and apply steady, unwavering pressure. Do not pause mid-hole. If you stop feeding, the bit will spin against the stainless, work-hardening the spot and making it nearly impossible to continue drilling without destroying the bit.
For the best control on stainless or any precision metalwork, consider a drill press. The rigid setup and perfect perpendicularity prevent the bit from walking and ensure even pressure.
Frequently Asked Questions
Can I use a step drill bit in a hand drill?
Yes, a hand drill is fine. The key is maintaining a perfect 90-degree angle to the workpiece, which is harder without the rigid column of a drill press. Go slower, use a center punch, and brace the workpiece firmly.
How do I know what size step bit to buy?
Match the bit’s range to your most common jobs. A bit labeled 4-20mm (like the Sutton D504) gives you nine sizes from 4mm to 20mm in 2mm increments. For electrical work, a 1/4-inch to 1-1/8-inch bit covers common conduit and knockout sizes. Consider a kit like the Ideal 36-700 4-piece set if you need multiple ranges.
Why does my step bit keep getting stuck?
It’s usually one of three things: RPM too high, no lubricant, or chips aren’t clearing. The bit heats up, the metal expands, and it seizes in the hole. Stop, let it cool, apply oil, clear the flutes, and restart at a slower speed.
Do I need a pilot hole for a step drill bit?
No. The split-point tip on quality step bits like the Bosch Professional HSS Turbo is designed to start its own hole without walking. Just use a center punch for absolute accuracy.
Before You Go
A step drill bit turns a messy, multi-bit job into a clean, one-tool operation, but only if you treat it like the precision cutter it is. Remember the 650 RPM rule for steel. Remember the lubricant for aluminum. And remember to ease off before breakthrough.
For everything else, choosing a drill bit for different materials, safely operating a hammer drill for masonry, or mastering countersink technique for wood screws, the principles are the same: match the tool to the task, respect its limits, and let the geometry do the work. Your tools, and your projects, will last longer.
