
How to Use a Drill Press Correctly for Perfect, Safe Results
This post contains affiliate links. As an Amazon Associate, we earn from qualifying purchases.
To use a drill press, you must match three things: the workpiece, the drill bit, and the machine’s settings. Secure the material in a vise or with clamps. Select the correct bit and speed for your material. Then, lower the quill with steady pressure to drill a clean, accurate hole. The machine does the spinning; your job is positioning and control.
That control starts before you touch the power switch. A drill press is a fixed tool, which means every mistake in setup translates directly into the cut. The feed lever just amplifies your initial decisions.
What follows is the sequence that turns a intimidating machine into a repeatable asset: how to calculate your real working capacity, set up for three common hole types, and avoid the single physical failure that ruins most first attempts.
Key Takeaways
- Clamp everything. A drill press exerts tremendous rotational force. Any unsecured workpiece will spin, crack, or be thrown.
- Speed kills bits. Running a large drill bit in metal too fast generates enough heat to soften and ruin the cutting edge in seconds. Match RPM to the bit diameter and material.
- Use a backup board. Always place a sacrificial piece of wood between your workpiece and the metal drill press table. It prevents tear-out on the backside and protects the table surface.
- The quill return spring is a safety feature. After drilling, release the feed lever and let the spring retract the bit from the hole. Pulling it out by hand risks breaking the bit or grabbing the workpiece.
- Depth stops are for consistency. For blind holes or repeated drilling, set the depth stop nut. It turns a visual guess into a mechanical guarantee.
What a Drill Press Actually Does (And What It Doesn’t)
A drilling machine, called a drill press, is used to cut holes into or through metal, wood, or other materials. Drilling machines use a drilling tool that has cutting edges at its point. This cutting tool is held in the drill press by a chuck or Morse taper and is rotated and fed into the work at variable speeds.
This federal lab definition gets the mechanics right. A drill press provides two motions: a powered, constant rotation of the spindle, and a vertical feed path you control. Its primary job is drilling straight, perpendicular holes with more precision and force than a handheld drill.
It also handles operations like countersinking, counterboring, and reaming. These are all hole-finishing tasks that rely on the machine’s rigidity.
Where beginners misunderstand the tool is in side loading. A drill press is not a mill. The spindle and bearings are designed for vertical force, not the sideways pressure you’d use with an end mill or a fly cutter. Attempting to mill on a drill press wears out the spindle quill and leads to inaccurate holes. For shaping metal, you need a milling machine.
Your machine’s capacity is defined by its swing. This is twice the distance from the center of the spindle to the front of the column. A 10-inch swing model can center-drill a 10-inch diameter circle. For a complete breakdown, see our guide on drill press swing.
The 3-Secure Rule Before You Power On
Before you start: The rotating drill bit is a hook. It will grab any loose material and spin it with enough force to break bones or shatter the workpiece. Secure long hair, remove gloves and jewelry, and ensure all loose clothing is tucked in. The chuck key must be removed from the chuck before starting the motor. Every time.
The most critical step happens before the drill spins. You must immobilize the workpiece completely. The rotational force wants to turn it. Your clamping strategy must defeat that.
| Clamping Method | Best For | Risk If Skipped |
|---|---|---|
| Drill Press Vise | Metal, plastic, small wood blocks | Workpiece spins inside vise, shearing bolts or damaging jaws |
| T-Slot Clamps | Large, flat sheet material | Sheet lifts and rotates, bending the bit and causing violent kickback |
| Fence + Stop Block | Repetitive holes in multiple identical pieces | Part walks forward with each plunge, ruining hole spacing |
| Double-Sided Tape | Thin, fragile materials you can’t clamp | Tape shears, part becomes a spinning blade at 1500 RPM |
Secure the workpiece. Use a dedicated drill press vise, not a handyman’s bench vise. Tighten it onto the table’s T-slots. For flat stock, use at least two clamps, opposing each other across the workpiece.
Secure the table. The table must be locked to the column. Loosen the table lock, raise or lower it to the right height, then re-tighten firmly. A table that can tilt should also have its bevel lock bolt tightened for all standard drilling.
Secure your backup. Place a flat piece of scrap plywood or MDF between your workpiece and the metal table. This backup board prevents the drill bit from tearing out the backside of a wood workpiece and stops you from accidentally drilling into the cast iron table surface. It is not optional for through-holes.
Where this goes sideways: Holding a small block of wood by hand because “it’s just one quick hole.” The bit catches the grain, the block rotates instantly, and your knuckles smash into the column or the spinning chuck. The emergency room visit is longer than the time to clamp it.
Matching Speed, Bit, and Material
The factory settings are almost always wrong. The speed chart on the inside of the belt guard is a starting point, not a final answer. You match the spindle’s revolutions per minute (RPM) to the drill bit’s diameter and the hardness of your material.
Large bits need slower speeds. Hard materials need slower speeds. The physics are simple: a bigger cutting edge covers more distance per revolution, generating more heat. Too much heat softens the metal of the bit itself, a process called annealing. A dull, blue-colored tip is the telltale sign.
| Material | Bit Diameter | Recommended RPM Range | Why This Range |
|---|---|---|---|
| Hardwood (Oak, Maple) | 1/4″ (6mm) | 2000 – 3000 | Clean cutting without burning the wood fibers |
| Mild Steel | 1/4″ (6mm) | 800 – 1200 | Removes material without overheating the bit’s high-speed steel |
| Aluminum | 1/2″ (13mm) | 500 – 800 | Prevents the soft metal from gumming up the bit’s flutes |
| Plastic (Acrylic) | 3/8″ (10mm) | 1000 – 1500 | Slow enough to melt and clear, fast enough to avoid cracking |
Changing speeds typically means moving the drive belt on stepped pulleys. Always turn the machine off and unplug it before changing belts. Rotate the pulley by hand to help the belt settle into the new groove. On a variable-speed electronic model like the Ellis 9400, you adjust the dial with the motor running.
The bit itself must be sharp and appropriate. A standard twist drill works for metal and wood. For flat-bottomed holes in wood, you need a Forstner bit. To create a conical seat for a screw head, use a countersink bit. For enlarging existing holes in thin metal, a step drill bit is the cleanest choice. The process for choosing a drill bit starts with the hole you need to make.
Drilling Your First Hole: A 5-Step Sequence
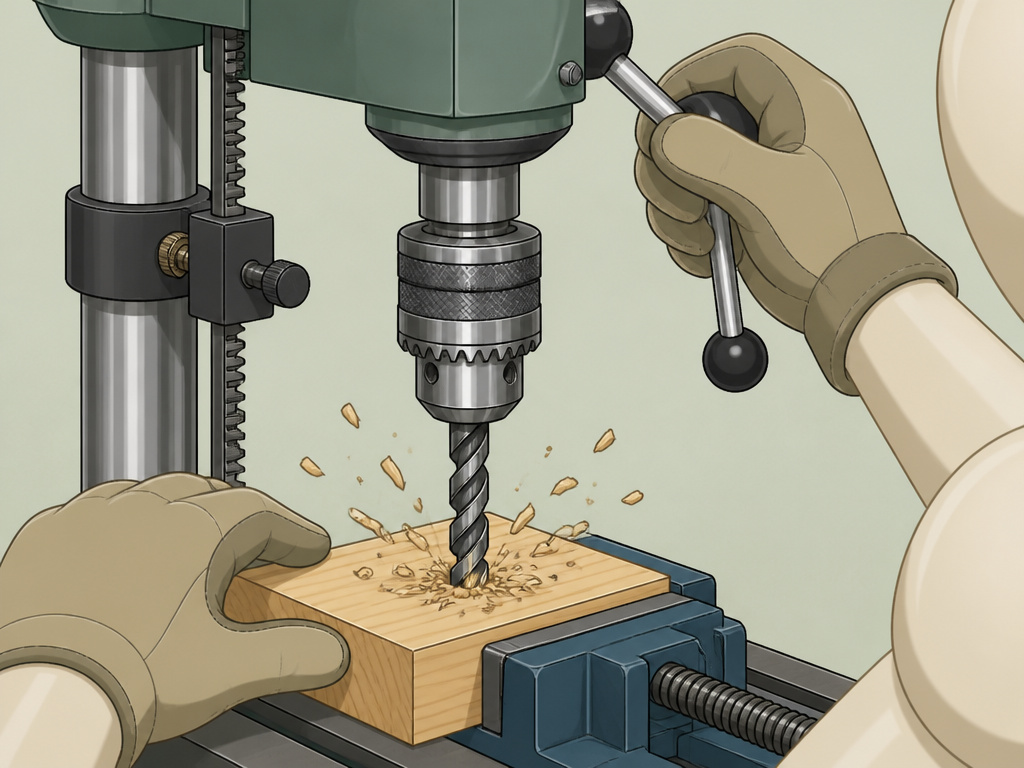
This is the core manual skill. The goal is a clean, straight hole that matches your layout mark.
- Install the bit. Open the chuck jaws by turning the key counter-clockwise. Insert the shank of the drill bit deep into the chuck, at least three-quarters of the way. Tighten all three jaws evenly with the key. Remove the key and set it aside.
- Position the workpiece. Lower the quill by hand until the bit tip is about an inch above your clamped material. Loosen the table lock and move the table so the bit aligns directly over your center-punched mark. Tighten the table lock.
- Set the depth (for blind holes). Lower the quill until the bit touches the workpiece. Hold the quill there and turn the depth stop nut down until it contacts its bracket. For a hole 19mm deep, raise the quill, set the depth scale to 19mm, and lock the stop nut. The Argonne National Laboratory drill press guide notes this method for precision work.
- Start the drill and feed. Turn on the machine. Place one hand on the feed lever. Apply steady, firm downward pressure. You should see continuous chips or shavings ejecting from the flutes. No chips means the bit is dull or the speed is wrong. For a through-hole, reduce pressure just before the bit breaks through the back to prevent tear-out.
- Retract and clear. Release the feed lever and let the quill return spring pull the bit completely out of the hole. Turn off the machine. Wait for the spindle to stop completely before clearing any chips from the table.
The feed pressure is a feel. Too light and the bit rubs instead of cuts, overheating. Too heavy and you risk breaking the bit or stalling the motor. Listen to the sound—a steady whirring is good; a high-pitched squeal or a labored grunt is not.
Benchtop vs. Floor Model: When the Machine Itself Changes the Rules
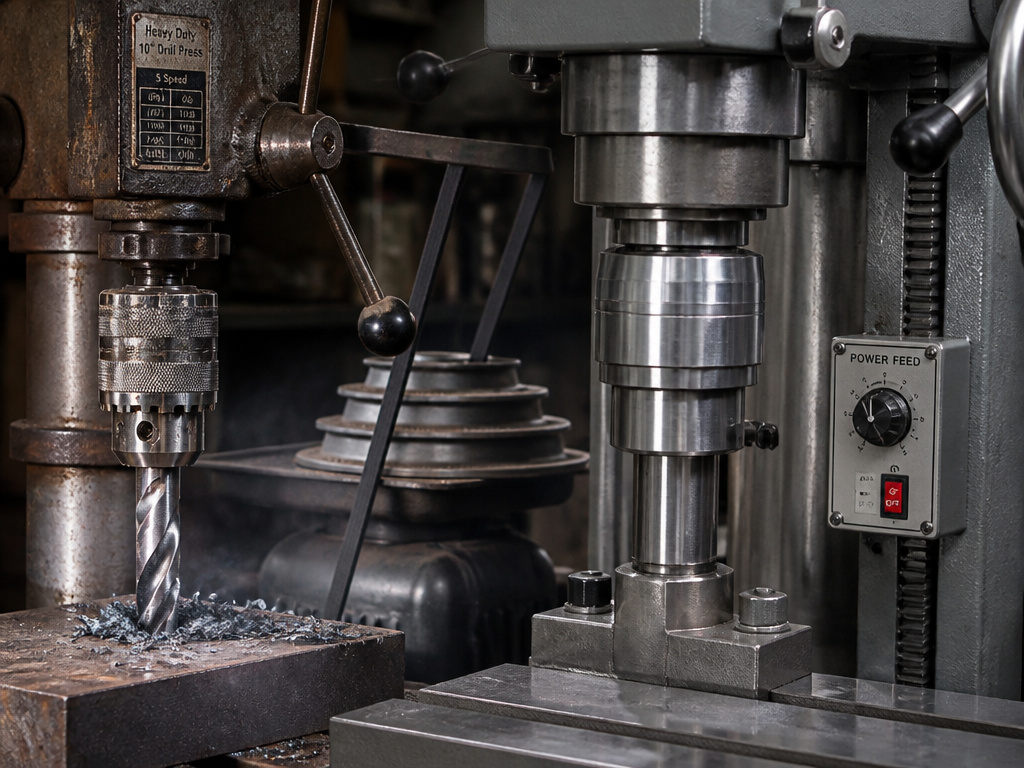
The core principles are identical. The scale and capability are not. Your choice dictates what you can realistically drill.
A typical benchtop press, like many Craftsman models, uses a JT33 taper spindle and a 1/2 HP motor. Its five pulley-driven speeds (e.g., 740-3140 RPM) handle wood, plastic, and light metal duty. The chuck capacity is usually 1/2 inch. This is the right tool for a home workshop.
An industrial floor model like the Ellis 9400 is a different class. It uses a Morse Taper #3 (MT3) spindle, accepts larger tooling, and has a 2HP motor with variable speed control (0–1200 RPM). It includes a power feed mechanism that advances the spindle 0.004″ per revolution for consistent, hands-off drilling in steel. This is for a professional fabrication shop.
The difference matters when you push limits. Drilling a 1-inch hole in steel on a benchtop press strains the motor, the belts, and the spindle bearings. The same job on the Ellis is within its rated capacity. Understanding how a drill press works at the mechanical level explains why one machine shrugs off a task that breaks another.
Essential Upgrades and Accessories You’ll Actually Use
The machine out of the box is a starting point. These additions solve specific, common problems.
- A Laser Crosshair Guide: Projects intersecting lines onto your workpiece from the drill head. It eliminates the guesswork of aligning the bit over a center punch mark. Worth its weight for repetitive layout.
- A Drill Press Table with a Fence: Replaces the small, round factory table with a large, square MDF or aluminum surface. A T-track fence makes clamping and repeat positioning trivial. It is the single biggest upgrade for accuracy on woodworking projects.
- A Mortising Attachment: Converts your drill press into a dedicated mortising machine for square holes. It uses a specialized hollow chisel and bit. If you build furniture, this accessory pays for itself on the first set of table legs.
- A Drum Sander Attachment: A rubber drum that mounts in the chuck, allowing you to sand curves and smooth edges. It turns the drill press into a stationary spindle sander for small parts.
These aren’t gadgets. They extend the applications of a drill press from simple hole-making into finer woodworking and metalworking. Start with the laser or a better table.
Maintenance: The 10-Minute Monthly Habit That Prevents Breakdowns
A drill press is simple. Neglect still wears it out. The symptoms are a wobbly chuck, excessive vibration, and a quill that doesn’t retract smoothly.
- Check belt tension. With the power off, press on the drive belt midway between the pulleys. It should deflect about 3/16”. A loose belt slips and squeals; an overtightened belt strains motor and spindle bearings.
- Lubricate the quill. Wipe the exposed spindle clean, then apply a drop of light machine oil (like 3-in-1 oil) to the length of it. Work the quill up and down to distribute the oil. This keeps the return spring working and prevents rust.
- Clean the table and column. Wipe off metal dust and debris. A dirty column makes it hard to adjust the table height. A clean machine is a safe machine.
- Inspect the chuck. Open and close the jaws. If they move unevenly or feel gritty, it’s time for service or replacement. Learning drill press chuck removal is a necessary skill for long-term ownership.
Do this every month if you use the tool weekly. If the drill press sits for a season, give it a clean and oil before the next project. Cast iron tables rust surprisingly fast in a humid garage.
Frequently Asked Questions
What safety gear do I need for a drill press?
Safety glasses are non-negotiable. Hearing protection is recommended for extended use, especially with metal. Do not wear gloves—they can get caught in the rotating chuck. Secure long hair and avoid loose sleeves. The drill press overview in our library details the full safety protocol.
Why does my drill bit keep breaking?
The two most common causes are sideways pressure and improper feed. If the workpiece isn’t clamped, it can shift and bend the bit. Feeding too hard, especially as the bit exits the back of the material, also snaps bits. Use a backup board and ease up on the pressure at breakthrough.
Can I use hole saws on a drill press?
Yes, and it’s the best way to use them. The drill press’s stability prevents the saw from walking and provides the steady downward pressure needed for clean cuts. Use a slow speed and clamp the workpiece extremely well, as hole saws generate significant torque.
How do I drill a perfectly perpendicular hole without a guide?
The drill press itself is the guide. The key is ensuring the table is perpendicular to the bit. Use a machinist’s square to check that the table is at 90 degrees to the column. Once that’s set, any hole drilled with a properly secured workpiece will be perpendicular.
My drill press is wobbling. How do I fix it?
First, check that the drill bit is seated straight and tight in the chuck. If the wobble persists, the chuck itself might be damaged or not mounted correctly. Inspect the chuck jaws for wear. The final culprit could be spindle runout, which requires professional service or spindle replacement.
The Bottom Line
A drill press turns a chaotic, handheld operation into a precise, repeatable one. The machine isn’t smart. It just follows your setup. Get the setup wrong, and it amplifies your error with industrial force. Get it right, and you have a partner for a hundred projects.
Clamp with purpose. Match the speed to the bit. Let the tool do the work. That’s the whole game. For everything else—the theory, the specs, the comparisons—you have a drill press resource built on the same principle. Start with a secure foundation.
