
How to Use a Masonry Drill Bit | The One Mode That Destroys It
This post contains affiliate links. As an Amazon Associate, we earn from qualifying purchases.
To use a masonry drill bit, you must match three things: the bit’s shank to your drill’s chuck, the correct drill operating mode (hammer or rotary-only), and the right pressure-speed balance for the material. Using hammer action on a rotary-only bit shatters the carbide tip. Drilling an anchor hole with a standard bit instead of an ANSI-tolerance bit can cut pull-out strength by 20 percent.
That 20 percent figure isn’t a guess. It’s from the spec sheet for bits like the Relton REL207, manufactured to ANSI B212.15 tolerance for expansion anchors. An oversize hole, even by a few thousandths of an inch, means the anchor doesn’t expand fully against the concrete. The wall gives way before the anchor does.
What follows is the setup most guides skip: how to read your bit’s requirements, why your drill has a hammer setting, and the physical signs you’re pushing too hard. By the end, you’ll know which of the five common masonry bit types you actually need and the one drill mode that destroys half of them.
Key Takeaways
- Match the shank. An SDS-plus bit locks into an SDS-plus rotary hammer chuck for efficient impact transfer. A round shank bit needs a standard keyed or keyless chuck. Forcing the wrong fit damages the chuck and the bit.
- Respect the mode. Bits marked for “rotary-only” (like Relton’s Tip-Top or Rebar Eater series) must never see hammer action. The hammer’s impact will crack the carbide tip on the first strike.
- Anchor holes need precision. For any expansion anchor (wedge, sleeve, drop-in), use an ANSI B212.15 tolerance bit like the Relton REL207. A standard masonry bit drills an oversize hole, reducing holding power dramatically.
- Let the bit cut. Apply steady, firm pressure, but never lean on the drill. If the RPM drops and the motor whines, you’re overheating the bit and glazing the carbide. Ease up.
- Never use water. Do not spray water on a masonry bit to cool it or settle dust. The thermal shock cracks the carbide, and water mixed with concrete dust forms a paste that grinds the cutting edges dull.
The 4-Step Setup That Comes Before Drilling
You don’t start by pressing the trigger. You start by identifying the four variables that decide whether the hole is clean or the bit is scrap.
A masonry drill bit’s shank type dictates its compatible drill and chuck. The two most common are the round shank for standard hammer drills and the SDS-plus shank for rotary hammers. Using an SDS-plus bit requires an SDS-plus chuck; a standard keyless chuck cannot grip it.
First, look at the bit’s shank. Is it perfectly round, or does it have grooves and indentations? A round shank fits any standard drill chuck, keyed or keyless. An SDS-plus shank has two open grooves and two locking slots—it only fits an SDS-plus chuck on a rotary hammer. This isn’t about convenience. The SDS-plus system allows the bit to slide slightly in the chuck, transferring hammer impact energy directly into the bit with less loss. Trying to use an SDS-plus bit in a standard drill requires an adapter, which defeats this efficiency and often wobbles.
Second, check the bit’s specified operating mode. This is the most overlooked step. Most general-purpose masonry bits are designed for hammer drill mode. But specific types, like the Relton Rebar Eater (RELRB) for cutting through rebar or the Relton Tip-Top (RELTT) for drilling tile, are strictly rotary-only. The packaging or manufacturer guide will state this. Ignoring it is a one-way trip to the trash can.
Third, select the matching mode on your drill. A combi-drill like the SKIL HD527801 or Milwaukee M18 has a collar near the chuck with icons: a drill bit (drill-only), a hammer (hammer drill), and sometimes a screw (drive). For masonry, you turn this to the hammer icon. If your bit is rotary-only, you must use the drill-only setting. On a dedicated rotary hammer like the Ryobi PSBRH01B, the hammer action is usually always engaged when drilling.
Fourth, secure your workpiece and mark the hole. Use a center punch on brick or concrete to create a small dimple. This prevents the bit from “walking” across the surface when you start. For tile or glazed brick, apply a piece of painter’s tape over the mark. The tape gives the bit’s tip some initial grip to prevent skidding.
Pressure, Speed, and the Overheat Point
Driving a masonry bit is a balance of force and patience. The goal is to let the carbide tip scrape and fracture the material, not to melt it.
Start at a low speed with very light pressure to establish the hole. Once the bit is engaged a quarter-inch deep, you can increase to a medium speed. For a standard hammer drill, this is often the mid-range trigger setting. Listen to the drill. A healthy drilling sound is a consistent, gritty crunch. If the sound becomes a high-pitched whine and the drill’s RPM visibly bogs down, you are applying too much pressure.
Where this goes sideways: Leaning on the drill to make it go faster. Excessive pressure overheats the bit, glazes the carbide tip (making it shiny and slick), and wears out the drill’s bearings. The hole becomes off-center and irregular, and the bit is effectively dead after about ten seconds of this.
The SKIL manual states that too much pressure will overheat the drill, wear the bearings, bend bits, and produce bad holes. The fix is simple: ease off. Let the tool do the work. For hard concrete, apply firm, steady pressure. For softer brick or block, lighter pressure is better. If you hit an especially hard aggregate, don’t fight it. Pull the bit out partially to clear dust, then continue with steady force.
Dust removal is part of the process. Every 10-15 seconds, pull the bit back slightly while it’s still spinning to eject the dust from the flutes. A bit clogged with compacted dust cannot cut and will overheat immediately.
| Material | Recommended Pressure | Recommended Speed | Key Risk |
|---|---|---|---|
| Concrete (B25/B35) | Firm, steady pressure | Medium | Overheating on rebar or hard aggregate |
| Brick / Cinder Block | Light to moderate pressure | Medium to High | Blowing out the back side of hollow block |
| Tile / Porcelain | Very light pressure | Low (Rotary-Only Mode) | Cracking the tile or skidding |
| Natural Stone (Granite) | Moderate pressure | Low to Medium | Glazing the bit on ultra-hard silica |
The Five Masonry Bit Types and When to Use Each

Not all carbide-tipped bits are the same. Picking the wrong one for the job wastes time and money. Here are the five types you’ll encounter, based on the Relton catalog which mirrors the broader market.
- ANSI-Tolerance Anchor Bits (e.g., Relton REL207): This is your bit for installing any mechanical expansion anchor—wedge, sleeve, or drop-in. It’s manufactured to ANSI B212.15 tolerance, meaning the hole diameter is precise. Use it in a rotary hammer for clean, exact holes. The alternative is a sloppy fit and weak holding power.
- General-Purpose Masonry Bits (e.g., Relton Groo-V Tip RELGRT): The workhorse for drilling holes for screws, conduit, or lag shields where exact diameter isn’t critical. They have a round shank and work in any standard hammer drill. Keep one set in your kit for everyday tasks.
- Rotary-Only Bits for Tile & Glazed Surfaces (e.g., Relton Tip-Top RELTT): These bits have a specialized tip geometry for cutting through hard, brittle surfaces without percussion. You must use them in rotary-only mode on a standard drill or the hammer setting turned off. They are for tile, decorative brick, or any material that cracks under impact.
- Rebar Eater Bits (e.g., Relton RELRB): Designed specifically to cut through steel rebar encountered mid-hole in concrete. The critical rule: they operate in rotary-only mode. After cutting through the rebar, you switch back to a standard masonry bit in hammer mode to finish the concrete. Using hammer action on a Rebar Eater destroys it.
- SDS-Plus Masonry Bits: These are not a different bit design but a shank system. Any of the above bit types can come with an SDS-plus shank for use in a rotary hammer. They offer faster drilling and less user fatigue for heavy concrete work.
Your guide to drill bit selection should start with the material and the purpose of the hole. Needing to set a 1/2″ wedge anchor? That’s a direct path to the REL207. Drilling a hole for a plastic wall plug in a brick? A general-purpose bit is perfect.
What Not to Do: The Three Guaranteed Failures
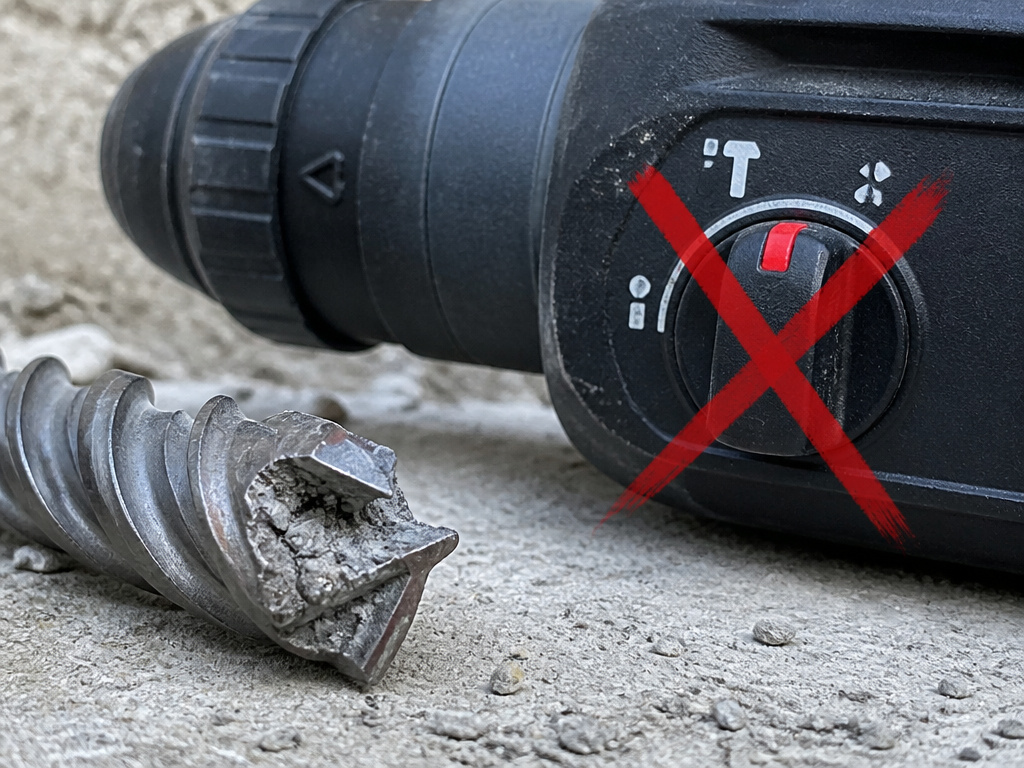
Some mistakes don’t just slow you down. They break things. Avoid these three moves completely.
Never use water to cool a masonry bit. The Milwaukee operator’s manual explicitly warns against this. Water causes thermal shock that micro-cracks the carbide. It also turns concrete dust into a cementitious slurry that grinds the cutting edges away. For dust control, use a vacuum attachment or drill briefly and pull out to clear debris.
First, do not run a rotary-only bit in hammer mode. This is the fastest destroyer of specialty bits. The hammer’s percussive blow is meant for carbide pressed against concrete, not for the delicate cutting edges of a tile bit or the side-load geometry of a Rebar Eater. You’ll hear a sharp ping and see the tip is gone.
Second, do not force a dull bit. A masonry bit is dull when it stops producing powder and instead creates fine, glitter-like dust, and it takes immense pressure to make any progress. Sharpening carbide is a job for a professional with a diamond wheel. For the cost of a new bit, it’s not worth attempting. A dull bit overheats your drill and produces poor-quality holes.
Third, do not ignore the drill’s break-in period. The manual for the Ryobi PSBRH01B rotary hammer notes a new tool may require up to five hours of operation for full break-in. During this time, you might notice slightly less power or more heat from the motor. This is normal. Pushing it to its max torque on day one can shorten its service life.
Drilling Specific Materials: Concrete, Brick, and Tile
The theory changes when you meet the wall. Here’s how to adjust your technique for the most common materials.
Concrete: This is where a rotary hammer with SDS-plus bits shines. Use hammer-drill mode, start with a center punch, and apply firm pressure. Expect to hit aggregate (small stones). When you do, the drill will sound different—a higher-pitched chatter. Maintain steady pressure; the carbide will eventually fracture the aggregate. If you hit rebar, stop. You need a Rebar Eater bit in rotary-only mode to get through it. For deeper holes, frequently pull out to clear dust. A clogged hole creates immense friction and heat.
Brick and Block: Softer than concrete, but crumbly. Use a standard masonry drill bit in hammer-drill mode, but with lighter pressure to avoid blowing out the exit side, especially on hollow block. If you’re drilling near an edge, reduce speed and pressure further. A sharp bit will cut cleanly; a dull one will spall and chip the surface.
Tile and Porcelain: This is a rotary-only job. Use a bit like the Relton Tip-Top or a diamond-tipped core bit. Apply the lightest possible pressure. Let the bit’s abrasiveness do the work. You can use a piece of tape to prevent skidding. Do not use hammer action—you will crack the tile instantly. A spray bottle with water is acceptable here only for diamond bits to keep them cool and clear debris, but never for standard carbide masonry bits.
Understanding the differences between masonry and regular bits is crucial here. A standard twist bit will polish itself dull on concrete in seconds, while a masonry bit will skate and crack tile.
Frequently Asked Questions
Can you use a masonry drill bit without a hammer drill?
Yes, but only on soft masonry like very soft brick or cinder block, and progress will be extremely slow. The bit is designed to fracture material with impact. In drill-only mode, it only scrapes. For concrete or hard brick, a hammer drill or rotary hammer is required.
Why is my masonry bit not drilling?
Three likely causes: the bit is dull (produces glitter, not powder), you’re using drill-only mode on concrete, or the flutes are clogged with compacted dust. Stop, clear the bit, check your drill mode, and inspect the tip. A shiny, glazed tip means it was overheated and is now dead.
How do I know if my bit is for hammer action or rotary-only?
Check the manufacturer’s packaging or product description. Bits designed for rotary-only will be explicitly labeled as such, often with “rotary-only,” “no hammer,” or “for drill mode only” printed on the shank or in the specs. General-purpose masonry bits assume hammer action.
Can a masonry drill bit be used on wood?
It will cut, but poorly. The tip geometry is wrong for slicing wood fibers. It will tear and splinter the wood, produce a rough hole, and overheat quickly due to poor chip ejection. Always use a masonry vs wood drill bit guide to choose the correct tool.
What does the SDS in SDS-plus stand for?
It stands for “Slotted Drive System” (originally Steck-Dreh-Sitz in German). The “plus” denotes a specific size and style of shank that allows for better power transfer and quicker bit changes in rotary hammers compared to standard round shanks.
How deep can a masonry drill bit go?
It depends on the bit’s Overall Length (OAL) and its usable flute length. Standard bits are often 4-6 inches long. For deeper holes, you need “extra-long” or “earth auger” style masonry bits, which can be 12, 18, or even 24 inches long. Always clear dust frequently when drilling deep.
The Bottom Line
Using a masonry drill bit correctly isn’t about strength. It’s about matching systems. The bit’s shank must match the chuck. The drill’s operating mode must match the bit’s design. Your pressure must match the material’s hardness.
Forget the commodity advice. The real work happens before the trigger pull: identifying a rotary-only bit, selecting the hammer setting on your hammer drill, and knowing that anchor holes demand ANSI-tolerance precision. When you get those right, the drilling itself is just holding steady and listening. The sound tells you everything. A steady crunch is good. A straining whine means stop.
