
How to Remove a Chuck From a Drill Press: A Complete Guide
This post contains affiliate links. As an Amazon Associate, we earn from qualifying purchases.
To remove a chuck from a drill press, you must first identify the spindle taper, either a Jacobs Taper (JT33) or a Morse Taper (MT2/MT3). For a JT33 taper, insert a steel drift punch into the spindle hole above the chuck and tap it with a hammer to knock the chuck free. For a MT taper, use a wedge set or a dedicated chuck removal tool inserted between the chuck body and the spindle collar. Never use the chuck key as a wedge.
That identification step is the whole job. The rest is just execution. A Morse taper holds with friction; a Jacobs taper holds with a mechanical lock. Confuse them, and you will either swing a hammer for an hour without moving the chuck or you will crack the cast iron spindle housing on the first blow.
What follows is the field method: three tools, two taper types, and the one mistake that breaks the spindle before the chuck moves. By the end, you will know which chuck your press has and the exact sequence to pull it without a $300 service call.
Key Takeaways
- The spindle taper type, JT33 or MT2/MT3, dictates the removal method. You must identify it first.
- For a Jacobs Taper (JT33), a 5/16-inch steel drift punch tapped into the spindle hole is the standard, non-destructive method. Using the chuck key as a wedge will shear the key and damage the spindle.
- For a Morse Taper (MT2/MT3), a chuck removal wedge set is the correct tool. Forcing a drift punch can crack the spindle casting.
- Always retract the quill fully and lock the spindle before applying force. A spinning spindle transfers shock to the gearbox.
- If the chuck is genuinely seized, penetrating oil and moderate heat (under 250°F) on the chuck body, never the spindle, can break the bond. A hydraulic press is the final, safe resort.
The Two Taper Types That Decide Your Method
The chuck on a drill press is held by one of two taper systems: a Jacobs Taper (JT33) or a Morse Taper (MT2/MT3). The Jacobs Taper uses a shallow, keyed friction fit; the Morse Taper uses a deeper, self-locking friction cone. Using the wrong removal technique directly damages the spindle.
Your first move is not to grab a hammer. It is to look at the spindle. Just below the chuck, there is a visible joint. On many benchtop models like the JET JDP-14J, the spindle ends in a JT33 taper, a short, steep taper about an inch long. Floor models and heavy-duty presses, like many JET JDP-17M or the Harbor Freight 17-inch model, often use a Morse Taper #2 (MT2). The WEN 4225 variable-speed press uses a JT33.
The difference is in the locking mechanism. A Jacobs Taper is a shallow, steep-angle taper that relies on a precise friction fit and a woodruff key inside the chuck to prevent rotation. It is designed to be knocked out from above with a drift. A Morse Taper is a longer, gentler taper that creates a “self-locking” wedging action under load. It requires a wedge tool to break that lock from the side.
| Taper Type | Common Models | Locking Method | Correct Removal Tool |
|---|---|---|---|
| Jacobs Taper (JT33) | JET JDP-14J, WEN 4225, many 12″-14″ benchtop presses | Friction fit + woodruff key | Steel drift punch (5/16″) |
| Morse Taper (MT2/MT3) | JET JDP-17M, Harbor Freight 17″, most floor presses >1/2 HP | Self-locking friction cone | Chuck removal wedge set |
If you are unsure, check the manufacturer’s manual. The UCSD Jet drill press manual lists the JDP-14J with a JT33 and the JDP-17M with an MT2. This is not a minor detail. Hammering on a Morse taper spindle is a direct path to a cracked housing.
The Tools You Actually Need (And One You Don’t)
You need three things, and one of them is patience. The other two are specific to the taper you just identified.
For a JT33 Taper: 1. A 5/16-inch diameter steel drift punch. This is not a nail set or a center punch. A drift punch has a flat, blunt end and is hardened to withstand hammer blows without mushrooming. The 5/16″ size fits the access hole in the top of the spindle. 2. A 16-ounce ball-peen hammer. A dead-blow hammer works, but the sharp impact of a steel hammer is often more effective for breaking the initial friction seal. 3. A bench vise or a way to securely hold the spindle. If your press head swivels, you can often lock it and work on the machine. For a benchtop model, you might need to remove the spindle assembly.
For a Morse Taper (MT2/MT3): 1. A chuck removal wedge set. This is a pair of hardened steel wedges. One slides between the chuck body and the spindle collar; the other is driven in opposite it to spread the force evenly. 2. A soft-faced mallet (brass or rubber). You are applying a prying force, not an impact. A steel hammer can slip and dent the chuck or spindle. 3. Penetrating oil (like PB Blaster or Kroil). A Morse taper can gall and seize over time. Let the oil soak into the seam for at least an hour before you start.
The part nobody mentions: The chuck key is not a tool for removal. It is a precision key for tightening the jaws. Jamming it between the chuck and the spindle as a wedge will shear the teeth off the key, score the spindle, and leave you with a stuck chuck and a broken key. The Harbor Freight manual explicitly warns to only use the supplied chuck key.
You do not need an arbor press for a standard removal. That is a last resort for a truly seized chuck. Start with the correct hand tools.
The Step-by-Step Removal Process
This is where the taper identification pays off. Follow the sequence for your type. Rushing the first step, securing the spindle, is how people break gears.
Before you start: Unplug the drill press. Retract the quill fully and lock it if your model has a quill lock. This prevents the spindle from rotating or sliding down, which transfers shock directly into the pinion gear and rack.
For a Jacobs Taper (JT33) Chuck
- Locate the access hole. Raise the chuck to its highest point and look straight down into the hollow spindle. You should see a small hole (about 5/16″) leading down to the top of the chuck arbor.
- Insert the drift punch. Place the flat end of your 5/16″ drift punch into the hole. It should rest squarely on the chuck’s arbor, not on the spindle walls.
- Deliver sharp, upward taps. Hold the punch vertically. Using your ball-peen hammer, strike the punch with firm, sharp blows. The goal is to shock the chuck downward, breaking the friction fit. Do not swing wildly.
- Catch the chuck. The chuck will release suddenly. Be ready to catch it with your free hand so it does not hit the table or floor. The chuck, and possibly the arbor, will drop out.
Where this goes sideways: Not locking the quill. If the spindle can rotate, the hammer’s energy spins it instead of moving the chuck. You will hear a loud clang and the chuck will not budge. The impact also travels into the drive belt and pulley bearings.
If the chuck does not move after a dozen solid hits, stop. It may be corroded or galled. Proceed to the “Dealing with a Stuck or Seized Chuck” section.
For a Morse Taper (MT2/MT3) Chuck
- Apply penetrating oil. Spray the seam where the chuck meets the spindle collar. Let it soak for at least 30-60 minutes. Wipe away any excess.
- Position the wedge set. Slide one wedge of the removal set into the gap between the bottom of the chuck body and the spindle’s collar. Tap it gently until it is snug.
- Insert the opposing wedge. Place the second wedge directly opposite the first. The goal is to apply even, spreading pressure.
- Tap the wedges alternately. Using your soft-faced mallet, tap one wedge, then the other, gradually driving them deeper. The chuck will begin to rise on the taper.
- Remove and catch. Once the chuck is loose, remove the wedges and lift the chuck straight off the taper. If it is tight, you can gently pry with a large screwdriver behind the chuck body, but protect the spindle finish.
This method relies on steady pressure, not impact. The UCSB Wen drill press manual emphasizes using the correct tools for chuck installation and removal to avoid damaging the precision spindle interface.
Dealing with a Stuck or Seized Chuck
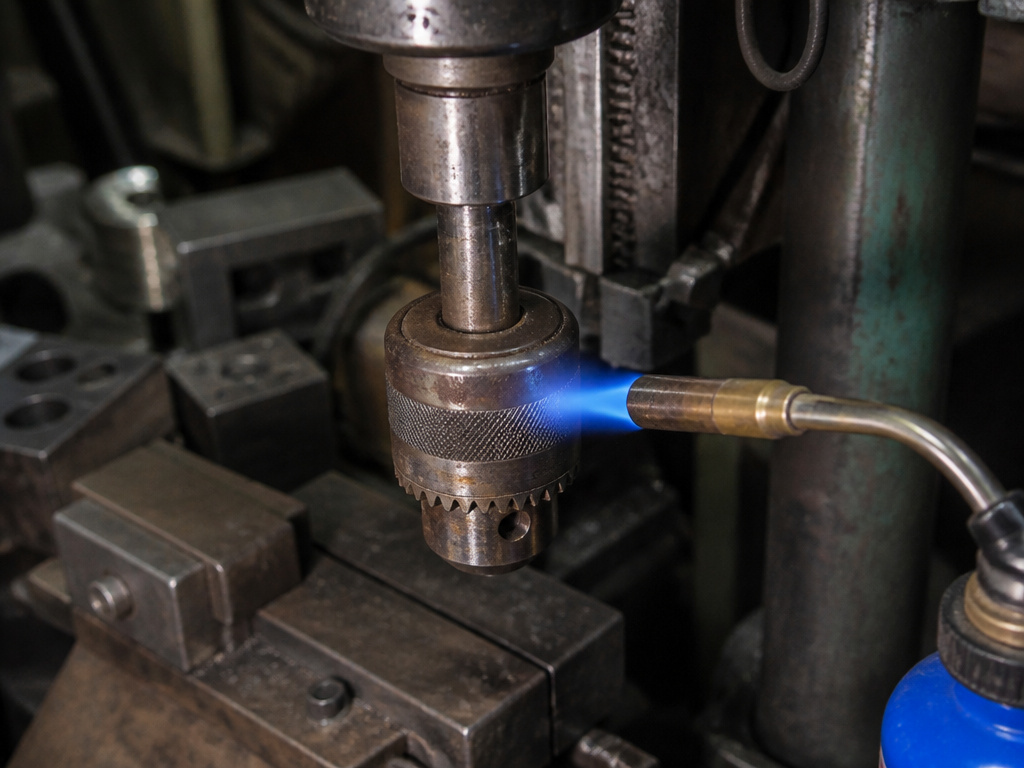
Sometimes, a chuck will not budge. Corrosion, metal galling, or a previous owner’s misuse can weld it to the spindle. Do not escalate to more hammer force. That breaks things.
First, apply heat. Use a propane torch to gently heat the body of the chuck, the steel cylinder that holds the jaws. Focus the flame on the chuck, not the spindle. You want the chuck to expand slightly, breaking the corrosion bond. Stay under 250°F; you are not trying to glow the metal. Then, try your removal method again while the chuck is warm.
If heat fails, the next safe step is a hydraulic press. This is a job for a machine shop or a well-equipped garage. You support the spindle horizontally on two blocks, place a drift punch on the chuck arbor, and use the press to apply tons of steady, controlled force. It is the only way to remove a truly seized chuck without destroying the spindle.
Common mistake: Soaking the assembly in penetrating oil for days and then hitting it with an air hammer. The oil cannot penetrate a galled metal bond, and the air hammer’s vibration will fracture the cast iron housing long before it moves the chuck. If oil and moderate heat do not work, you need a press.
What to Do After Removal
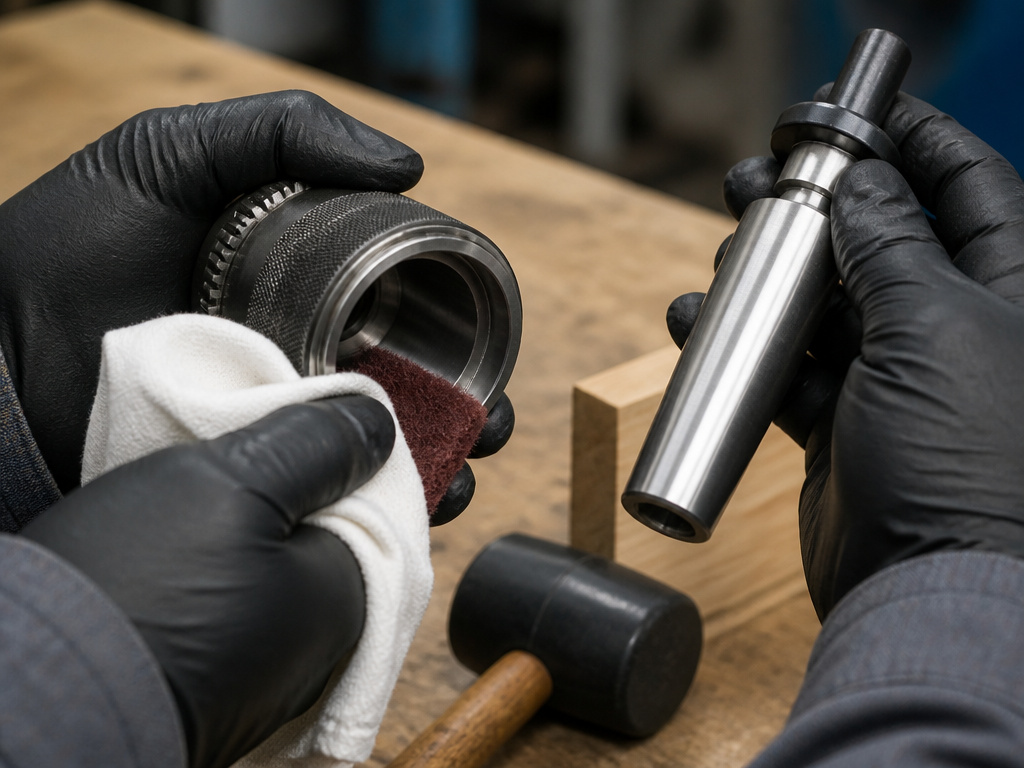
You have the chuck off. Now what? Inspect the spindle taper. Look for scoring, rust, or metal transfer (galling). A clean, smooth taper is essential for the new chuck to seat properly.
If you are installing a new chuck, ensure its internal taper matches your spindle (JT33 or MT2). Lightly clean both tapers with a Scotch-Brite pad and denatured alcohol to remove any oil or debris. Do not lubricate the taper, a dry, clean surface is required for the friction fit.
For a Jacobs Taper, insert the new chuck and give it a firm tap with a mallet and a block of wood to seat it. Then, insert a drill bit, tighten the jaws, and give the chuck a solid downward pull while the bit is locked in a vise. This final “shock load” fully seats the taper. For a Morse Taper, a firm push and a slight twisting motion should seat it. The first time you drill, the cutting force will lock it home.
Understanding the drill press mechanics helps here. The spindle transmits torque through the woodruff key (on JT33) or pure friction (on MT). A poorly seated chuck will wobble, producing out-of-round holes and premature wear.
Frequently Asked Questions
Can I remove a drill press chuck without a removal tool?
For a JT33 taper, yes, a proper drift punch is the standard tool. For a MT taper, no. Attempting to pry or hammer it off will likely damage the spindle. A cheap wedge set is a worthwhile investment compared to a spindle replacement.
Why won’t my chuck come off after hitting the drift punch?
The most likely cause is a seized or galled taper, often from moisture or lack of use. The second is that you have a Morse Taper and are using the wrong method. Confirm the taper type, apply penetrating oil and heat, and if it still will not move, seek a hydraulic press.
Is it safe to use an impact wrench or air hammer?
No. Never use an impact tool on a drill press spindle. The sudden, high-torque impulses can shatter the cast iron gear housing or twist the spindle shaft. The removal process requires controlled force, not brute impact.
How do I know if I damaged the spindle during removal?
Inspect the taper for deep scratches, dents, or cracks. After installing a new chuck, run the press at its lowest speed without a bit. Look and listen for any wobble or rhythmic vibration. A damaged spindle will cause a visible “wobble” in the chuck and produce uneven, oversized holes.
Can I replace my chuck with any brand?
Yes, as long as the taper (JT33 or MT2/MT3) and the capacity match your spindle. A Jacobs-branded chuck is the industry standard for durability, but other brands like Rohm or Albrecht make excellent replacements. Just match the taper specification exactly.
The Bottom Line
Removing a drill press chuck is a straightforward mechanical job that hinges on one piece of information: the spindle taper type. Identify it first. JT33 or MT2. For a JT33, use a drift punch. For an MT2, use a wedge set. Secure the spindle, apply force correctly, and never use the chuck key as a pry bar.
If the chuck is stuck, heat and penetrating oil come before greater force. When in doubt, the manufacturer’s manual, like the official Jet benchtop drill press documentation, has the final say on your specific model’s design. Get that right, and the chuck comes off in five minutes. Get it wrong, and you are buying a new spindle.
