
The Correct Way to Drill Holes for Drawer Pulls & Hardware
This post contains affiliate links. As an Amazon Associate, we earn from qualifying purchases.
To drill holes for drawer pulls, you need three things: the correct drill bit size (usually 3/16″), the exact hole center measurement of your pull, and a method to mark the cabinet without splintering the wood. Match the screw length to your cabinet thickness plus a quarter inch. The most common mistake is using a bit that’s too small for pulls with integrated studs.
That drill bit size isn’t a guess. It’s printed in the installation sheets from Amerock, Signature Hardware, and Kohler. Those manuals also list the one scenario where the standard size fails — and what to use instead.
What follows is the drill-and-mount sequence that actually works, pulled from those manufacturer guides. We’ll cover the tools that prevent tear-out, how to handle thick drawer boxes, and when to ignore the power drill entirely.
Key Takeaways
- The standard drill bit size for most pulls is 3/16″. Pulls with molded “studs” require a 1/4″ bit.
- Screw length should be 1/4″ longer than your cabinet door or drawer front thickness. A 3/4″ thick front needs a 1″ screw.
- Always use painter’s tape on the drilling surface to prevent wood splintering and to make clean, erasable marks.
- For absolute precision across multiple cabinets, invest in a reusable cabinet hardware template like the Liberty AN0191C-G-Q1.
- Hand-tighten screws first. Overtightening with a power driver strips the threads in the wood or cracks the pull.
The One Drill Bit Size That Fits Most Pulls
The number you need is 3/16 of an inch. That’s the diameter specified by Amerock, Signature Hardware, and Liberty Hardware for drilling holes for the vast majority of knobs and pulls. It creates a hole that’s snug enough for the screw threads to grip the wood firmly, but loose enough for the screw to slide through without binding.
When drilling for a knob or pull, a 3/16″ hole is recommended for most styles. The exception is pulls that have ‘studs’. A stud is simply an extension of the molded screw holes. If a pull has a stud, then a 1/4″ hole is required. – Amerock Installation Manual
Pulls with studs are the main exception. These have little cylindrical posts molded as part of the backplate or the pull itself. The studs drop into the holes to align the pull and take stress off the screws. A 3/16″ hole is too tight for them. You must step up to a 1/4″ bit. Modern Matter also bucks the trend slightly, recommending a 7/32″ bit for their hardware to match their provided metric screws.
| Brand / Source | Recommended Drill Bit Size | Notes |
|---|---|---|
| Amerock | 3/16″ | Standard for most styles. |
| Amerock | 1/4″ | Required for pulls with integrated “studs.” |
| Signature Hardware | 3/16″ | Standard for surface-mount and through-mount pulls. |
| Kohler | 3/16″ | Listed for K-99686 and K-99689 pulls. |
| Modern Matter | 7/32″ | Matches their included M4 machine screws. |
Using the wrong bit has consequences. A bit that’s too small forces the screw, which can split the wood or strip the threads before the pull is tight. A bit that’s too large gives the screw nothing to bite into, and the pull will wobble loose after a few weeks of use. Check your pull’s packaging or the manufacturer’s website for the spec sheet before you drill a single hole.
Screws, Thickness, and the “Quarter-Inch Rule”
The screws in the package are not always the right length. Amerock includes 8-32 x 1″ long machine screws because the typical cabinet door or drawer front is 3/4″ thick. That’s a good starting point, but it’s just a guess for your kitchen.
In general, the screw length(s) used should be 1/4″ longer than the thickness of your cabinet door or drawer front material. – Amerock Installation Manual
Here’s the mechanical reason: the screw needs enough thread to engage fully in the drilling in wood, plus a little extra to account for the thickness of the pull’s mounting hardware or backplate. A quarter-inch of extra length covers that gap. Measure your actual cabinet door with calipers or a ruler. If it’s 3/4″ thick, a 1″ screw is perfect.
The real trouble starts with drawer boxes. It’s common for a drawer to have a 3/4″ thick front attached to a 3/4″ thick box, making the total material you’re drilling through 1 1/2 inches. The included 1″ screw won’t reach. You need a 1 3/4″ screw (1.5″ + 0.25″). This is why checking both a door and a drawer is a non-negotiable first step. Hardware stores sell 8-32 machine screws in various lengths.
Where this goes sideways: Using a screw that’s too long. It protrudes through the back of a drawer box, snagging clothes or dishes. The fix is simple. The Kohler guide shows a method: insert the screw, count how many notches on the threaded portion are visible past the wood, then remove it and cut the screw at that notch with side cutters.
Measuring and Marking: Your Template Options
You have two paths: measure each pull location individually, or use a template. For a one-off pull replacement, measuring is fine. For a whole kitchen, a template saves your sanity.
The measuring method starts with finding the center of the drawer front. For a single pull, that’s your target. For two pulls, divide the drawer width into thirds or quarters—your choice. The classic rule of thumb is to place a pull vertically centered on the drawer panel. Use a sharp pencil and a combination square to mark a perfect crosshair.
The template method is foolproof for matching hole centers. A reusable template like the Liberty AN0191C-G-Q1 clamps to the drawer edge, with pre-drilled holes for the most common spacings (3″, 4″, etc.). You just drill through the guide holes. Even a homemade template from scrap wood or heavy cardstock works. The Amerock manual warns not to use a paper printout as a template, as printers can distort the scale.
Easy to miss: Apply painter’s tape over the area before you mark it. The tape gives your pencil a crisp line, prevents the drill bit from wandering on glossy paint, and most importantly, drastically reduces splintering on the backside of the hole when the bit exits.
Whether you measure or use a template, the final check is a level. Place it across your two marked hole centers. If the bubble isn’t centered, your pull will hang like a wonky picture frame.
Step-by-Step: Drilling and Installing a Pull
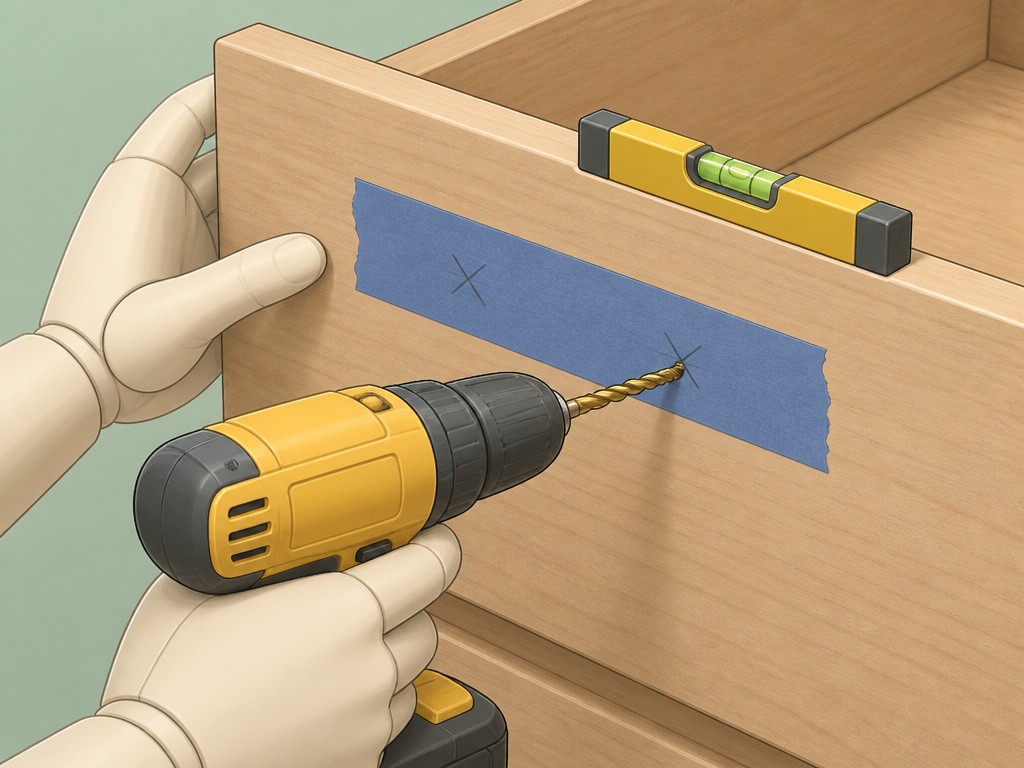
This is the sequence that avoids the most common errors. Have your drill, the correct bit, painter’s tape, a pencil, a level, and a screwdriver ready.
-
Tape and Mark. Apply a strip of painter’s tape over the drilling area. Mark your hole centers precisely on the tape with a sharp pencil. Use a level to confirm the marks are perfectly horizontal. Skip this, and the drill bit will skate on slick paint, landing an inch off-target.
-
Drill the First Hole. Secure the drawer front. Using a cordless drill at medium speed, drill straight in at your first mark. Use steady, light pressure. Let the bit do the work. Heavy pressure causes the bit to grab and splinter the exit side, especially in veneered plywood.
-
Test the Fit. Insert one of the pull’s screws into the new hole by hand. It should slide in smoothly but not wiggle. This confirms your bit size is correct before you drill the second hole.
-
Drill the Second Hole. Repeat the drilling process at your second mark. For absolute precision when drilling for cabinet handles, some pros use a drill a pilot hole guide block clamped in place.
-
Remove Tape and Clean Up. Peel off the painter’s tape. Any pencil marks go with it. Blow out the holes to remove wood dust.
-
Mount the Pull. Insert the screws from the back of the drawer front. Thread the pull onto them by hand, turning counter-clockwise until you feel engagement, then clockwise to tighten. Finish snugging with a screwdriver. > Common mistake: Using a power driver to install the screws. Modern Matter’s guide explicitly warns against this. The torque cracks ceramic knobs, strips brass threads, or over-compresses the wood. Hand-tighten only.
For a clean, splinter-free exit hole, place a sacrificial block of scrap wood tightly against the back of the drawer front where the bit will emerge. The drill bit enters the drawer front and exits into the scrap block, leaving a clean hole.
The Right Drill and Bits for the Job
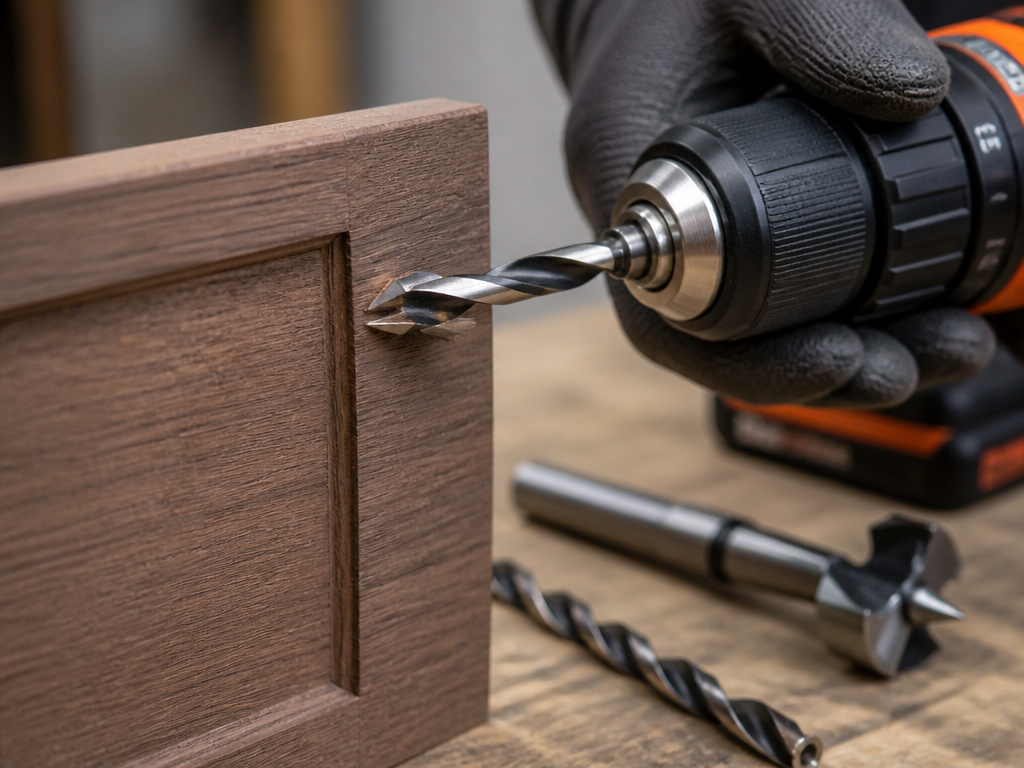
A standard twist bit in a cordless drill is the tool for 95% of pull installations. But bit quality matters. A cheap bit will dull quickly, burn the wood, and produce a ragged hole.
For pristine holes with no tear-out, a brad point bit is the upgrade. The sharp central tip prevents wandering, and the outer spurs score the wood fibers before the cutting edges lift them out, leaving a smooth-sided hole. It’s the best choice for visible hardwoods. If you’re installing many pulls, brad point drill bits are worth the investment.
What about a Forstner bit? A Forstner drill bit cuts a flat-bottomed, exceptionally clean hole. It’s overkill for a simple through-hole for a screw, but it’s the right tool if you need to countersink a pull’s backplate flush with the wood surface. For that, you’d follow with a countersink bit to bevel the screw head.
When NOT to use a spade bit. A spade drill bit is for rough, fast material removal. It tears and splinters too much for finish cabinetry. Save it for running wiring, not installing hardware.
Frequently Asked Questions
What if my new pulls don’t match the old hole spacing?
You have two options. You can drill new holes in the correct location, then fill the old holes with wood filler, sand, and repaint. The cleaner, easier solution is to use a drawer pull backplate. This is a decorative metal plate that mounts behind the new pull, covering the old holes and markings completely.
Can I use a drill press for drawer pulls?
Yes, a drill press guarantees perfectly perpendicular holes, which is ideal. It’s especially helpful for thick or awkwardly shaped drawer fronts. Clamp the workpiece securely to the drill press table. The control prevents the tear-out that handheld drills can cause on the exit side.
How do I find the hole center measurement on a pull?
Turn the pull over. Measure from the center of one screw hole to the center of the other. This is the “hole center” or “center-to-center” measurement. Do not measure the total length of the pull. Common sizes are 3″, 4″, and 96mm.
My drawer front is laminate or veneer. How do I prevent chipping?
The painter’s tape trick is essential. Also, use a sharp, new drill bit. Drill from the finished side toward the back. As the bit tip is about to break through, reduce pressure drastically. For maximum safety, clamp a backup board behind the drilling spot, as mentioned in the step-by-step guide.
What’s the best placement for a pull on a cabinet door?
There’s no strict rule, but the common practice is to place a knob or pull in the corner opposite the hinges. On a base cabinet door, that’s usually 2-3 inches up from the bottom corner. On a wall cabinet door, it’s 2-3 inches down from the top corner. It’s an aesthetic choice—hold the pull in place and see what looks right to you.
The Bottom Line
Drilling for drawer pulls comes down to three verified specs: a 3/16″ bit (or 1/4″ for stud-style pulls), screws that are a quarter-inch longer than your cabinet thickness, and the hole-center measurement of your specific hardware. Skip the guesswork and reference the manufacturer’s installation sheet—Amerock, Kohler, and Signature Hardware all publish them.
Use painter’s tape to mark and protect. Drill with control, not force. Tighten by hand. That process works for a single replacement or a full kitchen renovation. The right prep turns a fifteen-minute job into a clean, permanent install.
