
The Right Type of Drill Bit for Tile: 3 Effective Options
This post contains affiliate links. As an Amazon Associate, we earn from qualifying purchases.
Use a carbide-tipped (PTC) bit, a diamond-grit core bit, or a dry diamond core bit. Carbide bits need water coolant and a strict 700-900 RPM on rotary-only setting. Diamond bits work wet or dry but last longer with constant water. Dry diamond cores, like the Milwaukee M14, attach to an angle grinder and need no water but demand high RPM. The wrong bit or hammer setting cracks tile and burns out the tip in under a minute.
That RPM window isn’t a suggestion. It’s the difference between a clean hole and a blue, rounded stump where your cutting edge used to be. The steel support turns blue when the tip overheats, and that color change is the manufacturer’s proof you ran it too fast or dry. Your warranty is gone the moment you see it.
What follows is the breakdown of those three bit types, when each one wins, the exact speeds they demand, and the physical mistakes that turn a $20 tool into scrap before the first hole is finished.
Key Takeaways
- Carbide-tipped (PTC) bits are for small holes under 12mm but demand water coolant and a 700-900 RPM rotary-only setting. Using hammer action or drilling dry voids the warranty by burning the tip out.
- Diamond-grit core bits are the go-to for holes up to 35mm. They can be used “dry” by dipping in water, but constant water flow triples their life. Speed is critical: a 6mm bit needs 2000-2500 RPM, while a 25mm bit needs 1500-2000 RPM.
- Dry diamond core bits like the Milwaukee Diamond Max M14 are for angle grinders, not drills. They need no water but require the grinder’s high RPM. This is the exception that breaks the “always use water” rule.
- Start every hole at a 45-degree angle to score the tile’s glazed surface and prevent the bit from “skating.” Bring the drill perpendicular only after the groove is cut.
- Never use a general-purpose masonry drill bit on tile. The hammer action and blunt tip will shatter the material on contact.
The Three Drill Bit Types for Tile, Explained
Forget “tile bits.” That category hides three different tools with different jobs. Picking the right one isn’t about brand loyalty. It’s about matching the bit’s cutting mechanism to the tile’s hardness and the hole size you need.
Technical Spec: Per Armeg’s technical data sheet, PTC Carbide bits are designed for rotary-only drilling at 700-900 RPM with continuous water coolant. Using hammer action or excessive speed causes “tip burn out,” indicated by the steel support turning blue, and invalidates the product warranty.
Carbide-Tipped (PTC) Bits: For Small, Precise Holes
Think of this as your finish carpenter’s bit. The Armeg PTC Carbide bit and the Tivoly 1200032 are ground to a sharp point, not a blunt hammer-drill tip. They cut a clean, small-diameter hole (typically 4mm to 12mm) perfect for screw anchors, cable pass-throughs, or faucet handles.
Why they work: The ground carbide tip slices through the tile’s hard glaze. It doesn’t hammer or crush. That’s why you must disable the hammer function on your drill. The “cracking” sound you hear when you first press the bit to the tile is the tip locating itself in the glaze, that’s normal.
Where they fail: These bits are water-cooled only. The Armeg sheet states warranty voidance for “tip burn out/rounding off” caused by “excessive speed and/or failure to use water coolant.” The steel turns blue as evidence. They are also strictly for tile. Switching to the masonry behind the tile without changing bits will snap the tip.
| Best For | Hole Size | Critical Setting | If You Skip It |
|---|---|---|---|
| Porcelain, ceramic, granite | 4mm – 12mm | 700-900 RPM, Rotary-Only, Water Coolant | Tip burns blue in 30 seconds; warranty void. |
| Wall tiles, splashbacks | Under 10mm | Start at 45° angle to prevent skating | Bit slides across glaze, scratching tile. |
| Quick fixture installs | Small anchors | Constant water flow to cutting tip | Overheat blunts tip; it stops cutting. |
Diamond-Grit Core Bits: The Versatile Workhorse
This is the bit you’ll use 80% of the time for anything over a 1/4 inch. A diamond-grit core bit looks like a hollow tube with a diamond-coated end. It grinds away a circle of material, leaving a clean hole and a tiny “slug” of tile in the bit’s core.
Why they work: Diamond is the only abrasive that effectively wears down porcelain. The bit works by friction, not impact. You can use it in a standard drill, and it handles the widest range of sizes, from 5mm up to 102mm for drain pipes.
The water dilemma: You can use these “dry” by dipping the rotating bit in water every few seconds. The Armeg data sheet allows this but warns it “will diminish the life of the product.” For constant water flow, a simple water feed kit pumps coolant to the tip and turns a 5-hole bit into a 15-hole bit.
Where this goes sideways: Assuming all diamond bits use the same speed. A 6mm bit needs 2000-2500 RPM. A 25mm bit needs 1500-2000 RPM. Running a large bit too fast generates catastrophic heat and glazes the diamond coating, rendering it useless.
Dry Diamond Core Bits (Angle Grinder): The Power Exception
The Milwaukee Diamond Max M14 represents a different path. These are dry-use, diamond-core bits with an M14 thread that screws directly onto an angle grinder, not a drill.
Why they exist: Angle grinders spin at 10,000+ RPM, the ideal speed for dry diamond cutting. The bit’s design dissipates heat without water coolant. This is for pros making many large holes in hard materials like quarry tile or cast iron.
When to avoid them: This is not a beginner tool. The high speed and lack of drill-style control make it easy to chip tile or cut an uneven hole. It’s also overkill for one or two small holes in a bathroom wall. For most DIY drilling into tile projects, a wet diamond bit in a drill is safer and more controlled.
Carbide vs. Diamond: The Speed and Cooling Trade-Off
This isn’t an abstract choice. It’s a decision you make based on the hole in front of you and the tool in your hand.
Pick the Carbide (PTC) bit when:
- The hole is under 12mm.
- You have a way to deliver water (a spray bottle or a helper with a cup works).
- You need a precise, clean hole for a visible fixture.
- You can set your drill to a low 700-900 RPM and confirm hammer mode is off.
Pick the Diamond Core bit when:
- The hole is over 10mm or you need multiple sizes.
- You’re drilling into ultra-hard porcelain or granite.
- You can use a water feed kit or accept a shorter bit life with the dip-and-drill method.
- You need to follow the specific RPM chart for the bit’s diameter.
Pick the Dry Diamond (Angle Grinder) bit only when:
- You own and are proficient with an angle grinder.
- You’re drilling many large-diameter holes in thick, hard tile.
- Water is impractical (e.g., electrical work, finished walls).
- You understand this bypasses the conventional process for drilling into tile with a drill.
Step-by-Step: How to Drill Tile Without Breaking It
The right bit is half the battle. The technique is the other half. This sequence assumes you’re using a water-cooled carbide or diamond bit in a standard drill.
Before you start: Unplug the drill. Mark your hole with tape to prevent skating. Have a water source ready. Double-check that your drill’s hammer action is disengaged.
- Secure the tile. If it’s not already fixed to the wall, clamp it to a scrap wood backing. A vibrating tile will crack.
- Fit the bit and set the speed. Match the RPM to your bit type and size. For a new Armeg PTC Carbide bit, that’s 700 RPM.
- Start at a 45-degree angle. Position the bit on the mark and tilt the drill. Start at low speed to grind a shallow groove. This scores the glaze so the bit can’t skate.
- Gradually bring the drill upright. Once the groove is established, slowly tilt the drill to 90 degrees. Continue drilling with steady, light pressure.
- Maintain coolant and clear debris. Keep the tip wet. For diamond bits, pull out occasionally to let water flush out the ground tile dust from the core.
- Ease off before breakthrough. Reduce pressure as the bit nears the back of the tile to avoid a blow-out chip on the rear face.
- Switch bits for the substrate. Once through the tile, stop. Change to a proper masonry drill bit for the wall or a wood drill bit for studs. The tile bit’s job is done.
Common mistake: Forcing the bit. Let the tool do the work. If you lean on it, you risk breaking the tip of a carbide bit or overheating a diamond one. The telltale sign is smoke, not progress.
What NOT to Use: Bits That Will Crack Your Tile
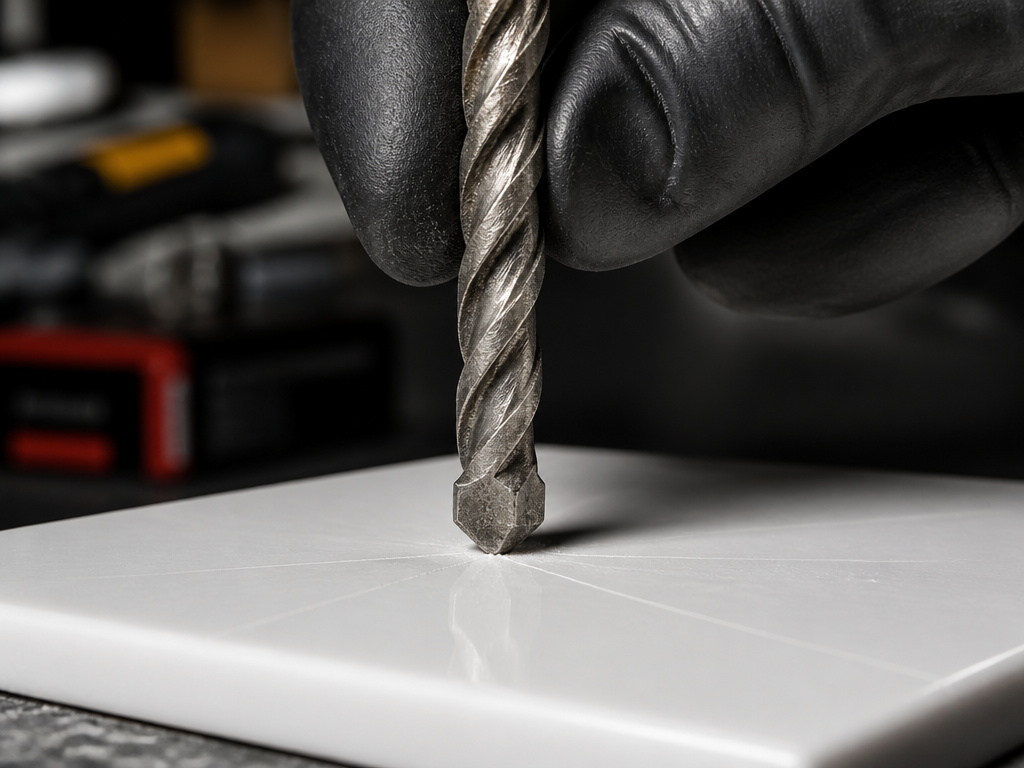 This is non-negotiable. Using the wrong bit doesn’t just give a bad result, it destroys your material.
Never use a standard masonry drill bit. Its tip is designed to crush brittle concrete and brick via hammer action. On hard, brittle tile, that hammer blow is a guaranteed crack. You might as well hit the tile with a nail. Understanding the difference in drill bits between masonry and tile is the first lesson in safely drill tile work.
Never use a twist drill or wood bit. These will dull instantly on the glaze and generate enough heat to thermal-shock the porcelain.
Never use a hammer setting on any tile bit. Not even “just a little.” The warranty sheets are explicit: hammer action causes immediate tip blunting or breakage.
Troubleshooting: Why Your Tile Bit Isn’t Cutting
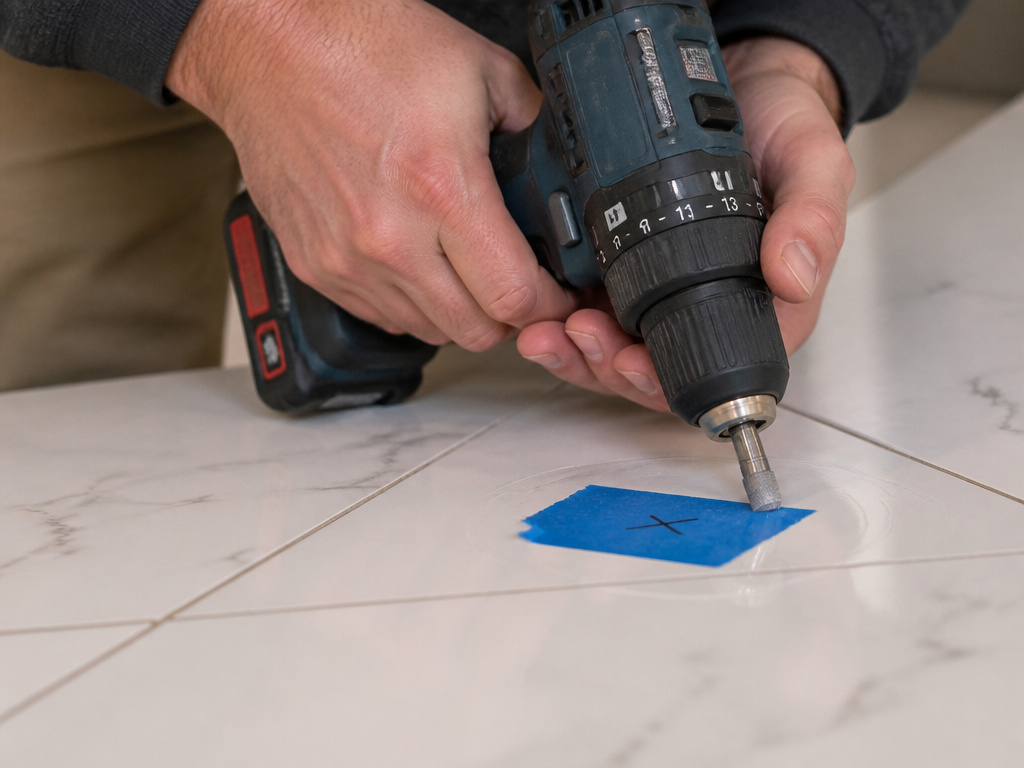 A bit that spins but doesn’t advance is telling you something.
- Bit skates on the surface: You didn’t start at an angle. The glaze is too slick. Use a piece of tape over the mark or a specialized drill guide to give the tip initial purchase.
- Bit gets hot and smokes: No coolant. For diamond bits, the core is clogged with dust. Stop, cool the bit, flush the core, and resume with water.
- Bit drills slowly, then stops: The diamond coating is glazed over from dry, high-speed use. Once glazed, it’s often irrecoverable. This is why constant water flow is the rule.
- Tile cracks around the hole: Too much pressure, hammer action was on, or the tile wasn’t supported. It can also happen if you use a drill bit for brick on tile.
If you’re ever unsure about how to identify a masonry drill bit versus a tile bit, look at the tip. A masonry bit has a wide, blunt, carbide spear. A tile bit is either a sharp spear (carbide) or a hollow tube (diamond).
Frequently Asked Questions
Can I use the same bit for tile and the wall behind it?
No. Drill through the tile with your tile bit, then stop and switch to a masonry bit for brick or a wood bit. Using a tile bit on concrete will destroy it in seconds. This two-bit method is core to any drilling tile guide.
Is water absolutely necessary?
For carbide (PTC) bits, yes. It’s mandatory for both performance and warranty. For diamond-grit bits, water dramatically extends life, a bit used wet lasts 3x longer than one used dry. The Milwaukee M14 dry bits are the engineered exception.
What speed should I use for a 1/4-inch (6mm) diamond bit?
6mm diamond-grit bit, per Armeg’s spec, should run at 2000-2500 RPM. This is faster than most people guess. Always check the manufacturer’s chart. Your guide to choosing the correct drill bit must include this RPM data.
Why did my new carbide bit stop cutting after one hole?
You likely used hammer action or no water. The tip overheated, burned out, and rounded over. The steel may be blue. This is a warranty-voiding failure mode stated in the product sheet.
Can I use an old, dull carbide bit on anything?
Yes. Once a carbide bit is too dull for porcelain, the Armeg sheet suggests repurposing it for softer tile like plaster-backed ceramic wall tile. It won’t be fast, but it will work.
How do I keep the bit from slipping when I start?
Use the “lean-in” method. Start with the drill at a 45-degree angle to create a score mark. You can also place a piece of masking tape over the mark or use a suction cup drill guide. This is a fundamental technique for drilling tile without damage.
The Bottom Line
Don’t overthink it. For a handful of small holes, get an Armeg PTC Carbide bit, run your drill at 800 RPM with the hammer off, and keep the tip wet with a spray bottle. For anything larger or more frequent, invest in a diamond-grit core bit and a cheap water feed kit, the longer bit life pays for the kit on the second job.
Ignore the tool aisle’s generic “tile and glass” labels. Look for the specific type: carbide-tipped, diamond-grit, or dry diamond core. Your success isn’t in the brand name. It’s in matching that bit to the three rules printed on every manufacturer’s sheet: the right speed, the right cooling, and absolutely no hammer.
