
What Type of Drill Bit for Brick? A Guide to Masonry Bits
This post contains affiliate links. As an Amazon Associate, we earn from qualifying purchases.
Use a carbide-tipped masonry drill bit. The tip is a brazed-on chunk of tungsten carbide, harder than the brick’s silica. For holes under 3/8 inch in a standard hammer drill, a round-shank bit works. For anything larger, more frequent, or in dense brick, an SDS-plus shank bit in a rotary hammer transfers impact energy directly and drills 15% faster. Match the bit’s diameter to your anchor’s spec, a hole just 0.005 inches oversize can cut anchor strength by 20%.
That 20% drop is the tolerance floor specified in the ANSI B212.15 standard for expansion anchor bits.A general masonry bit can get close, but an anchor-setting bit like the Relton REL207 series is machined to that spec. The difference lives in the flutes and the braze.
What follows: the two shank systems that decide your speed, the one bit type that fails on decorative brick, and the drill-rpm math that keeps the carbide from turning blue and falling off.
Key Takeaways
- Carbide is non-negotiable. A high-speed steel bit will dull on brick in seconds. The tip must be tungsten carbide, brazed at over 1,100°C.
- Shank type dictates tool choice. Round shanks fit any drill chuck but waste impact energy. SDS-plus shanks require a rotary hammer but transfer force directly, reducing drill wear.
- Anchor holes need precision. For wedge or sleeve anchors, use a bit manufactured to ANSI B212.15 tolerance (like the Relton REL207). A slightly oversize hole critically reduces holding power.
- Delicate materials demand a rotary-only bit. For glazed brick, tile, or vintage masonry, use a rotary-only carbide bit (e.g., Relton Tip-Top RELTT). Hammer action will crack the face.
- Speed kills carbide. In a rotary hammer, keep RPM under 1,500 for bits under 1/2 inch. In a standard drill, start at 600 RPM and listen, a high-pitched whine means slow down.
The Core Spec: Carbide-Tipped Masonry Bits
A brick drill bit is a pulverizing tool, not a twist bit. Its tip consists of a wedge of tungsten carbide brazed onto a steel body.As the hammer action pounds, the carbide crumbles the brick’s crystalline structure instead of slicing it.
The flutes are shallow and straight, designed to eject dust, not curl a chip. If you try to use a standard twist bit, the soft steel edge rounds over within ten seconds. You’ll smell burnt metal and see a polished, useless tip.
The Chinese National Standard GB/T 6335.2-2010 specifies the technical requirements for these bits. For a 10mm diameter bit, the allowable runout (wobble) of the carbide tip relative to the shank axis is 0.50mm. More wobble than that, and the hole drills oversize, wallows out, and the anchor won’t set.
Masonry bit identification starts with that blunt, spade-shaped carbide tip. Look for the braze line, a distinct, often silvery joint between the dark carbide and the steel body. A true masonry drill bit will also have a shaft marked with its diameter and sometimes the letters “TC” for tungsten carbide.
The Two Jobs: General Drilling vs. Anchor Setting
All carbide-tipped bits drill brick. But not all create a hole precise enough for mechanical anchors.
| Bit Type | Best For | Tolerance | What Happens If You Use the Wrong One |
|---|---|---|---|
| General Masonry Bit (e.g., Bosch Bulldog, standard round-shank) | Through-holes, conduit, pilot holes for plastic anchors. | Standard manufacturing tolerance. Hole may be +0.010″ oversize. | An expansion anchor rattles in the hole. Tightening the nut expands the sleeve, but it contacts only high spots, reducing pull-out strength by up to 50%. |
| Anchor-Setting Bit (e.g., Relton REL207) | Wedge anchors, sleeve anchors, drop-in anchors—any expansion anchor. | ANSI B212.15 precision tolerance. Hole diameter held to within a few thousandths of an inch. | The anchor sleeve expands uniformly against the hole wall. The rated holding capacity is achieved. |
The Relton REL207 is the benchmark here. It’s cut to the ANSI spec because a wedge anchor demands a perfect cylinder. A general bit often leaves a tapered or bell-mouthed hole.
The Shank Showdown: SDS-plus vs Round Shank
The shank is how the bit connects to the hammering mechanism. This choice decides your drill type, your speed, and your forearm fatigue.
Round Shank Bits fit into the standard three-jaw chuck on a hammer drill or drill driver. The chuck grips the smooth cylinder tightly.
- Pros: Works with the drill you likely already own. No special chuck needed.
- Cons: All hammer impact is transmitted through the chuck jaws. This wastes energy, creates more vibration, and wears out the chuck faster. It’s also slower, you’re pushing more and drilling less.
SDS-plus Shank Bits have two open grooves and two locking slots. They slide into an SDS-plus chuck on a rotary hammer, where they can move back and forth slightly.
- Pros: The sliding action lets the hammer’ piston strike the bit directly. Energy transfer is vastly more efficient. This means faster drilling, less vibration, and no chuck wear. Bosch rates their SDS-plus bits as drilling 15% faster in concrete than previous designs.
- Cons: Requires an SDS-plus rotary hammer. The bits are not interchangeable with standard drills.
Where this goes sideways: Trying to use an SDS-plus bit in a standard drill chuck with an adapter. The adapter negates the sliding action, so you get all the cost with none of the benefit. If you have a standard drill, use a round shank bit.
For one or two small holes in soft brick, a round shank in a hammer drill is fine. For a dozen holes, for dense brick, or for holes over 3/8 inch, the SDS-plus system is the only sane choice. The difference in effort and speed is transformative.
Matching Bit to Tool and Material
Your drill’s capacity and your brick’s hardness set the boundaries. A 6-amp hammer drill cannot drive a 1-inch bit through engineering brick.
Tool Capacity Guide
Check your drill’s manual for its “max capacity in masonry.” Don’t exceed it. The motor and hammer mechanism are rated for a specific energy output.
| Tool Type | Typical Max Masonry Capacity | Realistic Use for Brick | Risk If Exceeded |
|---|---|---|---|
| Hammer Drill (7-9 amp) | 3/8″ to 5/8″ | Holes for 1/4″ anchors, lag shields, small fixtures. | Motor overheats, chuck bearings fail, hammer mechanism breaks. The job stalls with a burning smell. |
| SDS-plus Rotary Hammer | 7/8″ to 1″ | Holes for 1/2″ anchors, core bits up to 3″, continuous professional use. | Overloading is difficult; the tool is built for it. The limit is usually your bit length, not power. |
| SDS-max Rotary Hammer | 1-1/4″ and up | Large core drilling, heavy anchoring. | Overkill for 99% of brick work. The weight and cost are unnecessary. |
Brick Type and the Delicate Material Rule
Not all brick is the same. A soft, sandy common brick drills like butter. A high-fired engineering brick or clinker is closer to concrete.
Skip this if: You’re drilling common red brick. Use a standard carbide bit in hammer mode.
For glazed brick, decorative tile, or historic soft mortar, hammer action is your enemy. The percussion will crack the glaze or spall the face.
The fix is a rotary-only carbide bit, like the Relton Tip-Top (RELTT) or a tile drill bit from Würth. These are designed to run at higher RPM (1,500-3,000) in rotary-only mode, grinding through the hard surface without impact. The WÜRTH brick and tile bit is explicitly for “dry drilling of high-fired bricks and tiles” and recommends a 20-second cool-down period between holes.
Step-by-Step: Drilling the Perfect Hole in Brick
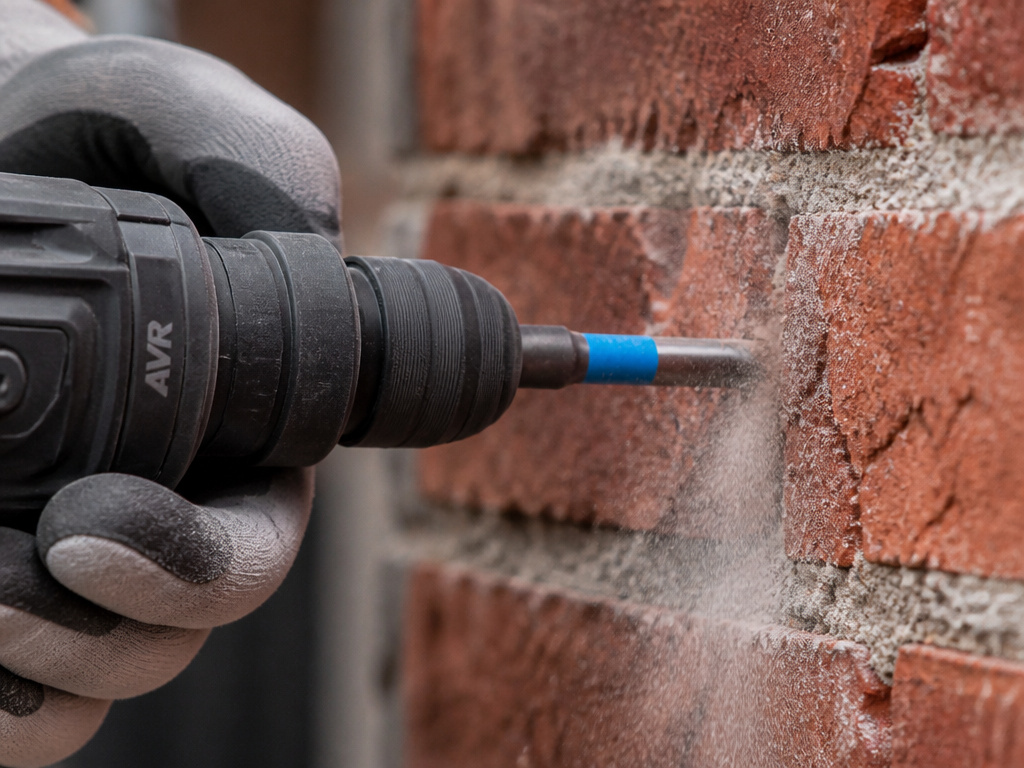
Tools You Need: Carbide-tipped masonry bit, hammer drill or rotary hammer, safety glasses, N95 respirator, shop vacuum, hammer, nail set or center punch, tape measure, painter’s tape.
- Mark and Punch. Measure and mark your hole with a pencil. Place a nail set or center punch on the mark. Give it two firm taps with a hammer to create a dimple. This keeps the bit from “walking” on the smooth brick surface when you start.
- Set Your Depth. Hold your screw next to the bit. Wrap a piece of painter’s tape around the bit at a point 1/4 inch longer than the screw. This is your depth gauge. It ensures room for dust so the screw seats fully.
- Start Slow, Straight, and Cool. Position the bit in the dimple. Start the drill at a low speed with no hammer action for the first 1/8 inch to establish the hole. Then, engage hammer mode (if using). Keep the drill perfectly perpendicular. Let the tool do the work, push firmly, but don’t lean on it. > Common mistake: Angling the drill mid-hole. This ovalizes the hole, and the anchor sleeve won’t expand evenly. The fixture will sit crooked and have less holding power.
- Clear Dust and Manage Heat. Every 20-30 seconds, pull the bit out completely. Use the shop vacuum to suck dust from the hole. For deep holes or hard brick, this also cools the bit. A carbide tip overheated to blue-hot loses its hardness permanently.
- Finish and Clean. Drill to your tape mark. Vacuum the hole one final time. No dust should remain. Now you’re ready for your anchor or drilling a screw into brick directly.
What About Brick Screws?
Brick screws, like Tapcons, are a different system. They tap their own threads into the brick, so hole precision is even more critical.
- Bit Diameter: For a 3/16″ screw, use a 5/32″ bit. For a 1/4″ screw, use a 3/16″ bit. The hole must be smaller than the screw.
- Bit Type: Still a carbide-tipped masonry bit, but the ANSI standard carbide bits are recommended to ensure the correct minor diameter for the thread.
- Depth: Drill the hole a minimum of 1/4 inch deeper than the screw will penetrate. This gives the cut brick dust a place to go so it doesn’t jam the screw.
The process for fastening to brick with screws is the same as for anchors, but the cleanout step is mandatory. Any residual dust will prevent the screw from threading to its full depth.
Frequently Asked Questions
Can I use a concrete drill bit for brick?
Yes. Bits for concrete are carbide-tipped masonry bits, often designed for harder aggregate. They will work on brick, often very well. The reverse is not always true, a bit meant only for soft brick may wear quickly on concrete.
What’s the difference between these and a core drill bit?
Core drill bits (core bits) are for holes larger than 1 inch, like for plumbing pipes. They are hollow cylinders with diamond or carbide segments on the rim. They grind a circular kerf, leaving a solid core in the center. For a 1/2″ anchor hole, a core bit is massive overkill.
How do I choose a drill bit for steel or tile?
The material dictates the bit. Drill bits for steel are made of cobalt or HSS with a 135-degree split point; they cut metal. Tile drill bits use a spear-shaped carbide tip or diamond grit for rotary-only grinding. Using a masonry bit on steel will ruin it; using it on tile will crack the tile.
Why did my new masonry bit get stuck and smoke?
You likely hit rebar or a metal lintel. Carbide masonry bits are not designed for metal. For drilling through reinforced brick, you need a Rebar Eater bit (e.g., Relton RELRB), which uses rotary-only action with special cutters to shear the steel. Then you switch back to your masonry bit.
Before You Go
For brick, the answer is always carbide. The real decision is between a round shank for your existing hammer drill and the SDS-plus system for serious work. Remember the 20% rule: for expansion anchors, spend the extra dollar on an ANSI-tolerance bit. And when the brick is glossy or antique, turn the hammer action off, the only thing you’ll break otherwise is the brick face itself.
The right bit turns a struggle into a five-minute job. The wrong one turns a simple anchor into a loose fixture and a weekend of regret. Match the tip to the material, the shank to the tool, and the tolerance to the task. Then push the trigger.
