
What Are Drill Presses Used For? Key Functions & Core Uses
This post contains affiliate links. As an Amazon Associate, we earn from qualifying purchases.
A drill press is used for drilling precise, perpendicular holes in materials like wood, metal, and plastic. Its core functions extend to reaming (smoothing hole interiors), countersinking (creating conical recesses for screw heads), counterboring (creating stepped recesses for bolt heads), boring (enlarging existing holes), and tapping (cutting internal threads). It delivers repeatable accuracy that a handheld drill cannot match, but it is not designed for milling or lateral cutting forces.
That list covers the official uses, but the real story is about control. A handheld drill lets you make a hole. A drill press lets you decide exactly where that hole goes, how straight it is, and how clean its edges are. That difference turns a basic task into a precision operation.
What follows: a breakdown of each function, the specific tooling required, the common mistakes that turn precision into scrap, and the hard line between what a drill press is built for and what will break it.
Key Takeaways
- Drill presses excel at repetitive, perpendicular holes, but drilled holes are always slightly oversized due to machine and tool rigidity factors.
- Attempting to use a drill press as a milling machine will damage the spindle bearings and can eject the workpiece as a dangerous projectile.
- The single most common cause of injury is an unsecured workpiece spinning with the drill bit; a vise clamped to the table is non-negotiable.
- For most home shops, a benchtop model handles holes up to 1/2 inch in steel; floor-standing models are needed for consistent work with bits over 3/4 inch.
- Operations like reaming and tapping require slower spindle speeds, often one-third the speed used for drilling the initial hole.
The 7 Core Functions of a Drill Press
Beyond just making holes, a drill press is a platform for several precision machining operations. Each requires specific bits and settings.
1. Drilling Holes (The Primary Job)
This is the fundamental task. The drill press holds a twist drill bit perfectly vertical and feeds it into the workpiece with controlled pressure.
Common mistake: Assuming a 1/4-inch drill bit will produce a 1/4-inch hole. According to Carnegie Mellon University’s machining guide, drilled holes are always slightly oversized due to factors like drill point accuracy, spindle rigidity, and workpiece setup. A 1/4-inch bit typically produces a hole several thousandths of an inch larger.
You match the bit to the material: High-Speed Steel (HSS) for wood and mild steel, cobalt for stainless steel, and carbide for abrasive composites. The key is spindle speed. Softer materials and smaller bits need higher RPMs; harder materials and larger bits need slower RPMs to avoid burning the bit.
| Material | Recommended Bit Type | Speed Consideration |
|---|---|---|
| Softwood / Plastic | HSS or Brad Point | Higher RPM (1500-3000) |
| Hardwood | HSS or Forstner | Medium RPM (800-1500) |
| Mild Steel / Aluminum | HSS or Cobalt | Lower RPM (500-1000) |
| Stainless Steel | Cobalt | Very Low RPM (200-500) |
2. Reaming for Precision
Drilling gets you close; reaming gets you exact. A reamer is a finishing tool that removes a minuscule amount of material to bring a hole to a precise diameter with a smooth finish.
You must drill the starter hole slightly undersized, typically 1/64″ to 1/32″ smaller than the desired final size. Then you swap in the reamer. The critical adjustment here is speed. Run the reamer at one-third to two-thirds of the drilling speed you just used. Force it and you’ll tear the material and ruin the tool.
Where this goes sideways: Using a reamer at drilling speed. The flutes clog, the tool binds, and it snaps off inside the hole, often ruining the workpiece.
3. Countersinking for Flush Hardware
A countersink bit cuts a conical recess at the top of a hole, allowing a flat-head screw to sit flush with the surface. It’s essential for cabinetry and metal fabrication.
The bit has a specific included angle, 82° and 90° are common, matching standard screw head angles. You run it at a medium speed, and the trick is to stop the cut the moment the screw head is flush. Go too deep and you create a visible crater.
4. Counterboring for Hidden Hardware
Counterboring is like countersinking with a flat bottom. It creates a clean, cylindrical recess for a bolt head or nut to sit below the surface, which is then capped with a plug. You need a piloted counterbore tool or a Forstner bit to create this clean-bottomed cavity after drilling the pilot hole for the bolt’s shaft.
5. Boring for Large or Odd-Sized Holes
When you need a hole larger than your biggest twist drill, or a non-standard diameter, you move to boring. This uses a single-point cutting tool mounted on an adjustable boring head.
You fix the boring head in the drill chuck, set the cutter to the exact radius you need, and take light passes. It’s a slower process than drilling, but it’s the only way to accurately achieve large diameters without specialized hole saws.
6. Tapping for Threads
With the right accessory, a tapping head or a good quality tap holder, a drill press can precisely start and guide a tap to cut internal threads. The drill press is not powering the tap; it’s holding it vertical. You set the spindle to its lowest speed, often using the back gears, and you turn the chuck by hand to start the threads, letting the tapping head’s clutch mechanism prevent over-torque.
Skip this if: You’re tapping soft materials like pine. Hand-tapping is faster and safer. Reserve the drill press for tapping hard metals where perfect alignment prevents broken taps.
7. Specialty Operations: Mortising & Drum Sanding
With add-on attachments, a drill press’s functions expand. A mortising attachment clamps on to use a square chisel and auger bit for cutting square holes in wood. A sanding drum mounted in the chuck turns it into a stationary spindle sander for smoothing curves. These are legitimate uses, but they push against the machine’s core design. They add lateral stress, so you must reduce speed and feed pressure accordingly.
What a Drill Press Cannot Do (The Milling Myth)
This is the most important line not to cross. A drill press is designed for vertical, axial force, pushing straight down. A milling machine is designed for lateral, radial force, pushing sideways while cutting.
The part nobody mentions: The spindle on a drill press is supported by bearings meant only for vertical load. Applying side pressure, as you do in milling, causes premature and catastrophic bearing failure. The drill chuck is also not designed to grip tools against lateral force; it will loosen and eject the tool.
Hobbyists sometimes attempt to convert drill presses into makeshift mills for aluminum or wood. The result is a machine that chatters, produces poor finishes, and has a short, noisy lifespan before the spindle develops permanent play. For any real milling, even in soft materials, a proper milling machine is the correct tool. The Wikipedia drill press entry explicitly warns against this practice, noting it poses a danger to the user.
Benchtop vs. Floor-Standing: Which Capacity Do You Need?
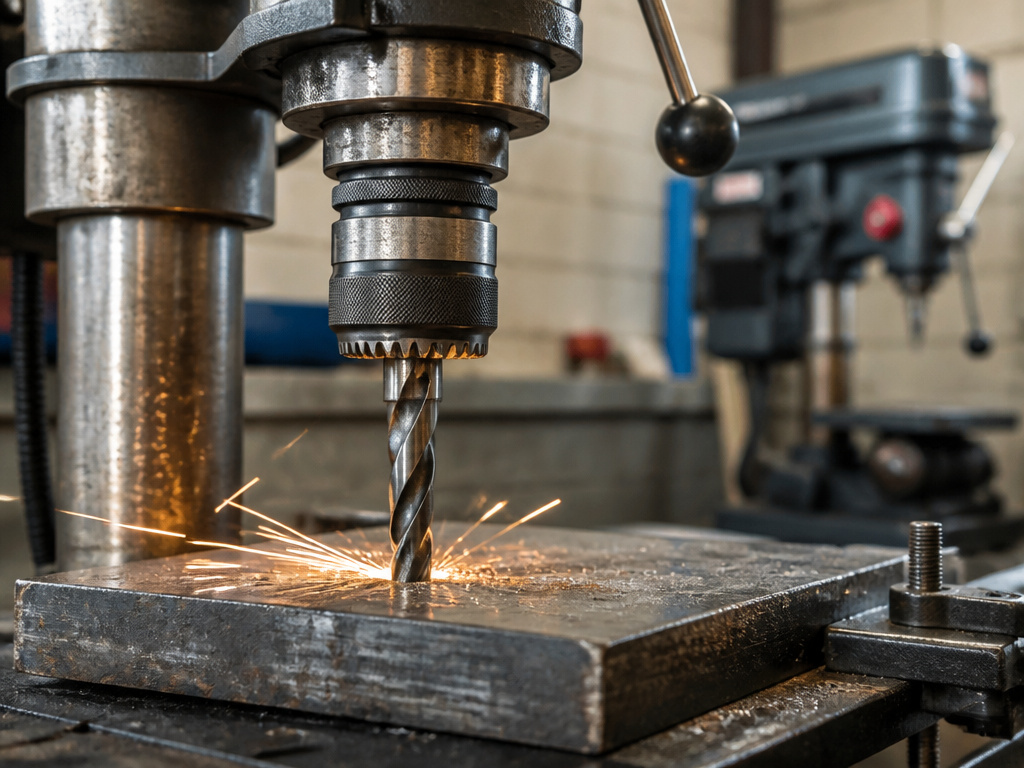 The “swing” measurement (twice the distance from the spindle center to the column) determines the maximum width of workpiece you can center. Your project size dictates the machine size.
A benchtop drill press typically has an 8-inch to 12-inch swing. It’s perfect for circuit boards, small brackets, and model making. Its motor and spindle are lighter, limiting its capacity in steel to about a 1/2-inch drill bit.
A floor-standing model has a 15-inch to 20-inch swing or more. It has the mass, motor power, and drill press swing to handle a 1-inch bit in steel or to drive a large Forstner bit through hardwoods without bogging down. The Argonne National Lab drill press reference notes that these larger, pedestal-type machines are standard in professional machine shops for a reason.
Bottom line: If you drill metal more than once a month or regularly work with pieces wider than a foot, the floor-standing model is the only sane choice. The benchtop will struggle, overheat, and wear out.
The Non-Negotiable Safety Rules
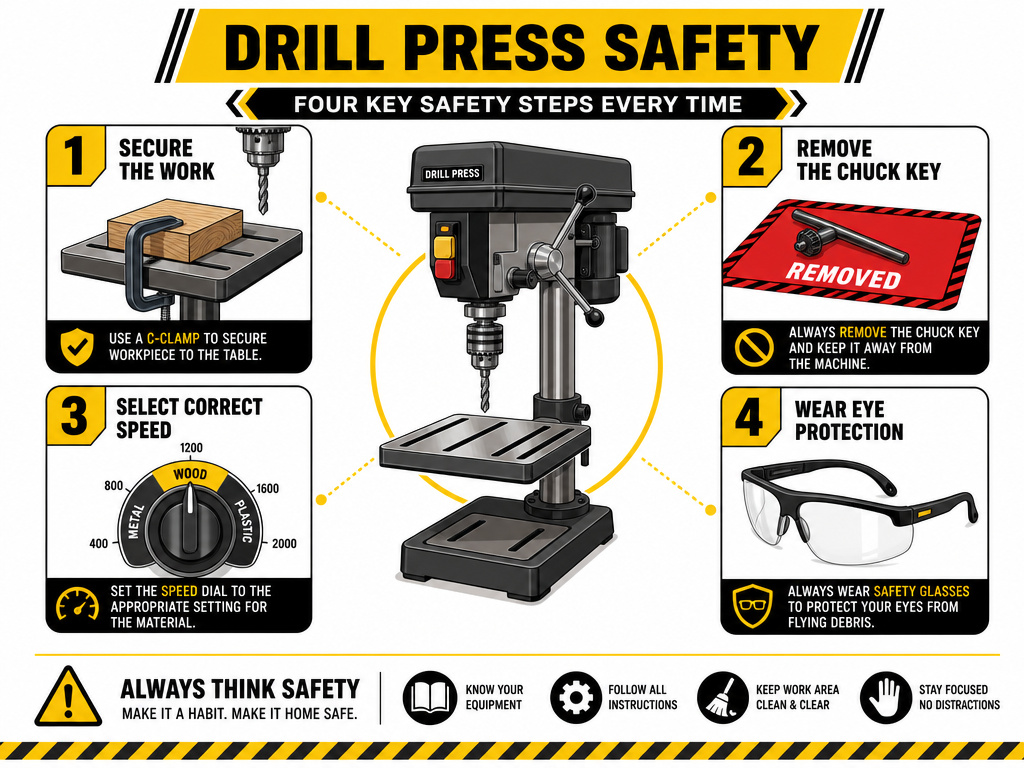 The OSHA woodworking drill press guide states that one of the most common causes of accidents is “poor operator judgment,” specifically trying to hand-hold the workpiece.
Before you start: Secure every workpiece with a vise or clamps that are themselves bolted to the table. Do not wear gloves, long sleeves, or jewelry. Tie back long hair. Know where the emergency stop button is.
The hazard is rotational energy. When the drill bit catches, an unsecured piece of wood or metal becomes a high-speed, jagged projectile. A glove can catch on the rotating chuck and pull your hand in before you can react. These aren’t abstract warnings; they are the direct causes of the injuries documented in every safety manual.
The 4-second checklist before each hole:
- Workpiece clamped? (Not just held.)
- Chuck key removed? (The “fly across the shop” key.)
- Speed set for material and bit size?
- Safety glasses on?
Choosing the Right Bit for the Job
The drill bit is the consumable. Matching it to the operation is the final step in using a drill press correctly.
- Twist Drill (HSS/Cobalt): The default for metal and general-purpose holes in wood.
- Brad Point: For clean, precise holes in wood without tear-out.
- Forstner Bit: For flat-bottomed, large-diameter holes in wood (e.g., for concealed hinges).
- Spade Bit: For quickly boring large holes in framing lumber where finish doesn’t matter.
- Countersink Bit: For recessing screw heads, as discussed.
- Hole Saw: For cutting large-diameter disks or rings, best used at slow speeds.
A spade bit is fast but rough. A Forstner bit is slow but leaves a cabinet-quality finish. A countersink bit is useless without a pilot hole. Knowing which to reach for separates a neat job from a hacked one.
Frequently Asked Questions
Can a drill press be used on metal?
Yes, that’s one of its primary uses. You need the correct bit (HSS or cobalt), a secure clamping setup, cutting fluid or oil for lubrication, and a slow spindle speed. The machine’s rigidity is what makes metal drilling feasible and safe compared to a handheld drill.
What is the biggest limitation of a drill press?
Its inability to handle lateral force. It is an axial-motion machine only. Any operation that requires moving the workpiece side-to-side under the bit (milling, shaping) is outside its design scope and will damage it.
How is a drill press different from a hand drill?
Control and repeatability. A hand drill relies on your arm to maintain angle and pressure. A drill press locks the bit in a perfect perpendicular plane and uses a lever for consistent feed pressure, allowing for identical, accurately placed holes every time.
Do I need a special drill bit for a drill press?
No, you use the same drill bits as a hand drill. However, the drill press’s capabilities allow you to use specialized bits like Forstner bits or large-diameter twist drills that would be dangerous or uncontrollable in a hand drill.
What should I look for when buying a drill press?
Prioritize spindle runout (minimal wobble), horsepower (at least 1/2 HP for floor-standing), and quill travel (how deep it can drill). The swing size determines your workpiece width. A quality chuck that tightens securely is more important than a high top speed.
Before You Go
A drill press transforms drilling from a hopeful act into a measured one. Its common drill press applications, drilling, reaming, countersinking, are about adding intention to a basic task. The machine’s value isn’t in doing things a hand drill cannot; it’s in doing the same things with unwavering consistency.
Respect its limits. Feed it the right drill bit for the job. Clamp everything, every time. Do those three things, and it will be the most reliable, repeatable tool in your shop for decades. Treat it like a makeshift mill or get lazy with securing work, and it will remind you, often violently, that it is a precision instrument, not a brute-force gadget.
