
Installing Curtain Rods Without a Drill: Easy Step-By-Step
This post contains affiliate links. As an Amazon Associate, we earn from qualifying purchases.
You can install curtain rods without a drill using three main methods: tension rods braced inside a window recess, adhesive hooks mounted on a clean wall surface, or magnetic rods clamped onto a steel window frame. The choice depends on your window type, curtain weight, and the humidity in the room.
That gap between “braced” and “resting” is the whole game. A tension rod that’s just resting will sag within an hour under a standard cotton panel. An adhesive hook that hasn’t cured for the full 24 hours under load will peel once the fabric pulls on it consistently. The difference is practical and essential for keeping your curtains up past the first week.
What follows: the specific weight limits and failure modes for each method, a step-by-step guide for the most reliable option, and the one environmental factor that changes your maintenance schedule from months to weeks.
Key Takeaways
- Tension rods are the fastest method but lose grip in humid rooms like bathrooms, recheck the twist-lock monthly instead of every three months.
- Adhesive hooks fail on textured walls and raw plaster because dust and oil cut holding strength by more than half if the surface isn’t cleaned with rubbing alcohol first.
- Magnetic rods only work on steel window frames; test with a refrigerator magnet before you buy.
- For wide windows, extend a tension rod 1.75 to 5 inches wider than the opening, per the RDN manufacturer spec, going under that range causes sag, going over bends the rod.
- Curtain panels should graze the floor or pool slightly; stopping four inches short makes the install look unfinished every time.
The 3 No-Drill Methods Compared
You have three paths that don’t need a drill: spring tension, industrial adhesive, or magnetic force. Each solves a different problem and fails in a specific way.
Tension rods work by spring compression between two parallel surfaces. The hollow tube expands when twisted, pressing rubber end caps against the window recess or wall. This friction hold fails when humidity swells the rubber, reducing grip over time.
The fastest option is a tension rod inside a window recess. You twist it to expand, and the pressure holds it in place. It doesn’t touch the wall at all. For a standard 28 to 48-inch window with lightweight cotton curtains, this is the default pick. Look for a Kenney Fast Fit bracket or an Umbra rod rated for at least 20 pounds.
Adhesive hooks stick a bracket to your wall. They look like a traditional curtain rod installation from the front. The bond depends entirely on the prep work. Skip the alcohol wipe, and you cut the hold by half. They also fail on textured surfaces, popcorn ceilings, raw plaster, brick. The surface area contact is too small.
Magnetic rods clamp onto the window frame itself. They’re elegant and simple, but only if your frame is steel. Test it with a fridge magnet. If the magnet sticks, you’re good. If you have vinyl or aluminum casings, this method is dead on arrival.
| Method | Best For | Weight Limit | Where It Fails |
|---|---|---|---|
| Tension Rod | Recessed windows, lightweight panels | 5–7 lbs (per Superior Brand) | Humid rooms, wide spans over 48 inches |
| Adhesive Hooks | Smooth drywall, tile, traditional look | Varies by brand | Textured walls, cold rooms (<50°F), heavy velvet |
| Magnetic Rods | Steel window frames, metal doors | Varies by model | Vinyl, wood, or aluminum frames |
Bottom line: For most bedroom windows, a tension rod wins. For a rental with smooth walls where you want the classic bracket look, adhesive hooks work. Only use magnetic if you confirm the frame material.
The Humidity Rule That Slipped
The detail most people discover the hard way involves steam. A tension rod in a dry bedroom can hold for three months without a second thought. Put that same rod over a kitchen window or near a shower, and the story changes.
Where this goes sideways: Humidity swings expand and contract the rubber end caps. The rod that felt solid on day one loses its spring tension. It starts to sag in the middle within six weeks, and a full slip-out follows soon after.
Recheck the twist-lock monthly in bathrooms and kitchens. Give the rod a gentle downward tug with the curtains on. If it shifts, extend it another quarter-turn until you feel firm resistance again. This is a matter of physics, not a design flaw. The rubber gets a temporary memory from the moisture, and the pressure drops.
The same principle applies to installing curtains without a drill with adhesive hooks in a humid room. The adhesive itself can re-emulsify. A hook that looked solid empty can peel once the fabric pulls on it after a steamy shower.
Measure Twice, Hang Once
Getting the measurements wrong is the single most common reason a no-drill install looks sloppy. The panels are either too short, too narrow, or the rod is at the wrong height. The numbers aren’t suggestions.
First, measure the window width inside the recess if you’re using a tension rod. That’s your starting point. For a rod that mounts on the wall above the window, measure the width of the trim or the wall space you want to cover.
Wider is better. Place the rod brackets 4 to 6 inches wider than the window frame on each side. This lets the curtain panels stack completely outside the glass, maximizing light when open. It also makes the window look larger.
Second, measure the drop. Decide if you want the curtains to touch the floor, hover an inch above, or pool slightly. Measure from where the rod will sit down to that point. Buy panels that are 2 to 3 inches longer than that number. Panels that stop four inches above the floor read as a mistake, not a style choice.
A Trick for Finding the Right Height
Hang the rod in relation to the ceiling, not the window. This is the fastest way to make a room feel taller and the install look intentional.
If you have standard eight-foot ceilings, place the rod about 3 to 4 inches below the ceiling line. If there’s crown molding, go 3 to 4 inches below the molding’s bottom edge. This gives the rod and finials room to live fully in that painted strip of wall. It visually lifts the entire window.
Hold a curtain panel up on one side of the rod. Have someone step back across the room to check the proportion. Your eye will spot a rod that’s too low instantly, it crowds the window trim. This same principle of visual proportion applies when you hang blinds or install a shelf for display.
Step-by-Step: Installing a Tension Rod (The Most Reliable Way)
This is the method with the fewest variables. You need a rod that fits your window width, a flat surface on both sides of the recess, and about five minutes.
Before you start: Make sure the window recess is clean and dry. Dust on the end caps reduces friction. Check that the surfaces are parallel. A slight inward tilt will make the rod slip.
Step 1: Assemble the rod. If it’s a two-piece design like the RDN Tension Rod, slide the hollow tube over the silver connector. Align the holes and tighten the set screws with the included Allen wrench. A loose connection here will cause a wobble later.
Step 2: Extend it wider than the space. Don’t guess. The RDN manual gives exact numbers: for a 120- to 130-inch space, extend the rod 1.75 to 3 inches wider. For 130-140 inches, go 3-4 inches wider. For 140-150 inches, extend it 4-5 inches wider. Going under these ranges causes sag. Going over can bend the tube.
Step 3: Twist to lock. Turn the end cap counter-clockwise until you feel strong resistance. The rod should be firmly braced, not just resting. You shouldn’t be able to rotate it by hand without significant force.
Step 4: Load the curtains. If the end caps are removable, loosen the set screws, take one cap off, slide your curtain panels on, and replace the cap. For rods with fixed caps, you’ll need to install a screw or use a different hanging method.
Step 5: Test the hold. Give the loaded rod a firm downward tug. It should not budge. If it sags or shifts, remove the curtains, extend the rod another half-inch, and retwist. The tension is correct when the rod holds its position without any support.
When Adhesive Hooks Are Your Only Option
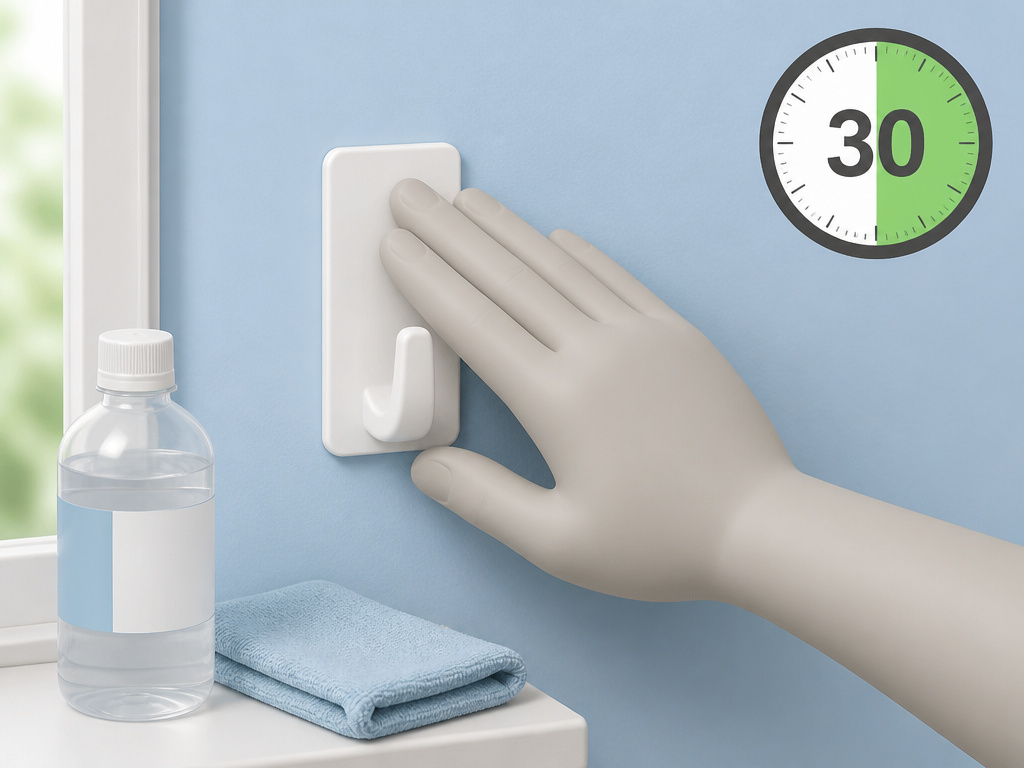 Sometimes a tension rod won’t work, no recess, or the window is too wide. If you have smooth, painted drywall or tile, adhesive hooks can mimic a drilled bracket. The success rate hinges on patience.
Clean the wall with rubbing alcohol. Not just a wipe, scrub the spot to remove all dust and oil. This step alone doubles the holding strength. Press the adhesive pad firmly onto the wall for a full 30 seconds. Then attach the hook or bracket to the pad.
Now wait. Most products require a full hour before you hang the empty rod, and a full 24 hours before you load it with curtains. This cure time lets the adhesive cross-link. Hang the curtains too soon, and the constant pull will break the bond within days.
I won’t recommend adhesive hooks for heavy blackout curtains in a child’s room. The weight is too close to the limit, and the consequence of failure isn’t just a fallen panel, it’s a scared kid and a broken rod. For light sheers in a living room, they’re fine.
What if your walls are plaster or have texture? The adhesive can’t get enough surface contact. In that case, you’re better off exploring a different method altogether, like using a freestanding pole or a TV mount style pressure-based system.
The Weight Limit You Can’t Ignore
 Every method has a ceiling. Exceed it, and the install will fail, usually within the first few hours of full load.
Tension rods are rated for 5 to 7 pounds across a standard span. That’s one lightweight cotton or chenille panel per the Superior Brand spec. A pair of heavy velvet or thermal blackout curtains can double that weight. The rod will bow in the middle, the end caps will slip, and eventually it will crash down.
Adhesive hooks list their limit on the package. Respect it. If it says 5 pounds, that’s the maximum with the cure time followed perfectly. Hanging a rod and two panels that total 4.5 pounds is asking for trouble. The margin is too thin.
Magnetic rods vary wildly. Some cheap models claim to hold 10 pounds but barely grip the frame. Look for models with wide, neodymium magnets and a positive lock mechanism. Even then, reserve them for light to medium panels.
If your curtains are heavy, you’ve reached the limit of no-drill methods. The next step involves real anchors in the wall. You can learn how to install a plastic anchor or put a drywall anchor in without a drill, but that’s a different skill set involving manual force and different hardware.
Frequently Asked Questions
Can you really hang curtains securely without drilling?
Yes, if you match the method to your specific window and curtain weight. Tension rods are secure for standard windows with light panels. Adhesive hooks are reliable on perfectly prepared smooth surfaces. The failure comes from using the wrong method, like a magnetic rod on a vinyl frame or a tension rod for heavy velvet.
How do I keep a tension rod from falling down?
Extend it to the manufacturer’s specified width, twist until you feel solid resistance, and recheck the tension monthly in humid rooms. If the rod has smooth end caps, wrap a thin layer of rubber shelf liner around them to increase friction. For a persistently slippery recess, switch to a rod with wider, grippier caps.
What is the best no-drill method for heavy curtains?
There isn’t a good one. Heavy curtains require the support of a wall bracket screwed into a stud or secured with a robust drywall anchor. Attempting to hold them with adhesive or tension is a short-term solution with a near-guaranteed failure. The weight will overcome the spring tension or adhesive bond.
Do command strips work for curtain rods?
Specific Command curtain rod hooks are designed for this job and list a weight limit. Standard picture-hanging strips are not. You must use the product designed for rod brackets, follow the prep and cure times exactly, and stay well under the weight limit. They work for very light sheers and smaller windows.
How long do adhesive curtain rod hooks last?
On a well-prepared wall in a stable indoor environment, they can last for years. However, their lifespan shortens dramatically with humidity swings, temperature changes, or if the wall surface is less than ideal. Plan to recheck the bond every six months, and have a backup plan for when they eventually weaken.
Before You Go
Installing curtain rods without a drill requires matching three things: the right hardware for your window type, the confirmed weight limit of your curtains, and an honest assessment of the room’s environment. A tension rod is the default winner for most homes.Just remember the humidity rule, what works in a dry bedroom fails twice as fast in a steamy bathroom.
Measure from the ceiling down, not from the window up. Extend the rod wider than the frame. Let the curtains graze the floor. Those three choices separate a pro-looking install from a temporary hack. Now you know what breaks, when, and why. That’s the difference between curtains that stay up and a project you do twice.
