
How to Put Up Curtains Without a Drill: 3 No-Tool Methods
This post contains affiliate links. As an Amazon Associate, we earn from qualifying purchases.
To put up curtains without a drill, match your window and curtain weight to one of three hardware types: Kwik-Hang brackets tap into wooden trim, spring tension rods press between frame walls, and Command Heavyweight Hooks stick to the wall surface. The Kwik-Hang holds up to 20 lbs per pair on trim between 1/2 and 1 inch wide, installs in under 60 seconds, and leaves no holes.
That 20-pound rating is the key spec. It’s not a guess, it’s the manufacturer’s tested ceiling for the built-in pins that grip the wood. Go over it, or put it on the wrong trim material, and the bracket tears out. The whole game is picking the method whose failure mode you can live with.
What follows: the physical limits of each system, the one measurement that matters most for each, and the step that everyone skips until their curtains hit the floor.
Key Takeaways
- Kwik-Hang brackets only work on real wood trim between 1/2″ and 1″ wide. They fail on oak, PVC, MDF, metal, or plastic because the pins can’t grip.
- Command Heavyweight Hooks need a full hour of set time before you hang any weight. Loading them early breaks the adhesive’s chemical bond.
- Tension rods bow and slip if the window has inside-mounted blinds. The rod body contacts the blind mechanism, and a single solid tug pulls it down.
- Curtain weight dictates the rod diameter. Use a 5/8-inch rod for sheers; switch to a 1-inch rod for heavy drapes to prevent sagging.
- The install is five minutes. The prep is thirty. Cleaning the wall surface for adhesive hooks and measuring the trim for pin brackets is where the job actually happens.
The Kwik-Hang Bracket Method (Under a Minute)
This isn’t a generic “no-drill bracket.” It’s a specific product with a patented pin system. You position it at the top corner of your window trim and tap it in with a hammer. The steel pins drive into the wood grain, locking it place.
The mechanism is simple friction. The pins are angled and barbed slightly, so pulling straight down engages more wood fiber. Pulling out is easy, you just lift up. That’s why the 20 lb weight rating is a vertical load limit, not a guarantee against a kid yanking the curtain sideways.
Each Kwik-Hang curtain rod bracket has a set of pins that attach to the top of the window trim like a thumbtack, securing it in place. No measuring, drilling or nails required. The brackets can hold up to 20 lbs.
Check your trim material first. The manufacturer states these brackets are not compatible with oak, PVC, MDF, metal, or plastic trim. Oak is too hard and splinters; synthetic materials are too soft or smooth for the pins to bite. The trim must be real, paint-grade wood like pine or poplar.
The trim width is your second gate. It must be between 1/2 inch and 1 inch wide. Narrower trim won’t give the pins enough purchase; wider trim moves the rod too far from the wall. Use a caliper or a ruler. Don’t guess.
Here is the quick compatibility check:
| Your Window Trim | Kwik-Hang Compatible? | What Happens If Not |
|---|---|---|
| Pine, painted wood (3/4″ wide) | Yes | Secure hold, installs in <60 sec. |
| Oak or hardwood | No | Pins won’t penetrate; bracket sits loose. |
| PVC or plastic trim | No | Pins strip through the soft material. |
| MDF or composite | No | Material crumbles around pins, no grip. |
| Metal wrap | No | Pins skid off surface; bracket falls. |
The install sequence is straightforward. Have your curtains pre-threaded on the rod. 1. Hold a bracket against the top outer corner of the window trim. The pins should contact the flat top surface of the wood. 2. Tap the bracket firmly with a hammer until the back plate sits flush against the wall. Do not overtap, you’ll compress the wood and weaken the hold. 3. Repeat for the other side. 4. Place the rod ends into the bracket cups. You’re done.
Common mistake: Using these on the wrong trim type. The bracket will seem tight at first, but the first time you draw a heavy curtain, the pins will rip free and take a chunk of PVC or MDF with them.
For corner windows or extra-long spans, the bracket has a screw hole for supplemental support. Using a screw defeats the “no-drill” promise, but it’s there if you need a permanent, foolproof anchor for a rod over six feet long.
Tension Rods: The Adjustable Pressure Fit
A tension rod is a spring-loaded tube inside a sleeve. You twist it to shorten the spring, then expand it to fit snugly between two walls. The outward pressure at each end is what holds it up.
The physics are basic. The spring wants to return to its relaxed length, so it pushes the end caps against the window frame with constant force. That force must exceed the downward pull of the curtain weight plus any lateral force from opening and closing the curtains.
Get a rod slightly longer than your measured space. The Home Depot guide recommends this for a secure fit. If your window recess is 36 inches wide, buy a rod that extends to 40 or 42 inches. You need that extra compression to generate sufficient holding force. A rod that just barely fits has no safety margin and will sag.
This method fails in two predictable scenarios: * With inside-mounted blinds. The rod body runs directly in front of the blind mechanism. You can’t operate the blinds, and the vibration from raising or lowering them will shake the rod loose. * With heavy curtains on a wide window. The rod bows in the middle. Once it bows, the end pressure angles inward and the rod slips. For spans over 48 inches or with heavy fabric, you need a center support bracket, which itself usually requires screws.
The install is one step, but the prep is critical. 1. Measure the inside width of your window frame at the exact height you want the rod. 2. Twist the rod to compress its spring fully. This usually means turning the inner tube counter-clockwise until it stops. 3. Place the rod at the desired height and gently release the tension, letting the end caps press against the side walls. 4. Give it a light downward tug to seat it. It should not move.
If the rod falls after a “solid yank,” as one tester noted, your window frame surface is too smooth or the rod is under-sized. The fix is either a longer rod for more pressure, or applying a thin strip of rubber grip tape to the end caps.
Command Heavyweight Hooks: The Adhesive Anchor
Command Heavyweight Hooks (XL) use a strip of VHB (Very High Bond) adhesive with a stretch-release removal system. Each hook is rated to hold 10 pounds, so a pair gives you a 20-pound capacity for your rod and curtains.
The bond doesn’t come from stickiness. It’s a chemical reaction. You press the adhesive strip onto a perfectly clean surface, and over the next hour, the adhesive flows into the microscopic pores of the wall material. That creates a mechanical lock. Hanging weight before that hour interrupts the flow, and the bond never reaches full strength.
Where this goes sideways: Skipping the one-hour set time. The hook feels solid after ten minutes, so you hang the rod. By evening, the constant load has peeled the adhesive from the wall, and the whole assembly drops.
The installation ritual is non-negotiable. Follow it exactly. 1. Clean the wall surface with isopropyl alcohol and let it dry completely. Dust or grease is a deal-breaker. 2. Press the adhesive strip onto the hook backing until it clicks. 3. Remove the liner and press the hook to the wall. Hold it firmly for 30 seconds, applying even pressure across the entire strip. 4. Wait one full hour. Do not touch it. 5. Hang your curtain rod. Use a rod with flat ends that sit securely in the hook’s cradle.
These hooks are the only good option for plaster, concrete, or tile walls where you can’t use pins or tension. Their failure mode is clean, when removed correctly by stretching the adhesive tab parallel to the wall, they claim to leave no residue. However, a similar tap-style bracket was reported to pull off the top layer of drywall upon removal, so test a hook in an inconspicuous spot first if your walls are old or fragile.
How to Choose: Kwik-Hang vs. Tension vs. Command
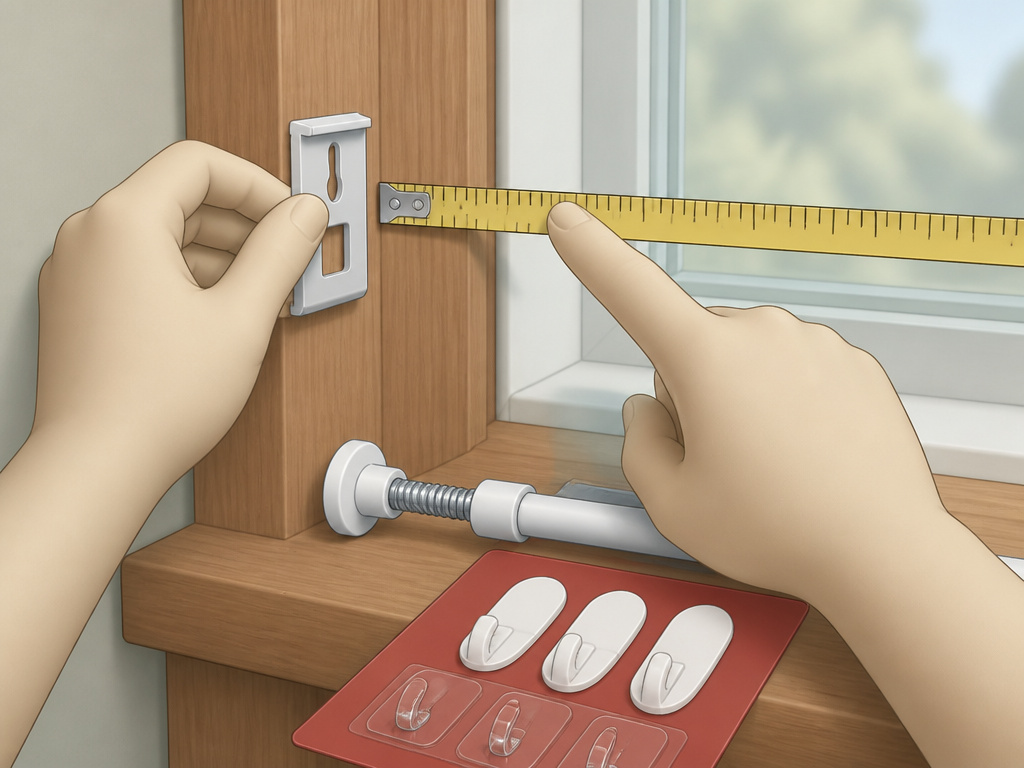
This isn’t about preference. It’s about your window’s physical reality. Match the method to your materials and you won’t have a failure.
| Method | Best For | Weight Limit | Key Limitation | Removal Damage |
|---|---|---|---|---|
| Kwik-Hang Brackets | Wooden window trim (1/2″–1″ wide) | 20 lbs per pair | Won’t work on oak, PVC, MDF, metal, plastic. | Small pin holes in wood trim (often hidden by bracket). |
| Spring Tension Rods | Inside-mount on bare window frame (no blinds) | Varies by rod; ~15 lbs for standard. | Cannot be used with inside-mounted blinds; bows on wide spans. | None. |
| Command Heavyweight Hooks | Flat, smooth walls (drywall, plaster, tile) | 10 lbs per hook (20 lbs per pair) | Requires 1-hour cure time; fails on textured or dirty surfaces. | Potential for paint or drywall paper tear if removed incorrectly. |
If you have standard wooden trim: Use Kwik-Hang. It’s the fastest and most secure. Just verify the trim width first.
If you’re renting and have a plain drywall wall: Use Command Hooks. They’re the safest bet for getting your security deposit back, provided you follow the set time.
If you have a simple window with no blinds and light curtains: A tension rod is fine. Size up for extra pressure.
The curtain rod itself is part of the system. For a Kwik-Hang or Command Hook setup, you need a rod with flat ends or finials that sit in the bracket or hook. For tension rods, the rod is the hardware. Remember the diameter rule: 5/8-inch rods for light sheers, 1-inch rods for heavy drapes. A heavy curtain on a skinny rod will bend the rod at the support points.
The One Measurement Everyone Gets Wrong

It’s not the width. It’s the projection, how far the rod will stand out from the wall. If your curtains are thick or you have grommet tops, they need space to hang without rubbing the wall or window trim.
For Kwik-Hang, the bracket’s projection is fixed. For Command Hooks, it’s the depth of the hook. For tension rods, it’s the rod’s diameter. If your chosen method doesn’t project enough, your curtains will be pinned against the wall and won’t drape properly. Hold the bracket or hook up to your window with the curtain sample behind it before you commit.
Here’s how to check: 1. Gather your curtain panel and your chosen hardware. 2. Temporarily hold the hardware in place at the install height. 3. Drape the curtain behind it. Does the fabric fall freely, or is it compressed? 4. If compressed, you need a different solution with greater projection, like a traditional bracket, which brings you back to drilling.
This five-minute test saves a full re-install later. Most curtain rod installation guides skip it because they assume you have standard panels. Bunk beds, deep window sills, or extra-lined blackout curtains change the math.
Tools You Don’t Need (And One You Might)
You can complete any of these methods without a power drill, level, or stud finder. That’s the point. But a few hand tools prevent frustration.
- A rubber mallet is better than a steel hammer for tapping Kwik-Hang brackets. It provides firm impact without marring the bracket finish or crushing the wood fibers as easily.
- Isopropyl alcohol and a clean cloth are mandatory for the Command Hook surface prep. Rubbing with a dry cloth just moves grease around.
- A metal ruler or caliper to verify that 1/2-to-1-inch trim width for Kwik-Hang. A tape measure is too imprecise for this critical check.
- A step ladder. Working at eye level with the trim is safer and more accurate than stretching.
The process for how to hang a curtain rod without tools is similar to other no-drill mounts. The same principles of clean surfaces, correct weight distribution, and patience apply when you hang a shelf or mount a TV on drywall. The hardware is different, but the mindset is identical: understand what the fastener is actually gripping.
Frequently Asked Questions
Can no-drill curtain brackets hold blackout curtains?
Yes, if you respect the weight limit. A typical pair of heavy blackout curtains weighs 8-12 pounds. A Kwik-Hang pair (20 lb limit) or Command Heavyweight Hooks (20 lb limit) can handle that. Always weigh your curtains on a bathroom scale before choosing your hardware. The rod must also be stout enough, use a 1-inch diameter rod to prevent bending.
Will Kwik-Hang brackets damage my window trim?
They leave small pin holes, similar to thumbtack holes. On painted wood trim, these are often invisible or can be filled with a dab of touch-up paint. The damage occurs if you force them onto incompatible trim like PVC or MDF, where the pins can tear out a chunk of material. On correct trim, damage is minimal.
How do I hang curtains without a drill if I have blinds?
Your only real option is Command Heavyweight Hooks mounted on the wall outside the window casing. Tension rods won’t work inside the frame, and Kwik-Hang brackets mount on the trim which may be covered by the blind header. The hooks let you place the rod several inches above and wider than the window, clearing the blinds entirely. This is a common scenario for window blinds installation in rentals.
Can I use these methods on a plaster wall?
Kwik-Hang brackets and tension rods are not for plaster walls. Use Command Heavyweight Hooks. Ensure the plaster surface is solid, not crumbly, and clean it thoroughly with alcohol. The adhesive needs a stable, non-porous surface to bond correctly. If the plaster is loose or textured, the bond will fail.
What’s the strongest no-drill method?
For sheer holding power on a suitable surface, the Kwik-Hang bracket is strongest, with its 20 lb rating and direct mechanical grip into wood. However, “strongest” is meaningless if your trim is PVC. The strongest method for your specific window is the one that matches your wall or trim material. When in doubt, the fundamental skill of knowing how to put screw in wall without a drill opens up other options using adhesive-mounted screw bases.
Before You Go
Skip the drill if your windows and walls match one of the three systems. Kwik-Hang for wood trim, Command Hooks for flat walls, tension rods for simple inside mounts. Check the trim width, wait the full hour for adhesive, and size up your tension rod. The right no-drill method isn’t a compromise, it’s the correct tool for a job that doesn’t need holes.
