
Learn How to Hang Blinds Without a Drill for Renters & DIYers
This post contains affiliate links. As an Amazon Associate, we earn from qualifying purchases.
You can hang blinds without a drill by using one of three proven methods: tension rods for adjustable pressure mounting, adhesive brackets for a semi-permanent bond, or Command™ strips for a removable, renter-friendly hold. The right choice depends on your window frame condition, blind weight, and whether you need a temporary or long-term solution.
That weight limit is the whole game. A set of Command™ Large Picture Hanging Strips holds 4 pounds. Your blinds weigh more than that, and the adhesive fails within weeks — you’ll find the bracket dangling by one strip after the first energetic pull. Tension rods rely on straight, sturdy frames; put one on a bowed vintage window and the pressure is uneven from day one.
What follows: the three no-drill methods broken down by their real weight ceilings, the one cleaning step nobody does right, and the window conditions that automatically disqualify each option. By the end, you’ll know which method fits your blinds and how to install it so it doesn’t come down.
Key Takeaways
- Command™ Large Picture Hanging Strips are rated for 4 pounds per set. Exceed that limit and the bond fails, often within a month of regular use.
- Tension rods require a straight, rigid window frame. Older or bowed frames create uneven pressure points, causing the rod to slip or the blinds to hang crooked.
- Always clean the mounting surface with isopropyl alcohol. Skipping this step leaves invisible oils that break the adhesive bond, leading to failure in humid conditions.
- Adhesive brackets are a semi-permanent solution. They hold well but can damage paint or drywall paper upon removal, unlike Command strips which are designed for clean release.
- Magnetic mounts only work on steel or metal-framed windows. They are useless on vinyl, wood, or fiberglass frames.
The 3 No-Drill Methods Compared
You have three main paths, and each comes with a hard physical limit. Picking the wrong one isn’t just inconvenient — it’s a guarantee the blinds will fall.
Tension rods press outward against the window frame jambs. Adhesive brackets and Command strips bond to the flat surface inside the frame. Magnetic brackets clamp onto the metal frame itself. The holding mechanism dictates everything from weight capacity to which windows are eligible.
Tension rods are the adjustable spring-loaded bars you twist to lengthen. They work by creating outward pressure against the two side jambs of your window frame. * Best for: Light to medium-weight roller or Roman shades. They’re ideal for standard, rectangular windows with straight, parallel sides. * Worst for: Older windows with bowed or uneven frames, or windows wider than 48 inches where the rod’s tension may not be sufficient. * The consequence if you get it wrong: On a bowed frame, the rod only contacts at the high points. The uneven pressure means a light bump can knock the whole assembly down. On extra-wide windows, the rod can’t generate enough tension and will slowly creep down over days.
Adhesive brackets use a high-strength, double-sided foam tape (often VHB tape) to stick the blind’s mounting hardware directly to the wall or frame. * Best for: A semi-permanent install where you don’t mind potential surface damage upon removal. Good for small to medium-sized blinds. * Worst for: Humid rooms like bathrooms, or windows in direct sunlight where heat weakens the adhesive. Also bad for heavily textured surfaces. * The consequence if you skip prep: The adhesive bonds to dust and oil, not to your paint or vinyl. In a week, the bracket’s weight will peel the tape back from one corner, and the whole blind will hang askew.
Command™ strips are the renter’s classic. They use a interlocking plastic hook-and-loop system with a removable adhesive backing. * Best for: Truly temporary, damage-free installations. Perfect for lightweight blinds like small solar shades or faux wood Venetians. * Worst for: Heavy blinds or frequent use. The 4-pound-per-set limit is a firm ceiling. * The consequence if you overload them: The strips don’t fail all at once. One strip detaches first, transferring all the weight to the remaining strips. They peel off in sequence, usually in the middle of the night with a loud snap.
| Method | Best For | Weight Limit | Fails When |
|---|---|---|---|
| Tension Rod | Straight frames, medium blinds | Varies by rod (~15 lbs typical) | Frame bows or width >48″ |
| Adhesive Brackets | Semi-permanent, flat surfaces | Varies by tape (~10 lbs typical) | Surface is dirty or humid |
| Command™ Strips | Renters, lightweight blinds | 4 lbs per set (manufacturer spec) | Blind weight exceeds limit |
What You Need to Know About Your Window First
The method you choose is dictated by your window, not your preference. Get this wrong and the install fails before you even open the packaging.
Measure in three places. Window openings are rarely perfect rectangles. Measure the width at the top, middle, and bottom. Use the smallest measurement. If you order a tension rod or cut blinds to the widest point, they won’t fit in the narrowest spot. You’ll force them, which either bends the rod or stresses the adhesive bond immediately.
Identify your frame material. Run a magnet over the frame. If it sticks, you have a steel frame and magnetic mounts are an option. If it doesn’t, you’re dealing with vinyl, wood, aluminum, or fiberglass. This single test eliminates magnetic brackets from consideration and saves you a trip back to the store.
Common mistake: Mounting adhesive products on a “clean” wall wiped with a damp cloth. Water pushes dust into the pores and leaves a film. Isopropyl alcohol is a solvent that evaporates completely, leaving a truly clean, dry surface for the adhesive to grip.
Assess the surface texture. Is the frame or wall smooth painted drywall, glossy vinyl, or textured plaster? Adhesive products need a smooth, non-porous surface for maximum bond. Heavy texture means less surface contact. In that case, a tension rod is your only reliable no-drill bet.
Step-by-Step for Adhesive Brackets (The Most Common Method)
This is the method most “no-drill” blind kits use. It seems simple, but three out of four failures happen here because people rush the prep.
Step 1: Clean with isopropyl alcohol, not water.
Wipe the mounting area with a cloth dampened with 70% isopropyl alcohol. Let it air dry for 60 seconds. Water just moves grease around; alcohol dissolves it. Skip this, and you’ve already lost half the adhesive strength.
Step 2: Mark your bracket placement with a level.
Hold the bracket in place and use a small bubble level across the top. Mark the screw holes with a pencil. Do this for both brackets. If they’re not level, your blinds will perpetually look crooked even when they’re down.
Step 3: Apply the adhesive tape and mount.
Peel the red liner off the adhesive tape (usually 3M VHB) and press it onto the back of the bracket. Then peel the other liner, position the bracket over your marks, and apply firm, steady pressure for 30 seconds. Don’t just tap it. Use the heel of your hand and press like you’re trying to leave a print.
Step 4: Wait before hanging.
The adhesive needs time to develop full strength. Do not hang the blinds for at least an hour. Better yet, wait overnight. Hanging weight immediately after mounting creeps the adhesive and causes slow, permanent slippage.
When a Tension Rod is Your Only Real Option
For wider windows or less-than-ideal surfaces, a tension rod is often the only no-drill method that provides genuine security. It’s a mechanical hold, not a chemical one.
Get the length right. Tension rods are adjustable. You want it to extend about 1-2 inches longer than your window’s measured width. This gives you the necessary compression to twist it into place. Too short, and it won’t reach. Too long, and you won’t be able to compress it enough to fit.
Install at a slight upward angle. Don’t try to push the rod straight in horizontally. Tilt one end up into the top corner of the frame, then compress and swing the other end up into place. This uses gravity to help you seat the ends firmly into the frame’s top corners, where they’re less likely to slip.
Check for frame deflection. Once the rod is up, gently push on the middle of the blinds. If the window frame itself flexes inward, the frame is too weak for the rod’s tension. You’ll need to relocate the rod lower, where the frame is more solid, or abandon the method altogether.
The Weight Limits That Aren’t Suggestions
 Manufacturer weight limits are not conservative guesses. They are the calculated point of failure.
The Command™ Large Picture Hanging Strips limit of 4 pounds per set is your brightest red line. A typical 36-inch faux wood blind can weigh 5-7 pounds. That’s already over the limit for one set of strips. The fix isn’t adding more strips; it’s choosing a different method. Overloading strips doesn’t cause a slow descent—it causes a sudden, loud failure.
Adhesive brackets list a shear strength (force pulling parallel to the wall) and a peel strength (force pulling away from the wall). Blinds primarily exert a peel force. Most brackets are far weaker in peel. That’s why the “press for 30 seconds” instruction matters—it maximizes surface contact to resist peeling.
Where this goes sideways: Assuming “medium-weight” blinds are okay for a rod rated “up to 15 lbs.” The rating is for static weight. The dynamic force of you pulling the cord or lifting the bottom rail adds 50-100% more load momentarily. That shock load is what finally breaks the adhesive bond.
Frequently Asked Questions
Can you hang cordless blinds without drilling?
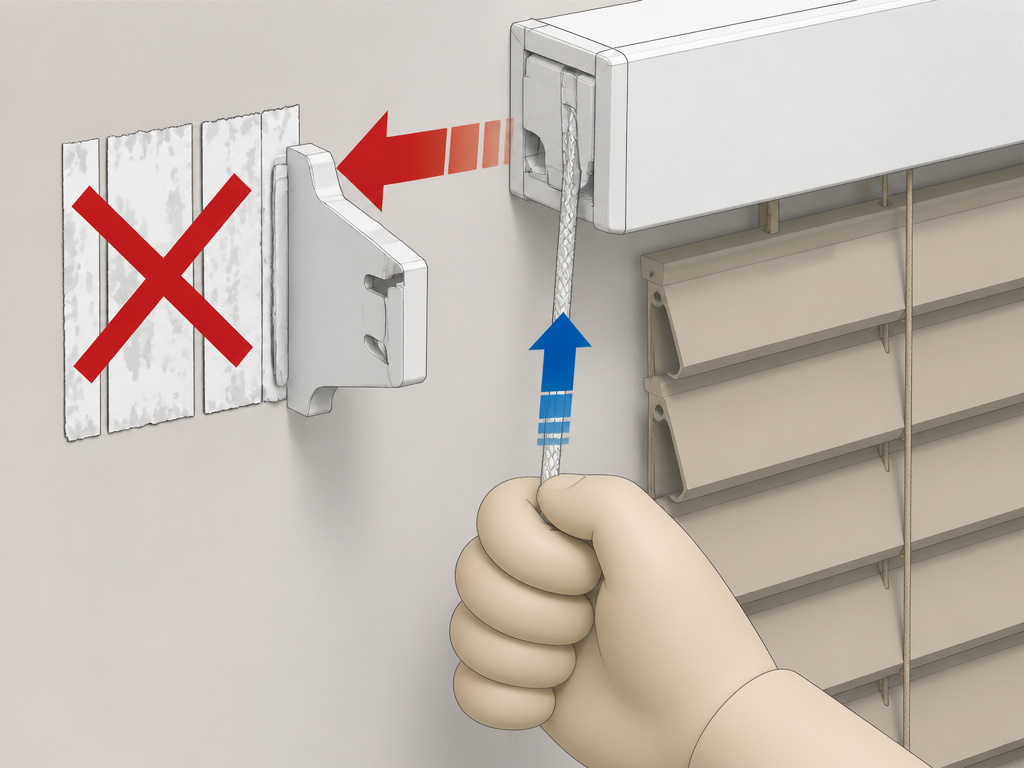
Yes, you can hang cordless blinds without drilling using the same no-drill methods. However, be extra cautious when removing them. Pulling a cordless shade straight out of its brackets can release the internal spring tension. Always refer to the manufacturer’s guide for safe removal to avoid damaging the blind mechanism.
Do no-drill blinds damage walls?
Command™ strips and some adhesive brackets are designed for damage-free removal when installed and removed correctly. However, adhesive brackets using strong double-sided tape can pull off paint or the paper facing of drywall, especially if left up for years. Test a small piece of the tape in an inconspicuous area first.
How long do no-drill blinds last?
Properly installed no-drill blind on a suitable window can last for years. The longevity depends on the method: tension rods last indefinitely, adhesive brackets can last 3-5 years, and Command strips are generally considered a 1-2 year solution. Humidity, heat, and frequency of use dramatically shorten adhesive life.
Can you use these methods on a door?
Yes, but your options narrow. Tension rods won’t work on most doors. Your best bet for a door is adhesive brackets or magnetic mounts (if the door has a steel frame). Ensure the adhesive product is rated for the vibration and movement a door experiences.
What if my window frame is textured or uneven?
Textured or uneven surface is the enemy of adhesive products. Your only reliable no-drill option is a tension rod, provided your frame is still roughly straight. If the frame is both textured and bowed, you may need to consider a different window treatment or get permission for a minimal-drill solution like screw hooks.
Before You Go
Skip the adhesive for anything over a few pounds. The 4-pound limit on Command strips is real, and exceeding it has a timeline—failure happens within the first few months of use. Tension rods are the workhorse for standard windows, but they demand a straight, rigid frame. The real secret isn’t in the fancy hardware; it’s in the prep work everyone skips. Clean with alcohol, press for a full half-minute, and wait before you hang. That’s what separates a blind that stays up from one that ends up in a pile on the sill. For other damage-free projects, the same principles apply to tasks like hanging curtain rods or mounting a shelf.
