
Step-by-Step Guide: How to Drain an Air Compressor Properly
This post contains affiliate links. As an Amazon Associate, we earn from qualifying purchases.
Draining an air compressor means depressurizing the tank to a safe level—30 PSI for most industrial units, 20 PSI for common home models—then opening the bottom drain valve to release accumulated water. Do this daily after use. Skipping it lets water corrode the tank from the inside, and a rust-weakened tank can rupture under pressure.
That 10-PSI difference between manuals is a critical requirement separating a clean drain from a valve clogged by unsettled sediment. ABAC’s 30 PSI spec is for their heavier-duty reciprocating pumps; your garage Husky or Porter-Cable manual says 20 PSI because the tank geometry and valve placement are different.Force it open at 50 PSI and you’re launching a high-velocity stream of rust and oil.
What follows: the exact depressurize-and-drain sequence from three OEM manuals, the one condition where you should not drain, and the $40 upgrade that turns a daily chore into a background task.
Key Takeaways
- Depressurize the tank to the manufacturer’s spec—20 PSI for most home units, 30 PSI for many industrial compressors—before opening the drain valve. Opening it at full pressure is dangerous.
- Drain the tank after every use or at minimum once per day. In high humidity, drain every few hours of runtime.
- If the compressor has been in freezing temperatures and you suspect ice inside, do not drain it. Move it to a heated space first to thaw.
- Install an automatic drain valve if you use the compressor regularly. It eliminates the human-forget factor that causes most tank corrosion.
- Visually inspect the tank’s exterior annually for rust or damage. Internal corrosion is invisible until the tank fails.
Why You Can’t Skip This (The Rust Timeline)
A compressor tank doesn’t get wet from a leak. It gets wet from the air you put into it. Every cubic foot of atmospheric air drawn into the pump contains water vapor. When that air is compressed and cools inside the tank, the vapor condenses into liquid water at the bottom. This is a physical certainty.
Where this goes sideways: The water sits against the steel, creating an ideal environment for rust. The ABAC manual notes that oil residue from the pump can mix with this water, forming a sludge. In a worst-case scenario, this oily residue can be ignited by carbon embers from the heat of compression, posing a fire or explosion risk.
The corrosion starts as surface rust. Within six months of intermittent use with no draining, that rust becomes pitting. After a year, the pitting can reduce the tank wall thickness by a measurable percentage. The Pressure Systems Safety Regulations in the UK, and similar standards elsewhere, mandate annual visual inspections for this exact reason. The tank is a pressure vessel. Its failure isn’t a leak; it’s a violent, sudden rupture.
This is why manuals state the consequence in blunt terms. The Husky manual warns: “If not drained, water will corrode and weaken the air tank causing a risk of air tank rupture.” It’s not scare talk. It’s the predictable end state of a chemical process.
The Daily Draining Procedure (Step-by-Step)
The steps are simple, but the specifics inside them matter. The biggest mistake is rushing the depressurization.
Before you start: Put on safety glasses that meet the ANSI Z87.1 standard. The stream from the drain can kick back debris. Wear hearing protection; the hiss of escaping air is loud enough to cause damage. Keep your face and body away from the drain port.
- Power Down and Depressurize. Turn the compressor off and unplug it. If it’s a gas model, disconnect the spark plug wire. Pull the ring on the pressure relief valve (usually on or near the tank) and hold it open. Watch the tank pressure gauge.
- Bleed to Correct Pressure. Let the pressure drop to your compressor’s specified level. For most homeowner models like those from Porter-Cable or Husky, this is 20 PSI. For many industrial units like the ABAC reciprocating series, the manual specifies 30 PSIG. Releasing the pressure fully to 0 PSI isn’t necessary and can make the next step less effective.
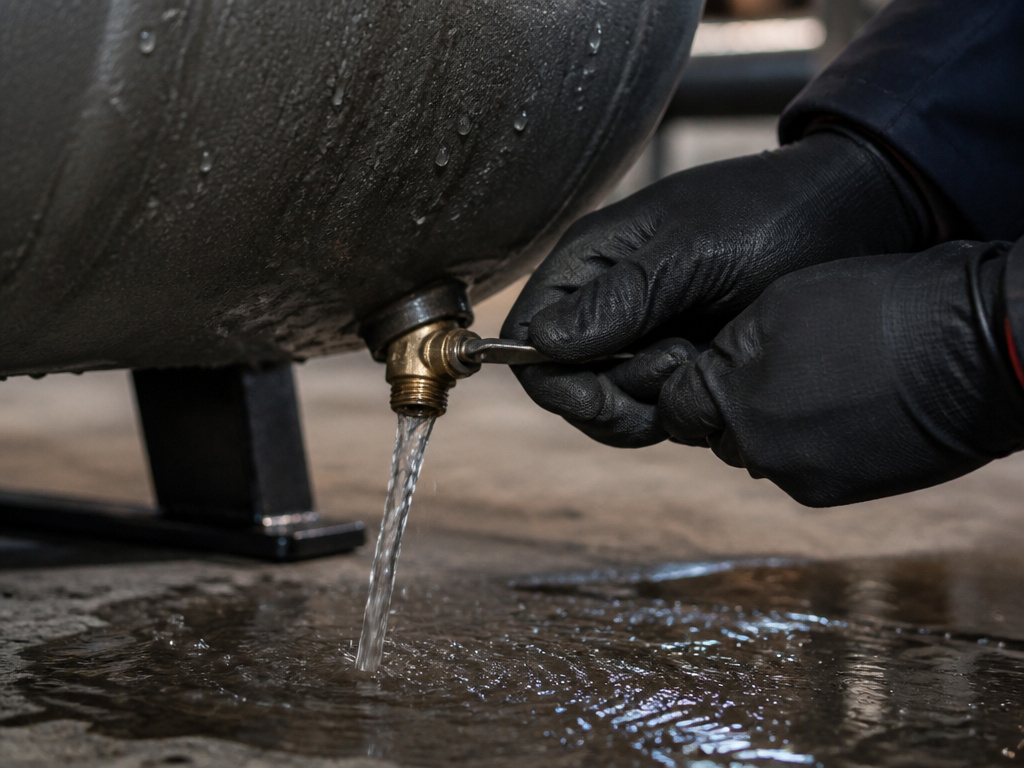
- Open the Drain Valve. Locate the drain valve at the very bottom of the tank. It’s often a small petcock or a brass elbow. Place a shallow pan or container underneath. Open the valve slowly by turning it counter-clockwise.
- Drain Completely. You’ll hear air and then see water stream out. Let it flow until only a faint mist of air comes out. This ensures all liquid is expelled.
- Close and Restore. Tighten the drain valve clockwise until snug. You can now release the pressure relief valve ring to vent the remaining 20-30 PSI if you’re storing the compressor.
The part nobody mentions: Open the valve slowly. A fast-opening valve on a tank with 20 PSI still in it will aerosolize the water and rust into a messy, forceful spray. A slow turn lets the liquid drain out under less turbulence.
What If Water Won’t Drain?
If you open the valve and get nothing but air, the valve is likely clogged with sediment. This is common on older, poorly maintained compressors.
- Do not try to poke it clear with a wire while pressurized.
- Follow the safety steps to fully depressurize the tank to 0 PSI.
- Unscrew the entire valve assembly from the tank (have a replacement washer or valve on hand).
- Clean the orifice with a small brush or pick. Flush it with water.
- Reinstall and test.
For a permanent fix, consider replacing the cheap stock petcock with a more robust ball valve drain kit. These kits provide a larger, less cloggable drain port.
Tools & Upgrades That Make Draining Foolproof
The manual method works, but it’s the first task people forget. For a system you rely on, a small investment in hardware pays off in safety and convenience.
| Tool/Upgrade | Best For | Risk It Eliminates |
|---|---|---|
| Standard Drain Pan | Every owner | Rust stains on garage floor, messy cleanup. |
| Brass Ball Valve Kit | Older compressors with clog-prone petcocks | Incomplete draining due to sediment blockage. |
| Automatic Drain Valve | Anyone who uses their compressor weekly | Human forgetfulness leading to internal corrosion. |
| In-line Water Filter | Painting, sandblasting, or air tool use | Water vapor reaching and damaging expensive tools. |
The game-changer is the automatic drain valve. These electronic or timer-based valves screw into your tank’s drain port and open for a few seconds at set intervals—say, every 30 minutes the compressor is pressurized, or once a day at 2 AM. They cost between $40 and $150.
I installed a basic timer-based automatic valve on my garage compressor two years ago. The first time I took it off for service, the inside of the tank was still coated in factory paint. No rust, no scale. It’s the single best upgrade for longevity.
When choosing one, ensure it’s rated for your compressor’s maximum PSI. For most home garages, a home garage compressor in the 125-150 PSI range pairs well with a standard 150 PSI rated automatic valve. If you’re running a larger reciprocating air compressor for a shop, you’ll need a heavier-duty model.
The Two Exceptions to the Daily Rule
1. Freezing Conditions
This is critical. The ABAC and Sealey manuals explicitly warn against draining if the tank has been in freezing temperatures and may contain ice.
- Why: Ice can block the drain port. If the tank is then moved to a warmer area and the ice melts internally, you might not know the water is there. More importantly, attempting to force a drain open with ice inside can damage the valve.
- The Fix: Move the entire compressor to a heated space (above freezing) and let it sit for several hours. Then perform the full draining procedure. Before long-term storage in a freezing garage, drain it thoroughly first, then leave the drain valve slightly open to prevent any residual moisture from being trapped.
2. High-Humidity Environments
If you’re running a compressor in a humid basement or during a rainy summer week, the normal amount of condensate multiplies. The Husky manual advises draining “daily and/or every hour” in these conditions.
- The Sign: You’re getting a surprisingly large amount of water out every time you drain.
- The Fix: Increase draining frequency dramatically. This is where an automatic drain valve truly earns its keep, as it can be set to purge every hour of operation without you lifting a finger.
Diagnosing Drain-Related Problems
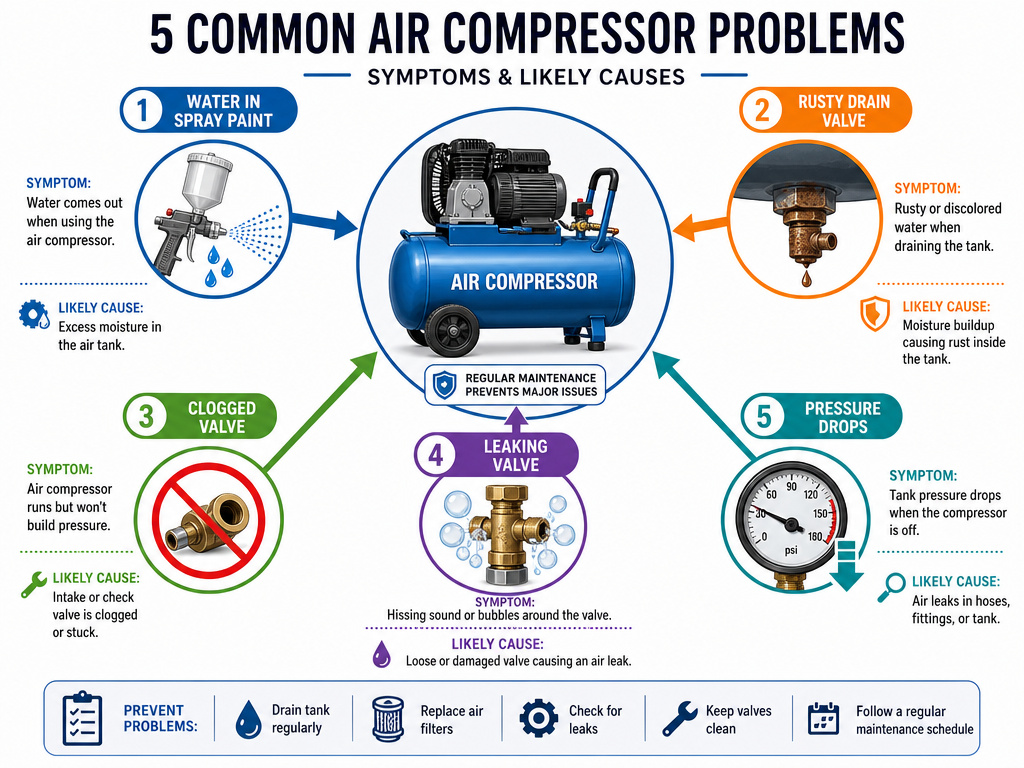
Many compressor issues, though not all, connect back to moisture.
| Symptom | Likely Cause | Immediate Fix |
|---|---|---|
| Water spraying from air tool | Water has traveled beyond the tank into the hose. | Drain tank completely. Install an in-line filter/regulator closer to the tool. |
| Rusty water coming from drain | Advanced internal corrosion. | Drain aggressively and frequently. Consider a professional internal inspection. |
| No water ever comes out | Clogged drain valve or valve not at true bottom. | Depressurize, clean or replace valve. |
| Air leaks from drain valve | Worn or damaged valve seal. | Replace the drain valve with a new kit. |
| Tank pressure drops overnight | Leak from drain valve, safety valve, or check valve. | Soapy water test to find bubble source; replace faulty component. |
If you discover a leak, the process to refill an air compressor after repairs is straightforward, but always fix the leak first. Constantly cycling to refill stresses the pump motor.
Frequently Asked Questions
How often should I drain my air compressor?
Drain it after every use. At an absolute minimum, drain it once per day of use. If you use it for extended periods in a day, drain it every couple of hours. For a compressor that sits unused, drain it before storage and once a month to check for condensation.
Can I leave the drain valve open all the time?
No. You should only leave it open when the tank is fully depressurized (0 PSI) for long-term storage. Leaving it open while the compressor is pressurized or plugged in will cause the motor to run continuously, trying to fill an endless leak, which will burn out the pump motor.
What type of oil is that in the water?
It’s likely compressor lubricating oil that has slipped past piston rings into the tank. This is normal in small amounts for oil-lubricated pumps. However, excessive oil means your pump may be worn and over-lubricating. Use only air compressor oil specified by your manual; automotive oil can cause carbon buildup and damage.
My compressor is oil-free. Do I still need to drain it?
Yes, absolutely. Oil-free compressors don’t put oil into the air stream, but they still compress humid air, which creates condensate. The OIL FREE COMPRESSOR manual reviewed states to drain “before and after EVERY use.” The corrosion risk from water is identical.
When should I replace the entire compressor?
Consider replacement if an internal inspection reveals severe pitting or corrosion, if the tank fails a hydrostatic test, or if repairs exceed the value of the unit. Our guide on how to replace an air compressor walks through that decision and the installation steps.
The Bottom Line
Draining your air compressor is essential maintenance and the primary defense against a failure with real consequences. The process boils down to three things: depressurize to the right spec (20 PSI or 30 PSI), open the bottom valve slowly, and do it daily.
Forget the myth that a tank lasts forever. Its lifespan is directly tied to how often you drain it. Spend five minutes today on the drain, or risk spending significantly more later. If you use the tool more than once a month, buy an automatic drain valve. It’s the cheapest insurance your compressor will ever have.
