
How to Change Air Compressor Oil | The Essential 3-Spec Match
This post contains affiliate links. As an Amazon Associate, we earn from qualifying purchases.
To change air compressor oil, you must match three specs: the correct non-detergent oil type, the manufacturer’s specific change interval, and the exact fill amount to the center of the sight glass or dipstick mark. Using the wrong oil or skipping the initial break-in change carbonizes the pump internals, leading to failure within months.
The oil type is non-negotiable. Detergent motor oil leaves carbon deposits on valve plates and cylinder walls. That carbon acts like grinding paste, accelerating wear every time the pump cycles. The initial oil change after the break-in period flushes out the microscopic metal particles from new components, skip it, and those particles circulate, scoring bearings and rings.
What follows: how to decode your compressor’s manual for the three critical numbers, the seven-step drain-and-fill process that prevents spills and air locks, and the two maintenance habits that add years to your pump’s life.
Key Takeaways
- Use only non-detergent compressor oil. SAE-30 or ISO 100 grades are standard. Detergent automotive oil creates destructive carbon deposits inside the pump.
- The first oil change is the most important. Change oil after the initial break-in period, anywhere from 10 to 100 hours, to remove wear-in metal particles.
- Fill to the center of the sight glass, not the top. Overfilling causes oil to be pumped into the air lines, contaminating tools and causing foaming.
- Dispose of used oil as hazardous waste. It contains metal particulates and moisture; never pour it down a drain or onto the ground.
- Tighten the drain plug to the proper torque. Overtightening strips the aluminum pump casing; undertightening leads to leaks and air ingestion.
The 3 Specs You Must Match Before Adding a Drop
You have three numbers to find before you open an oil bottle. Get one wrong, and you’re working toward a repair.
First, the oil type. Every manual in the research specifies non-detergent oil. The Omega manual demands Omega 30wt. Non-Detergent. The Rolair manual prints “DO NOT USE A DETERGENT OIL!!” in bold. The general Home Depot guide calls for SAE-30 non-detergent.
Detergent oils contain additives that suspend contaminants in engine crankcases. In a hot, wet air compressor pump, these additives bake onto metal surfaces as hard carbon. This carbon scores cylinder walls and holds valve plates open, causing a permanent loss of pressure.
Second, the change interval. This is where manufacturers disagree, and using the wrong schedule voids warranties. Omega Compressors dictate a 100-hour break-in change, then every 300 hours or 3 months. A general-duty Husky manual calls for a 10-hour initial change, then every 100 hours. Rolair specifies a 50-hour break-in. C-Aire recommends annual changes for light use. You must find your model’s manual.
| Manufacturer / Guide | Initial Change | Subsequent Changes | Recommended Oil |
|---|---|---|---|
| Omega Compressors | 100 hours | 300 hours or 3 months | Omega 30wt Non-Detergent |
| General (Husky) | 10 hours | Every 100 hours | SAE-30 Non-Detergent |
| Rolair | 50 hours | Not specified | Non-Detergent |
| C-Aire | Not specified | Annually | C-Aire ISO 100 |
Third, the oil capacity. This isn’t about “a quart.” It’s about the fill mark. Most pumps use a sight glass, a small round window on the side. The correct level is the center of the red circle or between the marked lines. Some older pumps use a dipstick with “H” and “L” marks. Overfilling is as damaging as running low. Excess oil gets whipped into foam, loses its lubricity, and can be pushed past the piston rings into the discharge air.
Where this goes sideways: Guessing the oil type. Someone uses leftover 10W-30 motor oil because it’s “30 weight.” The detergent additives carbonize on the hot pump head within 50 hours of runtime. The compressor loses maximum pressure, starts running hotter, and seizes within six months.
How to Find Your Compressor’s Specific Oil Requirements
Don’t rely on the label on the tank. That plate lists maximum pressure and electrical specs, not lubrication details.
Start with the physical manual if you have it. Look for the “Maintenance” or “Lubrication” section. The oil spec and interval will be there. If the manual is gone, your next stop is the manufacturer’s website. Search for your model number followed by “owner’s manual PDF.” The model number is usually on a metal plate or sticker on the pump itself, not the air tank.
For common brands, the research gives a baseline. An Ingersoll Rand TS4 series pump holds 40 ounces (1.2L) and typically uses a synthetic or non-detergent oil. A Rolair belt-drive unit needs non-detergent oil after its 50-hour break-in. For a generic oil-lubricated compressor from a home center, the 10-hour/100-hour schedule with SAE-30 non-detergent is a safe, conservative bet.
If you hit a dead end, identify the pump manufacturer. Many compressors use a third-party pump from companies like Champion, Quincy, or Kellogg-American. Search that pump’s model number. This is more reliable than the tank brand.
When you confirm the oil type, buy a dedicated compressor oil. Brands like Royal Purple, Mobil, and Champion make them. It’s worth the extra few dollars over trying to find a “non-detergent SAE-30” motor oil, which is increasingly rare on auto parts store shelves.
The Tools and Supplies You Need (Beyond a Wrench)
You need five things. Missing the last two is how messes happen.
- The Correct Oil. As specified above. Have enough for the change plus a little extra for topping off.
- A Drain Pan. Use a shallow, wide pan. The oil stream from the pump drain plug can splash. A disposable aluminum roasting pan works perfectly.
- Funnel & Clean Rags. A small funnel with a fine mesh screen or a built-in filter is ideal. It catches any debris as you pour. Have plenty of rags for spills.
- Socket Wrench or Box-End Wrench. Match the size of your pump’s drain plug (often 3/8″ or 1/2″). An adjustable wrench can round off soft brass or aluminum plugs.
- Oil Disposal Container. An empty, sealable gallon jug (like a milk jug or the new oil bottle). You must transfer the used oil from the drain pan to a sealed container for recycling.
Before you start: Depressurize the entire system. Run the compressor to shut-off, then trigger the safety valve on the tank and open any drain cock to bleed all air pressure. Pull the power plug from the wall. A pressurized crankcase can spray hot oil when the fill cap is removed.
Place your tools on a tray. You’ll be working in a cramped space, often under the pump between the tank and the frame. Laying everything out first keeps you from reaching over the drain pan later.
Step-by-Step Oil Change Process
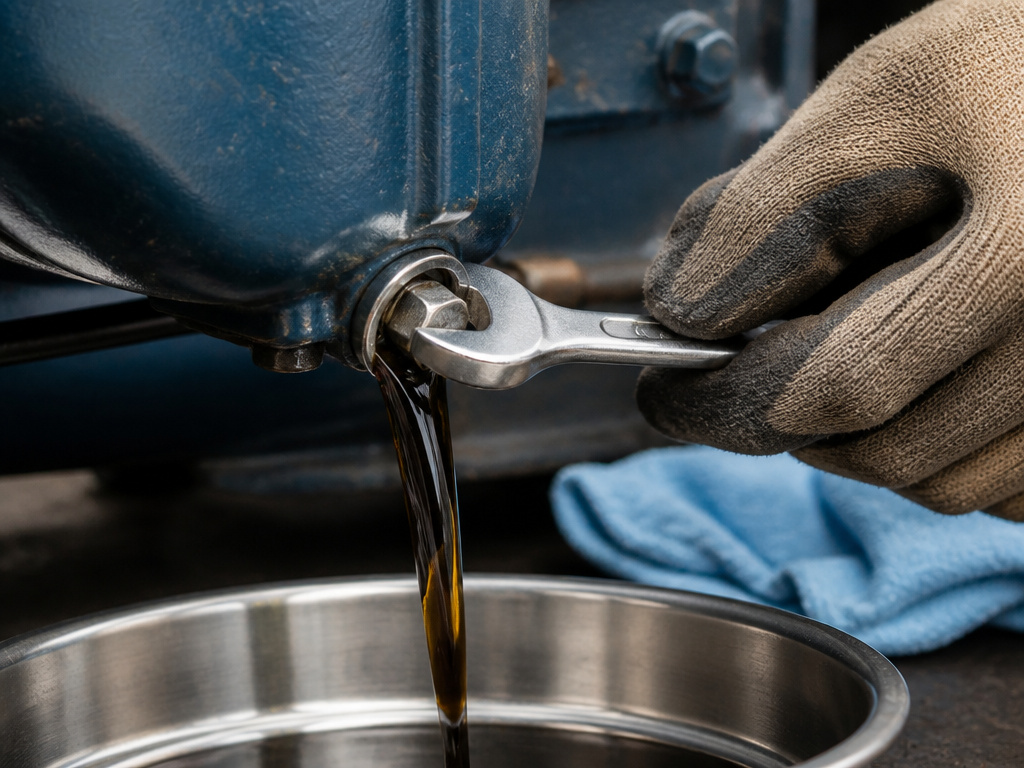
Follow this sequence. The order prevents air locks and ensures a complete drain.
Step 1: Run the compressor to warm the oil. Operate the compressor for 5-10 minutes. Warm oil flows out faster and carries more suspended contaminants with it. Then, perform the pressure release and lock-out steps described above.
Step 2: Locate and clean the drain plug. The drain plug is on the very bottom of the pump’s crankcase. It’s usually a hex-head plug. Wipe the area around it with a rag to prevent dirt from falling into the crankcase when you remove it.
Step 3: Drain the old oil. Position your drain pan directly underneath. Loosen the plug with your wrench, then unscrew it by hand the last few turns. Be ready, the oil will flow quickly. Let it drain until it slows to a drip. This can take 3-5 minutes. Tilt the compressor slightly forward (if possible) to help the last of it pool toward the drain hole.
Step 4: Inspect the old oil. While it drains, look at it. Normal used oil is black. If it has a milky, coffee-with-cream appearance, that’s water emulsified in the oil. It means your compressor is ingesting very humid air or has a internal cooling leak. If you see shiny metallic flakes, that indicates abnormal wear. Note these for troubleshooting later.
Step 5: Reinstall the drain plug. Clean the plug threads with a rag. Apply a small amount of pipe thread sealant (Teflon tape or a liquid thread sealant) to prevent leaks. Screw it in by hand, then tighten with the wrench. Do not overtighten. The crankcase is often cast aluminum. Snug is enough, typically 15-20 ft-lbs of torque. If you strip it, you’re drilling and heli-coiling.
Step 6: Refill with new oil. Find the fill port, which is on the top or side of the crankcase, often with a dipstick or a sight glass next to it. Remove the cap or plug. Insert your funnel and slowly pour in the new oil. Stop periodically to check the level via the sight glass or dipstick.
Step 7: Check the level and run the pump. Fill until the oil reaches the center of the sight glass. If using a dipstick, aim for the “H” mark. Replace the fill cap securely. Now, plug the compressor back in and run it for a minute without any air tools connected. This circulates the new oil. After shutting it off, wait a minute and check the sight glass again. The level may have dropped slightly as oil filled the internal galleries. Top it off to the center mark once more.
Dispose of the used oil immediately. Pour it from the drain pan into your sealable disposal container. Take it to an auto parts store or recycling center that accepts used oil. They handle it for free.
What Happens If You Use the Wrong Oil?

The consequences have specific timelines and failure modes.
Using detergent automotive oil (like 10W-30) is the most common error. The detergents and dispersants are designed for a water-cooled engine with a filter. In an air compressor, the oil gets much hotter and the water vapor from compressed air condenses into it. The additives break down and form a varnish, then hard carbon.
I opened a pump that had run on automotive oil for a year. The valve plate looked like it was coated in black ceramic. It wouldn’t seal, and the compressor couldn’t build past 60 PSI. The carbon on the cylinder walls had acted like lapping compound, visibly scoring the piston.
The pump will lose maximum pressure first. You’ll notice it runs longer to fill the tank. Then, it starts to overheat and cycle its thermal overload protector. Finally, the carbon pieces break off and jam a valve or score a cylinder, leading to a loud knocking noise and complete failure.
Using oil that’s too light (like SAE-20) leads to increased wear and higher operating temperatures almost immediately. The oil film between moving parts is too thin to protect them. You’ll hear more piston slap and the pump will feel hotter to the touch after a short run.
Using oil that’s too heavy (like SAE-50) makes the pump work harder, especially in cold weather. The motor will strain on startup, potentially tripping the breaker. It also doesn’t circulate as well, leaving the top of the cylinder under-lubricated.
How Often Should You Really Change the Oil?
The schedule in your manual is based on runtime hours, not calendar months. Unless you’re a professional running the compressor daily, you’re not hitting those 300-hour intervals in a year.
For a home garage compressor, translate hours into use. A 50-hour break-in is about the time it takes to frame a small shed, including nail-gun use. After that, a yearly oil change is a solid rule for moderate users (a few projects per season). If you only top off tires and blow out dust a few times a year, you can stretch it to two years, but check the oil color first.
Easy to miss: The oil degrades even when the compressor sits. Moisture from humid air condenses inside the crankcase over weeks of inactivity. This leads to that milky emulsion and causes internal rust during the off-season.
Two signs you’re overdue: the oil in the sight glass looks black and opaque, and the compressor seems louder or slower to build pressure. Change it immediately.
For heavy users, track runtime with an inexpensive hour meter. You can wire one into the compressor’s power line. It’s the only way to follow manufacturer intervals accurately.
Frequently Asked Questions
Can I use synthetic air compressor oil?
Yes, and it’s often a superior choice. Synthetic compressor oils resist thermal breakdown and oxidation better than conventional oils, meaning they can last longer between changes, sometimes double the interval. They also perform better in very hot or very cold conditions. Just ensure the synthetic is formulated for air compressors and is non-detergent. Always check your manual; some newer compressors like certain C-Aire models ship with synthetic from the factory.
What if my compressor doesn’t have a drain plug?
Most pumps have one. If you truly cannot find a dedicated drain plug, you must use a fluid extraction pump. Insert the pump’s tube through the fill hole down to the bottom of the crankcase and suction the old oil out. This method is less effective at removing sludge and metal particles from the bottom of the sump, but it’s better than not changing it at all.
Is it okay to mix new oil with a little old oil left in the pump?
No. You want to remove as much of the old, contaminated oil as possible. The small amount that remains clinging to parts will dilute the new oil, reducing its effectiveness. This is why a slow, complete drain is important. The residual film is negligible, but deliberately leaving a quarter-inch of old oil in the bottom defeats the purpose.
How do I know if I overfilled the oil?
The symptom is oil blowing out of the air discharge or into your tools. You may see an oily mist at the coupler or find oil in your paint sprayer or air ratchet. The compressor might also make a chugging or gurgling sound. To fix it, you must drain some oil out. Use a suction pump or carefully loosen the drain plug to let some flow out until the level is back at the center of the sight glass.
Can changing the oil fix a noisy compressor?
It can help, but it won’t cure mechanical damage. If the noise is a new tick or knock, fresh oil might quiet down a slightly worn bearing or piston for a short while by providing better lubrication. However, if the noise is a pronounced knock, clunk, or grind, the damage is already done. The oil change is maintenance, not repair.
Before You Go
Changing your air compressor oil is the single most impactful piece of maintenance you can do. It’s cheaper than a rebuild and simpler than most people think. Remember the triad: non-detergent oil, your model’s break-in interval, and the sight-glass center line.
Buy the right oil, a gallon of dedicated compressor oil. Block out thirty minutes. Follow the warm-up, depressurize, drain, and fill steps. That annual ritual is what keeps a ten-year-old compressor running like new, while the neighbor’s unit that’s never been serviced sits dead in the corner of the garage after three seasons.
Your pump doesn’t ask for much. Give it clean oil on schedule, and it will return the favor for decades.
