
What Is a Drill Press Used For? The Top Tasks It Masters
This post contains affiliate links. As an Amazon Associate, we earn from qualifying purchases.
A drill press is used for drilling perfectly straight, perpendicular holes with repeatable depth and power that a hand drill cannot match. Its rigid frame and adjustable table allow for operations like reaming, countersinking, boring with Forstner bits, and even light tapping in metal. The variable speed control, 0–1200 RPM on a model like the Ellis 9400, lets you match the tool to the material, from plexiglass to cast iron.
That power and precision come from a specific set of mechanical constraints. The column, table, and quill travel are the physical limits that define what the machine can and cannot do safely. Misreading those limits is how a project gets ruined or a warranty gets voided.
What follows: the three tasks a drill press uniquely solves, the specs that make those tasks possible, and the safety protocols that keep your fingers attached while you work. By the end, you’ll know whether your next project needs a bench-top model or a floor-standing workhorse, and exactly which accessory you should buy first.
Key Takeaways
- A drill press delivers perpendicular accuracy impossible with a hand drill, turning slanted, wobbly holes into clean, straight bores every time.
- Variable speed is non-negotiable. Running a 1-inch Forstner bit at 3000 RPM will burn the wood and likely break the bit; the Ellis 9400’s high-torque range caps at 570 RPM for a reason.
- Clamping is not a suggestion. The Argonne National Laboratory safety guide notes that the most common injuries come from workpieces spinning free, a drill press vise and T-slot bolts are your first accessories.
- Maintenance has a schedule. The Ellis 9400 manual calls for greasing every 25–30 hours of use; ignoring this leads to quill stickiness and inaccurate depth stops within months.
- It’s a specialist, not a generalist. For milling slots or complex contours, you need a milling machine; a drill press is for holes and related finishing operations only.
The 3 Core Jobs a Drill Press Does Better
A hand drill can make a hole. A drill press makes the right hole, in the right place, to the right depth, every single time. That difference comes down to three mechanical advantages no portable tool can offer.
1. Drilling Perfectly Perpendicular Holes
This is the fundamental reason the tool exists. The spindle is fixed in a vertical plane relative to the table. When you lower the quill, the bit cannot wander left or right. The result is a hole that is exactly 90 degrees to the work surface.
Try drilling a series of dowel holes for a chair leg by hand. Even with a guide, slight variations will throw the alignment off. On a drill press, you set the fence, clamp the workpiece, and every hole is identical. This is why joinery and metal fabrication rely on the tool. The techniques for drilling a straight hole start with this machine.
2. Controlling Depth with Repeatable Precision
The depth stop mechanism is a simple threaded rod with a locking nut. Once set, the quill will travel down exactly that far and no farther. This allows for operations like counterboring for hardware or creating stopped holes for mortises.
You can set the depth, lock it, and drill fifty identical holes without a single measurement after the first. That’s production-level repeatability on a benchtop.
For example, drilling for barrel bolts in a door requires a specific depth to hide the mechanism. A hand drill demands constant checking and is prone to error. The drill press does it once, and every subsequent hole is perfect.
3. Applying Consistent Power for Large-Diameter Bits
A hand drill struggles with anything over 3/4 inch in diameter. The torque required to drive a 1-1/4 inch Forstner bit through hardwood will stall most cordless models and strain your wrist. A drill press’s geared drive and low-speed range deliver that torque smoothly.
The OSHA drill press trainer script emphasizes using “recommended speeds…proper for the drill.This is about preventing the bit from grabbing, stalling the motor, and spinning the workpiece violently, which affects finish quality. The machine’s mass absorbs the reaction force your body would otherwise have to handle.
| Task | Hand Drill Challenge | Drill Press Solution |
|---|---|---|
| Perpendicular Holes | Requires perfect technique; often results in angled, weak joints. | Built-in mechanical guarantee of 90-degree alignment. |
| Depth-Sensitive Work | Depth stops are crude; consistency across multiple holes is poor. | Micro-adjustable depth stop with repeatability within thousandths of an inch. |
| Large-Diameter Boring | High risk of stalling, kickback, or broken bits due to insufficient torque. | Low-speed, high-torque settings provide controlled, powerful cutting. |
The Anatomy of Precision: Key Parts and What They Do
Understanding the drill press mechanics means knowing what each part controls. This vocabulary is the checklist you use when a job goes wrong.
Headstock & Motor: This is the power source. A 2 HP motor like the one in the Ellis 9400 provides enough torque for tapping 3/4-inch bolts in steel. The headstock houses the spindle and the variable speed mechanism.
Column: The 4-inch diameter steel post everything mounts to. Its rigidity is what prevents flex and ensures accuracy. If raising or lowering the table becomes difficult, the Ellis manual says to clean and wipe the column with light machine oil every three months. Ignore that, and you’ll be fighting it with a mallet.
Table: The work surface. It should have T-slots (two 0.625-inch slots on the Ellis) for clamping. The table tilts for angled holes and raises/lowers along the column to accommodate different workpiece thicknesses.
Quill & Spindle: The quill is the sleeve that moves up and down, carrying the spindle. The maximum spindle travel, 5.375 inches on the Ellis, is your maximum hole depth without repositioning the workpiece. The spindle itself has an inner Morse Taper #3 (MT3), a standard for securely holding drill chucks or tools directly.
Chuck: This three-jaw vise grips the drill bit. The drill press chuck mechanism is keyed to tighten. The cardinal rule: remove the chuck key immediately after use. Leaving it in is the fastest way to launch it across the shop when the motor starts.
Depth Stop & Feed Lever: The stop sets the limit. The lever is how you apply pressure. You never lean on it. You feed with steady, even pressure and ease up just before the bit breaks through the bottom layer to prevent tear-out.
What is a Drill Press Used For? The Complete Task List
Beyond just “drilling holes,” the machine’s rigidity and control unlock a suite of related operations. Each requires specific bits or accessories, turning a single-purpose tool into a workshop cornerstone.
Core Drilling Operations
- Drilling: The obvious one. From pilot holes to clearance holes, the press does it with unmatched straightness.
- Counterboring: Drilling a larger-diameter shallow hole so a bolt head or nut sits flush with or below the surface. Requires a counterbore bit.
- Countersinking: Cutting a conical recess so a flat-head screw sits flush. A dedicated countersink bit is used, often combined with drilling in one step.
- Spot Facing: Cleaning up a rough surface around a hole to provide a flat bearing area for a washer or nut. A special spot-facing tool is used.
Boring & Precision Hole Making
- Boring with Forstner Bits: For clean, flat-bottomed holes with smooth sides. Essential for hardware installation and decorative inlays. This is where drill press uses in fine woodworking shine.
- Using Hole Saws: The press’s stability prevents the saw from walking and provides the steady pressure needed for clean cuts in wood, plastic, or thin metal.
Metalworking & Machining Tasks
- Reaming: Slightly enlarging a pre-drilled hole to an exact diameter with a smooth finish. A reamer is a precise cutting tool that requires the alignment a press provides.
- Tapping: Cutting internal threads in a hole. The press holds the tap perfectly straight, which is critical for strong threads. The Ellis 9400 has a specified tapping capacity of 3/4″ – 10 NC.
- Center Drilling: Creating a precise starter dimple for lathe work or further drilling operations, using a center drill bit.
Where this goes sideways: Using a brand-new, razor-sharp drill bit on thin sheet metal or plexiglass. The Argonne National Laboratory guide warns it can “bite into it and may pull it out of the vise.” For these materials, they recommend a drill with a slightly dulled cutting edge to prevent grabbing.
Drill Press vs. Hand Drill: When to Use Which
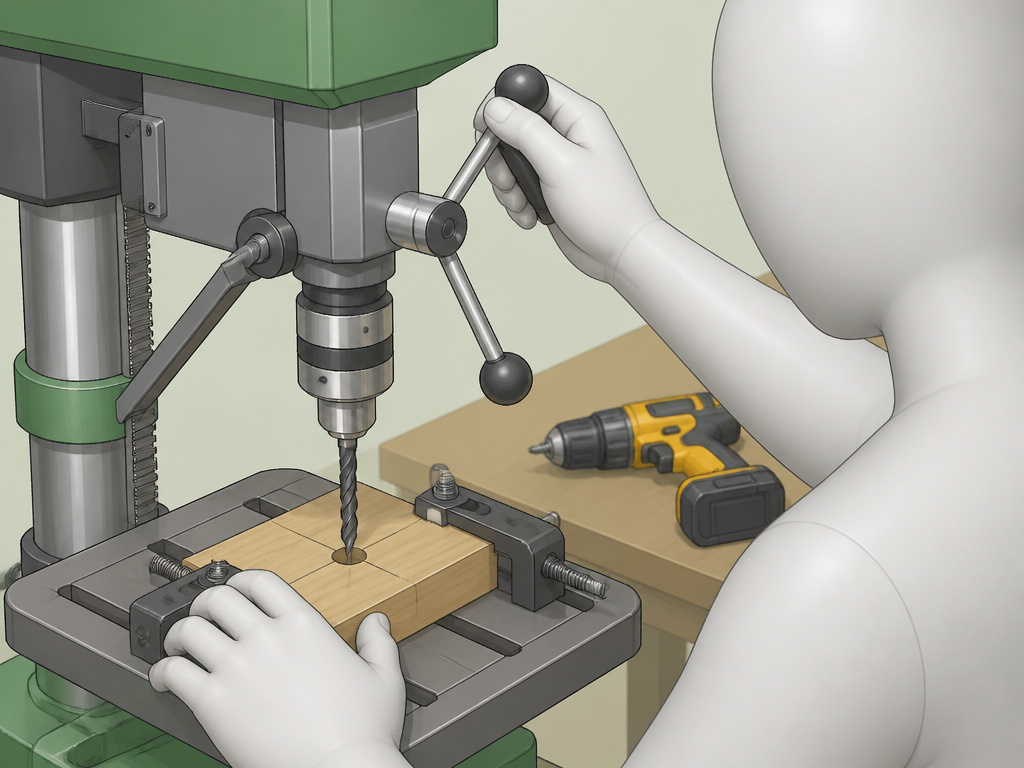 This is about matching the tool to the job’s requirements for accuracy, power, and safety.
Use a Hand Drill When:
- The workpiece is too large or awkward to bring to the machine (e.g., installing shelves on a wall).
- You need portability and speed over perfect precision (e.g., rough construction, drilling pilot holes for screws).
- The location makes clamping impossible, and you can accept a degree of error.
Use a Drill Press When:
- Accuracy is non-negotiable. Dowel joints, metal fabrication, and any project with multiple aligned holes demand it.
- You are working with large or hard materials. The sustained power for Forstner bits or hole saws in hardwood is a job for the press.
- Repeatability matters. Drilling a set of identical holes is trivial with a fence and depth stop.
- The operation is inherently dangerous with a hand tool. Tapping, reaming, or drilling deep holes are all safer on a secured machine.
The drill press vs milling machine comparison is a different question. A drill press moves the tool only vertically. A milling machine can move the workpiece in multiple axes under a rotating tool to cut slots, profiles, and complex shapes. Don’t try to mill on a drill press; the sideways forces will damage the spindle bearings.
Critical Safety: The Non-Negotiable Rules
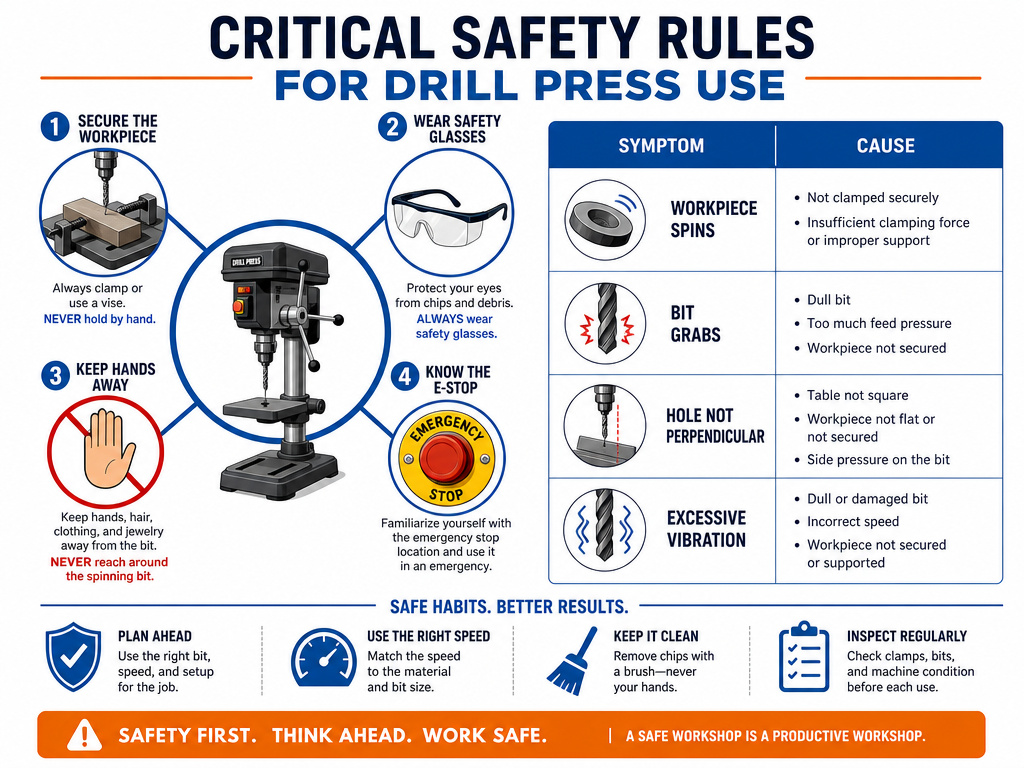 The power that makes a drill press useful also makes it unforgiving. The safety protocols are the direct lessons from documented injuries.
Before you start: The primary hazards are contact with the rotating chuck or tool and the workpiece spinning free. Mitigate them by always using a magnetic chip shield between you and the bit, and clamping every workpiece, no exceptions.
1. Secure Everything That Moves.
- Workpiece: Always use a drill press vise or clamps bolted into the T-slots. The safe drill press use procedure hinges on this.
- Bit: Ensure the bit is tightly seated in the chuck. Tug on it after tightening.
- Chuck Key: Remove it from the chuck immediately. Develop the muscle memory: tighten, remove key, then set it aside.
2. Protect Yourself from the Machine.
- Eye protection is mandatory. Flying metal chips can cause permanent injury.
- No gloves, jewelry, or loose clothing. Anything that can be caught by the rotating spindle will be, with extreme force.
- Tie back long hair. This is so fundamental it’s often overlooked until it’s too late.
3. Operate with Intent.
- Let the machine do the work. Do not force the feed lever. Excessive pressure causes bits to snap.
- Ease up before breakthrough. When the drill tip is about to exit the material, reduce feed pressure to prevent grabbing and tear-out.
- Stop completely for adjustments. Never try to adjust the table, fence, or workpiece while the spindle is rotating. Turn it off and wait for it to stop.
4. Know Your Machine’s Emergency Features.
The Ellis 9400 has an emergency stop button that disconnects power with a time delay of about twenty seconds. Know where this button is. A magnetic drill press used on steel beams has different safety considerations, but the principle is the same: locate the e-stop before you need it.
| Symptom | Likely Cause | Immediate Action & Fix |
|---|---|---|
| Workpiece spins violently. | Not properly clamped. | Hit e-stop. Re-secure workpiece with vise/clamps. |
| Bit grabs and stalls motor. | Feed pressure too high, speed too fast for bit size. | Turn power off immediately (don’t just release lever). Clear jam manually, restart at lower speed. |
| Hole is not perpendicular. | Table not square to spindle, or workpiece shifting in vise. | Check table lock. Re-square workpiece using a machinist’s square. |
| Excessive vibration/chatter. | Bit not seated straight, or bit is dull/damaged. | Stop machine. Remove and re-seat bit. Inspect for damage; replace if needed. |
Choosing the Right Drill Press for Your Work
Your choice dictates the jobs you can tackle safely and effectively. The two main categories are benchtop and floor-standing models.
Bench-Top Drill Press
- Best for: Home workshops, hobbyists, woodworking, and light metalwork.
- Pros: Lower cost, smaller footprint, sufficient for most DIY tasks (drilling up to 1/2″ in steel).
- Cons: Less power, shorter spindle travel, smaller table, more prone to vibration on heavy cuts.
- Swing: Typically 8″ to 12″. Remember, the drill press swing measurement (twice the throat distance) determines the maximum width of material you can center-drill.
Floor-Standing Drill Press
- Best for: Serious woodworking, metal fabrication, and production environments.
- Pros: More powerful motor (1.5 HP+), greater spindle travel, larger table, heavier construction reduces vibration.
- Cons: Higher cost, significant floor space required, often needs 220V power.
- Example: The Ellis 9400 is a floor-standing model with a 2 HP motor, 5.375″ spindle travel, and a 677 lb. Weight for stability.
The Must-Have Features:
- Variable Speed Control: Either a stepped-pulley system or an electronic variable speed dial. This is not a luxury.
- Depth Stop with Fine Adjustment: A threaded stop rod with a locking nut is standard. Look for one that’s easy to set precisely.
- T-Slot Table: Allows for flexible clamping. A table that only has holes is far more limiting.
- Chuck Guard: A transparent polycarbonate shield that contains flying chips. It should be easy to install and remove.
If your work is 90% wood and 10% light metal, a quality benchtop model with a 1/2 HP motor and variable speed is the default pick. If you plan on tapping threads in steel or boring large holes in thick stock, step up to a floor-standing unit like the Ellis or a Jet equivalent. The investment pays off in capability and durability.
Frequently Asked Questions
Can you use a drill press as a milling machine?
No. A drill press is designed for vertical, axial loads (straight down). A milling machine applies significant lateral (sideways) force to the cutter. Using a drill press for milling will damage the spindle bearings, cause chatter, and produce poor results. It’s also unsafe. For milling operations, you need the rigid structure and table feed of a milling machine.
How do you change the speed on a drill press?
It depends on the model. Traditional models use a belt-and-pulley system. You stop the machine, open the belt cover, and move the belt to different pulley grooves to change the speed ratio. Modern models often have an electronic variable speed dial that adjusts motor RPM directly. Always consult the manual, and never change belt positions while the motor is running.
What maintenance does a drill press need?
Regular maintenance prevents wear and ensures accuracy. The Ellis 9400 manual specifies: * Monthly (or every 25-30 hours): Apply Lithium Grease N.L.G.I. #2 to the quill mechanism. * Every three months: Wipe the lower quill clean and oil it lightly. Also clean and oil the column if table adjustment becomes stiff. * Before each use: Visually inspect belts for wear, ensure the chuck is clean, and verify all safety guards are in place.
What is the “swing” on a drill press?
The swing is twice the distance from the front of the column to the center of the spindle. A 12-inch swing means you can center-drill a piece of material up to 12 inches wide. It’s a key spec that determines the machine’s maximum work capacity, not its power.
How do you remove a stuck drill chuck?
First, ensure the spindle is locked. Many presses have a spindle lock pin for this. Then, insert a chuck key into the side hole and tap it gently with a mallet in the direction to loosen (usually counter-clockwise when viewed from above). If it’s severely stuck, you may need a gear puller. Our guide on chuck removal covers the full process.
Before You Go
A drill press turns a chaotic, variable process into a controlled, repeatable one. That’s its entire value. It’s not about doing more things; it’s about doing the fundamental thing, making a hole, with absolute authority.
Start with the safety rules. They are shorter than the manual and more important than any technique. Clamp your work. Wear your glasses. Keep your sleeves rolled up. Then, learn the machine’s limits from its manual, not from a broken bit. Match the speed to the bit size and material. Finally, invest in a good vise and a set of T-bolts before you buy any fancy bits. The basic drill press overview is your foundation.
The right hole in the right place is the difference between a wobbly shelf and a solid piece of furniture, between a stripped tap and a clean thread. That’s what you’re buying: certainty.
