
What Is a Drill Bit: The Anatomy of a Common Cutting Tool
This post contains affiliate links. As an Amazon Associate, we earn from qualifying purchases.
A drill bit is a rotating cutting tool, typically with a cylindrical shank and helical flutes, designed to be mounted in a drill chuck to remove material and create a cylindrical hole. Its geometry, point angle, flute design, and material, is engineered for specific materials like wood, metal, or masonry, with standards like ANSI/ASME B94.11M governing its precise dimensions.
That definition covers the textbook answer. The part most people miss is how a bit actually engages with the material. It doesn’t just spin and magically make a hole disappear. For metal and wood, the cutting edges at the tip slice through like a tiny, precise lathe. For concrete, a carbide tip doesn’t cut, it pulverizes the aggregate with thousands of micro-impacts. Getting that distinction wrong is why your first masonry bit in a regular drill stalls and smokes.
What follows is the anatomy lesson no toolbox comes with. We’ll break down the parts, the materials, the cryptic codes stamped on the shank, and the standards that ensure a 10mm bit from one brand fits the same hole as another. By the end, you’ll read a bit like a spec sheet.
Key Takeaways
- The point angle is the first spec to match to your material: 118 degrees for general-purpose steel, 135 degrees for harder metals, and a carbide tip for masonry.
- Flute design controls chip removal: a high spiral (fast twist) clears soft, gummy materials like aluminum; a low spiral (slow twist) provides strength for hard, brittle materials like cast iron.
- Length directly trades against rigidity. A jobber-length bit offers the best balance for most tasks; longer “aircraft” bits can wander, demanding a drill press or guide for accuracy.
- Material codes matter: HSS (High-Speed Steel) handles most metals, HSS-Co (Cobalt) tackles stainless steel, and carbide-tipped bits are mandatory for masonry and tile.
- Ignoring the shank type locks you out of tools. Round shanks fit standard chucks; SDS-plus and SDS-max shanks require specific hammer drills for masonry work.
The Core Components of a Drill Bit
Look past the basic shape. Every part of a drill bit has a job, and the interaction between them determines if you get a clean hole or a broken tool.
The twist drill bit’s geometry is defined by its point angle, flute helix angle, and land width. The point angle (commonly 118° or 135°) determines the cutting edge’s engagement with the material, while the helix angle controls the efficiency of swarf ejection. A bit’s functional length is measured from the tip to the beginning of the shank.
The tip, or point, is where the work happens. The two cutting edges meet at an angle, this is the point angle. A 118-degree angle is sharper, requiring less downward force to start cutting, which is perfect for general steel and soft metals. A 135-degree angle is blunter, spreading the load over a wider area. This makes it more durable for drilling into harder steels without chipping the edge.
The body is the spiral section. Those grooves are flutes. Their primary job is to channel cut material (swarf or chips) up and out of the hole. The steepness of the spiral is the helix angle. A high helix angle, like on a bit meant for aluminum, creates an aggressive auger effect to pull long, stringy chips out fast. If those chips clog, they weld to the bit and ruin the hole. A low helix angle, common in bits for hard plastics or cast iron, makes a stiffer bit that can withstand more torque and break short, brittle chips.
The shank is the part your drill grabs. Most are simple round shanks for three-jaw chucks. Some have a hex shank for quick-change chucks or impact drivers, the flats keep the bit from spinning under high torque. Then there are specialty shanks like SDS-plus. These have grooves that allow the bit to slide back and forth in the hammer drill while transferring both rotation and impact force. You cannot use an SDS bit in a standard chuck without an adapter.
Drill Bit Materials: From Soft Steel to Industrial Carbide
The material determines what you can cut and for how long. It’s a hierarchy of cost, durability, and hardness.
High-Speed Steel (HSS) is the workhorse. It’s hardened steel that retains its edge at the high temperatures generated by drilling. The Bosch HSS drill bit line is designed for quick swarf removal, a critical feature when using hand-held drills where coolants often aren’t practical. For the average DIYer drilling wood, plastic, and mild steel, a good HSS bit set is the only one you need.
Cobalt Steel (HSS-Co) is the next step up. It’s HSS alloyed with 5-8% cobalt. This increases red-hardness, meaning the bit stays hard even when the tip glows dull red from friction. This is your bit for stainless steel, hardened steel, and cast iron. The trade-off is brittleness, a HSS-Co bit is more likely to snap if it binds or you use it at an angle.
Carbide-Tipped bits have a small, braised tip of tungsten carbide on a steel body. Carbide is incredibly hard and wear-resistant, but it’s also brittle. These bits excel at abrasive materials that would dull steel in seconds: masonry, brick, tile, and concrete. They are not for metal or wood. The carbide tip crushes abrasive material; it doesn’t slice it.
Solid Carbide bits are the professional-grade option, entirely made of carbide. They are extremely rigid and are used for precision drilling in circuit boards, ceramics, and aerospace composites. They are fragile and expensive, requiring a rigid setup like a drill press or mill.
| Material | Best For | Limitation | Typical Shank |
|---|---|---|---|
| HSS (High-Speed Steel) | Wood, plastic, soft steel, aluminum | Dulls quickly on abrasive materials | Round, sometimes hex |
| HSS-Cobalt (HSS-Co) | Stainless steel, cast iron, hard steel | More brittle, can snap if misused | Round |
| Carbide-Tipped | Masonry, brick, concrete, tile | Brittle tip, not for metal or wood | Round, SDS-plus |
| Solid Carbide | Precision holes in PCBs, glass, composites | Very fragile, requires perfect alignment | Round |
Common mistake: Using a black-oxide coated HSS bit on concrete. The abrasive aggregate will grind the steel edge off in under 30 seconds, leaving you with a polished, useless tip and a cloud of dust. That’s not drilling; that’s friction welding.
How Standards Define Every Bit on the Shelf
The hardware store rack looks chaotic. It’s not. Every bit there conforms to published standards that ensure consistency across brands. This is the non-commodity backbone of the tool world.
Size is the most obvious standard. The ANSI/ASME B94.11M-1993 standard is the American benchmark, defining the fractional, number, and letter drill sizes machinists have used for decades. A #7 drill bit is always 0.2010 inches in diameter. A 13/64″ bit is always 0.2031 inches. This predictability is what allows for precise choosing a drill bit for tap threads or clearance holes.
For masonry bits, the ISO 5468:2017 standard takes over. It specifies everything from diameters (4–25 mm) to length series (short, long, extra-long) and even how to measure the carbide tip. When you buy a 10mm x 160mm masonry bit, you’re buying to an ISO specification.
Even hole accuracy is standardized. The ISO 286 system defines International Tolerance (IT) grades. For a hole between 10mm and 18mm, an IT10 grade means the hole will be within 0.07mm of the nominal size. An IT12 grade allows 0.18mm of variance. Consumer bits operate at the looser end of this scale; precision machine shop bits are held to tighter tolerances.
These standards are why a DeWalt bit and a Milwaukee bit of the same size are interchangeable. They’re not just similar; they’re manufactured to the same dimensional blueprint.
The Three Major Types and What They Actually Do
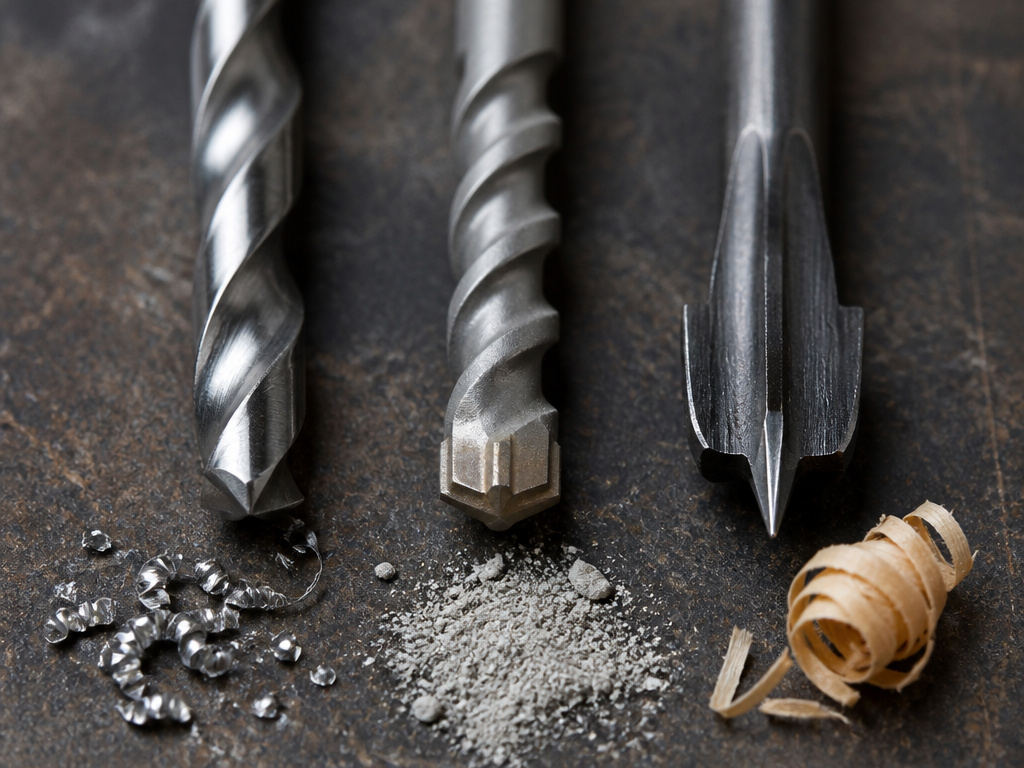
Bits are categorized by their primary target material. The geometry and material differences aren’t subtle, they’re fundamental.
Metal Drill Bits (Twist Drills) are the default image of a drill bit. Made of HSS or HSS-Co, they have a pointed tip with a 118° or 135° included angle. They cut by shearing material, producing spiraled chips. They require moderate speed and often lubrication (cutting oil) to manage heat and prevent work-hardening materials like stainless steel. This is the core tool for using a drill bit in fabrication.
Masonry Drill Bits are built for punishment. They feature a carbide tip brazed to a steel shaft, often with a special flute design to handle dust. They don’t cut. When used with a hammer drill’s impact function, the tip pounds and crumbles the aggregate in concrete or brick. Using one without the hammer action just creates friction and dust. For a deep dive on this distinction, see our comparison of masonry drill bits versus regular bits.
Wood Drill Bits include several specialized designs. A standard twist bit works, but it can tear grain. A brad point bit has a sharp, centered spur that pierces the wood first, creating a clean entry hole and preventing the bit from wandering. It’s the go-to for fine woodworking and furniture. For flat-bottomed holes for concealed hinges, a Forstner bit is unmatched, it cuts a clean, precise cylinder using a peripheral rim.
| Bit Type | Core Function | Key Geometry | Required Tool Mode |
|---|---|---|---|
| Twist (Metal) | Shearing material to form a chip | 118°/135° point angle, helical flutes | Drill (rotary only) |
| Masonry | Crushing abrasive aggregate | Carbide tip, wide flutes | Hammer Drill (rotary + impact) |
| Brad Point (Wood) | Slicing wood fibers cleanly | Central spur, sharp outer spurs | Drill (rotary only) |
Specialized Bits for Specific Problems
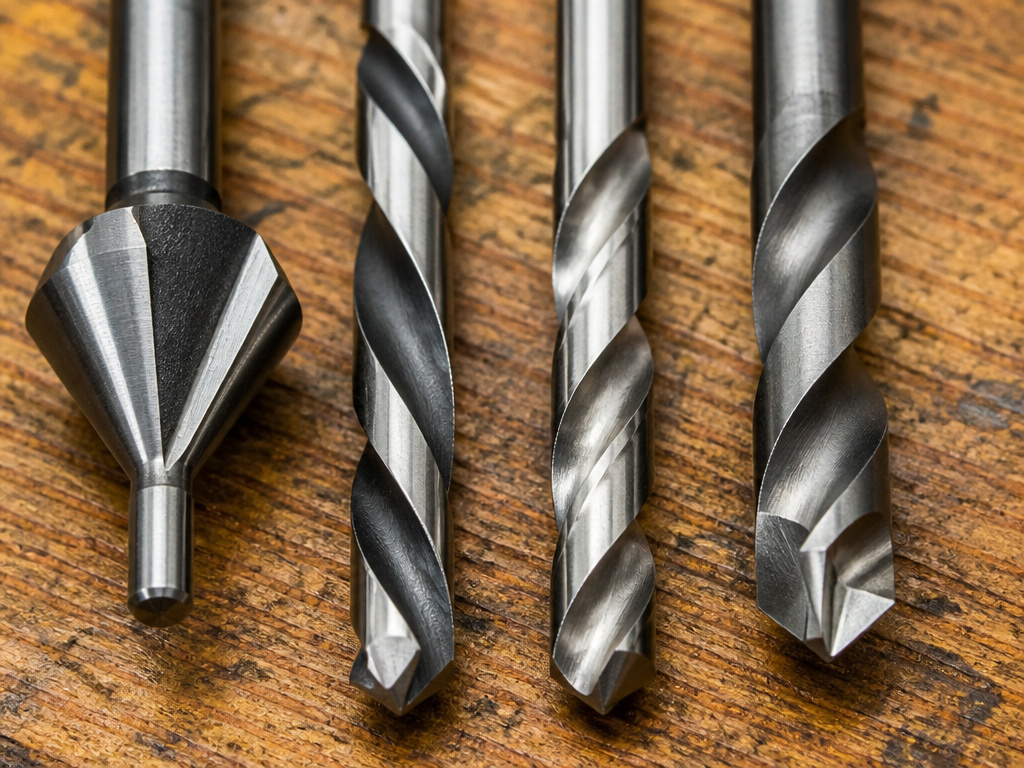
Beyond the big three, a whole ecosystem of bits solves niche problems. Knowing these can save a project.
A countersink bit combines a drill bit with a conical cutter. It drills the pilot hole and then widens the top to create a recess for a screw head to sit flush with or below the surface. It’s essential for professional-looking woodworking.
A left-handed drill bit has flutes twisted in the reverse direction. Its primary use is extraction: when a standard right-hand bit spins, it tightens broken screws or bolts. A left-hand bit spins backwards, often catching and backing the broken piece out. It’s a salvage tool.
The jobber drill bit isn’t a special type; it’s a standard length. The name refers to the most common length-to-diameter ratio, providing a good balance of reach and stiffness. Longer “taper length” or “aircraft” bits exist for deep holes, but they flex more, requiring careful guidance.
For drilling perfectly centered holes in metal without a punch, a split point drill bit is the answer. The tip is ground with a self-centering point that reduces “walking” when the bit first contacts the material. It’s a favorite for metalworking shops.
The Real-World Impact of Getting It Wrong
Theory is clean. Practice is messy. The consequences of mismatching bit to material or tool are immediate and often expensive.
Drill aluminum with a low-helix bit made for steel, and the long, gummy chips will jam in the flutes. The bit seizes, the drill torques in your hand, and the aluminum workpiece is gouged or the bit snaps. The fix is a high-helix bit designed for non-ferrous metals, it pulls the chips out before they can bind.
Try to drill hardened steel with a standard HSS bit, and you’ll work-harden the surface. The bit rubs instead of cuts, generating intense heat that toughens the steel layer just ahead of it. You end up with a polished dimple and a dull bit. The solution is a HSS-Co bit, slower speed, and steady, firm pressure to ensure it cuts rather than rubs.
Where this goes sideways: Using a cordless drill’s high-torque setting with a small-diameter bit (under 1/8″). The extreme torque can snap the bit the instant it binds, often leaving the broken end stuck in your workpiece. Switch to the drill’s speed-control setting for small bits.
The most common frustration is bit wandering on curved or hard surfaces. The solution isn’t more force. Use a center punch to make a small dent for the bit to seat in, or start with a center drill bit to create a precise pilot. For critical holes, a drill guide or press is the only way to guarantee perpendicular, accurate placement.
Frequently Asked Questions
What do the numbers and letters on a drill bit shank mean?
They indicate size and material. A number like “8” means it’s an 8mm diameter bit. Letters like “HSS” mean High-Speed Steel. “HSS-Co 5%” means 5% cobalt alloy. “TiN” is a gold-colored Titanium Nitride coating that reduces friction and increases wear resistance. The Wikipedia entry on drill bits provides a broad overview of materials and design history.
Can I use a wood drill bit on metal?
You can, but you shouldn’t. A brad point bit for wood has a sharp central spur that can snap off on metal, and its cutting edges aren’t hardened like HSS. It will dull almost immediately, burn the wood residue onto the metal, and produce a terrible hole. Always use the correct bit for the material.
What is the difference between a drill bit and an end mill?
Both cut material, but their application is different. A drill bit is designed primarily to cut in the axial direction (straight down into the material) to create a hole. An end mill is designed to cut in the lateral direction (side-to-side) for milling slots, profiles, and surfaces. A drill bit has a pointed tip; an end mill has cutting edges on its sides and bottom.
Why does my new drill bit not make a hole?
It’s likely rubbing, not cutting. The most common cause is the drill running in reverse. Check the direction switch on your drill. The second cause is insufficient pressure, the cutting edges need to bite into the material. The third is a mismatch: using a masonry bit in “drill only” mode on concrete will just polish the tip.
How can I tell if a drill bit is dull?
Look at the cutting edges. Sharp edges have a distinct, polished line. A dull bit will have rounded, shiny wear marks on the very tip. Listen and feel: a sharp bit cuts with a consistent, slightly rough sound and steady progress. A dull bit squeals, produces excessive heat and smoke, and requires much more pressure to move forward.
The Bottom Line
A drill bit is a deceptively simple tool governed by precise geometry and material science. Its job, removing material to form a hole, is constant, but its execution changes completely based on what’s in front of it. The right bit, matched to the material and the tool, feels like an extension of your intent. The wrong one fights you every step of the way.
For 90% of home projects, a quality set of HSS twist bits and a separate set of carbide-tipped masonry bits will cover it. Remember the hierarchy: point angle and material first, length and shank type second. When you hit a snag, like a wandering bit or gummed-up aluminum, the answer is almost always in the geometry you chose. Now you know what to look for.
