
What Is a Countersink Drill Bit? | The Critical Angle Guide
This post contains affiliate links. As an Amazon Associate, we earn from qualifying purchases.
A countersink drill bit is a conical cutting tool that creates a tapered recess in a material, allowing the head of a flat-head screw or fastener to sit flush with or below the surface. It is defined by three specific dimensions: the countersink diameter (larger than the screw head), the included angle (standardized to match the fastener), and the pilot hole diameter (which guides the screw shank).
That flush seat isn’t just for looks. It’s a functional geometry that distributes clamping force across the screw head’s entire bearing surface. Get the angle wrong by a few degrees, and the screw contacts only a thin ring of material instead of the full cone.
What follows is a breakdown of the three dimensions that define every countersink, the ISO and ANSI angle standards that trip up shops, and how to match the tool to your job, not just the material, but the fastener you’re using.
Key Takeaways
- The countersink angle must match the fastener’s head angle (82° for ANSI, 90° for ISO metric). An 8° mismatch prevents proper seating and can damage thin material.
- Depth tolerance matters more than you think: ±0.10 mm is fine for cosmetic panels, but structural joints demand ±0.025 mm to maintain consistent preload.
- Drill and countersink in the same setup whenever possible. Separating the operations risks misalignment, with a target of ≤0.05 mm Total Indicator Runout (TIR) for precision work.
- A piloted or multi-flute countersink bit (like the Bosch PRO Steel HSS) produces a cleaner finish with less chatter, which reduces preload scatter in critical assemblies.
- Countersinks are for flat-head screws; counterbores are for socket-head caps. They are different tools for different fasteners.
The Three Dimensions That Define Every Countersink
A countersink isn’t just a chamfer. It’s a precision conical hole defined by a trio of numbers. Miss one, and the screw won’t seat. Get all three right, and the joint works as designed.
First, the countersink diameter. This is the major diameter at the material’s surface. It must be larger than the screw head’s diameter to allow the head to sink fully. If it’s too small, the head sits proud. Too large, and you’ve weakened the material for no benefit.
Second, the countersink angle. This is the included angle of the cone, and it is not a suggestion. It is dictated by the fastener standard.
For precision assemblies, the angle tolerance is typically ±0.5° or tighter. Tool wear can push this tolerance, so inspect bits regularly.
Third, the pilot hole diameter. This is the straight hole the screw shank passes through. Its size is determined by the screw’s major diameter and the desired fit, clearance, normal, or tight. The pilot guides the countersink bit and ensures the screw aligns with the cone.
What a Countersink Bit Actually Does (And What It Doesn’t)
The job seems simple: make a cone. But the physics of that cut determine whether your project looks professional or fails early.
A proper countersink creates a continuous, smooth bearing surface for the screw head. When the screw is torqued, the force is distributed evenly around the cone. This prevents stress concentration, reduces the chance of the material cracking under the head, and helps the fastener maintain its clamping force, its preload, under vibration.
Where this goes sideways: Using an 82° ANSI tool on a drawing that calls for 90° ISO fasteners. The screw contacts only the outer rim of the cone, creating a wedging force that can “dish” thin aluminum sheet. We see this specific 8° mismatch cause rework on hundreds of aerospace panels annually.
A countersink does not provide a flat landing for a socket-head cap screw. That’s a counterbore, a cylindrical recess made with a different tool. Confusing the two is a fast track to a loose joint. For a clean, flat-bottomed hole in wood, you’d reach for a Forstner bit.
The surface finish inside the cone matters more than most DIY guides mention. A rough surface (high Ra value) increases friction variably under the screw head. This scatters the relationship between the torque you apply with a driver and the actual preload achieved on the joint. For structural work, aim for a finish of Ra 1.6 µm or better.
82°, 90°, or 100°? Matching the Angle to Your Fastener
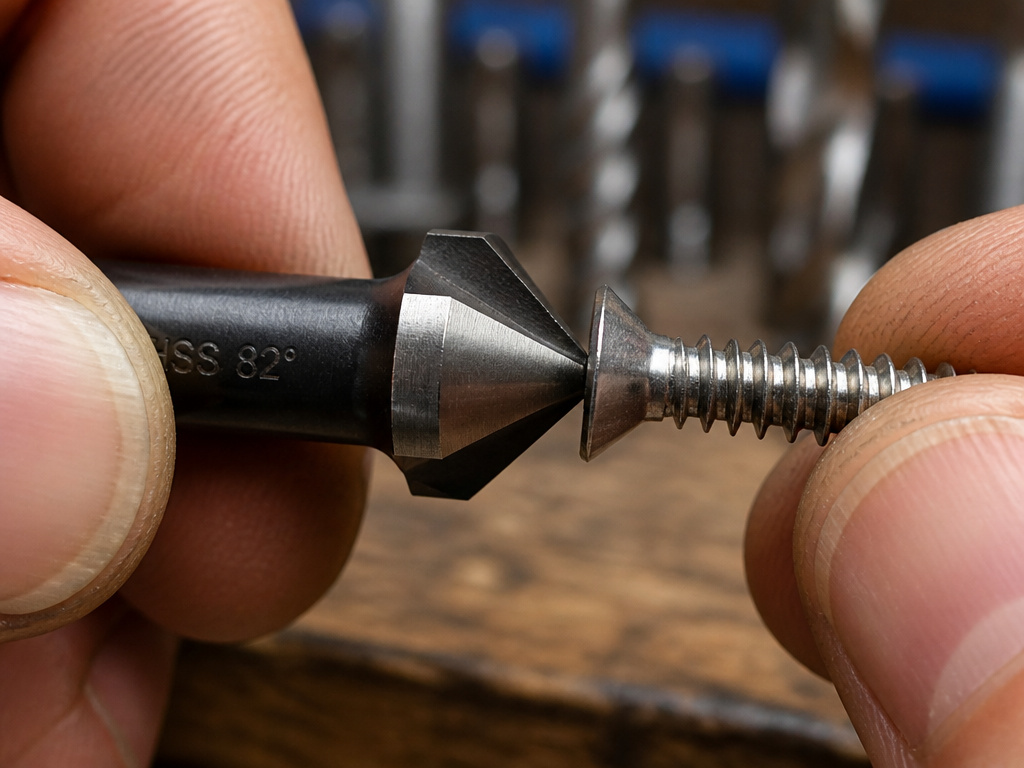 This is the single most common mistake, and it’s entirely preventable. The angle on your bit must be the angle on your screw.
82° is the standard included angle for flat-head screws under the ANSI/ASME B18.6.3 standard for imperial (inch) fasteners. Most wood screws you find at a hardware store in the US have an 82° head.
90° is the standard under ISO 10642 for metric flat-head screws. This is the global standard. If you’re working with M4, M5, or M8 metric hardware, you need a 90° countersink. The ISO 4205:2016 standard for countersinks details the specifications for these 90° tools.
100° is a specialty angle, often found in aerospace applications for rivets and certain high-strength fasteners.
| Angle | Fastener Standard | Common Use Case | Risk if Mixed |
|---|---|---|---|
| 82° | ANSI/ASME B18.6.3 | Imperial wood & machine screws | Screw sits proud, can dish thin material |
| 90° | ISO 10642 | Metric machine screws, global hardware | Concentrated contact at pilot hole, reduced preload |
| 100° | NASM / Aerospace | Aircraft rivets, specialty fasteners | Joint not to spec, potential failure |
The consequence of mismatch is mechanical, not just visual. A 90° screw in an 82° hole bears on the outer edge. The wedging action tries to enlarge the countersink. In thin sheet metal, this creates a visible dimple. In a structural joint, it slashes the clamping force the fastener can sustain.
How to Choose the Right Countersink Bit for the Job
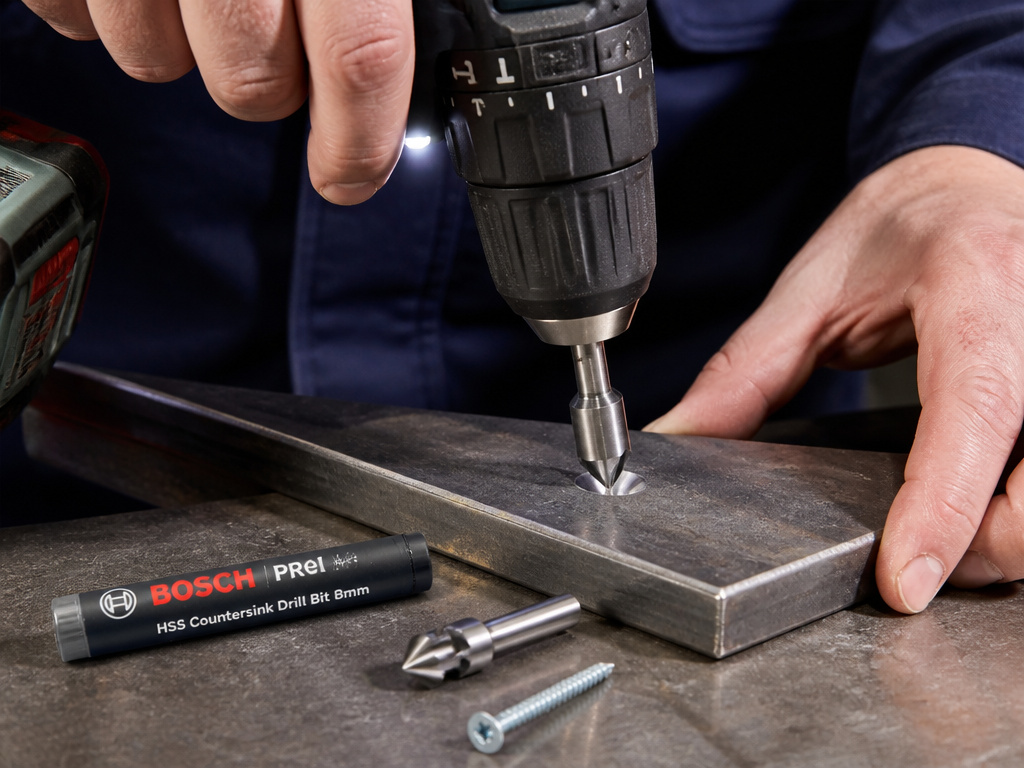 You don’t just pick a countersink for metal or wood. You pick it for the fastener, the precision needed, and your tool’s chuck.
Material dictates the cutting edges. For aluminum and soft metals, a bit with three flutes is common. For steel, you need a harder material and often more cutting edges to share the load and dissipate heat. The Bosch PRO Steel HSS Countersink Drill Bit uses five 90° cutting edges specifically for deburring and countersinking in steel. Its high-speed steel construction resists the heat generated when cutting harder materials.
Shank size must match your tool. Most professional-grade countersinks, like the Bosch PRO series, come with an 8mm cylindrical shank for a solid grip in a drill chuck. Smaller bits for M3 fasteners might have a 6mm shank. Don’t try to use a bit with a shank too small for your chuck; the runout will ruin your concentricity.
Piloted vs. Non-piloted is a critical choice. A piloted countersink has a solid guide that rides in the pre-drilled pilot hole. This guarantees the cone is centered on the hole, which is non-negotiable for precision work. A non-piloted bit is cheaper and faster for rough work, but you’re relying on your eye and drill control to keep it centered.
For general shop work, a set covering multiple angles and sizes is the starting point. For a specific, repetitive task, like installing M6 flat-head screws in a steel frame, buy the single, high-quality piloted bit that matches the fastener exactly. This is part of a smart drill bit selection guide.
The Step-by-Step Countersinking Process
The goal is a concentric, correctly sized cone. Rushing it guarantees a poor result.
- Drill the pilot hole first. Use a standard jobber drill bit to create the hole for the screw shank. Drill to the full depth the screw requires. This hole guides the next steps.
- Select the correct countersink bit. Verify the angle matches your fastener. Check that the bit’s maximum diameter is sufficient for the screw head.
- Secure the workpiece. Any movement during the countersinking operation will create an oval or uneven cone. Use clamps.
- Drill and countersink in the same setup if possible. The best practice is to use a combination drill-countersink bit, or to mount a piloted countersink in the drill immediately after drilling the pilot, without moving the workpiece. This ensures alignment.
- Apply steady, light pressure. Let the cutting edges do the work. Forcing it creates chatter, poor surface finish, and accelerates tool wear. In steel, use a cutting fluid or oil to manage heat.
- Check depth frequently. The screw head should sit flush. A simple way to test is to place the screw in the hole. The top of the head should be even with or slightly below the surface.
- Deburr the edge. The countersinking process often leaves a slight burr at the intersection of the cone and the surface. A quick pass with a deburring tool or even a larger countersink bit at a very light feed will clean this up.
Common mistake: Countersinking before the pilot hole is drilled to full depth. The pilot portion of a combination bit can’t cut effectively if it’s trying to enlarge an existing hole, leading to wandering and an off-center countersink.
Following a disciplined using a drill bit process here pays off. The alternative is a screw that sits crooked, doesn’t clamp properly, and makes the whole assembly look amateurish.
Countersink vs. Counterbore vs. Other Drill Bits
Drill bits are designed for specific tasks. Using the wrong one is like using a screwdriver as a chisel, it might work once, badly.
A countersink (⌵) makes a conical recess for a flat-head screw. A counterbore (⌴) makes a cylindrical, flat-bottomed recess for a socket-head cap screw or to house a nut. They are not interchangeable. Your drill index should have both.
How does a countersink compare to other common bits? A brad point bit is for drilling clean, accurate holes in wood, using a sharp center spur to prevent wandering. A split point bit is for metal, with a self-centering tip that reduces “walking” on curved surfaces. A left-handed drill bit turns counter-clockwise and is primarily used for removing broken fasteners.
Each has a distinct drill bit purpose. The countersink’s purpose is singular: to prepare a proper seat for a conical screw head. It doesn’t drill the primary hole, and it doesn’t finish the job of a screwdriver. It enables it.
Frequently Asked Questions
Can I use a regular drill bit as a countersink?
No. A twist drill bit has a pointed tip and cutting edges designed to shear material forward to create a cylindrical hole. A countersink bit has cutting edges angled to shear material sideways to create a cone. Using a twist drill will produce a ragged, uneven chamfer that won’t properly seat a screw head.
How do I know what size countersink I need?
You need two measurements. First, the screw head’s diameter. Your countersink’s major diameter should be 0.5-1mm larger than this. Second, the screw’s head angle (82°, 90°, etc.). Match your bit to this angle. The pilot hole size is determined by the screw shank diameter and desired fit.
Why is my countersink bit chattering and making a rough hole?
Chatter is caused by instability. The most common causes are: a loose drill chuck, a bit with a shank too small for the chuck, excessive overhang of the bit from the chuck, or trying to feed the bit too fast. Slow your drill speed, apply firm and steady pressure, and ensure everything is tightly secured.
Do I need a special countersink for stainless steel or aluminum?
Yes. For stainless steel, you need a bit made of cobalt (HSCO) or carbide-tipped material to withstand the work-hardening and heat. For aluminum, a high-speed steel (HSS) bit with sharp, polished flutes is fine, but you must use a lubricant to prevent material from gumming up the cutting edges.
What’s the difference between deburring and countersinking?
Deburring is the removal of the sharp, often ragged edge (the burr) left after drilling or cutting. Countersinking is the creation of a conical recess. Many tools, like the Bosch PRO Steel HSS, are designed to do both in one action: they can chamfer the edge of a hole (deburr) and also cut a deeper cone for a screw (countersink).
The Bottom Line
A countersink drill bit is about fit and force distribution, not just making screws disappear. The correct angle, 82°, 90°, or 100°, is mandated by the fastener standard, not your tool collection. Mismatch that by 8 degrees and the joint is compromised before you even tighten it.
For most home workshops, a basic 82° countersink bit set covers the majority of wood screws and general purpose work. When you step into metal fabrication or metric hardware, you need the 90° tools specified by the ISO 15065:2005 countersink standard. The Bosch PRO Steel HSS is the benchmark for that job in steel.
Remember the sequence: drill the pilot hole, then countersink, ideally without moving the workpiece. That guarantees alignment. Your goal is a smooth, concentric cone that lets the screw head bear fully. That’s the difference between a joint that stays tight and one that works loose after the first vibration.
