What Is a Dual Bevel Miter Saw? The Expert’s Guide
This post contains affiliate links. As an Amazon Associate, we earn from qualifying purchases.
A dual bevel miter saw is a compound miter saw where the saw head tilts sideways both left and right. This allows you to make bevel cuts in either direction without flipping the workpiece over. The primary advantage is speed and consistency on projects requiring matching left and right bevels, like crown molding or multi-sided furniture.
A dual bevel miter saw is a compound miter saw where the saw head tilts sideways both left and right. This allows you to make bevel cuts in either direction without flipping the workpiece over. The primary advantage is speed and consistency on projects requiring matching left and right bevels, like crown molding or multi-sided furniture.
Most people think this tool is only for pros installing fancy trim. That’s part of it. But the real time-saver shows up on any project where you have to cut the same angle mirrored on opposite ends of a board. Flipping a 12-foot piece of oak trim twice to find the mark again, all while keeping the good face up, eats an hour you don’t have. A dual bevel saw eliminates that dance.
This guide breaks down exactly how it works, when the extra cost is justified, and the specific projects where it pays for itself in saved time and fewer mistakes. We’ll also cover how to spot one, key features to compare, and honest advice on whether you need it or if a single bevel miter saw will do.
Key Takeaways
- A dual bevel miter saw tilts left and right, letting you cut mirrored bevels without flipping the board. A single bevel model only tilts one way, usually left.
- The biggest benefit is efficiency on complex trim and multi-angle joinery. It’s not about making impossible cuts, but making difficult cuts simple and repeatable.
- Look for the V-shaped notch cut into the fence. This is the visual giveaway that the blade can tilt deeply into the fence on either side.
- For a DIYer doing one crown molding job, a single bevel is fine. If you build furniture, picture frames, or do regular trim work, the dual bevel’s convenience becomes a necessity.
- These saws have more moving parts. Check the bevel detents and locking mechanisms for play before you buy, a wobbly pivot point ruins accuracy fast.
How Does a Dual Bevel Miter Saw Work?
The mechanism is an evolution of the compound miter saw. A standard miter saw rotates on a horizontal plane to cut angles (miters). A compound saw adds the ability to tilt the blade left or right to cut bevels. A dual bevel compound saw takes the next step, allowing that tilt in both directions.
A dual bevel miter saw operates on two axes. The base rotates for miter angles (typically 0-52 degrees left and right). The saw head pivots on a horizontal arm for bevel angles (typically 0-45 degrees or 0-48 degrees). The dual-bevel gear train and pivot assembly are mounted centrally, permitting tilt to both the left and right sides of the fence without repositioning the workpiece.
Here’s the sequence for a typical cut, like one side of a picture frame with a beveled edge. You set your miter angle, say, 45 degrees to the left. Then you set your bevel angle, say, 15 degrees to the left.
You make the cut. For the matching piece, you keep the miter at 45 degrees left, but now you change the bevel to 15 degrees to the right. The workpiece never moves. The saw does all the work.
If you tried this with a single bevel saw, you’d have to flip the entire board end-for-end after the first cut. You’d also have to mark the new cut line on what was the back of the board. It’s doable. It’s also where small measurement errors turn into visible gaps.
Dual Bevel vs. Single Bevel: What’s the Real Difference?
This is where most buying decisions are made. The functional difference is simple, but the practical impact on your workflow is huge.
A single bevel miter saw tilts in one direction only. For 90% of models, that’s to the left. You can still cut a right-hand bevel, but you must physically flip your workpiece over so the “good” face is down, then tilt the blade to the left again. This requires re-measuring, re-marking, and a mental flip of your angle settings. It’s a recipe for frustration on long stock.
A dual bevel saw removes that mental and physical gymnastics. The saw head tilts both ways. The fence stays put. Your workpiece stays put. You just change a setting.
| Feature | Single Bevel Miter Saw | Dual Bevel Miter Saw |
|---|---|---|
| Bevel Direction | Tilts left only (typically) | Tilts both left and right |
| Workpiece Handling | Must flip board for opposite bevel | Board stays in position |
| Best For | Occasional DIY, straight cuts, simple framing | Repetitive trim work, complex joinery, furniture |
| Cost | Lower entry price | Premium, often 1.5x to 2x the cost |
| Setup Speed | Slower for mirrored cuts | Faster, more consistent setups |
| Common User | Homeowner, beginner woodworker | Serious DIYer, trim carpenter, furniture maker |
The truth is, a skilled user with a single bevel saw can produce any cut a dual bevel saw can. I’ve cut miles of crown molding on a single bevel DeWalt. It works. You also spend twice as long setting up each piece, and your error rate climbs after the third coffee. The dual bevel is about efficiency and reducing variables, not capability.
How to Identify a Dual Bevel Miter Saw
You can spot one from across the store. Don’t look at the price tag first. Look at the fence.
The fence is the vertical surface at the back of the table that your workpiece rests against. On a dual bevel saw, this fence has a pronounced V-shaped or U-shaped notch cut right out of the center of it.
That notch exists for one reason: to provide clearance for the blade when it’s tilted at a steep angle toward the fence. Since the blade can tilt to the right into the fence, the fence material has to be removed so the blade teeth don’t hit it. A single bevel saw only tilts away from the fence (to the left on most models), so its fence is usually a solid, uninterrupted piece of metal or plastic.
Other clues are dual bevel scales (angles marked on both the left and right side of the saw’s arm) and a bevel lock lever that doesn’t seem to favor one side. If the bevel adjustment feels identical whether you’re pushing the head left or right, you’re holding a dual bevel.
When Do You Actually Need a Dual Bevel Miter Saw?
The sales pitch always shows crown molding. That’s valid. But if that’s the only reason, you might rent one. Where it becomes indispensable is in a busy shop or on any project with symmetrical, multi-angle parts.
- Complex Crown Molding & Trim: This is the classic. Cutting crown nested against the fence requires compound angles. Having dual bevel lets you cut left and right inside corners without moving the long, awkward molding stock.
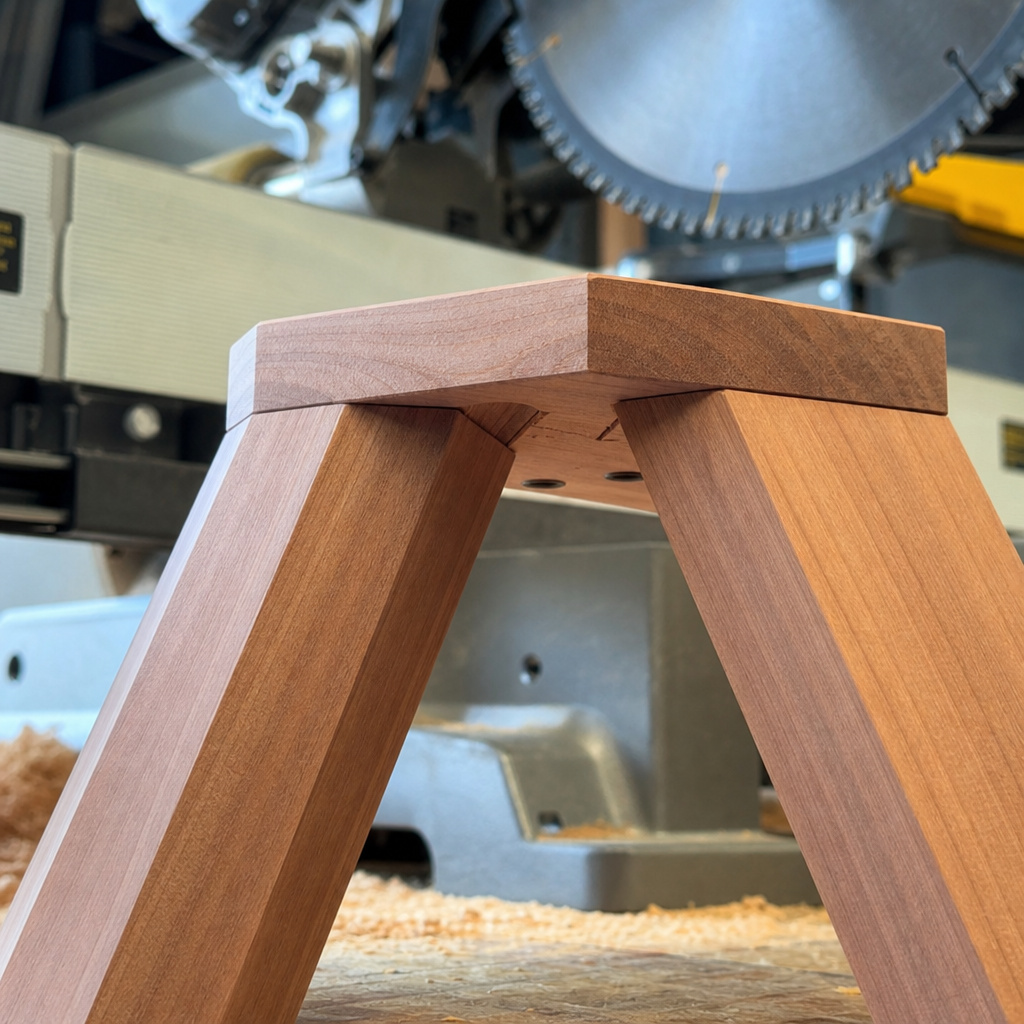
- Furniture with Splayed Legs: Think of a chair, stool, or table where the legs angle outwards. Each leg requires a matching left and right bevel at the top where it meets the apron. Cutting eight perfect, mirrored compound angles is trivial with a dual bevel. With a single bevel, it’s a day of flipping, swearing, and test-fitting.
- Polygonal Projects & Picture Frames: Hexagon planters, octagon gazebo brackets, or picture frames with beveled edges. Any project where you need multiple identical pieces with mirrored bevels benefits massively.
- Production Work: If you’re building more than one of something, the time saved on setup compounds. What takes 10 minutes per piece on a single bevel might take 3 minutes on a dual bevel. Over ten pieces, you’ve saved over an hour.
I built a set of four Adirondack chairs a few summers back. The arm supports needed a 12-degree bevel left on one end and a 12-degree bevel right on the other. On my old single bevel saw, I messed up two pieces before I got a system. The third chair was built after I borrowed a friend’s DeWalt DWS780. I finished the arms for two chairs in less time than it took me to screw up the first one. The difference wasn’t skill. It was not having to reset my brain and my clamps every single cut.
If your work is mostly straight crosscuts, 90-degree miters for baseboard, or the occasional simple picture frame, a standard miter saw or single bevel is perfectly adequate. The dual bevel shines when “occasional” becomes “frequent.”
Key Features to Consider When Buying
Once you know you want a dual bevel, don’t just buy the biggest one. Match the specs to your actual work.
- Blade Size (10-inch vs. 12-inch): A 10-inch blade is lighter, cheaper, and cuts most dimensional lumber and trim. A 12-inch blade has greater crosscut capacity (like a 6×6 post) and can often cut wider crown molding nested flat. Most DIYers are served well by a 10-inch. Contractors cutting large material lean toward 12-inch.
- Sliding vs. Non-Sliding: This is separate from the bevel function. A sliding compound miter saw has rails that let the head move forward and back, increasing cut width capacity. A non-sliding (or “chop”) saw is more compact and often has less blade deflection. For cutting wide boards (like a 1×12), you need a slider. For most trim and lumber under 2×8, a non-slider is fine. Consider your space, sliders need significant depth behind the fence.
- Bevel Range: Most tilt to at least 45 degrees. Some go to 48 or even 52 degrees. For standard trim and furniture, 45 is plenty. If you work with steep angles, check the max.
- Positive Stops & Detents: These are the click stops at common angles (0, 15, 22.5, 31.6, 45 degrees). Good saws have crisp, positive detents that lock the angle in precisely. Test this in the store. A mushy detent means sloppy cuts.
- Fence System: Look for a sturdy, solid fence, often with extendable or adjustable wings to support long workpieces. The V-notch should be cleanly machined, not just stamped out.
Use this as a quick reference when comparing models:
| Specification | Why It Matters | Good Target for DIY/Pro |
|---|---|---|
| Motor Amps | Determines cutting power, especially in hardwoods. | 15 amps |
| Bevel Range | Maximum tilt angle for steep cuts. | 0-45° left & right |
| Miter Range | How far the base rotates for angled cuts. | 0-52° left & right |
| Positive Stops | Common angles that lock in with a click. | 0°, 15°, 22.5°, 31.6°, 45° (left & right) |
| Dust Collection | Port size and design for connecting a vacuum. | 2.5-inch port with decent shrouding |
Pros and Cons: The Honest Breakdown
Let’s cut through the marketing.
Pros:
- Massive Time Savings: The core advantage. No flipping, re-measuring, or re-clamping for mirrored bevels.
- Improved Accuracy: Fewer workpiece manipulations mean fewer chances to introduce error. Your left and right cuts are guaranteed to be true opposites.
- Easier Complex Projects: Makes intimidating tasks like crown molding or compound-angled furniture much more approachable.
- Professional-Grade Workflow: If you aspire to do higher-end work, this is the tool that enables it.
Cons:
- Higher Cost: You pay for the added mechanism. Expect a significant premium over a comparable single bevel saw.
- Increased Weight & Complexity: More gears and pivots mean more to go wrong and a heavier tool to lug around.
- Potential for More Play: A dual-bevel pivot has to be impeccably machined. A cheap model can develop slop in the bevel tilt, ruining precision. This isn’t a place to buy the absolute cheapest option.
- Overkill for Simple Tasks: If you mostly cut 2x4s to length, this is a Ferrari to haul mulch.
Before you start: Always disconnect power before changing blades or making adjustments. The blade coast-down time is longer than you think, wait until it stops completely. Never remove the blade guard, and always use clamps for pieces shorter than 12 inches. A kickback from a small offcut can send it toward your hand at surprising speed.
Maintenance and Calibration Tips
That dual-bevel pivot needs attention. It’s not set-and-forget.
- Check for Bevel Play: Every few months, or if your cuts seem off, test for slop. Unplug the saw. Tilt the head to 45 degrees and lock it. Try to wiggle the head up and down. Any noticeable movement means the pivot bolts or the bevel gear mechanism needs tightening. Consult your manual, overtightening can bind the mechanism.
- Clean the Bevel Tracks: Sawdust and pitch build up in the channels where the bevel mechanism slides. This causes stiff movement and inaccurate angles. Use a dry brush or compressed air to clean these tracks regularly. A light spray of dry Teflon lubricant on the rails (not the gears) helps.
- Square the Blade: This is critical for any miter saw, but especially for dual bevel models where error compounds. You need to check two things: that the blade is 90 degrees to the table (vertical squareness) and that it’s 90 degrees to the fence when at 0 miter and 0 bevel (horizontal squareness). Use a reliable combination square, not the built-in stops. Adjust using the screws near the bevel and miter pivots.
- Lubricate the Detent Balls: The little spring-loaded balls that click into the detent plates can get gummy. A tiny drop of light oil (3-in-1 oil) on each one keeps them snapping crisply.
Your first project after a tune-up should be a test cut on scrap. Make a left 45-degree bevel cut, then a right 45-degree bevel cut on the same piece. Hold the two beveled faces together. They should form a perfect 90-degree angle with no light showing through the seam. If there’s a gap, your saw isn’t calibrated.
Frequently Asked Questions
Can a single bevel miter saw cut crown molding?
Yes, absolutely. The YouTube transcript in the research shows a pro doing exactly that with a single bevel saw. It requires more steps, you cut one side of the molding with the bottom against the fence, then for the other side you flip the molding so the top is against the fence, all while adjusting angles. It’s less efficient and more prone to error, but it’s entirely possible.
Is a dual bevel miter saw worth it for a beginner?
It depends on your ambition and budget. If you’re sure you’ll stick with woodworking and tackle complex projects, buying a dual bevel upfront can be a good investment, it’s one less tool to upgrade later. If you’re just starting and unsure, a quality single bevel saw is a wiser, lower-risk purchase. You can always add a dual bevel later when your skills demand it.
What are some good dual bevel miter saw models?
Brands like DeWalt (DWS780), Bosch (GCM12SD), and Makita (LS1019L) are benchmarks in the contractor category, known for accuracy and durability. For the DIYer on a budget, models from Ryobi (TSS120R) or Metabo HPT offer dual bevel capability at a more accessible price point. The key is to feel the bevel action in person, it should be smooth and lock solidly.
Do I need a 12-inch dual bevel sliding miter saw?
Only if you regularly cut material wider than about 8 inches. The 12-inch blade offers greater diameter, and the sliding mechanism adds reach. For trim, framing, and most furniture parts, a 10-inch non-sliding dual bevel is more than sufficient, lighter, and takes up less space. Use our guide on miter saw size to decide.
How do I make a simple bevel cut?
For a basic miter saw operation, set your miter angle to 0 degrees. Then, loosen the bevel lock, tilt the saw head to your desired angle (say, 30 degrees left), and re-tighten the lock. Position your workpiece firmly against the fence, start the saw, and lower the blade smoothly. The cut edge will be angled.
The Bottom Line
A dual bevel miter saw isn’t a magic wand. It won’t make you a better woodworker overnight. What it does is remove a major source of friction and error from complex projects. It trades money for time and consistency.
For the contractor running crown molding in a whole house, that trade is a no-brainer. For the serious DIYer building a set of dining chairs, it’s a justifiable upgrade that pays off in satisfaction. For the homeowner who needs to install baseboard once every five years, it’s likely overkill.
Look at the projects you want to complete in the next two years. If that list includes anything with matching compound angles, the convenience factor tips the scales. If your cuts are mostly straight or simple miters, put the money toward a better blade or a more robust stand. The right tool is the one that matches the work you actually do, not the work you imagine doing someday.
