What Size Miter Saw Do You Need? Blade Size vs. Project
This post contains affiliate links. As an Amazon Associate, we earn from qualifying purchases.
The right miter saw size is the blade diameter that matches the width and thickness of the wood you cut most often. A 10-inch blade handles 2×6 lumber and standard trim. A 12-inch blade cuts 2x8s, 4×4 posts, and wide crown molding in one pass. A sliding mechanism adds width capacity without needing a bigger blade.
Most people buy a saw that’s either too small for their ambitions or too large for their garage. They see a 12-inch sliding compound miter saw on sale, bring it home, and realize it weighs seventy pounds and needs a dedicated stand.
Or they buy a compact 7.25-inch model for picture frames, then try to cut a 2×8 for a deck bench and can’t get through it. The size question isn’t about inches, it’s about matching the tool’s physical limits to your project list and workspace.
This guide walks through blade diameters, motor specs, and the sliding versus non-sliding trade-off. It also covers what happens when you pick wrong, how to maintain the saw you buy, and which features are worth the extra cash.
Key Takeaways
- A 10-inch miter saw is the DIY sweet spot for trim, framing, and general carpentry, cutting a 2×6 at 90 degrees. Go 12-inch if you regularly work with 4×4 posts or crown molding wider than 5.5 inches.
- Sliding saws add crosscut width capacity without a larger blade. They are heavier, more expensive, and require more rear clearance. For cutting wide deck boards or sheet goods, sliding is non-negotiable.
- Motor amperage (12-15 amps for corded) dictates cutting power through dense material. Cordless brushless motors now rival corded performance but check the battery system’s voltage and amp-hour rating.
- The stock blade is for general construction pine. Swap it immediately for a dedicated finish blade (80+ teeth for a 12-inch) for hardwoods and trim, and a lower-tooth framing blade for pressure-treated lumber.
- Dust collection is almost useless with just the bag. Connect the port to a shop vacuum with at least a 5-gallon capacity. Sawdust will coat everything within ten feet in two hours of work otherwise.
What Size Miter Saw Blade Cuts What?
Blade size dictates the maximum depth and width of a single cut. It’s a hard limit. A 10-inch blade cannot physically reach through a 4×4 post at 90 degrees, you’d need two cuts, flipping the post, and the results are rarely square.
A 10-inch non-sliding compound miter saw typically crosscuts a board up to 5.5 inches wide at 90 degrees. A 12-inch non-sliding saw increases that to about 7.5 inches. Adding a sliding mechanism allows the saw head to travel forward, enabling a 12-inch sliding saw to crosscut a 2×12 (11.25 inches actual) in a single pass.
Here’s the real-world translation. If your project list includes building a deck with 2×6 framing lumber, a 10-inch saw is sufficient. If you’re installing 3.5-inch baseboard or quarter-round, a 10-inch is overkill. But the moment you need to cut a 4×4 post for a pergola or 6-inch colonial crown molding, the 10-inch saw fails. The 12-inch blade has the diameter to reach through the thicker material.
| Blade Size | Max Crosscut (90°) Non-Sliding | Max Crosscut (90°) Sliding | Cuts 4×4 at 90°? | Best For |
|---|---|---|---|---|
| 7.25-inch | ~3.5 inches | Not typically available | No | Small trim, picture frames, craft projects |
| 10-inch | 5.5 – 6 inches | Up to 12 inches | No (requires 2 cuts) | DIY framing, standard baseboard, most common trim |
| 12-inch | 7.5 – 8 inches | Up to 16 inches | Yes | Deck posts, wide crown molding, 2×8+ lumber |
| 15-inch | ~10 inches | Up to 18+ inches | Yes, easily | Timber framing, large dimensional lumber |
The sliding feature is a force multiplier for width. It doesn’t help with depth of cut, that’s still the blade radius. So a 10-inch sliding saw can cut a board as wide as a 12-inch non-sliding saw, but it still can’t cut through a 4×4.
This is where people get confused. Sliding equals width. Blade diameter equals depth.
The Corded vs. Cordless Miter Saw Debate
Corded saws plug in. They draw 12 to 15 amps and deliver consistent, unlimited power. They’re the default for a stationary workshop. Cordless saws run on battery packs, usually 18V, 20V Max, or 40V platforms. The performance gap has nearly closed, but the trade-offs are real.
A corded DeWalt DWS780 or Makita LS1019L will pull through wet pressure-treated lumber all day without a hiccup. A cordless model from the same brand, like the DeWalt DCS779B or Makita XSL06PT, might bog down on the third consecutive cut through a 4×4 if the battery is at half charge. Brushless motors help, but physics still favors the direct wall outlet.
The cordless advantage is portability and setup speed. There’s no cord to manage, no outlet to find. For a contractor moving between job sites or a homeowner working in a driveway, that’s huge.
But you’re buying into a battery ecosystem. If you already own DeWalt 20V Max or Makita 18V LXT tools, adding the cordless miter saw makes sense. Starting from zero? The cost of two high-capacity batteries and a charger can double the initial outlay.
My first cordless saw was a 12V model, a mistake I made because the price was right. It struggled with anything thicker than a 1×4. Pine was fine.
Oak stopped it cold. I now keep a corded 10-inch Hitachi C10FCE2 in the garage for heavy work and a cordless 18V for quick trim jobs outside. That split works.
Safety First: What Most Guides Gloss Over
Miter saws are deceptively safe-looking. The blade guard covers the teeth. The electric brake stops the blade fast. It feels contained. Then you cut a piece of PVC trim or a thin piece of molding.
Before you start: The blade guard can catch on narrow workpieces and lift, exposing the spinning blade. Always hold down narrow stock with a clamp, never your hand. Wet pressure-treated lumber can kick back violently if pinched. And the dust port, if not connected to a vacuum, will fill your lungs and shop with fine particulate in under an hour, wear a respirator.
The electric brake is brilliant, but don’t wait for the blade to stop completely before lifting the saw head. That habit leaves a witness mark on your workpiece. Raise the head just as the blade stops spinning, about one second after you release the trigger.
The sawdust bag is a joke. It fills up after twenty cuts and then just spews dust into the air. Connect the 2.5-inch port directly to a shop vacuum. Your sinuses and shop floor will thank you.
Sliding vs. Non-Sliding: The Space and Weight Trade-Off

All sliding miter saws need extra space behind the fence. The saw head slides back on rails. If your workshop bench is against a wall, you need to pull the saw forward by at least the length of those rails, often 12 to 18 inches. A non-sliding saw can sit flush against the wall. That rear clearance requirement is a deal-breaker in tight garages.
Sliding mechanisms also add weight. A typical 10-inch non-sliding saw weighs around 35 pounds. A 10-inch sliding model can hit 50 pounds.
A 12-inch sliding compound miter saw, like the Bosch CM10GD, weighs over 60 pounds. That matters if you’re moving it from a shelf to a stand regularly. The mechanism itself introduces another point of potential play or wear over time. A well-made sliding saw stays accurate for years, but a cheap one will develop slop in the rails, ruining precision.
So when do you need sliding? When your material is wider than the blade’s non-sliding capacity. Cutting 10-inch wide shelving boards?
You need a slider. Building a tabletop from glued panels? Slider. If 90% of your cuts are on lumber 6 inches wide or less, save the money, weight, and space.
Single vs. Dual Bevel: A Time vs. Money Calculation
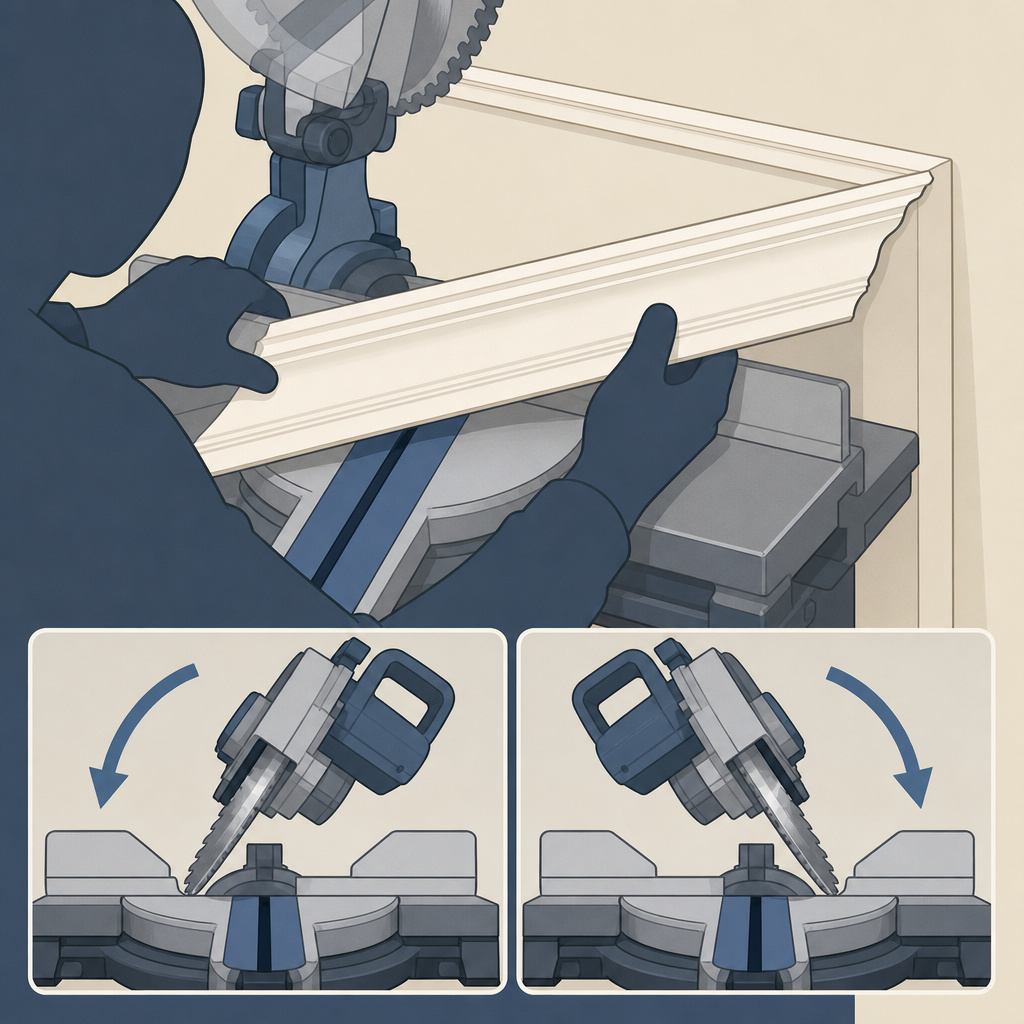
A miter saw cuts angles across the face of the board. A compound miter saw adds the ability to tilt the blade left or right to cut a bevel through the thickness. A dual bevel compound miter saw tilts both left and right.
If you only ever cut straight 90-degree crosscuts or simple miters for picture frames, a single-bevel is fine. The moment you install crown molding or baseboard where you need a compound cut on both ends of a piece, a dual-bevel saves you massive time. With a single-bevel saw, you must cut the first end, then flip the entire long piece of molding over to cut the matching opposite bevel.
It’s awkward, and your measurements have to be perfect. With a dual-bevel, you set the angle, cut one end, swing the blade to the opposite bevel, and cut the other end without moving the workpiece. For frequent trim work, dual-bevel is worth every extra dollar.
I installed the trim in my entire house with a single-bevel saw. I swore I’d never do it again. The number of times I nicked a finished wall because I was wrestling a 12-foot piece of casing to flip it convinced me. My next saw was a dual-bevel.
Motor Power and Blade Teeth: The Cutting Performance Engine
Motor power is measured in amps for corded tools (e.g., 13 amps) or volts for cordless (e.g., 20V). More amps means more torque to maintain blade speed under load. For corded, aim for at least 12 amps. For cordless, 18V is the minimum for a 7.25-inch saw, but you really want a 20V Max or 36V system for a 10-inch or 12-inch model.
Blade teeth per inch (TPI) or the total tooth count determines cut speed and finish. A 12-inch blade with 24 teeth is for framing, it cuts fast but leaves a ragged edge. A blade with 80 teeth is for finish carpentry, it cuts slower but leaves a surface smooth enough for stain-grade work. The stock blade that comes with the saw is usually a 40-tooth general-purpose blade. It’s mediocre at everything.
- For rough construction: Use a 24-tooth framing blade. It chews through pressure-treated lumber and plywood.
- For trim and hardwoods: Use an 80-tooth or higher fine-finish blade. Brands like Freud and Diablo make excellent ones.
- For plastics or aluminum: Use a specialized non-ferrous metal or plastic-cutting blade with triple-chip grind teeth.
Swapping blades takes two minutes with the included wrench. Not doing it means burning through hardwoods or leaving tear-out on expensive oak. I keep three blades for my 12-inch saw: one for framing, one for finish, one for composites. The finish blade never touches pressure-treated wood.
What Most People Get Wrong About Dust Collection
The dust bag that comes with the saw captures about 30% of the dust on a good day. The rest goes into the air and onto every surface in your workspace. Sawdust is more than a mess; it’s a respiratory irritant and a fire hazard near electrical equipment.
Connect the saw’s dust port to a shop vacuum with a hose adapter. Even a basic 5-gallon wet/dry vac captures 80% of the dust. For a semi-permanent setup, a cyclone separator between the saw and the vac keeps the filter from clogging instantly. If you’re doing a lot of MDF or melamine, this is non-negotiable, that dust is especially fine and pervasive.
After a long cutting session, blow out the saw’s interior with compressed air. Dust builds up around the motor brushes and in the sliding rails, causing premature wear. I learned this after my first saw’s motor started sounding strained. A $20 can of compressed air and five minutes every month keeps it running smoothly.
Step-by-Step: How to Choose Your Saw
Don’t start by looking at saws. Start with your wood.
- List your next three projects. Be specific. “Build a workbench” is vague. “Build a workbench from 2x4s and a 3/4-inch plywood top” gives you material sizes.
- Identify the widest, thickest piece. For the workbench, that’s the 2×4 (actually 1.5″ x 3.5″). For a deck, it might be a 2×8 (1.5″ x 7.25″). For crown molding, it’s the height and projection of the molding profile.
- Match the blade size. Use the capacity chart earlier. If your widest common cut is under 6 inches and you never cut 4x4s, a 10-inch saw fits. If you see 4x4s or 2x10s in your future, step up to 12-inch.
- Decide on sliding. If your widest board is under the non-sliding capacity of your chosen blade size, skip the slider. If it’s over, you need the sliding feature.
- Choose bevel type. If you’ll cut crown molding, wainscoting, or any trim that requires compound angles in both directions, get a dual-bevel. For straight cuts and basic miters, single-bevel is fine.
- Corded or cordless? If the saw will live in one place, go corded for power and price. If you need to move it around a lot or work off-grid, invest in a cordless model within your existing battery system.
- Budget for blades and a stand. The saw is just the start. Factor in a finish blade ($50-$80), a stand if you don’t have a workbench ($150-$300), and a dust collection hose.
This process seems obvious, but most people skip to step 6 and then try to justify their purchase. Write the list down. It prevents emotional buying.
Maintaining Your Miter Saw for Longevity
A miter saw is a simple machine, but neglect kills it faster than use. Here’s the ten-minute monthly routine that adds years.
- Blow it out. Use compressed air to remove sawdust from the motor vents, fence rails, and base. Accumulated dust traps moisture and causes rust.
- Check the belt. On belt-drive saws (many DeWalt and Makita models), inspect the drive belt for cracks or glazing. A worn belt slips under load and burns out the motor.
- Lubricate the slides. Wipe down the sliding rails and apply a dry lubricant like silicone spray. Do not use grease or oil, it attracts sawdust and gums up.
- Inspect the brushes. On brush-motor models, check the carbon brushes for wear. Most have windows or access ports. Replace them when they’re half worn.
- Verify squareness. Use a precision square to check that the blade is 90 degrees to the table and the fence is 90 degrees to the blade. Adjust if needed. This takes two minutes and ensures every cut is accurate.
I didn’t do this for the first year with my saw. The slide action got stiff, and my crosscuts started drifting. A $10 can of lubricant and a five-minute adjustment fixed it. Now it’s a calendar reminder.
Frequently Asked Questions
Can a 10-inch miter saw cut a 4×4?
Not in one pass. A 10-inch blade doesn’t have the depth to cut through a 4×4’s 3.5-inch thickness at 90 degrees. You must make a cut, flip the post 180 degrees, and cut again. This rarely results in a perfectly square end and is time-consuming. For regular 4×4 work, a 12-inch saw is the right tool.
What’s the difference between a miter saw and a chop saw?
chop saw is a simpler, more powerful tool designed almost exclusively for straight 90-degree cuts in metal using an abrasive blade. A miter saw is for wood (and sometimes plastic/light aluminum) and is built with precision miter and bevel adjustments for angled cuts. Don’t use a wood-cutting miter saw blade on a metal chop saw, the RPMs are wrong and it’s dangerous.
Is a laser guide worth the extra money?
For rough framing, no. For finish carpentry, yes. A laser projects a line where the blade will cut, which is invaluable for aligning precise trim cuts. Shadow line systems (an LED that casts the blade’s shadow) are even better, as they don’t require alignment. I find myself using the shadow line on my DeWalt for every trim cut now. I wouldn’t go back.
How often should I replace the blade?
Replace the blade when you see burn marks on the wood, hear the motor laboring, or notice excessive tear-out on the cut’s back side. For a DIYer using the saw weekly, a good carbide-tipped blade should last 1-2 years. Professionals might change blades every few months. Sharpening is an option for high-end blades, but often a new mid-range blade costs the same as sharpening.
Can I use a miter saw to cut metal or plastic?
Yes, with the correct blade. Use a fine-tooth carbide blade designed for non-ferrous metals (aluminum, copper) or plastics. Never use a standard wood-cutting blade, the material can melt, gum up the teeth, or shatter. Always secure the workpiece firmly and cut slowly to avoid grabbing. For any metal thicker than 1/8 inch, a dedicated metal-cutting bandsaw is a safer, better choice.
The Bottom Line
Stop looking at saws and start measuring your lumber. The biggest board you plan to cut regularly tells you the minimum blade size. The space behind your workbench tells you if you can fit a sliding saw. Your project list tells you if you need dual-bevel capability. Buy for your actual needs, not the fantasy workshop. A well-chosen 10-inch non-sliding saw will serve most homeowners for decades. A 12-inch sliding dual-bevel is the pro’s choice for versatility. Get the one that fits the wood you own, not the one that looks impressive in the store. Then buy a good blade, connect a vacuum, and make your first cut a test on scrap. You’ll know within minutes if you chose right.