
How to Use a Drain Snake with a Drill | The 500 RPM Rule
This post contains affiliate links. As an Amazon Associate, we earn from qualifying purchases.
To use a drain snake with a drill, you need a compatible tool, like a RIDGID POWER SPIN+ or General Spin-Thru, and a cordless drill set to low speed (under 500 RPM). Never use a corded drill. Position the tool within 4-6 inches of the drain, feed the cable in, and let the rotating head cut through the clog without forcing it.
That speed limit isn’t a suggestion. It’s the line between clearing a pipe and snapping a steel cable. The manuals from RIDGID and General Pipe Cleaners put that number in bold for a reason: go faster, and the cable whips, kinks, and can lash back.
What follows is the drill-down past the basic “attach and turn” advice. We’ll cover the two types of drain snake heads, the non-negotiable safety specs that keep your knuckles intact, and the step-by-step for the most common bump-feed models. By the end, you’ll know which drill to grab, what speed to set, and exactly how close to stand to the drain.
Key Takeaways
- Only use a battery-powered cordless drill set to its lowest speed setting, ideally under 500 RPM. Using a corded drill drastically increases the risk of electrical shock.
- Place the drain snake drum within 4 to 6 inches of the drain opening. Any farther and the unsupported cable can whip violently.
- Leather work gloves and safety glasses are mandatory. A rotating cable can grab loose cloth or skin in a fraction of a second.
- Let the boring head do the work. Forcing the cable is the fastest way to kink, snap, or jam it permanently.
- For pop-up style sink drains, you must often disconnect the lift rod under the sink to fully remove the stopper before inserting the snake.
The Critical Drill Choice: Cordless vs. Corded
This is the first decision, and for one major brand, it’s not a choice at all. The RIDGID POWER SPIN+ manual states it plainly: “Do not use with a corded drill. Operating with a corded drill increases the risk of electrical shock.”
Do not use with a corded drill. Operating with a corded drill increases the risk of electrical shock. – RIDGID POWER SPIN+ Operator’s Manual
The reason is water. You are working directly over a drain, often in a wet sink basin or on a damp floor. A corded drill introduces a continuous live electrical connection. A battery-powered cordless drill isolates you from that hazard.
For other tools, like the General Pipe Cleaners Spin-Thru, the instructions specify an electric drill that is “properly grounded or double-insulated.” Even then, the same warning applies: “Do not operate tool with electric drill if operator or tool is standing in water.”
Your drill must have a variable speed trigger or a low-speed setting. You are not drilling; you are driving a flexible cable. The target speed is under 500 RPM. Most cordless drills have a high/low gear selector. Set it to low (usually numbered ‘1’ on the collar). If your drill has a single speed, do not use it for this job.
The chuck size is almost always 3/8-inch. The spindle on tools like the General D-25 Handy is designed to slide directly into a standard 3/8″ drill chuck. Tighten it securely.
| Drill Type | Recommended? | Key Requirement | Risk If Ignored |
|---|---|---|---|
| Cordless Drill | Yes, preferred. | Set to low-speed gear (<500 RPM). | Safe for wet environments. |
| Corded Drill (Ground Fault Protected) | Not recommended; prohibited for RIDGID. | Must be double-insulated & used with a GFCI outlet. | High risk of electrical shock from water contact. |
| Corded Drill (Standard) | No. Never. | N/A. | Severe shock hazard, potential for fatal electrocution. |
| Impact Driver | No. | N/A. | The hammering action will instantly kink and destroy the drain snake cable. |
Gearing Up: Safety First, Every Time
Drain cleaning is a dirty, physical job. The safety rules are written around specific failure modes that happen fast.
Wear leather work gloves. The manuals are unanimous on this. Cloth, rubber, or coated gloves can get caught and wound around the spinning cable, pulling your hand in. Leather provides grip and protection from sharp edges inside the pipe. If you suspect harsh chemicals are in the drain, wear latex gloves underneath the leather.
Safety glasses are non-negotiable. The cable can throw back debris, rust, or even snap. Your eyes are in the line of fire.
Keep loose clothing, jewelry, and long hair secured. The rotating drum and exposed cable are entanglement hazards. Practice basic hygiene when you’re done. Wash your hands and arms with hot, soapy water. Don’t eat or smoke while handling the equipment.
Before you start: Check that the cable is not already kinked or broken. Pull out a few feet and look for any sharp bends or fraying. A weak cable will snap under load. Also, run a small stream of water from the faucet while you work. It helps flush debris back and confirms when the clog is clear.
Know Your Drain Snake: Bump-Feed vs. Manual
Not every drain snake is designed for a drill. You need a model with a direct-drive spindle or a power feed mechanism. There are two common types.
Bump-Feed / Power-Feed Heads (e.g., RIDGID POWER SPIN+, General Power Spin-Thru)
These are the most user-friendly for drill operation. They have an internal clutch or AUTOFEED mechanism. When the drum spins, you can bump the tool or pull a trigger to automatically advance the cable into the drain. This allows one-person operation, you control the drill with one hand and the feed with the other. The RIDGID POWER SPIN+ is the benchmark here.
Manual Feed Heads (e.g., General D-25 Handy)
These are simpler, drum-style tools. You remove a hand crank, exposing a spindle that goes into your drill chuck. To feed the cable, you must stop the drill, loosen a chuck or thumbscrew, push the cable in by hand, re-tighten, and start drilling again. It’s more stop-and-go but very effective and often more affordable.
The right drill bit for the job is already attached, it’s the boring head on the end of your snake. Choosing the correct drill bit types for materials is a different skill, but the principle is the same: match the tool to the task.
Step-by-Step for a Bump-Feed Head
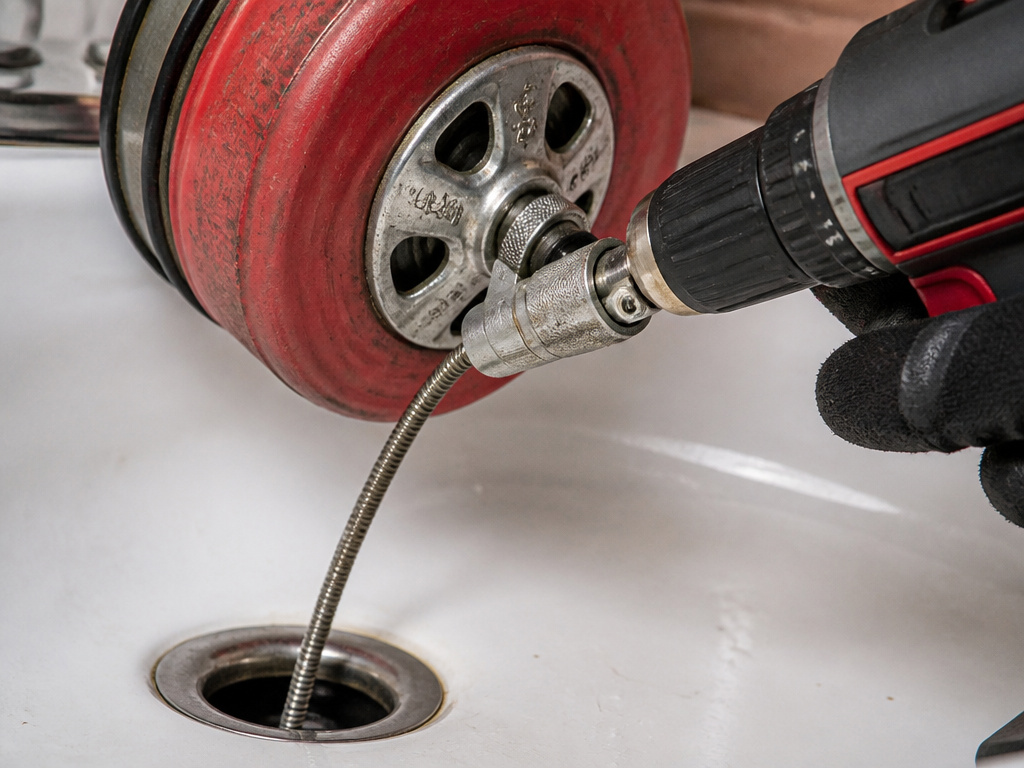
This sequence is for tools like the RIDGID POWER SPIN+ or General Power Spin-Thru. The goal is steady, controlled progress.
- Position the Drum. Place it as close as possible to the drain opening, no more than 6 inches away. If you can’t get that close, run the cable through a short piece of hose or pipe to prevent whipping.
- Prepare the Drain. Remove any strainer or stopper. For a bathroom sink pop-up, you often need to go under the sink. Loosen the nut that holds the pivot rod, disconnect it, and lift the stopper out from above.
- Insert the Cable Tip. Loosen the tool’s feed mechanism (usually a thumbscrew). Manually push the boring head through the strainer hole and into the pipe until you feel the clog. If the head won’t fit, many snakes have a bent tip on the opposite end for tight strainers.
- Engage the Drill. Set your cordless drill to low speed. Attach it to the drive socket and tighten the chuck. Start the drill, ensuring it’s turning clockwise (as viewed from the drill).
- Feed the Cable. With the drum spinning, engage the tool’s feed mechanism. For the RIDGID, you pull a trigger. For others, you may bump the tool forward. Apply light forward pressure. Let the rotating head cut. If it stops advancing, reverse the drill briefly, then go forward again.
- Retrieve and Clear. Once the clog breaks, you’ll feel the cable move forward freely. Keep the drill running and retract the cable using the tool’s reverse feed or retrieval function. Flush the drain with hot water.
Where this goes sideways: Forcing the cable when it stops. This binds the head, wraps debris into a knot, and can kink the cable permanently. If it won’t go, reverse and try again with a gentle rocking motion.
Step-by-Step for a Manual Feed Head
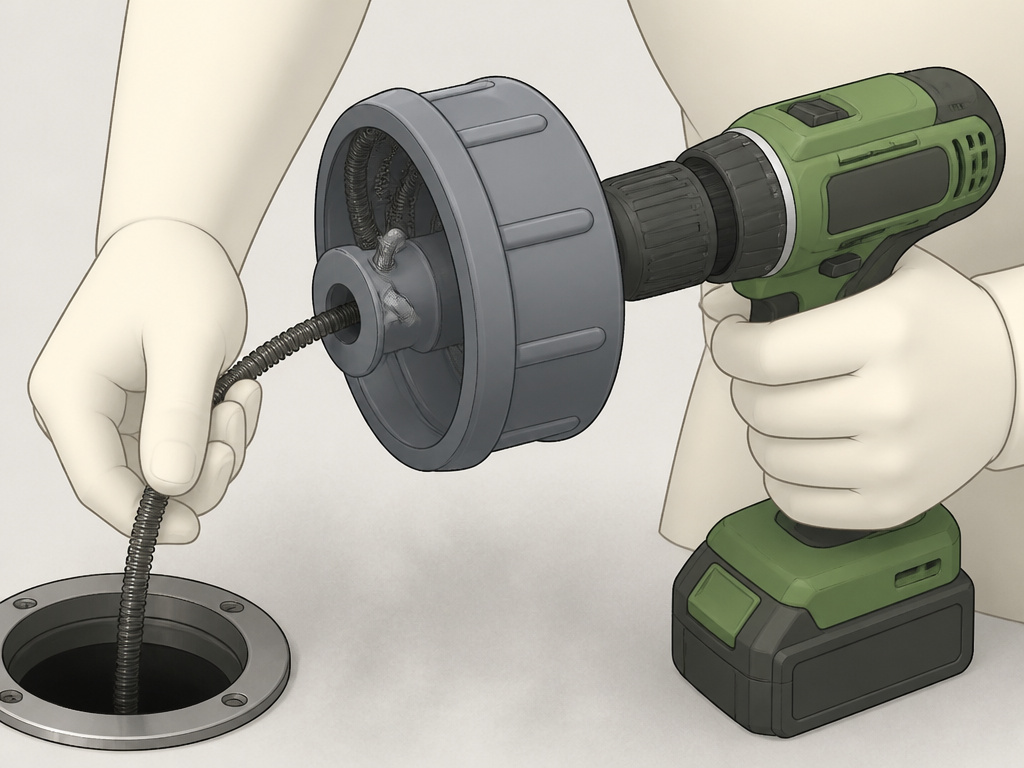
The process for a tool like the General D-25 Handy is more manual, but it teaches you the fundamental feel of cable feeding.
- Remove the Hand Crank. Unthread the hand-turn handle from the center of the drum. This exposes the drive spindle.
- Chuck the Spindle. Slide the spindle into your drill’s 3/8-inch chuck and tighten it firmly. A loose connection will slip and damage the spindle.
- Position and Insert. Place the drum within 6 inches of the drain. Loosen the drum’s cable lock (often a large plastic chuck). Manually push several feet of cable into the drain until you hit the clog.
- Lock and Spin. Tighten the cable lock on the drum. Start your drill on low speed, turning clockwise.
- Feed in Stages. The cable will screw itself into the clog. When about 6 inches of cable has entered the pipe, stop the drill. Loosen the lock, manually push another 6 inches of cable into the pipe, re-tighten the lock, and restart the drill. Repeat.
- Retract Under Power. When clear, keep the drill running in the same direction and slowly pull the entire cable back by hand. The rotation helps drag debris out.
This manual process is slower but gives you direct control. It’s excellent for learning how much pressure is “enough.” The principle is identical to knowing what drill bit to use for a pilot hole, you match the action to the material’s resistance.
Cable Size and Pipe Compatibility
You can’t use any cable in any pipe. A cable too small lacks rigidity and can knot. A cable too thick won’t make the bends. Match the snake to your drain’s diameter.
| Cable Diameter | Pipe Size Range | Typical Applications |
|---|---|---|
| 1/4 inch (6 mm) | 1-1/4″ to 2″ | Small lines, tubs, and shower drains. |
| 5/16 inch | 1-1/2″ to 2″ | Kitchen and bathroom sink drains. |
| 3/8 inch | 2″ to 3″ | Main sink lines, laundry drains (no roots). |
Most homeowner-grade drill snakes, like the RIDGID POWER SPIN+, come with 1/4-inch cable, which handles the majority of sink, tub, and shower clogs. The drum holds about 25 feet, which is enough for most household branch lines.
If you’re dealing with a completely blocked pipe, the approach is similar to using a speed-out bit on a stripped screw: you need the right tool head. For hair clogs, a boring head with small cutting teeth works. For grease or soap, a larger, bulbous head may be better.
Troubleshooting Common Snags
The cable won’t go past the P-trap. This is the most common hurdle. The P-trap is the U-shaped pipe under the sink. You need to push the cable firmly but flexibly around that bend. Use the bent-tip end of your snake if it has one. A small stream of water can help lubricate the path. If it absolutely won’t go, you may need to disconnect the P-trap, that’s a separate, wet job.
The cable is spinning but not feeding. The feed mechanism on a bump-feed head may be disengaged. Check that any lock or clutch is in the correct position. On a manual head, you may not have tightened the cable lock enough; it’s slipping inside the drum.
The drill stalls or the cable kinks. You are forcing it. The drill’s motor or the cable itself is telling you to stop. Immediately reverse the drill direction to unwind any binding. Pull back a foot, then try again with slower feed pressure. A kinked cable is weakened and more likely to snap on the next use.
You’ve cleared it, but it drains slowly. You broke up the clog but didn’t remove it all. The debris is now further down the pipe. Run the snake through again, and flush aggressively with hot water for several minutes. A hammer drill is for masonry, not drains, this job requires patience, not percussive force.
Frequently Asked Questions
Can I use my impact driver instead of a drill?
No. Never. An impact driver delivers sudden, jarring hammer blows. This will destroy the drain snake cable, causing it to kink and snap almost immediately. You need the smooth, continuous rotation of a standard drill.
What if my drain has chemical cleaner in it?
Be very careful. Corrosive drain chemicals can cause serious burns and damage the cable’s coating. If possible, try to flush the chemical out with plenty of water before snaking. Always wear protective gloves and eyewear.
How do I clean the cable after use?
Wipe it down with an old rag as you reel it back into the drum. For a deeper clean, you can spray it with a mild degreaser or soapy water and wipe it. Ensure it’s dry before storing to prevent rust inside the drum.
Can I use this on a toilet?
Most small drum-style snakes like the RIDGID POWER SPIN+ are not recommended for toilets. Toilets have specific traps and require a closet auger designed for their shape. Using a standard sink snake can scratch the porcelain and may not effectively clear the obstruction.
Why does the cable keep coming out of the drill chuck?
You are not tightening the chuck enough. The spindle needs to be fully inserted and the chuck hand-tightened firmly. If your chuck is worn and slips even when tight, the jaws may be damaged. This is a good moment to review basic drill operation and maintenance.
The Bottom Line
Using a drain snake with a drill turns a messy, frustrating job into a five-minute fix, if you follow the manufacturer’s rules to the letter. Grab a cordless drill, set it to low speed, and keep the drum within six inches of the drain. Let the tool do the work.
For most homeowners facing a clogged sink or tub, the RIDGID POWER SPIN+ is the tool that gets it right. Its AUTOFEED mechanism paired with a common cordless drill makes the process straightforward. For those on a tighter budget or who prefer total control, the General D-25 Handy manual feed snake is a proven, durable alternative.
Skip the harsh chemicals. With the right setup, you can clear a drain physically, know exactly what caused the blockage, and walk away with a tool that’s ready for next time.
