How to Use a Power Saw: The Complete Guide for DIYers
This post contains affiliate links. As an Amazon Associate, we earn from qualifying purchases.
Using a power saw correctly requires matching three things: the right saw for the job, the correct blade for the material, and a strict adherence to safety protocols that includes securing the workpiece, wearing protective gear, and letting the tool do the work without forcing it.
Most people get this wrong by focusing on the cutting action itself. They ignore the setup. A loose board, a dull blade, or missing safety glasses turns a simple cut into an instant accident. The saw doesn’t care if you’re in a hurry.
This guide walks through the essential power saws for a home shop, the non-negotiable safety steps, and the specific techniques for making clean, accurate, and safe cuts with a circular saw, the most versatile first saw you should master.
Key Takeaways
- Secure everything. A clamped workpiece is non-negotiable. Movement causes binding, kickback, and ruined cuts.
- Match the blade to the material. A 24-tooth framing blade will splinter plywood. A 140-tooth fine-finish blade will burn and bog down in a 2×4.
- Set the blade depth to 1/4 inch past the material. More blade exposure increases kickback force and danger dramatically.
- Let the saw reach full speed before cutting. Engaging a spinning-up blade is the fastest way to cause it to grab and jump.
- Your first ten cuts on scrap lumber are tuition. Expect to wander off the line. That’s how you learn the tool’s weight and sound.
Before you start: A power saw can remove fingers in less time than it takes to blink. The blade guard is not optional, if it’s stuck, fix it before plugging in. Sawdust in your eyes can cause permanent corneal scratches. Loose clothing or jewelry will be pulled into moving parts instantly. Treat the tool with the respect its potential for harm demands.
What are the most important power saw safety rules?
Safety isn’t a list you skim. It’s the foundation every cut is built on. Miss one item here and the rest of the technique doesn’t matter.
First, personal protective equipment (PPE) is mandatory, not a suggestion. Safety glasses must be rated ANSI Z87.1, the cheap hardware store ones often aren’t. If you’re cutting masonry, metal, or treated wood, add a respirator with P100 filters; the dust is carcinogenic.
Hearing protection is about cumulative damage. A circular saw runs at about 100 dB. Without protection, that causes hearing loss in under 15 minutes. Use earmuffs with an NRR of 25 or higher.
Second, the workpiece must be immobilized. Use bar clamps, bench dogs, or a dedicated workbench. The rule is simple: if you can wiggle the board with your hand, it’s not secure enough for a saw. Cutting a piece that’s pinched between two supports is a classic kickback scenario. Always support the workpiece so the cut-off piece can fall away freely, not trap the blade.
Third, the tool itself must be in serviceable condition. Check the blade guard’s retraction spring, it should snap back instantly. Inspect the power cord for frays or cuts. Ensure the blade is sharp; a dull blade requires more force, heats up, and is more likely to bind. Always disconnect power (unplug or remove the battery) before any adjustment or blade change.
I learned the hard way about blade guards. I was trimming a few deck boards with an old Skilsaw whose guard was sticky with pine pitch. I thought I could manage without it retracting fully.
On the third cut, the saw bucked as the guard caught the board edge, jerking the saw sideways and nearly into my leg. The board was ruined, and I had a nasty bruise. I spent the next hour cleaning and lubricating that guard mechanism before I touched the saw again. It hasn’t stuck since.
Safety Gear You Can’t Skip
This isn’t about looking the part. Each piece of gear stops a specific, common injury.
- ANSI Z87.1 Safety Glasses or Face Shield: Sawdust and wood chips fly. Polycarbonate lenses stop them. A face shield is better for overhead work or when using a router.
- Hearing Protection (Earmuffs or Earplugs): Use them. Every time. Tinnitus is permanent.
- Work Gloves: Not for operating the saw trigger hand, but for handling rough, splintery material before and after the cut. For the saw hand, bare skin gives you better feedback.
- Dust Mask or Respirator: A basic N95 for wood dust. A half-face respirator with P100 cartridges for MDF, pressure-treated lumber, or sanding.
- Closed-Toe, Sturdy Shoes: No sandals. A dropped saw or a falling 4×4 post will break toes.
How to choose the right saw and blade
You wouldn’t use a sledgehammer to drive a finish nail. Picking the wrong saw makes the job harder and more dangerous.
| Saw Type | Best For | Worst For / Limitations |
|---|---|---|
| Circular Saw | Straight cuts in lumber, plywood, sheet goods. | Curves, intricate shapes, precise joinery. |
| Jigsaw | Curved cuts, cutouts (sinks, outlets), scrollwork. | Long, perfectly straight lines (it will wander). |
| Miter Saw | Fast, accurate crosscuts and angles in trim & lumber. | Ripping long boards, cutting large sheet goods. |
| Reciprocating Saw | Demolition, pruning, rough cuts where precision doesn’t matter. | Any cut requiring a clean, finished edge. |
| Table Saw | Extremely precise rip cuts, repeatable dados, joinery. | Portability. Requires significant skill & space. |
The blade is what does the cutting. Using the wrong one is like using a butter knife to carve a turkey.
A 7 1/4-inch circular saw blade with 24 teeth (ATB geometry) is for fast, aggressive framing cuts. A blade with 40-60 teeth (also ATB) is your all-purpose blade for sheet goods and cleaner cuts in dimensional lumber. A 140-tooth alternate top bevel (ATB) or triple-chip grind (TCG) blade is for fine woodworking, leaving a near-glue-ready edge on plywood and hardwoods.
The number of teeth per inch (TPI) or per blade determines cut speed and finish. Fewer teeth cut faster but rougher. More teeth cut slower but smoother. Tooth geometry matters too: Alternate Top Bevel (ATB) teeth are for cross-cutting wood, Flat Top Grind (FTG) teeth are for ripping, and Triple-Chip Grind (TCG) teeth are for hard materials like laminate or aluminum. Always check the blade’s maximum RPM rating against your saw’s speed.
How to Make Your First Cut with a Circular Saw
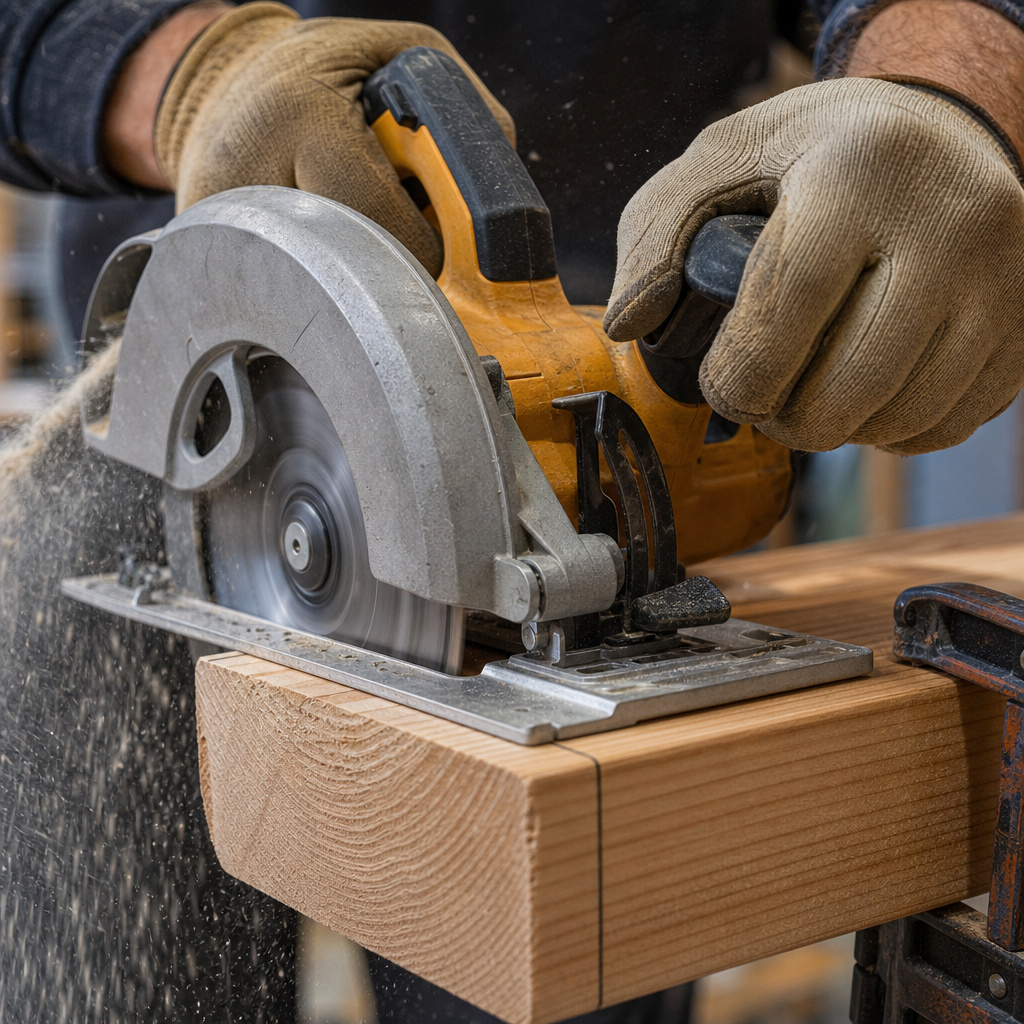
The circular saw is the gateway tool. It’s affordable, portable, and capable of about 80% of what a DIYer needs. Let’s break down a simple crosscut on a 2×4.
1. Measure, Mark, and Secure.
Measure and mark your cut line with a pencil and a speed square for a perfect 90-degree line. Clamp the 2×4 to your sawhorses or workbench. The piece you’re cutting off should be overhanging, unsupported, so it falls away. If you must cut between two supports, the kerf (the slot cut by the blade) can close and pinch the blade. That’s kickback city.
2. Set the Blade Depth.
Unplug the saw. Loosen the depth adjustment lever, usually at the rear. Place the saw next to your board with the shoe flat. Lower the blade until a tooth just penetrates the board’s underside, about 1/4 inch. Tighten the lever. This minimizes exposed blade, reduces binding, and makes the saw easier to control. A blade set too deep acts like a lever, magnifying any twist into a dangerous kickback.
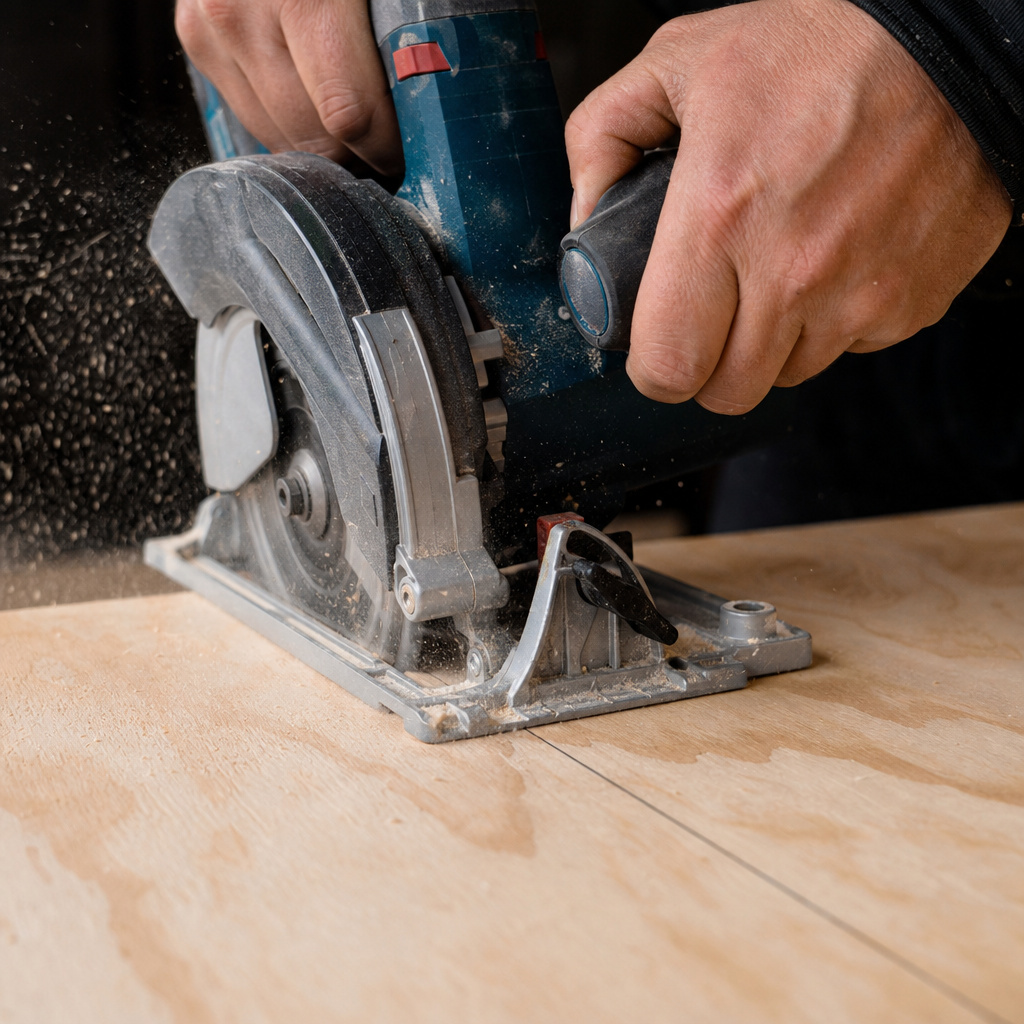
3. Align and Stance.
Position the saw so the notch in the front of the shoe (or a guide line on a transparent guard) lines up with your pencil mark. Stand with your feet shoulder-width apart, not directly behind the saw in case of kickback. Grip the saw firmly with your dominant hand on the main trigger handle and your other hand on the auxiliary front handle.
4. Start the Saw and Cut.
With the blade clear of the wood, pull the trigger. Let the motor spin up to full speed, you’ll hear the pitch stabilize. Gently but deliberately ease the spinning blade into the leading edge of the board. Don’t shove it. Look at the guide notch, not the flashing blade. Push forward at a steady pace. If the motor bogs down, you’re pushing too fast or the blade is dull. If you smell burning wood, you’re going too slow and the blade is overheating.
5. Finish and Power Down.
Follow through until the cut piece separates and falls. Keep the saw running and lift it up and out of the kerf before releasing the trigger. Wait for the blade to come to a complete stop before setting the saw down. Never walk away with the blade still spinning.
Your first few cuts will feel awkward. The sound is loud, the saw wants to pull. That’s normal. Practice on scrap 2x4s until pushing the saw forward feels like guiding it, not fighting it. For mastering straight cuts with a circular saw, a speed square or a homemade guide clamped to the workpiece is a game-changer.
What are the essential power saw techniques?
Beyond the basic crosscut, a few techniques unlock the circular saw’s real utility.
Rip Cutting: Cutting lengthwise along the grain of a board. This is where a guide is mandatory unless you have a surgeon’s hand. Clamp a straight board or a factory-made edge guide parallel to your cut line. The saw’s shoe rides against it. For consistent cutting wood with a circular saw along the length, this is the only reliable method.
Plunge Cutting: Starting a cut in the middle of a panel, like for a sink cutout. Tip the saw forward so the toe of the shoe is on the workpiece, with the blade clear. Start the saw, hold the guard up with your thumb (carefully), and slowly lower the spinning blade into the material. Once the shoe is flat, proceed normally. Practice this on scrap first.
Bevel Cutting: Angling the blade for a cut on the edge of a board. Loosen the bevel adjustment, tilt the saw to the desired angle (often up to 45 degrees), and re-tighten. The cut line is now along the blade’s new angle, not the shoe’s edge. Sight carefully.
Cutting Sheet Goods: Full sheets of plywood are unwieldy. Support the sheet fully on scrap lumber or foam insulation panels. Plan your cuts so you’re always cutting off a manageable strip, not trying to maneuver the saw in the center of a full sheet. A panel-cutting guide or a simple straight-edge clamped down is essential for clean, accurate plywood cutting.
I used to think I could rip a long board freehand if I just concentrated. I ruined a perfectly good 8-foot 1×8 of poplar when the saw drifted a quarter-inch off line over the last three feet. The board was now too narrow for my project. The time I wasted was worth ten times the cost of a simple edge guide. Now I clamp a guide for any rip cut longer than 12 inches.
What are other common power saw types and their uses?
Once you’re comfortable with a circular saw, these tools solve specific problems.
Jigsaw: The tool for curves and internal cutouts. The key is blade selection. A coarse 6-10 TPI blade chews through thick lumber. A fine 20+ TPI blade gives a smooth edge in plywood. For metal, use a bi-metal blade. Let the tool’s weight do the work, don’t push down. For tight curves, go slow. The blade will bend and follow the path of least resistance.
Miter Saw: The king of repeatable crosscuts and angles. It’s essentially a circular saw on a hinged arm, locked into a precise fence. It’s for cutting boards to length, not lengthwise. Compound miter saws tilt for beveled angle cuts, essential for crown molding. Safety is paramount: keep hands clear, use a clamp to hold small pieces, and let the blade stop before lifting it.
Reciprocating Saw (Sawzall): A demolition tool. It’s brutal, loud, and vibrates like crazy. Use it to cut through nails embedded in wood, prune tree limbs, or rough-cut PVC. Control is low, finish is terrible. Use short, aggressive blades for wood and metal, long blades for pruning. Let the tool vibrate, forcing it breaks blades.
Table Saw: The most dangerous and most useful stationary tool. It excels at ripping boards to exact widths and cutting joinery like dados and rabbets. It demands respect. Always use the guard, splitter, and push sticks. Never stand directly behind the workpiece in case of kickback. If you’re moving to a table saw, start by learning table saw operation fundamentals on simple, wide boards.
How do you maintain your power saw?
A clean, sharp saw is a safe, accurate saw. Neglect turns it into a hazard.
After every use, blow out sawdust from the motor vents with compressed air (wear safety glasses). Wipe down the shoe with a dry cloth to prevent rust. For corded saws, check the cord for damage near the plug and the tool housing. For cordless, keep batteries at room temperature and store them partially charged if not used for months.
Blades get dull. A sharp blade cuts with a high-pitched whine and little resistance. A dull blade makes a lower, laboring sound, burns the wood, and requires you to push harder.
Learn to change a circular saw blade safely: unplug, lock the arbor, and use the correct wrench. For carbide-tipped blades, send them out for professional sharpening after 4-5 hours of heavy use. It’s cheaper than a new blade.
Lubricate moving parts occasionally. A drop of light machine oil on the depth and bevel adjustment threads and pivot points keeps them moving smoothly. Don’t oil the motor or gears unless the manual specifies.
Store the saw in a dry place, hung up or in a case. Don’t throw it in a wet toolbox. Moisture rusts the shoe and corrodes electrical contacts.
Frequently Asked Questions
What’s the difference between a corded and cordless circular saw?
Corded saws deliver consistent, unlimited power. They’re lighter and often cheaper. Cordless saws offer complete portability and are fantastic for job sites without power, but you trade power and run-time. A premium 18V or 20V Max cordless saw can handle 90% of DIY tasks on a charge, but for ripping dense hardwood or all-day framing, a corded model or a high-torque worm drive circular saw is the professional’s choice.
My saw is burning the wood. What am I doing wrong?
You’re either pushing too slowly, using a dull blade, or both. The blade teeth are rubbing, not cutting, generating friction heat. Check your blade for shiny, polished edges on the carbide tips, that’s a sign of dullness. Increase your feed rate slightly. If the motor bogs down, the blade is definitely dull and needs replacing or sharpening.
How do I cut a 45-degree angle for a picture frame?
You need a miter saw for precision. If you only have a circular saw, you must set the bevel angle to 45 degrees using the saw’s adjustment gauge. This is tricky for accuracy. Clamp your workpiece firmly and use a speed square or a dedicated angle guide to keep the saw straight. Practice on scrap first, as the technique for 45-degree angle cuts with a hand-held saw has a steep learning curve.
Is it safe to cut metal with a circular saw?
Yes, with the correct blade. You need a ferrous metal-cutting blade with a negative hook angle (like a Diablo Steel Demon). The saw must have a high RPM rating compatible with the blade. Wear full face protection, heavy gloves, and be prepared for sparks. The cut will be loud and hot. For occasional metal cuts, it’s fine. For regular metalwork, an angle grinder or metal-cutting chop saw is better.
Why does my saw keep getting stuck or kicking back?
The blade is binding. The most common causes are: the workpiece isn’t supported correctly (the kerf is closing), the blade is dull and overheating, the blade depth is set too deep, or you’re forcing the saw and twisting it off line. Stop immediately if it binds. Unplug, reassess your setup, and ensure the cut-off piece can fall free.
The Bottom Line
Using a power saw isn’t about bravery. It’s about preparation. The time you spend checking your safety gear, clamping your board, and selecting the right blade is what separates a clean, successful project from a trip to the emergency room.
Start with a circular saw, master the straight cut, and respect the tool’s power. The confidence you gain is real, because it’s built on a foundation of deliberate, safe practice. Now go make some sawdust.