
Sharpen a Drill Bit on a Bench Grinder: The Essential Guide
This post contains affiliate links. As an Amazon Associate, we earn from qualifying purchases.
Sharpen a drill bit on a bench grinder by matching three things: the wheel’s rated speed to your grinder’s RPM, the bit’s original point angle (usually 59 degrees per side for a 118-degree tip), and a light, consistent pressure. The wheel must rotate into the cutting edge, and you must cool the bit after every 2-3 seconds of contact to prevent overheating and losing the temper.
That last bit about cooling is the line between a sharp bit and a ruined one. Overheat the steel, and the cutting edge goes soft. It’ll feel sharp for a hole or two, then dull faster than it did before you touched the grinder.
What follows: the three grinder specs you can’t ignore, the freehand method that sidesteps cheap jigs, and the two mistakes that crack wheels and burn bits before you even start.
Key Takeaways
- A wheel rated below your grinder’s no-load speed (like 3600 RPM) can explode. Match the ANSI B7.1 rating on the wheel to the data plate on your tool.
- The original point angle is everything. A 118-degree bit sharpened to 135 degrees will skate on metal and burn in wood.
- Let the wheel cut. Pressing hard generates heat, wears the wheel fast, and is the number one cause of a cold wheel cracking on startup.
- Cool the bit after every 2-3 seconds of contact. Dip it in water. If the metal turns blue, you’ve lost the temper and the bit is scrap.
- The V-groove work rest on Ryobi BGH615 and BGH825 models is angled for most standard drill bits, use it as a guide, not a crutch.
The 3 Bench Grinder Specs That Actually Matter
Your bench grinder is not a generic tool. It’s a 3600 RPM motor spinning an abrasive wheel that must meet a specific safety standard. Ignore the specs, and you’re not sharpening, you’re gambling.
First, the no-load speed. For common 6-inch models like the Ryobi BGH615 or the Makita GB602, that’s 3600 RPM. The replacement grinding wheel must have a safe rated speed at least as high as that number. A wheel rated for 3000 RPM on a 3600 RPM grinder is a hazard.
Grinding wheels must comply with ANSI B7.1 and have a rated speed greater than the grinder’s no-load RPM. The Ryobi manual states it plainly: using a non-compliant wheel is “explicitly prohibited and unsafe.”
Second, the wheel dimensions. They aren’t interchangeable. A 6-inch wheel has a 1/2-inch arbor hole; an 8-inch wheel, like on the Ryobi BGH825, has a 5/8-inch arbor. Forcing the wrong wheel on with spacers throws it off-balance. Vibration follows, then a broken wheel.
Third, the work rest. If your grinder has one with a V-groove, standard on the Ryobi BGH615 and BGH825, that groove is factory-angled for most standard drill bits. It’s a starting guide. Don’t clamp the bit in it and grind; use it to find your initial angle before you pull the bit back for the freehand motion.
What’s the Correct Point Angle for Sharpening?
You don’t get to pick. The bit’s original geometry is stamped into the metal. For general-purpose twist bits, that’s almost always a 118-degree included angle. That means each cutting lip is ground to 59 degrees relative to the bit’s centerline.
| Drill Bit Type | Common Point Angle | Best For | Risk If You Guess Wrong |
|---|---|---|---|
| Standard Twist Bit | 118° (59° per side) | Wood, plastic, soft metal | A 135° angle will skate on steel and burn in hardwood. |
| Split Point Bit | 135° (67.5° per side) | Hardened steel, stainless steel | An 118° angle will dig in too aggressively and chip. |
| Brad Point Bit | Varies (often ~60°) | Clean-entry woodworking | Changing the spur angle ruins its self-centering ability. |
Getting this wrong doesn’t just make drilling slower. A bit ground to the wrong angle produces more heat, wears faster, and can snap under load. If you don’t know the angle, match the existing grind by eye before you touch the wheel. The difference between 118 and 135 degree bits is the difference between a clean hole and a ruined workpiece.
The 7-Step Freehand Grind (Skip the Jig)
Sharpening jigs work, but they’re slow and often misaligned. The freehand method is faster once your hands learn the motion. It’s the technique detailed on woodworking sites like Woodgears, where the focus is on feel over fixtures.
- Secure the grinder and dress the wheel. Bolt the grinder down. A vibrating tool is an inaccurate tool. Then, square the wheel’s face with a dressing tool if it’s grooved or glazed. A true wheel cuts cleanly.
- Set the tool rest. Adjust it to sit about 1/8 inch from the wheel and square to the sides. This minimizes bit chatter.
- Find your stance and grip. Stand so you can see the bit’s tip against the wheel. Grip the bit near the shank with your dominant hand, using your other hand to steady the tip. Your knuckles should be clear of the rest.
- Align the cutting lip. Hold the bit so one cutting lip is horizontal and touching the wheel. The V-groove rest on a Ryobi is preset to roughly this angle, use it to check your start.
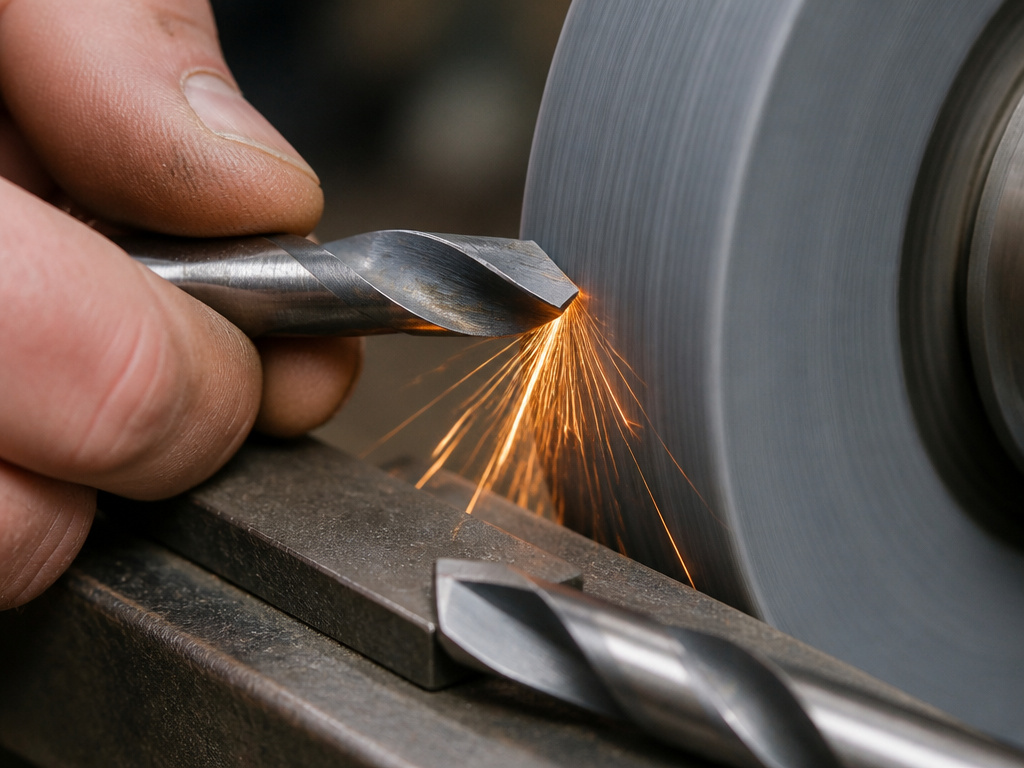
- Grind with a twist. Gently touch the lip to the wheel. In one smooth motion, lower the bit’s shank slightly while rotating it clockwise. You’re grinding the metal behind the cutting edge to recreate the clearance angle. Do this for 2-3 seconds max.
- Dip to cool. Immediately dip the bit’s tip in a cup of water. If it sizzles, you held it too long. The metal should be warm, not hot.
- Flip and repeat. Rotate the bit 180 degrees in your hand and repeat steps 4-6 on the opposite lip. Check for symmetry by sighting down the bit. Both lips should be identical in length and angle.
The goal is symmetry. An uneven grind makes the bit cut oversize holes and wander.
Common mistake: Grinding only the very tip of the cutting lip. This creates a dead flat spot where the lip meets the wheel, called heel drag. The bit will rub, not cut. You must grind back along the entire lip to maintain the clearance.
The 2 Most Common Sharpening Mistakes
These aren’t minor errors. They break tools and bits.
Mistake 1: Grinding a cold wheel. The Ryobi operator’s manual warns about this explicitly. Applying pressure to a wheel that hasn’t reached full operating speed can cause it to crack. The thermal stress is too much. Always let the grinder spin up for 10-15 seconds before bringing the bit into contact.
Mistake 2: Forgetting the clearance angle. A sharp bit needs two angles: the point angle (59 degrees) and the clearance angle behind it (usually 8-12 degrees). If you only replicate the point angle, you’ve created a blunt chisel. The back of the cutting lip must be relieved, or it will drag in the hole. This is where the clockwise twisting motion in the freehand method is critical, it grinds that relief in.
Wheel Care, Bit Cooling, and That Blue Tint
A worn wheel makes sharpening impossible. The Makita GB602/GB801 manual states the maximum wear allowed is a diameter decrease of 40 mm (about 1-9/16 inch). Once the wheel is that much smaller, replace it. A small wheel runs at a higher surface speed, changing your grinding dynamics and increasing the risk of overheating the bit.
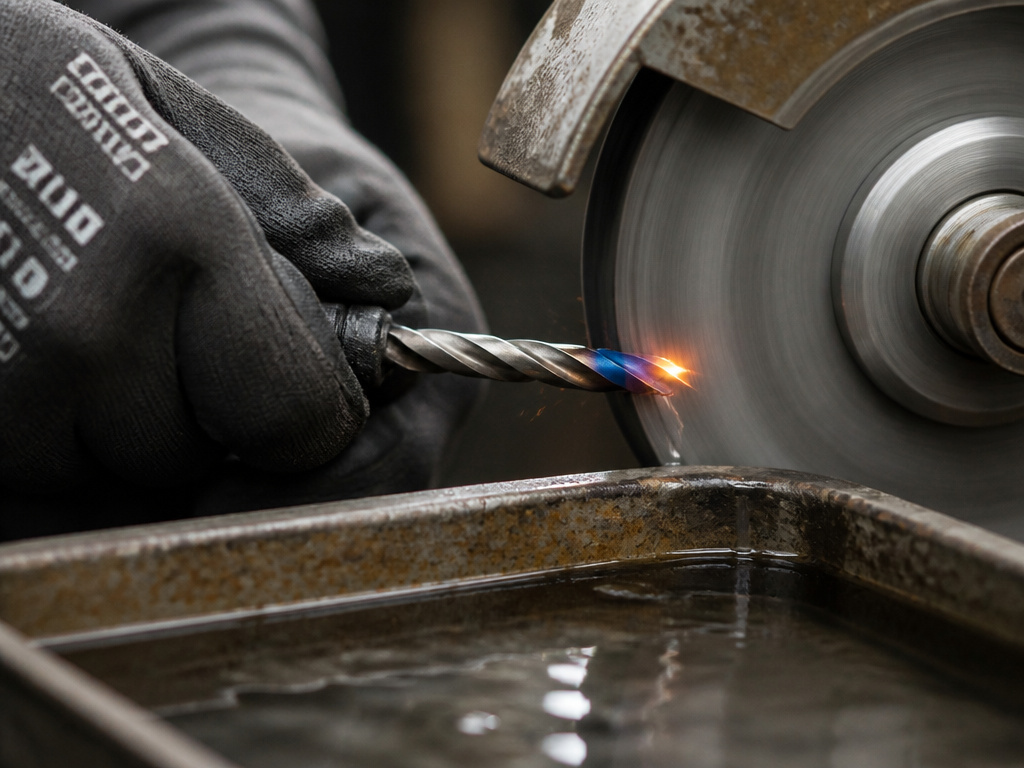
Bit cooling isn’t optional. The manuals for both Ryobi and Makita grinders specify using a cooling tray or pan of water. The sequence is non-negotiable: grind for 2-3 seconds, dip, inspect, repeat. If the bit’s cutting edge turns straw-colored or blue, you’ve overheated it and drawn the temper. The steel is now softer. That bit is done.
Where this goes sideways: Letting the bit get too hot to touch. By the time you feel the heat through your gloves, the temper is already gone. Cool early, cool often.
For specialty bits like brad point bits or split point bits, the process has nuances. A brad point’s spurs are fragile; use a fine stone or a file. A split point’s self-centering tip requires a precise touch on the grinder’s corner. For these, a dedicated sharpening drill bits jig might save more metal than it wastes.
How to Know When Your Bit Is Truly Sharp
Visual checks come first. Look straight down at the point. Both cutting lips should be equal in length and angle. The chisel edge (the line in the center) should be straight and centered. If one lip is longer, the bit will drill an oversized hole.
The fingernail test is classic. Drag the cutting lip across your thumbnail at a shallow angle. A sharp bit will catch and scrape off a sliver. A dull bit will skate smoothly.
Finally, the cut test. Use the bit on a scrap piece of softwood or mild steel. A sharp bit enters smoothly with minimal pressure and produces tight, curly chips. A dull bit requires heavy pressure, makes powdered dust, and squeals. If your freshly sharpened bit acts dull, you likely lost the temper by overheating it during grinder sharpening.
Frequently Asked Questions
Can you sharpen any drill bit on a bench grinder?
You can sharpen standard high-speed steel (HSS) twist bits, cobalt bits, and some masonry bits (resharpening the carbide tip requires a diamond wheel). Avoid sharpening titanium-coated or black oxide bits on a standard aluminum oxide wheel; the coating clogs the wheel. For those, sharpening with a file is a better first step.
What grit grinding wheel is best for drill bits?
Medium (60-grit) or fine (80-grit) aluminum oxide wheel is ideal. Coarse wheels (36-grit) remove metal too fast and make it hard to control the edge. A finer wheel gives a smoother finish, which translates to a sharper, longer-lasting cutting edge.
Why does my newly sharpened drill bit wander or make an oval hole?
This is almost always due to asymmetric grinding. One cutting lip is longer or ground at a different angle than the other. The bit pulls toward the longer lip, causing it to walk. Re-grind both lips, checking symmetry after every 1-2 seconds of contact. Using the bench grinder sharpening method demands a steady hand.
Is it worth sharpening cheap drill bits?
For basic carbon steel bits that come in a bargain bundle, often not. The steel is soft and loses its edge quickly. Your time is better spent choosing a drill bit made of better material from the start. Sharpening makes economic sense for HSS, cobalt, or carbide-tipped bits.
How do you fix a drill bit that’s been overheated and turned blue?
You can’t restore the lost temper with a home shop setup. The steel is permanently softened. You can re-grind it, but it will dull again after a few holes. For critical work, replace it. For non-critical tasks, it’s now a “disposable” bit for soft materials.
Before You Go
A sharp drill bit feels different in the hand. It bites with authority, doesn’t squeal, and makes clean chips. Getting there on a bench grinder is about respecting three numbers: your grinder’s RPM, the bit’s point angle, and the 2-3 second rule for cooling.
Skip the fancy jig for standard bits. Use the V-groove rest as a guide, practice the freehand twist, and cool the bit after every pass. Remember the Makita rule, once your wheel wears down by 40mm, replace it. A fresh wheel cuts cleaner and cooler.
And if you do overheat a bit and see that blue tint, toss it. No amount of sharpening by hand or regrinding will bring back the hardness you burned out. That’s the cost of the lesson.
