
How to Remove a Broken Drill Bit Safely From Any Workpiece
This post contains affiliate links. As an Amazon Associate, we earn from qualifying purchases.
To remove a broken drill bit, you must first identify where it’s stuck: inside the drill’s chuck or inside the workpiece. For a chuck, use the drill’s own mechanism, a 3-slot chuck key or the manual release on a keyless model. For a workpiece, you need reverse-threaded tools like a left-handed drill bit or a speed-out extractor. Force with pliers or vise-grips usually strips the shank and makes the problem worse.
That distinction between chuck and workpiece changes everything. One is a mechanical release; the other is a precision extraction. Using the wrong approach here costs you the bit, the tool, or the project.
What follows: the two-step diagnostic, the right tool for each scenario (with the one brand that gets the release right), and the three mistakes that turn a simple fix into a shop-vise repair job.
Key Takeaways
- Diagnose first: A bit broken in the chuck requires a mechanical release; a bit broken in the workpiece requires a reverse-threaded extraction tool.
- Never force a keyless chuck with pliers. The Ryobi manual explicitly warns against this, it deforms the chuck sleeve and the next bit will never seat straight.
- For a seized chuck, use low-pressure percussion. Tap the chuck body with a mallet while applying steady reverse rotation to break corrosion.
- Left-handed drill bits often work without extractors. Their counter-clockwise rotation can catch and back out a broken bit as you drill.
- A clean, centered pilot hole is non-negotiable for any extractor. An off-center drill point guarantees the extractor will skate and enlarge the hole.
Where Is the Bit Stuck? Chuck vs. Workpiece
Your first move isn’t a tool. It’s looking at where the broken end sits.
A bit snapped inside the drill’s chuck leaves a short, clean shank protruding. You can still see the chuck jaws around it. A bit broken off inside a piece of wood, metal, or masonry is flush or below the surface. The chuck is empty.
Common mistake: Grabbing vise-grips for a chuck-stuck bit. The hardened steel shank is smooth, and the grips slip. Each slip crushes the shank further, rounding it into a useless cylinder that no chuck jaw can ever grip again.
This split dictates your entire toolkit. Mix them up and you’ll spend an hour making the problem permanently worse.
How to Remove a Drill Bit Broken in the Chuck
This is a drill repair, not an extraction. Your goal is to command the chuck to open.
The Right Grip: It’s Not Your Hands
For a keyless chuck, the manual says to grip the textured sleeve and rotate. When a bit is broken inside, that grip often fails because your hand slips before the corrosion breaks. The fix isn’t more strength.
Wrap a rubber jar opener or a strip of inner tube around the chuck sleeve. The added friction multiplies your torque without needing to squeeze harder. If the chuck is cold, warm it with a hairdryer for 30 seconds, metal contracts when cold, and a slight expansion can break the bond.
The 3-Slot Chuck Key Method (If You Have One)
Many older drills and all keyed chucks have three small slots around the chuck body. This is your direct line to the jaw mechanism.
| Step | Action | Why It Works |
|---|---|---|
| 1. Secure the Drill | Lock the drill in a bench vise, clamping the motor housing, not the chuck. | Provides counter-torque so you’re not fighting the tool’s weight. |
| 2. Insert the Chuck Key | Fit the chuck key into one of the three slots. It should seat firmly. | The key engages the chuck’s internal pinion gear, giving you mechanical advantage. |
| 3. Tap & Turn | Tap the key handle lightly with a mallet while applying steady pressure counter-clockwise. | The percussion shock breaks micro-corrosion between the bit shank and chuck jaws without deforming metal. |
If the bit is truly seized, move to the next slot and repeat. Cycling through all three distributes the force evenly.
When the Chuck Won’t Budge: Percussion-Assisted Removal
For a chuck that refuses to rotate, the “Quantum Leap” drilling equipment manual prescribes a specific technique: low-pressure percussion assisted with reverse rotation.
- Lock the drill in a vise.
- Place a block of wood against the chuck body.
- Tap the wood block with a mallet, not the chuck directly.
- As you tap, maintain steady counter-clockwise pressure on the chuck sleeve or key.
- The vibrations travel through the chuck, breaking the bond of rust, debris, or galling that’s locking the bit.
The key is low pressure. You’re persuading, not pounding. A heavy hammer blow risks cracking the chuck casting.
Where this goes sideways: Using an impact driver on the chuck key. The sudden, extreme torque can shear the chuck’s internal gears or twist the spindle. You’ll hear a sharp crack and the chuck will spin freely without ever opening.
What If the Bit Snaps Flush?
When the break is perfectly flush with the chuck jaws, the jaws have nothing to grip to open. You need to give them purchase.
Option A: Chuck Wedges
These are thin, hardened steel blades you tap between the chuck jaws. As they seat, they force the jaws apart minutely, breaking their grip on the bit shank. Insert two wedges opposite each other and tap alternately.
Option B: The “Drill It Out” Last Resort
This is a destructive method. Use a left-handed drill bit slightly smaller than the bit shank. Drill carefully into the center of the broken shank. The reverse threads often catch and spin the shank out as you drill. If not, you’ve created a pilot hole for a small speed-out extractor.
How to Remove a Drill Bit Broken in the Workpiece
Here, the bit is part of the material. You must remove it without destroying the surrounding workpiece.
Step 1: Center-Punch & Pilot Hole
This step feels like a delay. It is the whole game.
- Use a sharp center punch to make a definitive dimple exactly in the center of the broken bit.
- Select a left-handed drill bit slightly smaller than the broken bit’s diameter.
- Drill a slow, straight pilot hole a few millimeters into the broken bit. The reverse threads do the work.
A left-handed drill bit turns counter-clockwise to cut. As it drills into the broken bit, the friction and threading often grab and unscrew the fragment before you even need an extractor.
Step 2: Choose Your Extractor
If the left-handed bit doesn’t back it out, you’ve now got a perfect pilot hole for an extractor.
| Extractor Type | Best For | How It Fails |
|---|---|---|
| Speed-Out/Spiral Flute | Soft metals (aluminum, brass), wood, plastic. | The flutes are brittle and snap if over-torqued in hardened steel. |
| Square-Taper/Straight Flute | Hardened steel, stubborn bits in metal. | Requires a perfectly sized pilot hole; if too loose, it just spins. |
| Screw Extractor Set | Small-diameter bits (<1/8″) in any material. | The small size means they snap easily if not perfectly aligned. |
Tap the extractor into the pilot hole until it seats firmly. Use a wrench or tap handle to turn it counter-clockwise. The extractor bites into the walls of your pilot hole and transfers all torque to the broken bit.
Step 3: Apply Heat (For Metal Workpieces)
If the bit is lodged in metal, heat can be the final key. Use a propane torch to heat the workpiece around the broken bit, not directly on it. Metal expands when heated. The workpiece expands slightly before the embedded bit does, loosening its grip.
Let it cool for a minute. Then try the extractor again. The thermal shock often breaks the last of the bond.
Step 4: The Salvage Move
When extraction fails, the bit is hardened, the extractor snapped, the hole is wallowed out, your goal shifts to salvage. Drill out the entire broken bit using progressively larger drill bits until you remove all material. This destroys the original hole size, so you’ll need to fill and re-drill or use a larger fastener.
This is when knowing how to drill out a broken screw or a broken bolt becomes the same skill set.
Tools You Actually Need (And One You Don’t)
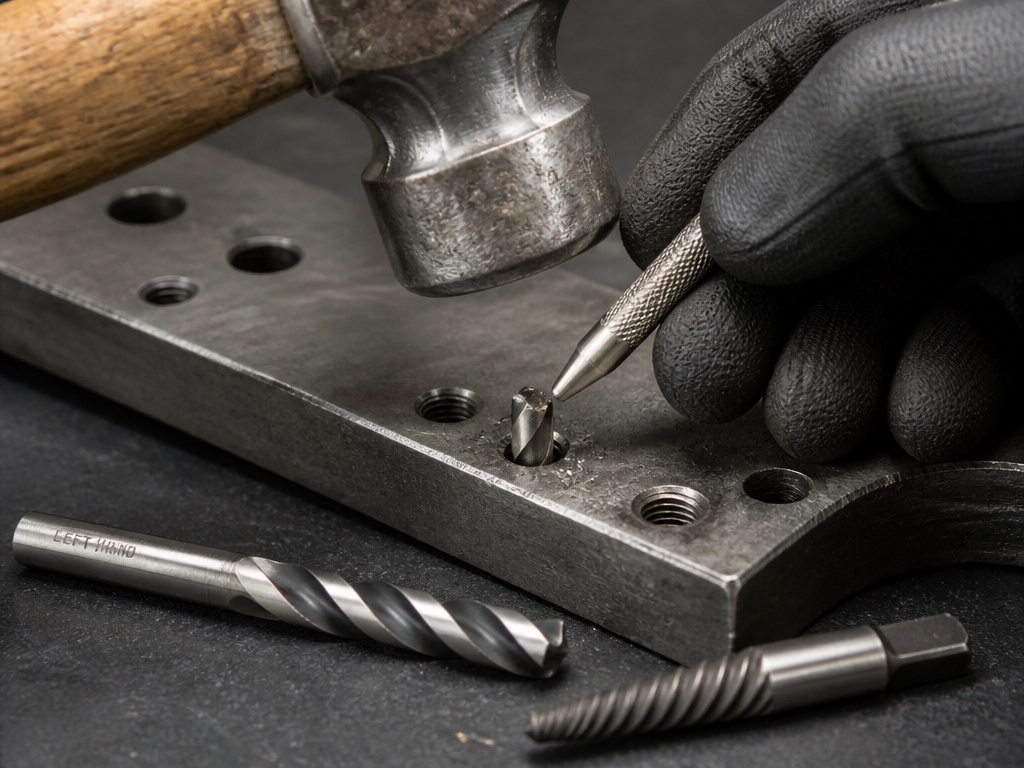 Skip the all-in-one “emergency extraction” kits. They’re mostly low-quality steel. Assemble these instead:
- Left-Handed Drill Bit Set (Titanium or Cobalt). The reverse threads make them dual-purpose.
- Spiral Flute Extractors (A quality brand like Alden or Irwin). Match the set size to your common drill bit sizes.
- Center Punch & Hammer. Non-negotiable for accuracy.
- Chuck Key (if your drill has slots).
- Rubber Strap Wrench or Jar Opener. For grip on keyless chucks.
- Bench Vise. Holding the drill steady is 80% of the battle.
The tool you don’t need: Vise-Grips. They are the last resort, not the first. Every time you clamp them on a smooth shank, you make the next proper tool’s job harder.
Why Bits Break & How to Prevent It
 Removing a broken bit is reactive. Preventing the break is proactive.
Excessive Side Load: Pushing the drill sideways while it’s spinning bends the bit. It snaps at the chuck where the stress is highest. Keep the drill straight.
Dull Bits: A dull bit requires more force to cut. That force translates into torsional stress on the shank. It twists until it shears. Sharpen or replace bits before they’re completely spent.
Hardened Materials: Drilling into hardened steel or masonry with a standard HSS bit is a gamble. Use bits rated for the material, a 135° split-point drill bit for metal, a carbide-tipped bit for masonry.
Seized Chuck: A chuck not fully tightened allows the bit to wobble and snap. Before starting, ensure the chuck is securely tightened around the full shank.
The part nobody mentions: Bits most often break just after they punch through the far side of a workpiece. The sudden loss of resistance, combined with a forward push, jams the flutes and snaps the tip. Ease up on pressure as you feel the bit about to breakthrough.
Frequently Asked Questions
Can I use an EZ-Out to remove a broken drill bit?
Yes, an EZ-Out (a type of screw extractor) is designed for this. The critical step is drilling a centered pilot hole into the broken bit. An off-center hole will cause the EZ-Out to skate and damage the workpiece. It works best on softer metals and larger diameter bits.
What if the broken bit is stuck in a concrete anchor?
This is a common headache. Concrete dust and debris can weld the bit to the anchor sleeve. First, try using a left-handed drill bit. If that fails, you’ll likely need to sacrifice the anchor. Drill out the entire anchor with a carbide masonry bit, then install a new one.
My chuck spins but won’t tighten or release. What now?
This indicates stripped internal gears. For a keyless chuck, this often means the sleeve mechanism is damaged from being forced with pliers. For a keyed chuck, the pinion gear teeth may be worn. Replacement is usually more cost-effective than repair. Search for a “chuck replacement” tutorial specific to your drill model.
Are left-handed drill bits the same as extractors?
No. A left-handed drill bit is a cutting tool with reverse threads. An extractor is a non-cutting tool designed to grip and remove. The drill bit can sometimes perform the extraction as a byproduct of drilling. The extractor only removes.
How do I avoid breaking bits in the first place?
Use sharp bits, apply steady straight pressure (no bending), reduce speed when drilling metal, and ensure your chuck is securely tightened. Also, know when to stop, if the bit isn’t cutting and is just smoking, it’s about to snap.
Before You Go
A broken drill bit is a friction problem. In the chuck, it’s friction from corrosion or overtightening, solved with mechanical advantage and shock. In the workpiece, it’s friction from being bound in material, solved with reverse-threaded force.
Your drill is not a hammer. Your chuck is not a vise. Treat both like the precision tools they are. Keep a set of left-handed bits and a spiral extractor in your kit. The next time you hear that sickening ping, you’ll reach for the right tool, not the closest pair of pliers.
And you’ll have the hole back in five minutes, not spend the afternoon at the hardware store buying a new drill.
