
Jump Start a Car with a Drill Battery | A 3-Step DIY Guide
This post contains affiliate links. As an Amazon Associate, we earn from qualifying purchases.
To jump a car with a drill battery, you connect its positive and negative terminals directly to the car battery using jumper cables. It works because an 18V drill battery’s fully charged voltage (up to 21V) is close enough to a car’s 12.8V–14.4V running range to crank the starter, but only on older vehicles with simple electronics. The hardest part is physically connecting standard jumper clamps to the drill’s small, recessed contacts.
This voltage overlap is why a Ryobi 1.5Ah pack started a 1990s Daihatsu Feroza and a DeWalt battery started a 1992 Mazda Miata. The method fails on modern cars because their engine control units and sensors can’t handle the brief voltage spike.
What follows is the exact three-step sequence, the two physical workarounds for those tiny terminals, and the short list of vehicles where this is a genuine last resort versus a guaranteed way to fry a computer.
Key Takeaways
- This only works on vehicles made before roughly 2005 with minimal onboard computers. A modern BMW or any car with start-stop technology will likely suffer damage.
- The physical connection is the biggest hurdle. Drill battery terminals are small and recessed; you may need to improvise with bits of metal to give the jumper clamps a solid bite.
- A fully charged 18V drill battery reads around 21V, which is within the safe operating range of a car’s starter motor but outside the tolerance of delicate microprocessors.
- Treat this as an emergency-only trick for an old truck in a field, not a replacement for a proper jump starter. Using it repeatedly will degrade your drill battery.
- If the car doesn’t start within 5 seconds, stop. Wait at least 3 minutes before trying again to prevent overheating the drill battery.
Why a Drill Battery Can Turn an Engine Over
A car doesn’t run on a steady 12 volts. A healthy, fully charged car battery sits at 12.8 volts. When the engine is running, the alternator pushes between 13.8 and 14.4 volts to everything electrical. Your 18V cordless drill battery isn’t a fixed 18 volts either. A fully charged Ryobi or DeWalt pack peaks around 21 volts. The starter motor only cares about having enough voltage and current to spin. That 21-volt peak from the drill pack delivers the necessary jolt.
A Ryobi 18V battery uses a string of five 18650 lithium-ion cells in series, reaching a peak voltage near 21V when full. This is within the historical operating range of a 12V automotive starter motor.
The capacity, measured in Amp-hours (Ah), dictates how long it can deliver that current. A small 1.5Ah battery has enough juice for a few cranking attempts on a small, cold engine. A larger 4.0Ah or 5.0Ah battery from your best cordless power tools has a better chance, but it’s still a finite reservoir. This is why a proper cordless air compressor uses a separate, high-capacity pack—continuous draw is different from a short, massive burst.
The real limit is every other computer module in the car, not the starter. They’re designed for the alternator’s regulated 14.4V ceiling, not a 21V spike from a tool battery.
The 3-Step Drill Battery Jump Start
Follow this sequence exactly. Getting the order wrong risks a short circuit, which can weld your jumper cables or ignite the battery.
Step 1: Prep the Car and the Battery
Turn the car’s ignition completely off. Kill all accessories: lights, radio, climate control. Pop the hood and locate the battery. Now, check your drill battery. It must be fully charged. A half-charged pack might not have the voltage or current to crank.
If your drill battery won’t charge, this method is dead before you start. Don’t waste time with a weak pack.
Step 2: Make the Connection (This Is the Tricky Part)
This is where most attempts fail. Drill battery contacts are tiny, recessed pads, not posts. Standard jumper clamps won’t grip them.
Where this goes sideways: Forcing a loose clamp onto a recessed terminal. It slips, sparks, and shorts the positive to the negative terminal on the drill battery. The internal protection circuit trips instantly, bricking the pack.
You have two options: 1. The Careful Clamp: Painstakingly seat the red positive clamp on the drill battery’s positive contact. Then seat the black negative clamp on its negative contact. The connection will be precarious. 2. The Improvised Adapter (Safer): Use two short, thick pieces of bare metal—a bolt, a nail, a wrench. Press one against each drill battery terminal so it protrudes, then clamp your jumper cables to the metal. This gives the clamps a solid, large target.
Once you have a grip, connect to the car in this order: Red clamp to the car battery’s positive (+) terminal. Black clamp to a clean, unpainted metal bolt on the engine block or chassis, not the car battery’s negative terminal. This minimizes sparking near the battery.
Step 3: Crank and Immediately Disconnect
Get in the car. Turn the key to start. If it’s going to work, the engine will catch within 3–5 seconds.
If nothing happens after 5 seconds, stop. Turn the key off. You are draining the drill battery and risking overheating. Wait at least three full minutes before a second attempt. This cooldown period is standard for any jump starter procedure.
If it starts, immediately disconnect in reverse order: Black clamp from the car’s metal ground, then red clamp from the car battery, then clamps from the drill battery. Do not let the idling car’s alternator feed back into your tool battery.
| Action | Drill Battery Risk If Done Wrong | Car Risk If Done Wrong |
|---|---|---|
| Connecting clamps to drill battery | Short circuit triggers internal fuse, permanent failure. | None. |
| Connecting red clamp to car | N/A. | Major spark if black clamp is already on car battery negative. |
| Connecting black clamp to car battery terminal | N/A. | Spark ignites hydrogen gas from battery, possible explosion. |
| Cranking for >5 seconds | Overheats cells, reduces lifespan, can trip protection. | Floods engine, strains starter motor. |
| Leaving connected after start | Alternator current can fry drill battery’s management circuit. | Voltage spike from drill battery can fry Engine Control Unit (ECU). |
When This Method Will Burn Your Electronics
This is a period-specific hack, not a universal trick. The dividing line is the complexity of the vehicle’s low-voltage network.
Pre-2000s vehicles (Good to Go): Simple fuel injection or carburetors, basic ECUs. A 1990s Daihatsu or a 1992 Miata fits here. Their electronics are robust enough to handle the voltage irregularity for a few seconds. 2000s–2010s vehicles (Gambling): More computers for emissions, stability control, advanced climate. The risk of frying a sensor or module is high.
Modern Vehicles (Absolutely Not): This includes most cars from the last decade, especially those with start-stop systems, turbochargers, or hybrid components. The author explicitly warns against trying this on a “modern BMW.” The network of controllers is too sensitive.
The exception that proves the rule is a Tesla Cybertruck. Its low-voltage system is designed to accept input from 12V, 16V, and 48V sources, making it uniquely compatible with external power sources. Your 2018 Ford F-150 is not a Cybertruck.
Drill Battery vs. Dedicated Jump Starter
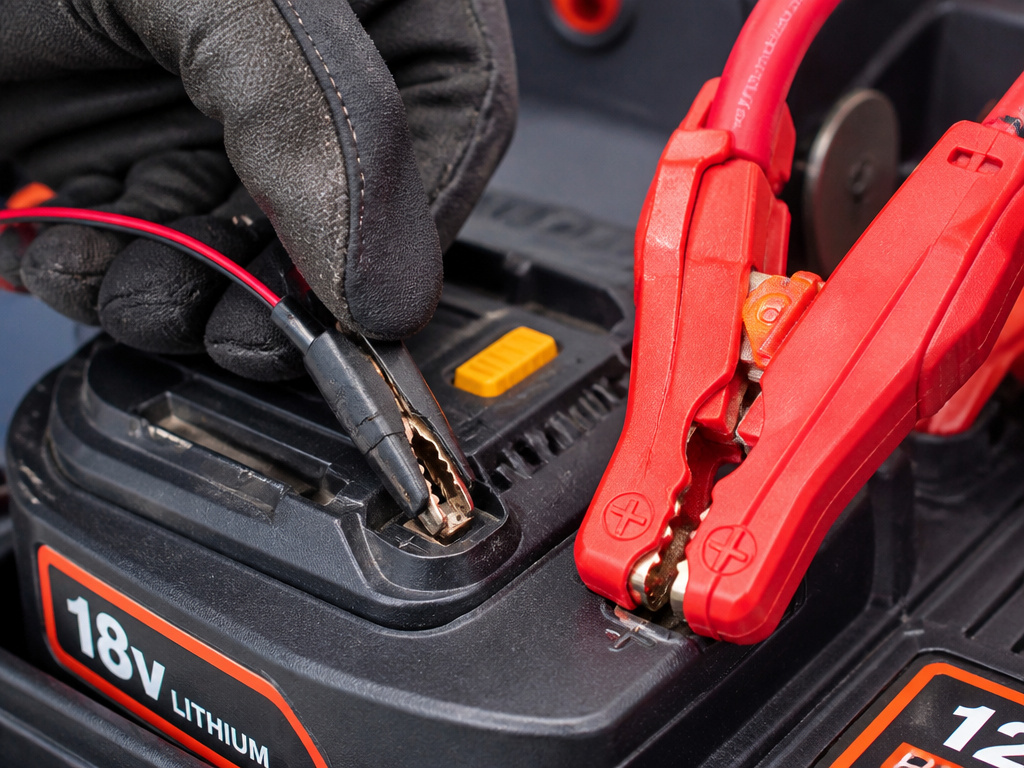 A commercial jump starter is a system designed for the task, not just a battery in a case.
| Feature | 18V Drill Battery | Dedicated Jump Starter (e.g., Harbor Freight) |
|---|---|---|
| Output Voltage | ~21V peak (unregulated) | Regulated 12V–14V output |
| Connection | Recessed, difficult pads | Large, color-coded clamps |
| Safety Circuits | Basic over-current protection | Reverse-polarity alarms, over-temperature shutoff |
| Cable Gauge | Your jumper cables (often thin) | Integrated 2-gauge cables (thick, low resistance) |
| Use Case | Emergency, old vehicles only | Designed for all 12V lead-acid batteries |
The Harbor Freight manual states an alarm sounds and Error Code Er1 appears if the clamps are connected backward. A drill battery offers no such warning. It just dies. A jump starter’s heavy 2-gauge cables can deliver the 500+ cold cranking amps needed for a large V8; the thin wires on discount jumper cables will heat up and waste energy.
Think of a drill battery charger as a maintenance device. A jump starter is a rescue device. One is for slowly feeding your tools; the other is for delivering a controlled, massive surge to an engine.
How to Charge Your Drill Battery Afterward
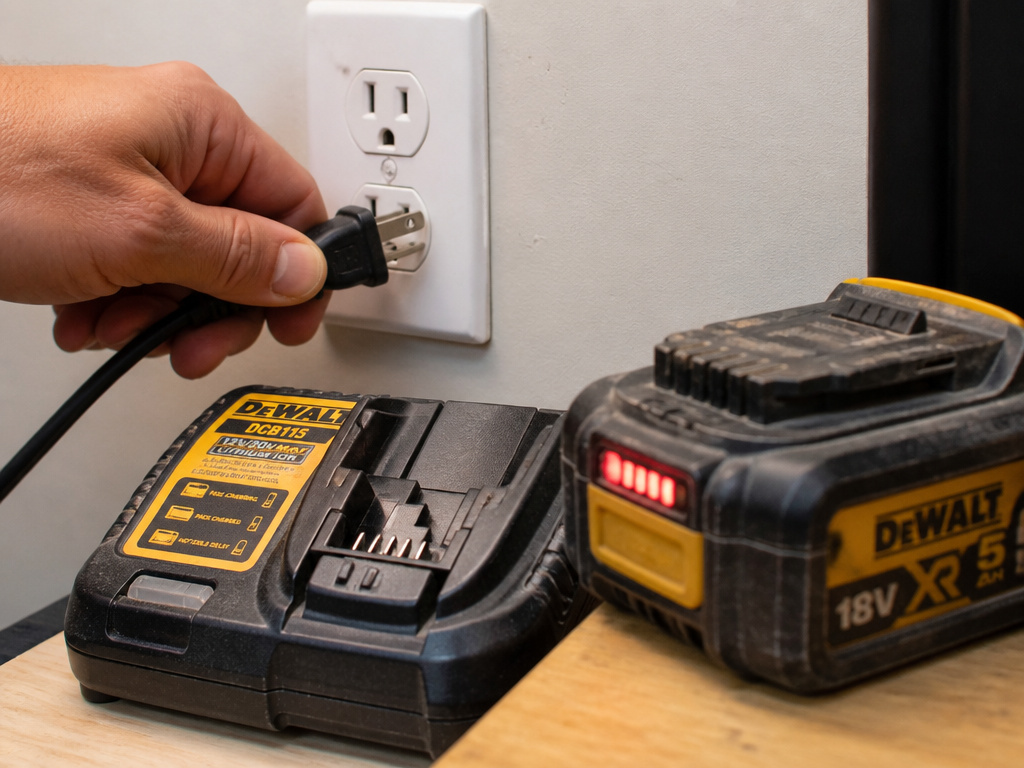 Using your pack to jump a car is a deep-discharge event, even if only for a few seconds. It needs a proper recharge cycle immediately.
Use the original charger for your brand. Don’t try to speed up the battery charge time by using a fast charger not designed for it. If you must use a different charger, ensure the voltage and polarity match exactly. Mismatched charging is a common reason owners need to learn how to fix a drill battery that won’t charge.
Let the battery cool to room temperature before charging. Plug it in and walk away. A full recharge for a depleted 4.0Ah battery can take over an hour. This is not the time to experiment with a phone charger hack.
The Tool System Advantage
This entire scenario highlights why investing in a cohesive battery system matters. If you own a Ryobi, DeWalt, or Milwaukee platform, you have multiple batteries that share the same core technology. In a true pinch, you could theoretically connect two 18V batteries for more capacity—though that introduces even more risk and complexity.
The deeper advantage is knowledge. Understanding that your cordless drill and your car starter operate on similar electrical principles turns a scary emergency into a solvable problem. You know the limits because you know your tools.
Frequently Asked Questions
Can any drill battery jump a car?
No. Only 18V/20V Max class batteries have the necessary voltage. A 12V drill battery won’t provide enough of a boost over the car’s dead 12V battery to make a difference. The chemistry also matters: you need a lithium-ion pack for its high current delivery. Old NiCad batteries lack the punch.
Is it bad for my drill battery?
Yes, it’s stressful. You are asking it to deliver peak current for which it wasn’t designed. Doing it once might not kill a healthy battery, but it will contribute to long-term wear. Repeated use will significantly shorten its life. It’s a trade-off: save a tow truck fee, sacrifice some battery cycles.
What if I have a Black & Decker drill?
The principle is the same. A 20V Max Black & Decker battery has a similar cell configuration and voltage profile. The same connection challenges and vehicle warnings apply. The process for a Black & Decker drill is identical to a Ryobi or DeWalt.
Why can’t I connect the black clamp to the car battery?
Connecting the negative clamp directly to the dead car battery’s negative terminal creates a spark right next to the battery. Lead-acid batteries vent hydrogen gas, which is explosive. By clamping to a bare metal point on the engine block, you ground the circuit away from the battery, reducing explosion risk. This is standard safe practice for any jump start.
My car started. Why won’t it stay running?
This means the drill battery provided enough juice to crank the engine, but your car’s alternator is dead. The alternator’s job is to generate power once the engine is spinning. If it’s failed, the car will run for a few seconds on the residual charge from the jump, then stall. The problem is no longer the battery; you need an alternator replacement.
The Bottom Line
Jumping a car with a drill battery is a documented workaround for pre-computer-era vehicles. It worked on a 1990s Daihatsu Feroza and a 1992 Mazda Miata because their electrical systems were simple. The sequence is straightforward: connect, crank for five seconds, disconnect immediately.
The real answer lives in the specifics. Your jumper cables are probably too thin. Your drill battery’s terminals are definitely too small. And your modern car’s electronics are certainly too sensitive. For an old tractor or a classic car, it’s a clever hack. For a daily driver built this century, it’s a shortcut to a four-figure ECU repair bill. Keep a proper jump starter in your trunk. Use your drill battery for what it’s good for: driving screws.
