
How to Get a Drill Bit Out of a Drill With a Keyless Chuck
This post contains affiliate links. As an Amazon Associate, we earn from qualifying purchases.
To get a drill bit out of a drill, first remove the battery. Firmly grip the drill’s body with one hand, then rotate the chuck sleeve counter-clockwise with your other hand until the jaws open and release the bit. For a keyless chuck, no tools are needed.
That battery step is non-negotiable. A drill with stored electrical charge can fire the trigger from a bump or a snagged cord, spinning the chuck with enough force to break a finger. It happens in under a second, and every manual from Ryobi to Kobalt leads with the same warning.
What follows is the full breakdown for keyless chucks, the standard on modern cordless drills. We’ll cover the universal three-step process, the model-specific quirks for Ryobi ONE+ drills, and what to do when a bit is stuck, hot, or just won’t budge.
Key Takeaways
- Always disconnect the battery first. This prevents accidental startup, which is the leading cause of hand injuries during bit changes.
- Grip the drill body, not the handle. Holding the main housing gives you a stable anchor to twist the chuck against.
- Turn the chuck sleeve counter-clockwise. On every keyless chuck, lefty-loosey opens the jaws.
- Insert the bit at least 20mm into the chuck. A shallow seat causes wobble, uneven wear, and can eject the bit under load.
- If the bit is hot from use, let it cool or use gloves. A hot bit can transfer heat to the chuck jaws, expanding the metal and making removal harder.
The Universal 3-Step Removal Process
This method works for any modern drill with a keyless chuck, from a Ryobi P209 to a Milwaukee M18 Fuel. The mechanism is identical across brands.
To remove a drill bit, disconnect the battery pack. Hold the drill body securely, then rotate the keyless chuck sleeve anti-clockwise to open the jaws and release the bit. Ensure the bit is cool before handling to avoid burns.
First, isolate the power source. Pull the battery off your Ryobi, DeWalt, or Makita drill. Place it away from your work area. This eliminates the risk of the drill turning on if the trigger is bumped, which is how most chuck-related injuries occur during this simple task.
Second, establish your grip. Wrap your non-dominant hand around the drill’s main body, just behind the chuck. Your palm should be on the motor housing. Do not hold the pistol grip handle, you need to counter the twisting force on the chuck, and the handle pivots.
Third, apply rotational force. With your other hand, grasp the knurled chuck sleeve. Turn it counter-clockwise. You’ll feel the jaws inside begin to retract. Keep turning until the opening is wide enough for the bit to drop free. If the bit doesn’t fall out, you may need to pull it straight out once the jaws are fully open.
Skip the battery step, and you’re one accidental trigger press away from the chuck spinning at 2,000 RPM with your fingers in the way. The drill doesn’t know you’re changing a bit; it only knows the switch is closed.
Why Your Grip on the Drill Body Matters
The chuck is threaded onto the drill’s spindle. To unscrew it, you must hold the spindle stationary. Your hand on the body does that. If you hold the handle instead, the entire drill can rotate in your hand, turning the chuck and the body together. Nothing loosens, and you just strain your wrist.
This is the single most common frustration for beginners. They turn the chuck hard, but the whole drill spins. The fix is simple: anchor the body, then turn the sleeve.
Ryobi-Specific Instructions and Model Nuances
Most of your questions will be about Ryobi 18V ONE+ drills. They dominate the homeowner market, and their keyless chucks follow the universal rules with a couple of documented quirks.
The Ryobi 18V ONE+ platform, from the older P209 to the brushless PBLDD01, uses a standard keyless chuck. The official support documents emphasize the same core steps: battery off, hold body, turn sleeve left.
| Ryobi Model | Key Feature | Bit Change Note |
|---|---|---|
| P209, PCL206K2 | 3/8″ Keyless Chuck | Basic keyless operation. No lock switch. |
| PBLDD01 (HP Brushless) | 1/2″ Chuck, Locking Trigger | Manual specifies using the trigger lock switch before bit changes. |
| KDD 524B-03 (Kobalt) | 1/2″ Brushless, 650 in-lb Torque | Direction selector must be in center lock position for changes. |
For the Ryobi PBLDD01 and similar prosumer models, the manual advises engaging the trigger lock switch. This is a secondary physical barrier. Find the small switch near the trigger that prevents it from being pulled. Slide it to the locked position. It’s a good habit, but it does not replace removing the battery.
Common mistake: Using the drill’s power to tighten the chuck. The manuals explicitly warn against holding the sleeve and pulling the trigger to tighten. It strains the chuck mechanism and voids the warranty. Tighten by hand only.
The direction-of-rotation selector, the switch marked with an arrow for forward and reverse, should be in the center position if your model has one. This mechanically locks the spindle, making it easier to break a stuck chuck loose. Not all Ryobi drills have this; it’s more common on brushless models like the Kobalt KDD 524B-03.
When the Standard Process Fails (Stuck, Hot, or Cross-Threaded)
Sometimes the bit won’t come out. The chuck turns but doesn’t open, or it feels completely seized. This is when you shift from standard removal to problem-solving.
When the Bit is Hot
If you’ve been drilling metal or running the drill hard, the bit and chuck jaws will be hot. Metal expands when hot. An expanded jaw can grip a bit tighter, making removal difficult.
Let the drill sit for five minutes. If you’re in a hurry, wear a leather-palmed work glove to handle the hot bit and chuck. Do not use a rag, it can catch on the chuck’s teeth and pull your hand into the mechanism.
When the Chuck Turns But Won’t Open
This usually means the bit is cross-threaded or jammed at an angle. You inserted it crooked and tightened, deforming the jaws.
- Re-seat the battery (safely).
- Set the drill to its lowest torque setting if it’s a drill/driver.
- Briefly pull the trigger in reverse (counter-clockwise) at a slow speed. Sometimes a jolt of reverse rotation can knock the bit loose from its wedged position.
- Immediately remove the battery again and try the manual removal process.
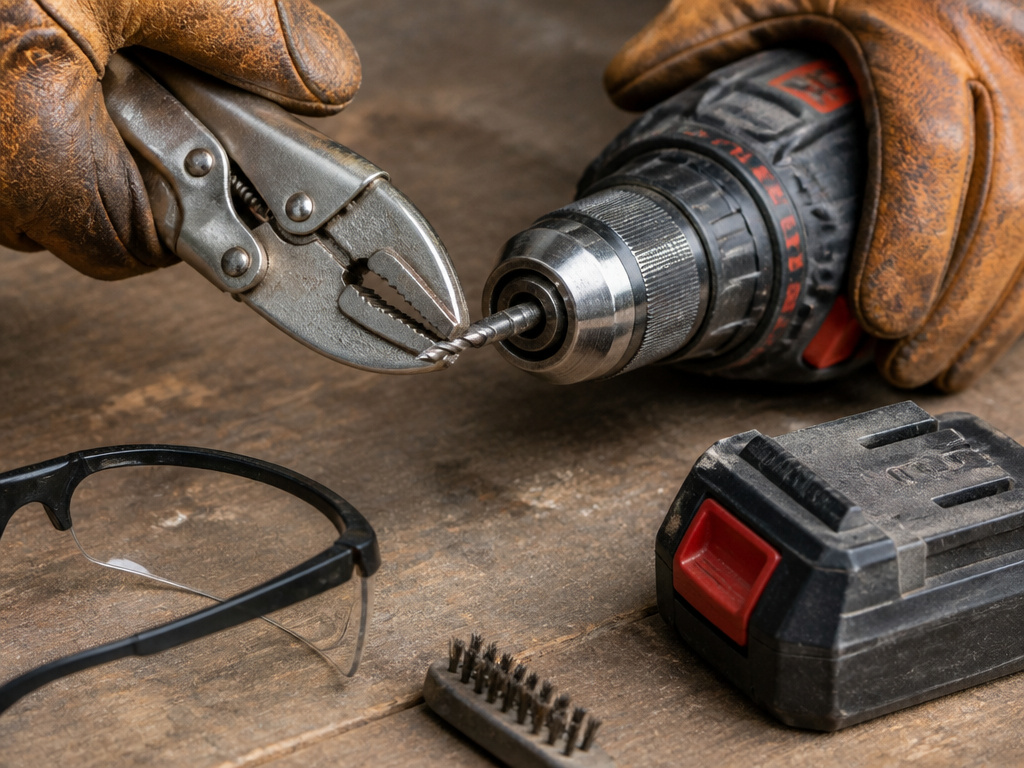
If that fails, you’re dealing with a stuck drill bit. This requires specific extraction techniques, like using a pair of locking pliers on the bit shank (if it protrudes) or applying a penetrating lubricant like Liquid Wrench to the chuck jaws.
When the Bit is Broken or Snapped Off
If the bit snapped inside the chuck, you’ll see a short, jagged shank. Do not try to drill with it.
Your best tool here is a pair of needle-nose vise-grips. Clamp them onto the broken shank as tight as possible. With the battery removed, hold the drill body and use the vise-grips as a lever to turn the shank counter-clockwise. The broken bit acts like a key. For a completely flush break, you may need to use a left-hand drill bit or a speed-out bit to bite into the shank and back it out.
Safety, Tools, and the Why Behind the Rules
 Power tool safety is about anticipating failure. The rules seem tedious until you see what happens when they’re ignored.
Before you start: Wear safety glasses marked ANSI Z87.1. A snapped bit or a metal shard from the chuck can travel fast enough to penetrate an eyeball. Also, ensure no loose clothing or gloves can be entangled in the chuck teeth.
The battery rule exists because a drill’s trigger is a simple switch. A falling tool, a snagged cord, or a stray hand can close it. A 18V drill can generate over 650 inch-pounds of torque, enough to spin the chuck with bone-breaking force before your reflexes can react. Disconnecting the power removes that hazard entirely.
The 20mm insertion depth isn’t arbitrary. A bit seated less than three-quarters of an inch into the chuck has minimal grip. Under lateral pressure, it can slip, scoring the inside of the jaws and creating a permanent wobble. Once the jaws are scored, the drill will never hold a bit perfectly straight again, ruining its accuracy.
The tools you need are simple: – Your hands. – Safety glasses. – A pair of leather gloves (for hot bits). – Locking pliers or vise-grips (for stuck bits). – A small brush to clean chuck jaws of debris.
A clean chuck is a functional chuck. After removing a bit, occasionally brush out any dust or metal shavings from the jaws. Debris acts like grit in a gearbox, accelerating wear and making the chuck harder to open and close smoothly.
Frequently Asked Questions
Why won’t my Ryobi drill chuck open?
If the chuck sleeve spins freely but the jaws don’t open, the internal wedge mechanism is likely jammed with debris or a damaged spring. Try tapping the chuck sleeve lightly with a rubber mallet while turning it. If that fails, the chuck may need replacement. A jammed drill bit can also cause this.
Can I use oil to loosen a stuck drill bit?
Drop of penetrating oil like WD-40 Specialist Penetrant on the chuck jaws can help. Apply it, let it sit for ten minutes, then try removal. Do not use regular motor oil or grease, it attracts dust and can gum up the mechanism.
How do you remove a drill bit without a chuck key?
Modern keyless chucks don’t use a key. For older drills with a geared key chuck, you insert the key into each of the three holes on the chuck and turn counter-clockwise to loosen each jaw evenly. You must loosen all three jaws before the bit will release.
Is it bad to leave a drill bit in the chuck?
Yes, for long-term storage. It keeps constant pressure on the chuck springs and can lead to “set,” where the jaws lose their ability to retract fully. It also promotes corrosion between the bit shank and the jaws, especially in humid environments. Store bits separately.
What do I do if the bit is stuck in the material, not the chuck?
This is a different problem. Stop the drill, remove the battery, and secure the workpiece. If the bit is stuck in a hole, you may need to extract a broken drill bit from the workpiece using dedicated tools like an extractor set. Forcing the drill can snap the bit.
The Bottom Line
Getting a drill bit out is a five-second job if you follow the sequence: power off, grip body, turn left. The stakes are real, a spinning chuck is a serious hazard, but the procedure is simple muscle memory once you’ve done it right a few times.
For 95% of situations, the standard three-step process is all you need. For the other 5%, hot, stuck, or broken bits, you now have the next steps. Keep your chuck clean, seat your bits deep, and always respect the power switch. That’s how you change bits for a decade without a single hitch.
