
How to Drill Spring Steel: The Critical 400°F Heat Threshold
This post contains affiliate links. As an Amazon Associate, we earn from qualifying purchases.
Drilling spring steel requires matching three things: a cobalt or carbide drill bit, low speed with high pressure, and continuous lubrication to keep the metal below 400°F. Spring steel begins to soften at that temperature, and exceeding it during drilling ruins the temper and the spring’s memory. The hole itself won’t cause a stress riser, but the heat from a dull bit or dry drilling will.
That 400-degree threshold changes the goal. You’re not just making a hole; you’re managing a thermal event. Every choice, bit material, RPM, clamp pressure, either keeps heat in the chip or lets it soak into the workpiece. Get it wrong, and the steel turns blue at the edge. The spring won’t break tomorrow, but it lost a chunk of its resilience right there.
What follows: the bit types that actually work, the drilling rhythm that prevents heat buildup, and the one setup mistake that guarantees a broken tool. You’ll also see why a standard practice like a pilot hole is wrong for some jobs, and how a leaf spring moves while you drill it.
Key Takeaways
- Spring steel starts to soften at 400°F. Keep the work cool with cutting fluid; WD-40 isn’t enough.
- Use cobalt (HSS-Co) or carbide drill bits. Standard high-speed steel bits dull in seconds.
- Drill at low speed with high, steady pressure. Letting the bit skate creates heat and work-hardens the surface.
- Clamp the workpiece rigidly. A leaf spring will deflect about 1/4 inch under drilling force.
- A clean, round hole does not create a stress riser. Nicks, gouges, or heat-affected zones do.
The 400°F Rule: Why Heat Control is Everything
According to Eaton Detroit Spring, spring steel begins to soften at 400 degrees Fahrenheit. The heat generated from drilling with a dull bit or insufficient coolant can locally exceed this, creating a small zone where the steel loses its spring temper. This damage is often visible as a blue or straw-colored ring around the hole.
That number isn’t a suggestion. It’s the failure line. Your drill bit generates heat through friction. The goal is to get that heat out in the metal shavings, not let it conduct back into your spring. This is why lubrication is non-negotiable. A quick splash of WD-40 might help a standard bit in mild steel, but it evaporates too fast for spring steel’s low thermal conductivity. You need a dedicated cutting oil or fluid that stays put and carries heat away.
The consequences are delayed but certain. A spring with a heat-softened spot will fatigue faster at that location. It might not fail on the first cycle, but its service life is now shorter. You can’t see the metallurgical change, but you often see the telltale temper colors, blue, purple, yellow, around the hole if you went too hot.
Common mistake: Assuming any oil is enough. WD-40 is a water displacer and light lubricant, not a cutting fluid. It boils off quickly, leaving the bit and workpiece dry. For a job that might take several minutes per hole, that guarantees overheating.
Cobalt vs. Carbide: Picking the Bit That Won’t Quit
Your bit choice decides the fight before it starts. Standard high-speed steel (HSS) bits are for mild steel and wood. They’ll lose their edge on spring steel’s hard, abrasive surface within seconds, generating massive heat as they rub instead of cut.
For most DIY and shop work, a cobalt drill bit is the default. These are labeled HSS-Co or M42 and contain 5-8% cobalt alloyed into the steel. The cobalt increases heat resistance and hardness dramatically. A sharp cobalt bit from a brand like Milwaukee or DeWalt will handle most spring steel drilling jobs. It’s the balance of performance, cost, and durability.
For production work or the hardest alloys, solid carbide drill bits are the next step. Carbide is significantly harder and more heat-resistant than cobalt. It’s also brittle. A carbide bit demands a perfectly rigid setup, almost always a drill press, and zero side load. Hand-drilling with carbide is a great way to snap a fifty-dollar bit. It’s the tool for when cobalt isn’t quite enough and you can control every variable.
The cobalt vs carbide drill bits debate hinges on rigidity and budget. Cobalt forgives a slight wobble; carbide does not.
| Drill Bit Type | Best For | Risk If Used Wrong |
|---|---|---|
| Cobalt (HSS-Co) | Most shop drilling, hand drills or drill press, general fabrication. | Will still overheat and dull if run dry or at high RPM. |
| Solid Carbide | CNC machining, high-volume production, ultra-hard alloys in a rigid press. | Snaps under hand-drill vibration or if the workpiece shifts. |
| Standard HSS | Mild steel, aluminum, wood. | Dulls instantly on spring steel, work-hardens the surface, ruins the bit. |
For a deeper comparison on bit materials for tough metals, our guide on the strongest drill bits breaks down the metallurgy.
Speed, Pressure, and Lubrication: The Drilling Rhythm
The machine settings matter as much as the tool. Spring steel punishes a fast, light touch. It rewards slow, heavy, and wet.
Set your drill press or cordless drill to its lowest speed setting. If you’re using a variable speed trigger, start slow. High RPMs create friction heat faster than the bit can evacuate chips. Aim for 100-300 RPM for larger bits (1/4″ and up). You want to see thick, curled chips coming out, not dust. Dust means you’re grinding, not cutting.
Apply high, steady pressure. Don’t peck. Let the bit’s cutting edges engage fully and maintain feed pressure until you’re through. Inconsistent pressure lets the bit skate and work-harden the surface, making it even harder to penetrate. If you’re using a hand drill, brace yourself or use a side handle. Your body is part of the feed mechanism.
Flood the hole with cutting fluid or heavy oil before you start and keep adding it. The fluid cools the bit, lubricates the cut, and flushes chips. For a drill press, a brush and a cup of oil works. For more advanced setups, a pump-style oiler is worth the investment. This is the step that keeps you under 400°F.
Where this goes sideways: “Pecking” the drill in and out. Each time the bit re-enters a work-hardened surface, it dulls faster. Push through in one smooth, lubricated motion.
Workholding: Your Spring Will Move
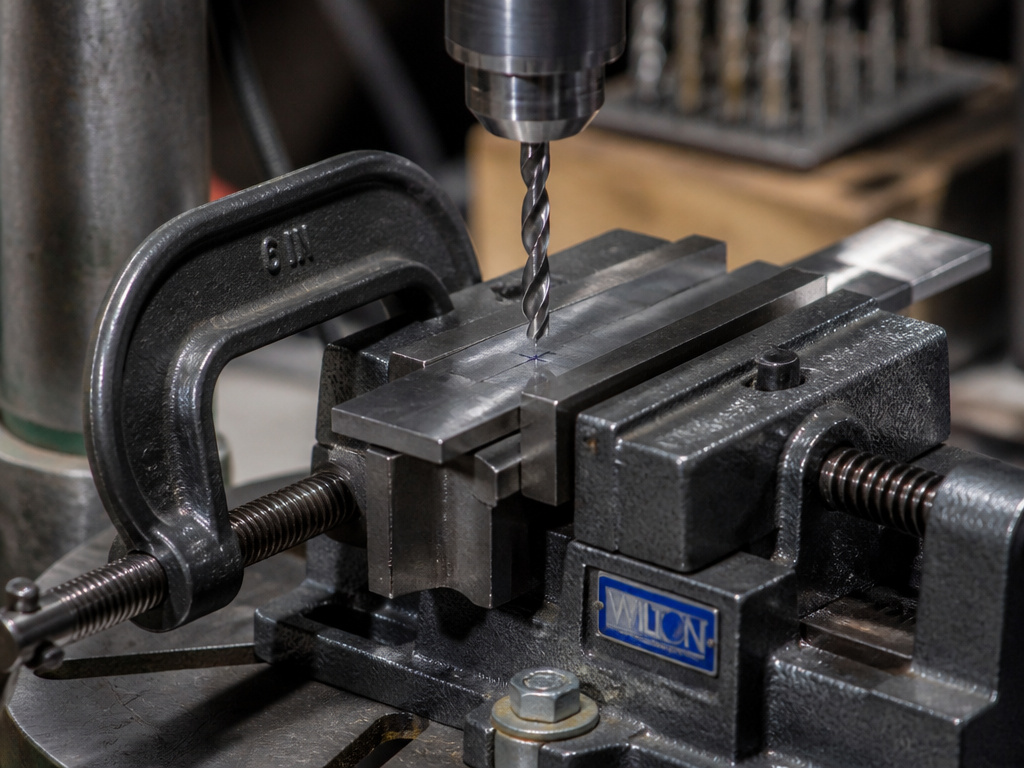
Spring steel is elastic. When you push a drill bit into it, the material will deflect, it will bend away from the force. Eaton Springs notes this is why they punch holes in production for speed. For you, it means your clamping game must be perfect.
Use at least two heavy-duty C-clamps or a machinist’s vise to secure the workpiece directly to your drill press table or a massive bench. The clamps should be on opposite sides of the drill point to counteract rotational force. If you’re drilling a leaf spring, know that it can deflect about 1/4 inch under drilling load. Your clamps must prevent this lift and twist.
A drill press vise alone often isn’t enough. The spring can still torque inside the vise jaws. Combine a vise with a clamp securing the vise itself to the table. The goal is zero movement. Any shift mid-drill will snap a carbide bit or chip the edge of a cobalt one.
This principle of rigid workholding is universal for tough materials, as detailed in our guide on how to drill through steel.
Step-by-Step: The Dimpling Technique for Clean Holes
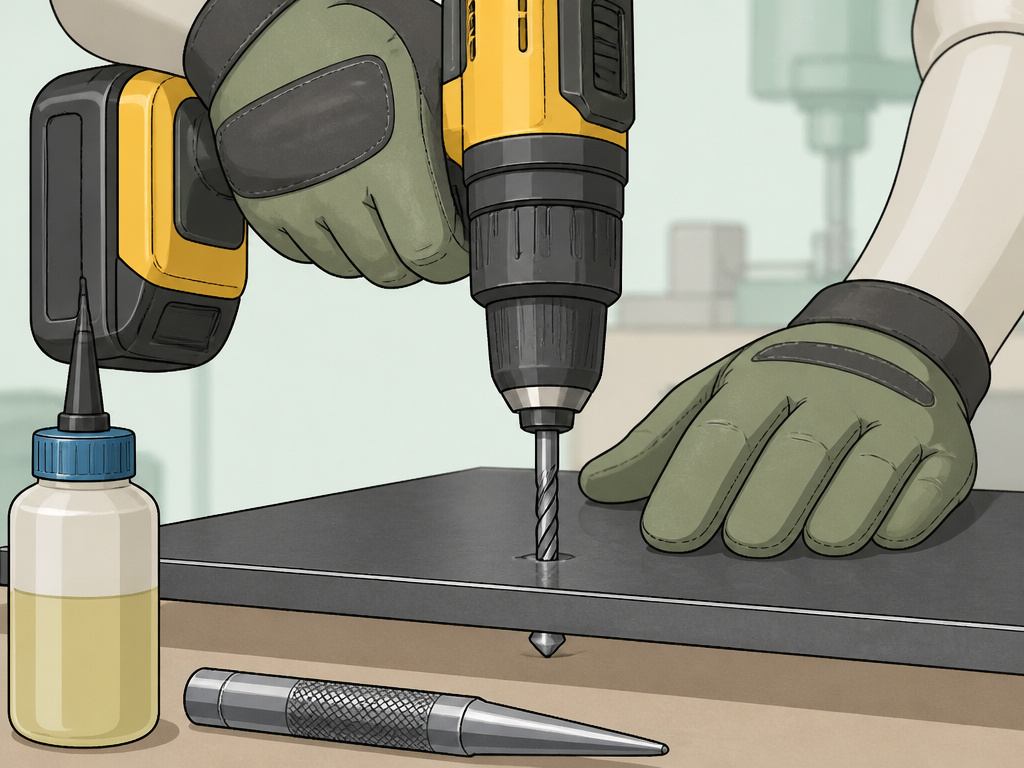
This method, recommended for tasks like installing StableLoad kits on leaf springs, prevents the bit from grabbing and tearing the exit side.
- Mark and Punch. Use a center punch to make a deep, clear dimple. This gives the bit a positive start and stops it from wandering on the hard surface.
- Secure the Work. Clamp the spring as described above. Check for any rocking or flex.
- Start Drilling with Lubricant. Apply cutting fluid. Start the drill at low speed and engage the punch mark with firm pressure.
- Drill Until Dimpling. Do not drill all the way through. Drill until the tip of the bit just begins to create a small dimple or “pimple” on the opposite side of the metal. Stop.
- Move to the Next Hole. If you have multiple holes, repeat steps 1-4 for each one. This lets the metal stress-relieve.
- Finish the Holes. Return to your first hole. The dimple will now guide the bit. Drill through the remaining thin web of material. Decrease pressure just as the bit breaks through to avoid a violent grab.
This technique controls the breakthrough and produces a cleaner hole with less burr. It’s especially critical for thicker sections.
When the Rules Change: Leaf Springs and Factory Advice
Drilling leaf springs for suspension upgrades like Torklift’s StableLoads introduces specific rules that contradict general machining practice. The kit supplies 7/16-inch cobalt drill bits and instructs you to mark the hole 1 inch back from the spring end.
The manufacturer explicitly advises against using a pilot hole. Their reasoning is that their supplied cobalt bit is designed to start cleanly in the punched factory hole, and a smaller pilot can work-harden the material, making the final drill more difficult. This is a case where you follow the product-specific instructions over generic best practice.
Also, many factory overload springs come pre-drilled with 1/2-inch holes. Always check before you start drilling. You might not need to drill at all.
What About Annealing?
Annealing, heating the steel to a critical temperature and letting it cool slowly, softens it, making it easy to drill. It’s a valid technique if the spring function in that specific spot is no longer required.
The problem is localization. Heating a small area to a dull red heat (around 1500°F) with a torch permanently removes the spring temper in that zone. It will be a weak point. For a decorative project or a part that won’t see stress, annealing is fine. For a functional spring where the hole is under load, it’s a terrible idea. You’ve traded drill difficulty for a fundamental material failure.
For other tough metals, the approach differs. Our resource on how to drill hardened steel covers when annealing is and isn’t appropriate.
Frequently Asked Questions
Can a round hole cause a spring to crack?
No. According to Eaton Detroit Spring, a clean, round hole will not create a stress riser. Stress risers come from sharp notches, gouges, weld spatter, or heat-affected zones around the hole. The drilling process itself, if done coolly, does not introduce a failure point.
What’s the best lubricant for drilling spring steel?
Dedicated cutting oil or fluid is best. Brands like Tap Magic, Rapid Tap, or even heavy-weight motor oil work far better than WD-40. The lubricant needs high lubricity and high flash point to stay under the bit and carry heat away.
Can I use a hand drill, or do I need a drill press?
You can use a high-torque hand drill, but a drill press is vastly superior. The press ensures perfect perpendicularity, provides mechanical feed pressure, and eliminates the wobble that breaks bits. For any hole over 1/8″ or any critical location, the drill press is the right tool.
How do I know if I overheated the steel?
Look for temper colors around the hole. A light straw or purple hue indicates you were warm. A blue or grey color means you exceeded 400°F and the steel has softened. The spring’s properties in that colored ring are now compromised.
Is spring steel harder to drill than stainless steel?
It can be, but differently. Spring steel is hard and abrasive, demanding bit hardness. Some stainless steels are gummy and work-harden quickly, demanding sharpness and constant feed. Both require slow speeds, heavy feed, and coolant. The techniques in our metal drilling guide apply to both.
Before You Go
Drilling spring steel isn’t a mystery. It’s a process defined by a few physical limits: the 400°F softening point, the need for bit hardness greater than the workpiece, and the reality of elastic deflection. Respect those limits with a cobalt bit, low speed, high pressure, and real cutting fluid, and the hole will be clean. Ignore them, and you’ll burn bits and damage the material. For one or two holes, take your time. For a production run, sub it out to a shop with a CNC punch. Your springs, and your tools, will last.
