
Guide: How to Drill a Hole in a Granite Countertop Safely
This post contains affiliate links. As an Amazon Associate, we earn from qualifying purchases.
To drill a hole in a granite countertop, you need a diamond core bit, continuous water cooling, and a controlled technique that reduces feed pressure to almost zero when the bit is 5–8mm from breaking through the bottom. Start the cut at a 45° angle to prevent the bit from walking, use a plumber’s putty dam to hold water, and let the diamond grit do the grinding, force cracks stone.
The 5–8mm rule isn’t a suggestion. It’s the line between a clean hole and a spiderweb crack radiating from the exit point. That final millimeter of material is under maximum stress; pushing through it at full pressure blows out the underside every time.
What follows is the shop method, adapted for your kitchen. We’ll cover the one bit type that works, the two critical angles, and the three mistakes that turn a weekend project into a $3,000 slab replacement. By the end, you’ll know how to drill for a faucet, a soap dispenser, or a hot water tap without paying a fabricator’s call-out fee.
Key Takeaways
- Reduce feed pressure to near-zero when the bit is 5–8mm from breakthrough. This is the non-negotiable rule to prevent chipping and cracking the exit face.
- Start every hole at a 45° angle to grind a starter groove before straightening the drill to 90°. A core bit will skate on polished granite otherwise.
- Use a diamond core bit with a soft bond for granite. A hard-bond bit, meant for marble, will glaze over and stop cutting.
- Drilling an installed countertop takes 2–3 times longer than drilling in a shop. The slab can flex on cabinet supports, so you must use slower speed and lighter pressure to avoid vibration-induced cracks.
- Chamfer the hole edge with a diamond burr after drilling. A slight bevel removes micro-chipping and prevents the faucet escutcheon from creating pressure points.
The Right Bit: Diamond Core Bits Only
Forget carbide masonry bits and standard hole saws. They will overheat, dull in seconds, and likely crack the granite. The only tool for the job is a diamond core bit. These are hollow cylinders with diamond-impregnated segments brazed to the cutting end. They grind the stone away rather than chipping it.
Diamond segments are held in a metal matrix called the bond. The bond’s hardness determines how quickly fresh diamond grit is exposed. For hard, abrasive stones like granite, quartzite, and engineered quartz, you need a soft bond. It wears faster, constantly revealing new, sharp diamonds. Using a hard-bond bit (designed for soft marble) on granite causes the diamonds to dull without releasing, the bit glazes over and stops cutting, generating heat that can thermal-shock the stone.
The technical difference: A diamond core bit for granite uses a softer metal bond that erodes steadily, exposing fresh diamond grit to abrade the hard stone. A bit for marble has a harder bond to retain diamonds longer against less abrasive material.
Segment profile matters too. T-shape segments, with relief grooves, cut faster and clear grinding slurry better than flat segments. For a one-off DIY job, a bit like the Kratos ALPA or a Drilax diamond hole saw kit with a guide system will handle a standard 1-3/8″ faucet hole cleanly. The guide stops the bit from walking on the polished surface.
If you’re planning multiple holes, investing in a proper core bit and learning how to use a hole saw designed for masonry is wise. The principles of steady pressure and cooling are the same, but the tool is more robust.
What You’ll Need (Beyond the Drill)
Gathering the right accessories is what separates a controlled operation from a disaster. Here’s the shortlist.
- Variable-speed drill (corded preferred for consistent torque) or a low-RPM drill motor.
- Diamond core bit (correct diameter for your hardware, verify the spec sheet).
- Plumber’s putty or modeling clay to build a water dam.
- Spray bottle or small jug of water.
- Painter’s tape.
- Permanent marker or grease pencil.
- Scrap wood block (at least 3/4″ thick).
- Clamps (if drilling a loose slab).
- Safety glasses, hearing protection, and a dust mask. Silica dust is no joke.
- Diamond hand file or rotary burr (for chamfering the hole edge afterward).
Having a dedicated guide for how to drill a straight hole is helpful, but the core bit’s pilot or a putty dam will serve for a single hole.
Step-by-Step: Drilling the Hole
This process assumes you are drilling an installed countertop. If the slab is loose on sawhorses, clamp it securely and place a scrap wood block underneath the drill point to protect the underside from blowout.
1. Mark and Verify. Twice
Find your center point. Measure from the sink edge and the wall, mark it with a tiny cross on the granite. Then, cover the spot with a 4″ square of painter’s tape and re-mark the cross on the tape. The tape helps reduce chipping and gives the bit a slight grip to start.
Common mistake: Drilling based on a verbal description like “standard faucet hole.” Always check the installation sheet for the actual required diameter. A hole drilled too large is permanent.
2. Build the Water Dam
Roll a snake of plumber’s putty about 1/2-inch thick. Press it onto the countertop in a circle around your mark, sealing the edges to create a small reservoir. This dam will hold the cooling water. No continuous water flow equals a burnt, glazed bit and a high risk of cracking the granite from heat stress.
3. The 45-Degree Start
Fill the dam with water. Position your core bit so it contacts the granite at roughly a 45-degree angle, with the edge of the bit aligned on your center mark. Start the drill at a low speed (around 500 RPM). Apply light pressure and grind until a crescent-shaped groove is established, this usually takes 10-15 seconds.
4. Straighten and Drill
With the groove set, slowly straighten the drill to perpendicular. Increase speed to the bit’s recommended range (often 1000-1500 RPM for handheld drills). Apply steady, moderate pressure. Let the diamonds grind; don’t force it. You should see a milky white slurry of stone dust and water. Replenish the water as it gets low.
Listen to the sound. A high-pitched whine means you’re pushing too hard or the bit is dry. A low, gritty rumble is correct.
The Single Most Important Step: The 5–8mm Breakthrough Rule
As you drill, you’ll feel the progress change. When you estimate the bit is 5–8mm from exiting the bottom, dramatically reduce your feed pressure. You’re almost not pushing at all at this point, just letting the bit’s weight and rotation do the final grinding.
Where this goes sideways: Ignoring the breakthrough rule. The last sliver of granite is under immense torsional stress. Forcing it blows out a chip the size of a quarter on the underside, and the crack can travel.
This final stage will take longer, maybe a full minute for those last few millimeters. Be patient. When the bit punches through, you’ll feel a sudden release. Keep the drill running and slowly pull the bit back out.
Drilling Installed vs. Loose Slabs: A Critical Difference
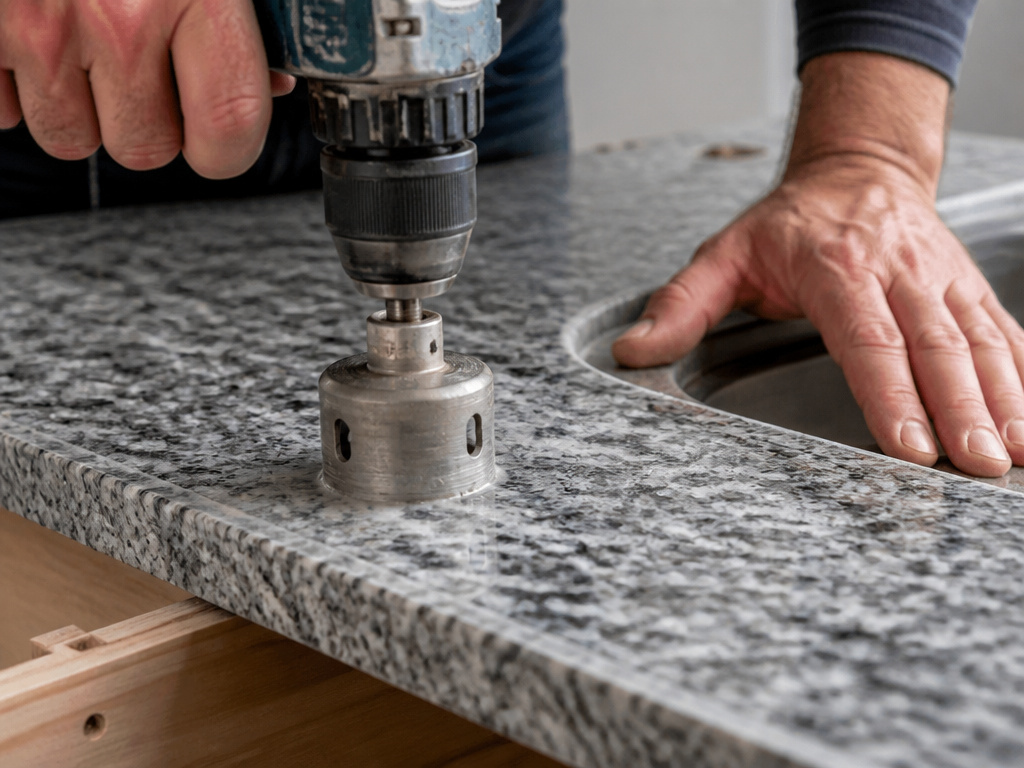 The shop technique doesn’t translate directly to your kitchen. On a shop table, the slab is fully supported and rigid. Your installed countertop is sitting on cabinet frames and brackets, which allow minute flex.
Drilling an installed countertop requires at least double the time. You must use slower RPMs and lighter pressure to avoid creating vibrations that travel through the slab. These vibrations can find a natural fissure in the stone and split it along a seam, especially near a sink cutout.
If you’re adding a hole post-installation, for a new soap dispenser, for example, plan for a slower, more delicate operation. The risk isn’t just a chipped hole; it’s a cracked countertop.
Finishing the Hole: The Professional Touch
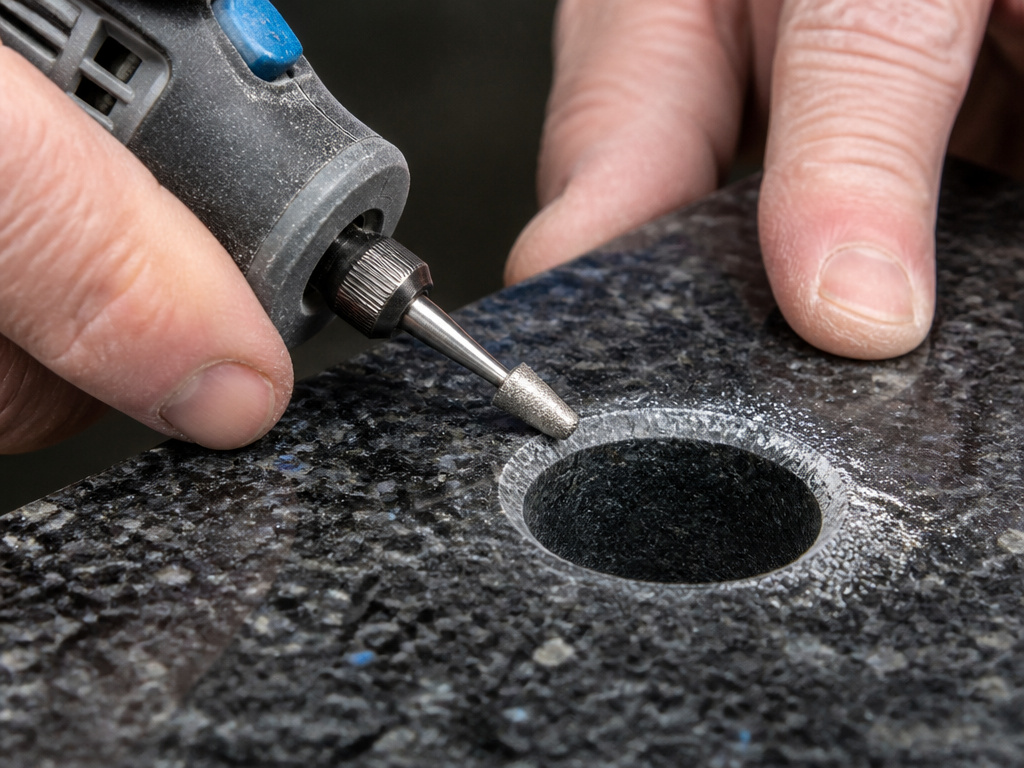 Inspect the hole edge. Even with perfect technique, you might see micro-chipping or a rough crystalline edge. This is where the pros separate themselves.
Use a diamond-coated rotary burr (on a Dremel tool) or a diamond hand file to lightly bevel or chamfer the top edge of the hole. A 45-degree bevel about 1mm wide removes any tiny chips and creates a clean, finished look. It also prevents the metal faucet escutcheon from pressing on a sharp edge, which can cause chipping over years of use.
This two-minute step makes the hole look factory-cut. For related techniques on delicate materials, our guides on drilling porcelain and drilling acrylic cover similar finishing principles.
What Not to Do: Three Costly Mistakes
| Mistake | What Happens | Timeline |
|---|---|---|
| Using a standard masonry bit | The bit dulls immediately, overheats, and binds. The torque can crack the granite radially from the hole. | Within 10 seconds of starting. |
| Drilling dry or with inadequate water | The diamond segments overheat, the bond softens, and diamonds pop out. The bit is ruined, and thermal shock creates micro-cracks in the stone. | Bit glazes after 20-30 seconds; cracks may appear later. |
| Forcing the breakthrough | The unsupported underside blows out, leaving a large, ragged chip. The fracture may propagate invisibly through the slab. | The instant the bit exits. |
The principles of patience and cooling are universal for hard materials. Whether you’re tackling drilling into stone or the more brittle process of glass drilling, rushing is the enemy.
Troubleshooting: When Things Go Wrong
The bit isn’t cutting, just spinning and smoking. The bit is glazed. Stop immediately. You may be using a hard-bond bit on granite, or you ran it dry. Try dressing the bit by running it briefly in a brick or concrete patio block with water to wear away the glazed bond and expose new diamonds. If that fails, the bit is toast.
A crack appears from the hole. Stop drilling. The crack is likely due to slab flex (if installed) or excessive pressure. There is no reliable DIY fix for a cracked granite countertop. Your options are to live with it, attempt an epoxy resin repair (which will be visible), or replace the slab.
The hole is off-center or too large. Off-center can sometimes be corrected by carefully enlarging the hole to the next standard size if the faucet base plate will cover it. A hole too large requires a professional fabricator to install a bonded granite plug, a costly and visible repair.
Frequently Asked Questions
Can I use a regular drill, or do I need a hammer drill?
Use a regular drill ONLY. Never engage the hammer function on a drill when working with granite. The percussive blows will shatter the stone around the hole. You need a variable-speed drill capable of low RPMs (under 1500) for control.
How do I keep the water contained and not ruin my cabinets?
The plumber’s putty dam is essential. For extra protection, tape a plastic bag or a small towel to the underside of the countertop directly beneath the hole to catch any slurry drip. Have a wet/dry vacuum handy for cleanup.
Is one bit enough for multiple holes?
Yes, a quality diamond core bit can handle dozens of holes in granite if properly cooled and not forced. Expect the drilling time per hole to increase slightly as the bit wears. Cool the bit in water between each hole.
What’s the difference between drilling granite and quartz?
Engineered quartz is slightly softer but more brittle. The technique is identical, diamond core bit, water, light pressure at breakthrough. However, quartz can chip more easily if the bit isn’t sharp, so a fresh bit or one designed for drilling quartz is ideal.
How do I attach the core bit to my drill?
Most diamond core bits have a standard 3/8″ or 1/2″ shank that goes directly into your drill’s chuck. For larger bits or those with a separate arbor, ensure it’s tight. Our guide on attaching a hole saw covers the mechanics for similar tools.
Before You Go
Drilling granite is about control, not power. The right bit, a diamond core bit with a soft bond, does the work. Your job is to keep it cool, start at an angle, and back off the pressure completely in the last 5mm. That last part is what you’re paying attention for. Skip it, and you’ll hear the crack.
For a single faucet hole, a guided kit like the Drilax provides the margin for error. For anything more, invest in a professional-grade core bit and practice on a scrap piece first. The stone doesn’t forgive, but it will cooperate if you follow its rules.
