
How to Drill a Hole in China Plate: Essential Tools & Tips
This post contains affiliate links. As an Amazon Associate, we earn from qualifying purchases.
To drill a hole in a china plate, you need a diamond-tipped or carbide-tipped drill bit, a stable work surface, and a steady hand. Mark the spot with masking tape, support the plate on a damp towel or scrap wood, and drill at a slow speed (1000–1500 RPM) with light pressure while keeping the bit cool with water. The plate is most likely to crack in the final second before the drill bit breaks through the back.
That final millimeter is where most projects fail. The physics are simple: as the bit exits, the unsupported glaze and ceramic at the hole’s edge spall and fracture outward. If your pressure isn’t perfectly even or the plate isn’t fully supported, that fracture runs.
What follows is the setup that prevents that: the right bit, the debated question of a soft or solid support, the exact RPM range that works, and what to do when you want a clean circle, not just a hole.
Key Takeaways
- The drill bit is non-negotiable. You must use a diamond-tipped core drill or a solid carbide-tipped bit. A standard twist bit will shatter the plate on contact.
- Speed is a specific number. Aim for 1000 to 1500 RPM. “Slow” is too vague; too fast generates heat, too slow increases chatter and cracking risk.
- The break-through point is critical. Reduce pressure to almost zero in the last 1-2mm. This is when 80% of cracks happen.
- Support is a contested choice. You must choose between a damp towel (absorbs vibration) or a flat piece of scrap wood (provides solid backing). The plate’s curvature decides which.
- Cooling isn’t optional. Dip the bit in water every 10-15 seconds. A hot bit thermally shocks the glaze and micro-cracks the ceramic body.
The Right Drill Bit Is Everything
Forget high-speed steel. Forget masonry bits. Drilling glazed ceramic demands a bit that grinds rather than cuts.
A diamond core drill is the default choice. It’s a hollow cylinder with diamond grit bonded to the cutting edge. It grinds a annular ring, leaving a solid core. This design reduces pressure and heat. For a standard hole, a 6mm diamond core drill is the common starting point.
A solid carbide-tipped spear-point bit is the alternative for small holes (like a 1/16″ hole for a wind chime). It’s a single, pointed tip made of tungsten carbide. It’s more aggressive and requires a drill press for control, but it works.
The wrong bit doesn’t just fail. It grabs, skitters across the glaze, and instantly creates a stress fracture you might not see until the plate breaks in your hands five minutes later.
Diamond drills have to be used to drill through china plates. This isn’t a recommendation; it’s a material constraint. The hardness of the glaze and the brittle ceramic body below it fracture under the impact force of a conventional drill bit.
The 7-Step Process for Drilling a China Plate
This sequence works for a standard hole in a plate or saucer. It assumes you’re using a handheld power drill or a rotary tool like a Dremel.
- Mark and Tape. Find your center with a tape measure. Place a 1-inch square of masking tape over the spot. Mark the center on the tape. The tape gives the drill bit initial grip and prevents skittering.
- Set Your Support. This is the first decision. For a nearly flat plate, use a flat piece of scrap wood. For a plate with a pronounced curved foot rim, use a folded damp towel to cradle it and absorb vibration. The goal is zero rocking.
- Secure the Plate. If using wood, clamp the plate gently at the rim. If using a towel, hold the plate firmly with your non-dominant hand. Never let it float.
- Start at an Angle. Begin drilling with the bit at a 45-degree angle to the surface. This creates a small starter groove. As soon as the groove is established, straighten the drill to vertical.
- Drill with Coolant. Use a sponge soaked in water. Squeeze a steady stream onto the drilling point. Drill at a steady 1000–1500 RPM with very light pressure, let the bit’s grit do the work. Dip the bit in water every 10-15 seconds.
- Ease Off Before Breaking Through. When you feel the bit is about 1mm from exiting the back, reduce pressure to the weight of the drill itself. This is the critical moment noted by users on The AnswerBank: “be very careful just before ‘breaking through’ as that is when it is likely to crack!”
- Finish and Deburr. Once through, remove the plate. The hole’s edge will be sharp. Smooth it with a 600-grit diamond file or fine sandpaper wrapped around a dowel.
| Step | Tool/Action | Purpose | Risk If Skipped |
|---|---|---|---|
| 1. Mark & Tape | Masking tape, marker | Prevents bit skittering | Bit scratches glaze, cracks plate on start |
| 2. Set Support | Scrap wood OR damp towel | Eliminates vibration & rocking | Amplifies chatter, fractures brittle ceramic |
| 3. Secure Plate | Clamp or firm hand grip | Maintains drilling position | Plate spins, bit grabs, snaps a segment |
| 4. Start Angled | Drill at 45° | Creates a pilot groove | Bit wanders off mark, ruins placement |
| 5. Drill with Coolant | Water, sponge, 1000-1500 RPM | Cools bit, reduces heat stress | Overheating cracks glaze; bit dulls in seconds |
| 6. Ease Off at Exit | Reduce to zero pressure | Prevents back-side blowout | Spalling and radial crack at hole exit |
| 7. Finish Edge | Diamond file, fine sandpaper | Removes sharp, cutting edge | Edge cuts hanging cord or user’s hand |
Soft Support vs. Solid Support: Which Actually Works?
The research shows a clear split. Some guides say “place the plate on a towel.” Others insist on “flat solid support under the point of drilling.” Both are right for different shapes.
Use a damp towel or tray of damp sand if your plate has a curved foot. The soft material conforms, cradling the curve and dampening every vibration from the drill. A solid block would only contact the rim, letting the center vibrate.
Use a flat scrap wood block if your plate is nearly flat, like many modern dinner plates. The solid backing directly under the drill point prevents flex. When the bit presses down, the plate has nowhere to bow and crack.
The wrong choice introduces a microscopic rocking motion. Over the 30-60 seconds of drilling, that rhythm finds the plate’s weak point.
How to Drill a Circle for Jewelry (The Harder Way)
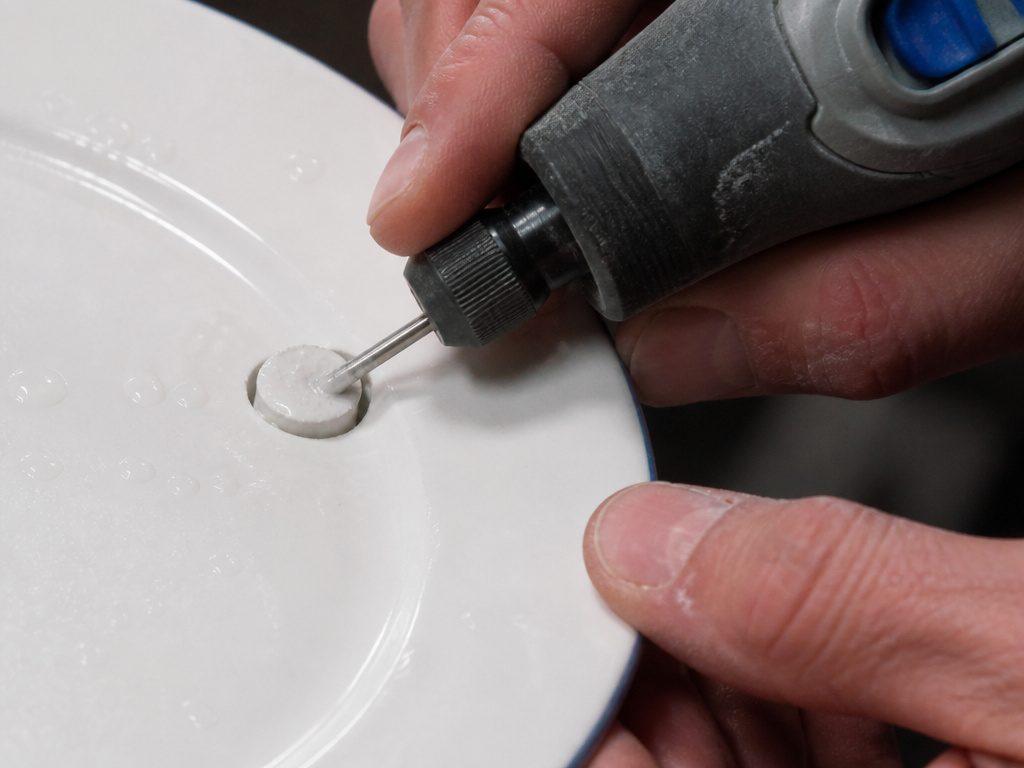
Drilling a hole is one thing. Cutting a clean circle out of a plate’s rim for a pendant is trickier. The process changes.
You need a 10mm bottle neck diamond core drill. This smaller-diameter core drill fits into a Dremel 3000 rotary tool with a multi-chuck. The bottle neck design allows deeper cutting.
The technique is the same, tape, coolant, slow speed, but the result is a fragile ceramic plug. The core will be ragged. You must smooth it immediately with a 600-grit diamond file on all edges.
This isn’t a beginner project. The thin rim material heats up fast, and the small core bit binds easily. It’s the edge case that breaks the standard procedure.
The Tools You Already Own (And The One You Must Buy)
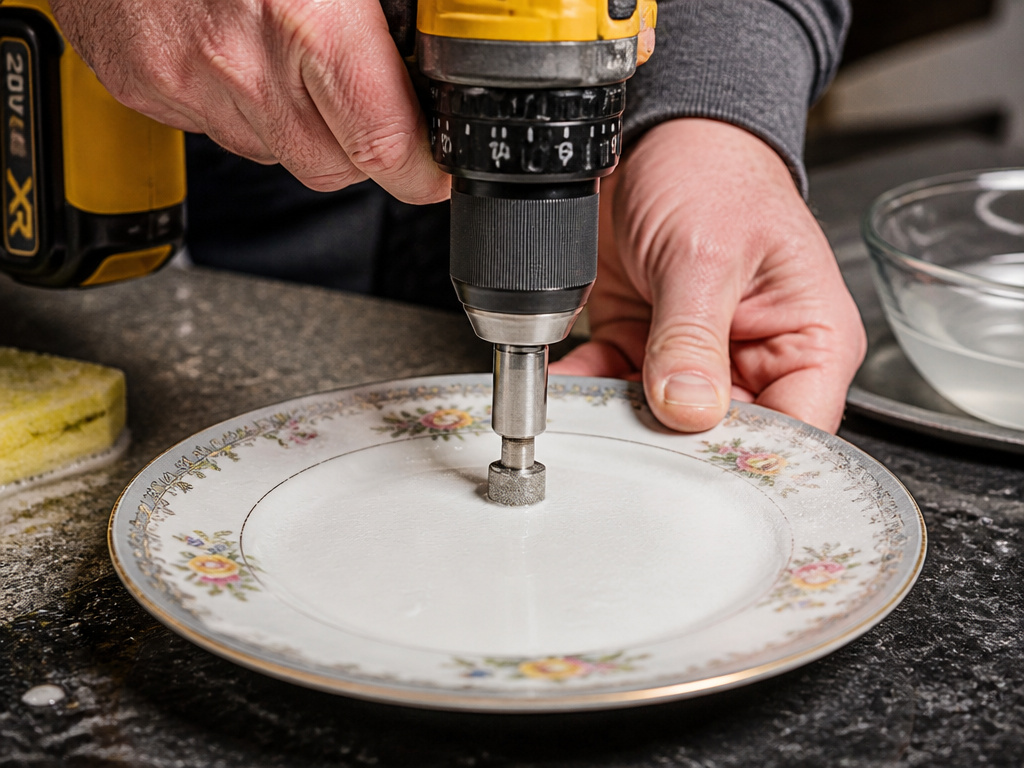
You can improvise most of this.
- Drill: A standard cordless drill works. A Dremel rotary tool gives better speed control for small holes.
- Cooling: A sponge and a bowl of water.
- Support: A scrap 2×4 or a hand towel.
- Safety: Safety glasses are mandatory. Gloves are smart.
The one thing you cannot improvise is the bit. You must buy a diamond core drill bit or a carbide-tipped bit for glass/tile. This is the single-point-of-failure purchase.
For a handheld drill, a standard diamond core bit from a hardware store is fine. For a Dremel, you need the specific Dremel diamond drill bit or bottle neck core drill that matches its collet size.
Where this goes sideways: Using a drill press without a weight on the quill. Your hand cannot apply perfectly even pressure. If you have a press, hang a weight on the feed handle to let gravity provide steady, unchanging pressure. This eliminates the surge that cracks the plate at the last second.
Drilling China vs. Drilling Glass, Tile, and Stone
The principles are cousins, not twins. Drilling glass is more about preventing splintering at the exit. Drilling porcelain tile is about harder ceramic and more pressure.
| Material | Bit Type | Key Difference | Biggest Risk |
|---|---|---|---|
| China Plate | Diamond core, Carbide-tipped | Glaze is brittle; body is porous ceramic | Crack at break-through point from uneven pressure |
| Glass | Diamond spear point, Core drill | Homogeneous, no glaze; conducts heat | Splintering (spalling) on the back side |
| Porcelain Tile | Diamond core drill | Denser, harder ceramic body | Bit glaze-over from heat; requires more pressure |
| Natural Stone | Diamond core drill | Granular, unpredictable hardness | Bit wandering on uneven surface |
The process for drilling glass relies heavily on a constant coolant stream. Drilling a glass jar adds the challenge of a curved, thin wall. Drilling a hole in a rock is about brute force and clearing debris. China sits in the middle, not as hard as tile, not as uniform as glass.
Your technique for drilling a straight hole is critical here. If the bit walks off the tape, you’re done. For larger holes, like for a clock mechanism, the principles of using a hole saw apply, but only with a diamond hole saw variant.
Frequently Asked Questions
Can I use a regular drill bit on a china plate?
No. A standard HSS or twist drill bit is designed to cut into metals and woods by shearing material. It will not grind through the hardened glaze; it will catch, skid, and immediately crack the plate. You must use a diamond-coated or carbide-tipped bit designed for glass, tile, or ceramic.
What speed should I drill at?
Aim for 1000 to 1500 RPM. This is a specific range from tool suppliers. “Low speed” on many drills is around 500-800 RPM, which can be too slow and cause chatter. “High speed” (over 2000 RPM) generates excessive heat. If your drill has variable speed, start at the low end and work up to a smooth, steady grind.
Why does the plate crack when I’m almost through?
This is the most common failure point. As the drill bit nears the back surface, the remaining thin layer of ceramic flexes under pressure. When the bit finally punctures it, that flex releases as a shock wave, causing a radial crack. The fix is to reduce pressure to almost zero in the last millimeter and let the bit’s weight and rotation finish the job.
Is water cooling really necessary?
Yes. The diamond or carbide grit generates significant friction heat. If that heat concentrates in one spot, it causes thermal shock, the glaze and ceramic expand at different rates, creating micro-fractures. Water cools the bit and flushes away grinding debris. A simple sponge and bowl are sufficient.
Can I drill a bone china plate the same way?
Yes, but with even lighter pressure. Bone china is more delicate and thinner than standard ceramic plates. Use the same diamond core bit and process, but your support must be impeccable (a damp towel is often better), and your pressure should be feather-light. The margin for error is smaller.
How do I drill a very small hole (like 1/16″)?
Use a solid carbide-tipped spear-point drill bit designed for glass. These are small, pointed bits. A drill press is highly recommended for the control required. The technique of starting at an angle and using coolant is even more critical, as the small bit wants to wander and snap.
Before You Go
Drilling china is a test of patience, not force. The right bit does the work; your job is to keep it cool, supported, and straight. Remember the break-through moment, that’s where the plate wins or loses.
If you’re making a single hole for a hanging, a handheld drill with a diamond core bit and a bowl of water is enough. If you’re cutting circles for jewelry, you need the precision of a Dremel and the patience to file each edge. For anything else, the right pilot hole technique is a foundational skill that applies here, too. The same goes for other materials; the mindset for drilling acrylic or drilling plastic is about managing heat and preventing melt-back, which is a different version of the same thermal control problem.
Go slow. Keep it wet. Let the tool do the cutting.
