
How to Use a Hole Saw Safely (Step-by-Step Guide)
This post contains affiliate links. As an Amazon Associate, we earn from qualifying purchases.
To use a hole saw safely, match the saw to your material, set the correct drill speed, and always clamp the workpiece. Use a backing board to prevent tear-out. Apply steady, moderate pressure and clear chips frequently to avoid binding. Wear safety glasses and gloves to protect from debris and sharp edges.
Most people grab the first hole saw they see and push the drill trigger to max. That’s a direct route to a ruined project, a dull saw, or a spinning piece of wood headed for your shin. The wrong speed melts plastic, the wrong technique splinters wood, and skipping the backing board leaves a jagged exit hole that needs an hour of sanding to fix.
This guide walks through the exact steps, from choosing the right saw for your kitchen sink pipe or door knob to pulling a clean, round plug without burning out your drill or your patience. You’ll learn how to start the cut without walking, how to clear a jam without breaking teeth, and what to do when the saw gets stuck, because it will.
Key Takeaways
- Match the saw to the material. A bi-metal hole saw strips its teeth on cinder block in three seconds. A diamond-grit saw will clog and overheat on pine.
- Speed kills the tool. High RPMs on metal or tile generate instant, destructive heat. Start slow and let the saw’s weight and sharp teeth pull it through.
- Clamp everything. An unsecured workpiece will spin with the saw, turning a simple cut into a dangerous projectile.
- Clear the teeth. Withdraw the spinning saw every 10-15 seconds to eject packed debris. A clogged saw binds, overheats, and snaps pilot bits.
- Flip for a clean exit. Drill until the pilot bit pokes through, then stop. Finish the cut from the backside to prevent ugly blowout.
Safety Gear You Absolutely Need
Before you start: A spinning hole saw can grab material and twist the drill with enough force to break a wrist. Hot metal chips ejected from the cut can burn skin or eyes. An unsecured board can become a spinning blade. Wear impact-resistant safety glasses, heavy-duty work gloves, and secure the workpiece with at least two clamps before the drill ever touches it.
Eye protection is non-negotiable. Standard safety glasses are a minimum; a full-face shield is better when cutting metal or masonry. The gloves are for heat and sharp edges, the pilot bit and the saw’s teeth are sharp, and the metal gets hot enough to blister after 30 seconds of cutting. Hearing protection matters too, especially with corded drills screaming at high RPMs.
Secure the material. I’ve seen a 2×4 spin out of someone’s hand and smack a garage wall because they thought hand pressure was enough. Use bar clamps or a bench vise. For sheet metal or thin plywood, sandwich it between two scrap boards. That backing board does more than prevent splintering; it gives the pilot bit something to bite into on the other side, stabilizing the cut.
Choosing the Right Hole Saw and Drill
You can’t cut a 3-inch hole for a dryer vent with a 1-inch saw. You also can’t cut through steel with a saw designed for drywall. The first step happens before you even plug in the drill.
| Saw Type | Best For | Will Fail On |
|---|---|---|
| Bi-Metal (High-Speed Steel) | Wood, plastic, plaster, drywall, non-ferrous metals (aluminum, copper) | Masonry, tile, hardened steel |
| Carbide-Tipped | Fiberglass composites, abrasive woods, light masonry, hard plastics | Thick steel, continuous heavy masonry |
| Diamond-Grit (Segmented or Continuous) | Ceramic tile, porcelain, glass, stone, granite, brick | Any soft material (clogs instantly) |
| Multi-Purpose Kit | Occasional DIY use across wood, plastic, thin metal | Professional, material-specific tasks |
Bi-metal saws are the generalists. The teeth are a hard steel welded to a flexible spring steel body. They’re affordable and will handle 90% of what a homeowner throws at them.
Carbide-tipped saws have tungsten carbide teeth brazed on. They stay sharper longer on abrasive stuff like particle board or PVC, but the tips can snap if you hit a nail. Diamond-grit saws are for tile and stone, they grind, they don’t cut. They also need water lubrication to keep the diamond matrix from glazing over and losing all cutting ability.
Your drill matters as much as the saw. A cordless drill needs to be 18-volt or higher, and the battery should be fully charged. A weak drill will stall, overheat, and burn out its motor.
A corded drill is more reliable for big, deep cuts. Variable speed is mandatory. You control the cut with the trigger, not the brute force of your arm.
The Step-by-Step Process
How do you start a cut with a hole saw?
Starting a hole saw cut requires the pilot bit to establish a centered guide hole before the saw teeth make full contact. Place the tip of the spinning pilot bit directly on the center mark, holding the drill perpendicular to the workpiece. Begin at the drill’s lowest speed setting to prevent the bit from “walking” across the surface. Apply light pressure until the pilot bit has penetrated at least 1/4 inch, creating a stable pivot point. Only then increase speed and allow the hole saw’s teeth to engage the material evenly around their full circumference.
The walking problem is real. If you just lean into the saw teeth, they’ll skate across the surface, gouging a crescent moon instead of a circle. That pilot bit is your anchor. Let it bite first.
- Assemble the saw. Screw the pilot bit into the arbor. Thread the hole saw onto the arbor until it’s hand-tight, don’t crank it with pliers. Check that the pilot bit extends at least 3/8 inch past the saw’s teeth. If it’s shorter, it won’t guide the cut before the teeth grab.
- Mark and clamp. Mark the exact center with an awl or a nail punch. This small dent gives the pilot bit a place to sit without sliding. Clamp your workpiece down. For a door, use a scrap block behind the spot you’re drilling to prevent the thin veneer from blowing out.
- Start the pilot hole. Set your drill to its lowest speed. Position the pilot bit tip in your center mark, holding the drill perfectly perpendicular. Squeeze the trigger gently and let the bit drill in about a quarter-inch. You’ll feel it settle into a stable rotation.
- Engage the saw teeth. With the pilot hole established, increase speed slightly and apply steady, forward pressure. Let the saw do the work. You’ll hear the pitch change as all the teeth make contact. If the drill labors or the saw starts smoking, you’re going too fast or pushing too hard. Ease up.
The first time I tried to install a doorknob, I skipped the pilot-bit-first step. I lined up the hole saw, squeezed the trigger, and immediately watched it skate across the door, leaving a two-inch scar in the veneer. I had to fill the gouge, sand it, re-stain the entire door edge, and start over. Now I always make that starter dent.
How do you prevent blowout and jamming?
Blowout is the ragged, splintered mess on the backside of your cut. Jamming is when the saw seizes in the material, locking the drill and potentially twisting it out of your hands. Both are predictable and preventable.
- Back it up. Always use a sacrificial backing board clamped behind your workpiece. This supports the fibers or metal as the teeth break through, resulting in a clean exit hole. For a finished door, a piece of 1/2-inch plywood works.
- Flip the piece. For through-holes, drill until the pilot bit just pokes through the back. Stop, pull the saw out, flip the workpiece, and place the pilot bit into the small hole it just created. Finish the cut from the backside. This guarantees a clean edge on both faces.
- Clear the chips. Every 10-15 seconds of continuous cutting, pull the saw partially out of the cut while it’s still spinning. This centrifugal force flings out the packed sawdust or metal shavings clogging the teeth. A clogged saw has nowhere for debris to go, so it binds and overheats.
- Use lubricant on metal. For steel or aluminum, a few drops of cutting oil or even WD-40 on the teeth every 30 seconds drastically reduces heat and friction. The metal shavings come out as tiny curls instead of hot, abrasive dust that wears down the teeth.
- Mind the speed. High speed generates heat, which softens metal and melts plastic. It also causes the teeth to load up faster. Slow and steady wins. For 1/2-inch steel, I run my drill at about 500 RPM. For softwood, I might go up to 1500 RPM.
| Problem | Likely Cause | Fix |
|---|---|---|
| Saw won’t start cutting, just spins | Dull teeth, wrong saw for material, insufficient pressure | Inspect teeth for damage, verify material compatibility, apply firm steady pressure |
| Saw starts smoking/burning smell | Excessive speed, no lubricant on metal, clogged teeth | Stop immediately. Reduce speed, apply oil, clear debris from teeth |
| Saw jams/stalls in cut | Too much pressure, packed debris, cutting too deep in one pass | Reverse drill to back out, clear chips, use shallower passes or flip workpiece |
| Cut is oval or off-center | Pilot bit walked at start, workpiece shifted | Recenter pilot hole in scrap, reclamp workpiece securely, restart cut |
| Rough, chipped exit side | No backing board, cutting all the way through from one side | Flip workpiece and finish from opposite side, use sacrificial backing |
What’s the trick to cutting angles or irregular shapes?
Cutting a hole on an angle, like for a sink drain in a countertop, is an advanced move. The saw wants to grab and twist. You need to trick it.
Start by marking the center point on your angle. Clamp a guide block to the workpiece so the drill body can rest against it, holding the desired angle.
Begin the cut with the drill perfectly perpendicular to the surface, just like a normal start. Let the pilot bit drill in about 1/4 inch to create a solid anchor point. Then, and only then, slowly tilt the drill to your target angle while maintaining light pressure. The pilot bit, now anchored, will keep the saw from skating as the teeth engage on a slant.
For irregular shapes or notches, you can’t use a hole saw. That’s a job for a jigsaw or a reciprocating saw. Trying to “walk” a hole saw to make a slot will overheat it and snap teeth off.
Maintenance and Troubleshooting
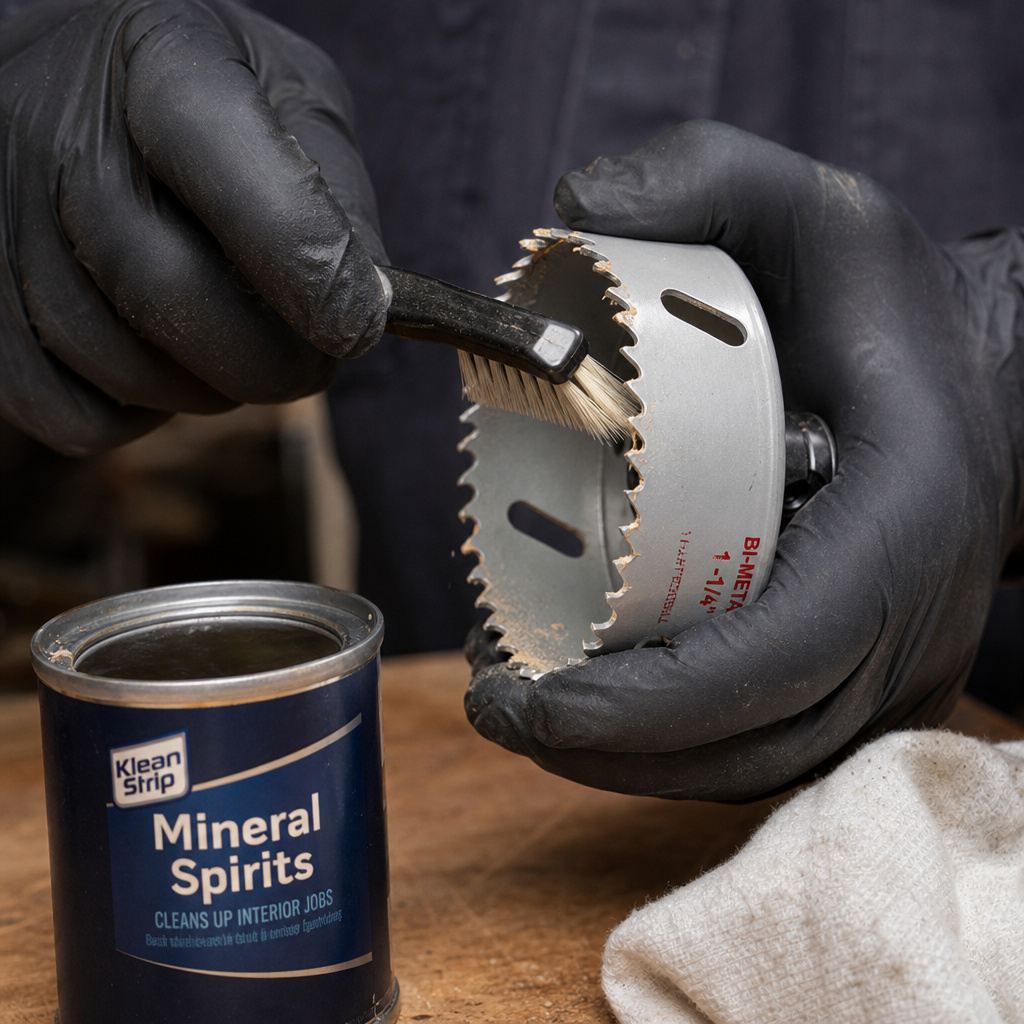
A hole saw isn’t a throwaway item. With basic care, a bi-metal saw can last for dozens of holes.
Clean it after every use. Tap the saw against a bench to dislodge packed material. Use a stiff brush (an old toothbrush works) to clean between the teeth. For stubborn plastic or pitch, a quick soak in mineral spirits softens the gunk. Dry it thoroughly. Leaving wet sawdust inside the cup promotes rust, which weakens the teeth at their base.
Inspect the teeth. Look for missing, chipped, or visibly rounded teeth. A single damaged tooth throws off the balance of the entire cut, causing vibration and a rougher hole. You can sometimes sharpen bi-metal teeth carefully with a small triangular file, following the original angle. For carbide-tipped or diamond saws, sharpening is a professional job.
Store it properly. Keep the saw and arbor in the original plastic case or a dedicated tool foam slot. Throwing it loose in a toolbox guarantees the teeth will get dinged against other tools. A little spray of light oil (like 3-in-1) on the steel body before storage prevents surface rust.
If your saw is consistently producing burned, ragged holes, it’s dull. If it’s jamming on every cut, you’re either forcing it, running too fast, or not clearing chips. Listen to the tool. A happy hole saw makes a consistent, medium-pitched whirring sound. A struggling one groans, whines, and smells like hot metal.
Frequently Asked Questions
Can I use a hole saw without a pilot bit?
No. The pilot bit centers the saw and provides the necessary pivot point. Without it, the saw will dance across the surface, making an uncontrolled, off-center cut that can damage the workpiece and be dangerous.
Why does my hole saw keep getting stuck?
The most common cause is packed debris inside the saw cup. The teeth cut material, but if the chips have nowhere to go, they create immense friction and heat, welding themselves to the saw. Pull the saw out of the cut every 10-15 seconds while it’s still spinning to clear the chips. Also, ensure you’re not trying to cut deeper than the saw’s capacity in one pass, most are only 1-1/4 to 2 inches deep.
What’s the best way to remove the plug from the hole saw?
After the cut, the plug often stays lodged inside the saw. Don’t pry it out with a screwdriver; you’ll bend the teeth. The safe method is to insert the pilot bit into the plug’s center hole and give it a sharp tap with a hammer. The plug should pop right out. For stubborn wood plugs, a few seconds with a heat gun on the outside of the saw cup expands the metal slightly, breaking the friction grip.
Can I use a hole saw on a drill press?
Absolutely, and it’s often better. A drill press provides perfect perpendicular alignment, consistent pressure, and usually more power. It eliminates the risk of the drill twisting in your hand. Just ensure your drill press has enough throat depth for the workpiece and use the same clamping and backing board principles.
How do I cut through material thicker than my hole saw’s depth?
You can’t cut deeper than the cup length in one pass. For thicker material, drill in from one side until you reach the saw’s depth limit. Pull out, clear the plug from the saw, and realign the pilot bit in the hole. Then drill in from the opposite side, meeting the first cut in the middle. It requires careful alignment, but it works.
The Bottom Line
A hole saw is a simple tool that punishes simple mistakes. The difference between a clean, perfect hole and a ruined piece of material comes down to three actions: matching the saw to the job, controlling the speed, and securing the work. Clamp everything.
Start slow. Let the pilot bit anchor the cut before the teeth engage. And for the love of your knuckles, pull the saw out every few seconds to clear the chips.
That last part feels tedious. You’ll think you can power through just one more inch. That’s when it binds, the drill kicks, and you spend the next hour prying a smoking, stuck saw out of a half-finished hole. Do the tedious thing. Your projects will look professional, your tools will last for years, and you’ll keep all your fingers in the right places.
