
The Right Way to Clean Drill Bits & Prevent Chuck Damage
This post contains affiliate links. As an Amazon Associate, we earn from qualifying purchases.
To clean drill bits, you need to remove debris, prevent rust, and avoid damaging your drill’s chuck. Wipe the shank clean after every use, scrub the flutes with a bronze brush and solvent for stuck-on gunk, and apply a light oil or dry-film protectant for storage. Never use harsh chemicals or steel wire brushes that can strip protective coatings.
The difference between a clean bit and a dirty one isn’t just appearance. Grit on the shank grinds against the chuck’s jaws with every rotation, wearing the precision fit that holds the bit straight. A worn chuck wobbles, and that wobble turns a clean hole into an oval.
What follows is a breakdown of why you clean, the three-step process that works on any bit material, the one tool that ruins coatings, and how to clean the machine that sharpens them. By the end, you’ll know which solvent to reach for and which one to leave on the shelf.
Key Takeaways
- Wipe the smooth shank of every bit clean before and after inserting it into the drill chuck. This single habit prevents 90% of chuck wear.
- Use a bronze brush, not a steel one, to scrub debris from the flutes. Steel scratches off black oxide and titanium nitride coatings, inviting rust.
- For storage protection, a light machine oil (3-in-1 oil) or a dry-film protectant like Fluid Film beats WD-40, which displaces water but evaporates and leaves little behind.
- Clean a Drill Doctor sharpener after every 20-25 bits. Let the grinding dust cool completely before vacuuming it out to avoid a fire hazard.
- Never spray cleaners, solvents, or water directly onto a power tool’s body. Compressed air and a slightly damp cloth are the only safe options for the drill itself.
Why Cleaning Drill Bits Isn’t Optional
A drill bit is a precision cutting tool. Its geometry, the angle of the tip, the helix of the flutes, the sharpness of the edges, determines whether it cuts or just grinds. Dirt and rust degrade that geometry in two specific ways.
First, abrasive dust and metal chips packed into the flutes increase friction and heat. The bit can’t clear material, so it works harder, dulls faster, and can even snap under torque in hardwoods or metals. You’ll smell the burning wood or metal before you see the smoke.
Second, and less obvious, is chuck wear. The Bosch 11258VSR user manual states plainly: “Shanks of all drill bits should be wiped clean.” That smooth cylinder is what the chuck’s jaws grip. If you insert a bit coated in concrete dust or sawmill grit, you’re essentially sanding the chuck’s internal jaws every time you drill. The chuck loses its grip, the bit slips, and your holes become inaccurate. That wear is permanent; you’re buying a new chuck or a new drill.
Common mistake: Letting debris build up on the bit shank. By the third project, the grit has lapped the chuck jaws, and the bit will visibly wobble at high speed. The fix costs more than a year’s supply of clean rags.
Tools and Materials You Actually Need
You don’t need a specialty kit. The right tools are probably in your shop already, and using the wrong one causes more harm than good.
- Lint-free rags or shop towels. Microfiber cloths work, but cheap paper shop towels are disposable and effective.
- A bronze bristle brush. This is non-negotiable. A bronze brush is hard enough to scrape out packed debris but soft enough not to damage most bit coatings. A steel wire brush will strip the protective coating right off a black oxide or titanium bit.
- A solvent for breaking down grease and pitch. For grease, tar, or tree sap, mineral spirits or a dedicated citrus-based degreaser works. For hardened concrete slurry, a weak acid like vinegar can help, but rinse and dry immediately.
- A rust-preventative. A bottle of 3-in-1 light machine oil or a spray can of Fluid Film dry lubricant. WD-40 is a water displacer and light cleaner, not a long-term protectant, it evaporates.
- Compressed air. A can of keyboard duster or an air compressor with a blow-off nozzle. This is for drying bits after washing and for clearing dust from your drill’s vents.
- A small, dry brush. An old toothbrush or a cheap chip brush for detailed work.
The 3-Step Cleaning Process for Any Bit
This sequence works for high-speed steel, cobalt, carbide, or coated bits. The goal is to go from dirtiest to cleanest without skipping stages.
Step 1: Dry Removal & Debris Knock-Out
Start with the bit completely cold. Tap the shank on your bench to dislodge large chips. Use your compressed air to blast loose dust from the flutes, pointing the bit into a trash can. This dry pass removes 70% of the mess without spreading gunk around.
If debris is packed in, use the bronze brush. Scrub along the flutes, following the spiral, not against it. This preserves the cutting edge. For stubborn chunks in the flute root, a pick or a small flat-head screwdriver can pry them loose gently.
Skip this step and you’ll just push surface grit deeper into the packed layer when you add solvent. The result is a paste that’s harder to remove.
Step 2: Solvent Wash for Grease & Pitch
Dampen a rag with your chosen solvent, mineral spirits for grease, a citrus degreaser for sap. Wipe the entire bit down, focusing on the flutes and the tip. For severe buildup, let the bit sit in a shallow dish of solvent for five minutes, then scrub again with the bronze brush.
WARNING: Wear nitrile gloves and work in a ventilated area. Most solvents are skin irritants and flammable. Never use gasoline or carburetor cleaner; they can damage some plastics and are extreme fire risks.
Rinse water-soluble cleaners with water, then move immediately to drying. The moment water sits on bare steel, rust begins.
Step 3: Dry Thoroughly & Protect
This is the step that decides if rust forms next week. Use compressed air to force water out of every crevice. Follow with a dry, lint-free rag. Hold the bit and feel for coolness, any remaining moisture will make it feel cold.
Once bone-dry, apply your protectant. Put a few drops of light oil on a rag and wipe the bit. You want a microscopic film, not a dripping wet surface. For long-term storage in a humid garage, a heavier coat of Fluid Film or a dedicated rust-preventative spray is better. It leaves a waxy, dry film that doesn’t attract dust like wet oil can.
| Bit Condition | Primary Tool | Solvent Needed? | Protection Priority |
|---|---|---|---|
| Light sawdust/oil | Rag & air | No | Low – quick oil wipe |
| Packed wood pitch | Bronze brush | Yes (citrus) | High – full dry & coat |
| Metal chips/grease | Bronze brush | Yes (mineral spirits) | High – full dry & coat |
| Concrete slurry | Stiff brush/pick | Yes (water/vinegar) | Critical – immediate dry |
How to Clean Your Power Drill & Sharpener
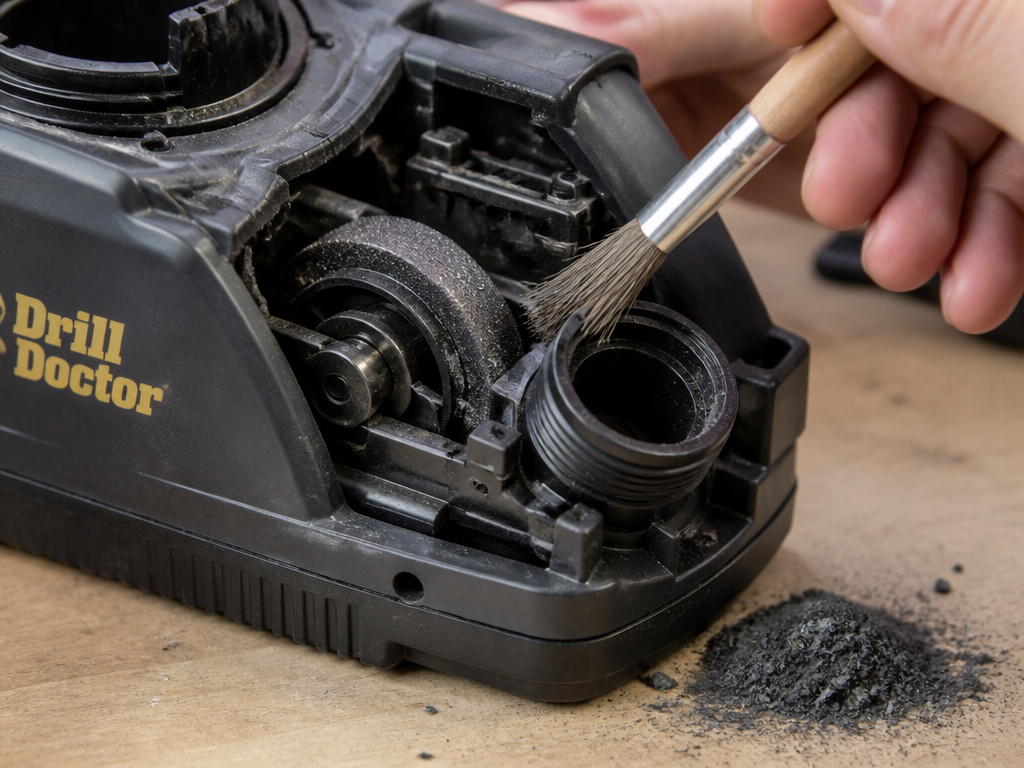 The tools that use and sharpen the bits need care too. The rules here are stricter because of electronics and precision mechanisms.
Cleaning the Drill Itself
The Harbor Freight Tools 45338 manual gives the universal rule: “Keep clean by wiping with a clean, damp cloth. Never use caustic agents to clean plastic parts.” Unplug the drill first.
Wipe the exterior with a cloth dampened with water only. For grime, a drop of mild dish soap in the water is acceptable. Dry immediately. Use a dry, soft-bristle brush (like a paintbrush) to dust out the ventilation slots. Compressed air can force dust deeper into the motor, use it gently and at an angle.
Where this goes sideways: Spraying any cleaner directly onto the tool. Liquids can seep past trigger switches and into the motor, causing corrosion or a short. The Bosch TG503 manual warns that cleaning agents and solvents can damage plastic parts. Damp cloth, dry brush. That’s it.
Cleaning a Drill Bit Sharpener
This is a specific, non-negotiable maintenance task. The Drill Doctor DD500X and DD750X User Guide states that after sharpening 20 to 25 drill bits, grinding dust will accumulate enough to promote wear in the Sharpening Port and Chuck.
Let the machine sit for 30 minutes after sharpening. The metal dust is hot and can ignite if concentrated. Then, remove the wheel cover and shake the dust into a disposable container. Use the small dry brush provided (or a paintbrush) to clean around the wheel and port. You can also use a standard 1” vacuum hose to suck out the dust. Wipe the exterior with a dry cloth.
The part nobody mentions: If you see a shiny, mirror finish on your freshly sharpened bits or the tips are turning blue, it’s not (just) your technique. It means the sharpening wheel is glazed with compacted metal dust and needs replacement. Cleaning the machine regularly pushes that replacement interval out by months.
What NOT to Use: Solvents & Tools That Damage Bits
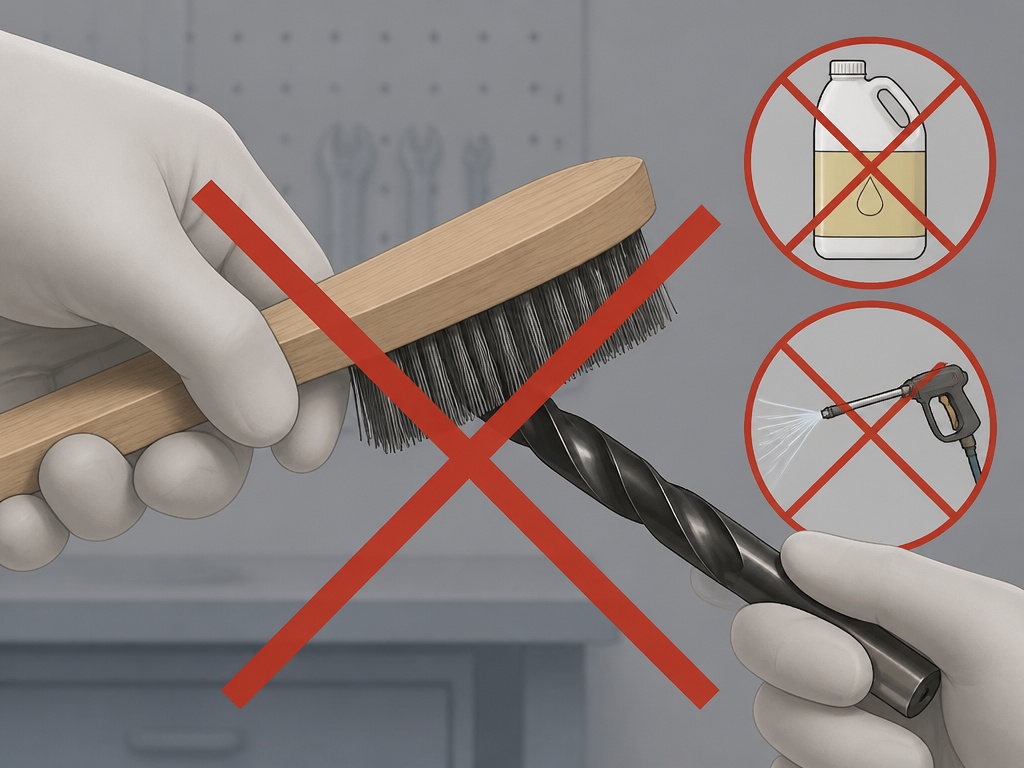 Good intentions with the wrong product ruin tools. This list is short and absolute.
- Steel Wire Brushes or Wheels: They are too aggressive. They will remove the protective coating on black oxide or titanium nitride drill bits, making the underlying steel vulnerable to rust. They can also round over sharp cutting edges.
- Harsh Acids (Muriatric, etc.): These will etch the steel, creating a rough surface that actually holds moisture and accelerates rust. They can also weaken brazed joints on carbide-tipped bits.
- Abrasive Cleaners (Scotch-Brite, Sandpaper): Same principle as steel brushes, they strip coatings and alter dimensions.
- High-Pressure Water or Steam: Forces moisture into microscopic pores and cracks, especially in carbide. This leads to internal rust and can crack carbide tips during temperature swings.
- Silicone-Based Sprays or Cleaners: The Hilti manual explicitly warns against silicone-containing agents. Silicone can migrate into electrical contacts and cause failures, and it creates a surface that paint and future coatings won’t adhere to.
Bottom line: If it’s not on the “tools you need” list, don’t use it on your bits. Simple beats clever every time.
Addressing Rust: Cleaning vs. Removing
Cleaning maintains a bit; rust removal restores one. They are different jobs. If you find light surface rust during cleaning, your bronze brush and some light oil might scrub it off. For heavier rust, you’ve crossed into restoration.
That process involves abrasives or chemical rust removers that actively eat away the iron oxide. It changes the bit’s surface and often requires re-sharpening afterward. If a bit is heavily rusted, ask if your time is better spent cleaning rust from a cheap bit or buying a new one. For valuable carbide or large-diameter bits, our dedicated guide on how to remove rust from drill bits walks through the safe methods.
Frequently Asked Questions
Can I clean drill bits in the dishwasher?
No. The combination of hot water, detergent, and extended moisture is a recipe for instant, severe rust. The heat can also affect the temper of some steels. Dishwashers are for dishes, not tools.
How often should I clean my drill bits?
Wipe the shank clean every time you remove the bit from the chuck. Give the flutes a full clean with a brush and protectant when you notice debris building up, or after a particularly messy job (concrete, pressure-treated wood, greasy metal). For sharp users, a quick wipe-down at the end of each work session keeps everything in ready condition.
Does WD-40 clean and protect drill bits?
It cleans and displaces water, but it’s a poor long-term protectant. WD-40 is thin and evaporates, leaving a very thin film that can be inadequate in humid conditions. Use it to break down light grease or dry a wet bit, then follow up with a proper light oil or dry-film protectant for storage.
What’s the best way to store clean drill bits?
In a dry place. A drill bit index or a foam-lined case that separates bits is ideal. It prevents them from rattling against each other (which dulls edges) and minimizes exposure to ambient moisture. A small packet of silica gel desiccant in the storage box is a pro move for humid climates.
Can cleaning make a dull bit sharp again?
No. Cleaning removes obstructions and prevents corrosion, but it does not restore a worn cutting edge. A clean dull bit is still a dull bit. If cleaning reveals damaged or rounded edges, it’s time to sharpen drill bits. The method you choose, whether you sharpen with a grinder or learn to sharpen by hand, depends on the bit type and your tools.
The Bottom Line
Cleaning drill bits is a five-minute habit that saves fifty-dollar tools. Keep the shanks clean to preserve your drill’s chuck. Use a bronze brush and the right solvent for the gunk. Dry every bit completely, then give it a light coat of oil before it goes back in the drawer.
Remember the two numbers: wipe the shank after every use, and clean your Drill Doctor sharpener after every 20-25 bits. Forget the fancy chemicals and aggressive brushes. A clean rag, some light oil, and a few minutes of attention will keep your bits cutting straight long after a neglected set has been tossed in the scrap bin.
