
Why Your Air Compressor Is Not Turning On & How to Fix It
This post contains affiliate links. As an Amazon Associate, we earn from qualifying purchases.
An air compressor not turning on almost always traces to one of six points: a power supply fault, a tripped circuit breaker, a failed pressure switch, a stuck check valve, a tripped thermal overload switch, or a dead motor capacitor. Start by verifying wall outlet voltage with a multimeter, then check the pressure switch for continuity and the tank for residual pressure holding the check valve shut.
That sequence is the difference between a five-minute fix and a three-hour parts hunt. Most guides tell you to check the obvious plug and switch. They skip the three electrical tests that find the real fault 80 percent of the time.
What follows is the diagnostic ladder a pro uses: voltage at the wall, voltage at the switch, continuity across the switch contacts, tank pressure zero-check, thermal reset location, and capacitor microfarad test. Each step rules out a failure mode before you touch a tool. The last two steps cover the sneaky failures that mimic a dead motor.
Key Takeaways
- Use a multimeter to confirm 120V or 240V at the wall outlet before blaming the compressor. A dead circuit or loose receptacle is the most common culprit.
- Drain all tank pressure to zero before testing. Residual pressure above 10 PSI can keep the internal check valve seated, preventing the motor from starting against a load.
- Locate the hidden thermal overload reset button (usually a red or black button on the motor housing) and press it if the motor hums but won’t turn.
- Test the motor start/run capacitor with a multimeter’s capacitance setting. A reading more than 10% below the rated microfarad (µF) printed on the capacitor means it needs replacement.
- For compressors inactive for months, the pressure switch contacts can corrode shut. Manually cycling the switch or tapping its cover can sometimes free them.
- Never bypass safety devices like the pressure switch or thermal overload. Doing so removes critical protection against motor burnout and tank over-pressurization.
The 6-Step Voltage & Switch Diagnostic Path
Grab a multimeter. This is not optional. Guessing with voltage is how you blow a $200 pressure switch or trip the breaker again. The goal is to isolate the fault to a single component before you buy anything.
Step 1: Verify Incoming Power.
Set your multimeter to AC voltage (V~). Test the wall outlet your compressor is plugged into. For a 120V compressor, you should see between 110V and 125V. For a 240V model, expect 220V to 245V. A reading of zero or a wildly low number (like 60V) points to a tripped breaker, a faulty GFCI outlet, or a broken wire in the circuit. Plug in a lamp to double-check, but the multimeter is the truth.
Step 2: Check Voltage at the Pressure Switch.
With the compressor plugged in and its main power switch ON, carefully remove the plastic cover from the pressure switch (the box on top of the tank with the pressure gauge). Set your multimeter to AC voltage again. Touch one probe to each of the two main power terminals coming INTO the switch. You should read the same voltage as at the wall. If you get zero here but full voltage at the wall, the power cord or the compressor’s internal main switch is broken.
Step 3: Test the Pressure Switch Itself.
Now, drain all air from the tank until both gauges read zero. This is critical. With the tank empty, the pressure switch should be in the “cut-in” state, meaning its internal contacts are closed to send power to the motor. Set your multimeter to continuity or resistance (ohms, Ω). Touch one probe to each of the two power terminals LEAVING the switch (going to the motor). You should hear a beep or see a very low resistance reading (like 0.5 Ω). No beep or infinite resistance means the switch contacts are corroded open. A manual pressure switch adjustment might not fix this—the switch needs replacement.
Common mistake: Testing the pressure switch with air in the tank. If the tank pressure is above the cut-in setting (often 90-100 PSI), the switch is designed to be OPEN. You’ll get a false “bad switch” reading. Always drain to zero first.
Step 4: Listen for the Check Valve.
After draining the tank, disconnect power and remove the hose from the tank outlet. Quickly press the pressure release valve on the switch. If you hear a loud PSSHHH of air escaping from the tank port, the check valve is leaking backwards—a problem, but not your no-start issue. If you hear nothing, then hear a faint click or pop from the pump head when you release pressure, that was the check valve finally unseating. A valve stuck shut by corrosion or varnish traps air in the pump head, creating back-pressure the motor cannot overcome. This is a common failure after long storage.
Step 5: Find and Reset the Thermal Overload.
Unplug the compressor. Find the motor housing. Look for a small, round button, usually red or black, near where the power wires enter the motor. This is the thermal overload protector. If the motor overheated on its last run, this button pops out. Push it firmly back in until it clicks. This simple troubleshooting pressure loss related to overheating can restore power instantly.
Step 6: Inspect and Test the Capacitor.
The capacitor gives the motor the extra torque to start spinning. Unplug the compressor and discharge the capacitor by shorting its terminals with an insulated screwdriver. Disconnect its wires. Set your multimeter to capacitance (µF). Touch the probes to the capacitor terminals. Compare the reading to the number printed on the capacitor’s label (e.g., “50 µF”). If your reading is below 45 µF on a 50 µF cap, it’s dead. It might look fine, but it won’t start the motor.
| Step | Tool Needed | Pass Condition | If It Fails |
|---|---|---|---|
| 1. Wall Voltage | Multimeter | 110-125V (120V) / 220-245V (240V) | Check circuit breaker, GFCI, outlet wiring. |
| 2. Switch Input | Multimeter | Voltage matches Step 1. | Faulty power cord, internal master switch, or wiring. |
| 3. Switch Continuity | Multimeter (Ohms) | Beep/0.5 Ω with tank at 0 PSI. | Pressure switch contacts corroded. Replace switch. |
| 4. Check Valve | Hearing | Faint click from pump after pressure release. | Valve stuck shut. May free with lubricant or need replacement. |
| 5. Thermal Overload | Finger | Button is flush with housing, clicks when pressed. | Motor overheated. Let cool, reset, investigate cause (low oil, bad ventilation). |
| 6. Capacitor | Multimeter (Capacitance) | Reading within 10% of label rating. | Replace capacitor with matching µF and voltage rating. |
Where This Goes Sideways: The Check Valve & Tank Pressure
You drained the tank. The gauge reads zero. The motor still strains and hums. The problem is often a sealed check valve holding pressure in the pump head, not the tank.
The check valve is a one-way gate between the pump and the tank. It lets air into the tank but stops it from flowing back. When it sticks shut—common after months of inactivity in a humid garage—air remains trapped in the pump’s cylinders. On startup, the motor must compress that already-pressurized air immediately. Most small motors can’t. They stall, trip the thermal overload, or blow the capacitor.
The fix isn’t force. Do not whack the valve with a hammer. Instead, locate the pump head (where the air lines connect). With the compressor unplugged and the tank drained, find the line between the pump and tank. There’s often a union fitting. Loosen this fitting slightly with a wrench. If you hear a hiss of trapped air escaping, you’ve found the problem. Tighten the fitting, ensure the tank is at zero, and try starting again. The valve often frees itself. If not, a replacement check valve is a standard part. Installing an automatic drain valve can prevent future moisture-related corrosion here.
Worth knowing before you start: On oil-lubricated pumps, a failed oil pump or severely low oil can cause enough internal drag to mimic a stuck check valve. Always check the oil sight glass first. The Rolair VT20ST manual specifies a 0.295 liter oil fill, for example.
The Hidden Thermal Reset Button (And Why It Tripped)
It looks like a tiny, recessed button on the motor end cap. Many owners never know it’s there. When the motor draws too much current or gets too hot, a bimetallic strip inside bends, pushing this button out and breaking the circuit. It’s a safety device, not a defect.
You’ll find it on most modern electric compressor motors. The motor might hum for a second when you turn it on, then go silent. Or it might do nothing at all. Feeling for the button is faster than looking. Run your fingers around the metal motor casing near the wiring entry point. A protruding button is your culprit.
Press it in. You should feel a definite click. Now try the compressor. If it runs, the overload did its job. The next question is why it tripped. * Extended runtime: Running the compressor for more than its duty cycle (e.g., 30 minutes on a 50% duty cycle model) will overheat it. * Low voltage: A long extension cord or undersized circuit can cause voltage drop, making the motor draw more amps to do its work, creating heat. * Bad ventilation: Compressors shoved in closets or against walls can’t shed heat. The Pilot Air manual explicitly warns against placing obstacles around the unit to facilitate maximum air flow. * Mechanical binding: A seized pump or bad bearings create drag, increasing amp draw.
If the reset button trips again immediately, the problem is downstream—a seized pump or a failing motor. Stop. Further attempts will damage the windings.
Testing and Replacing the Motor Capacitor
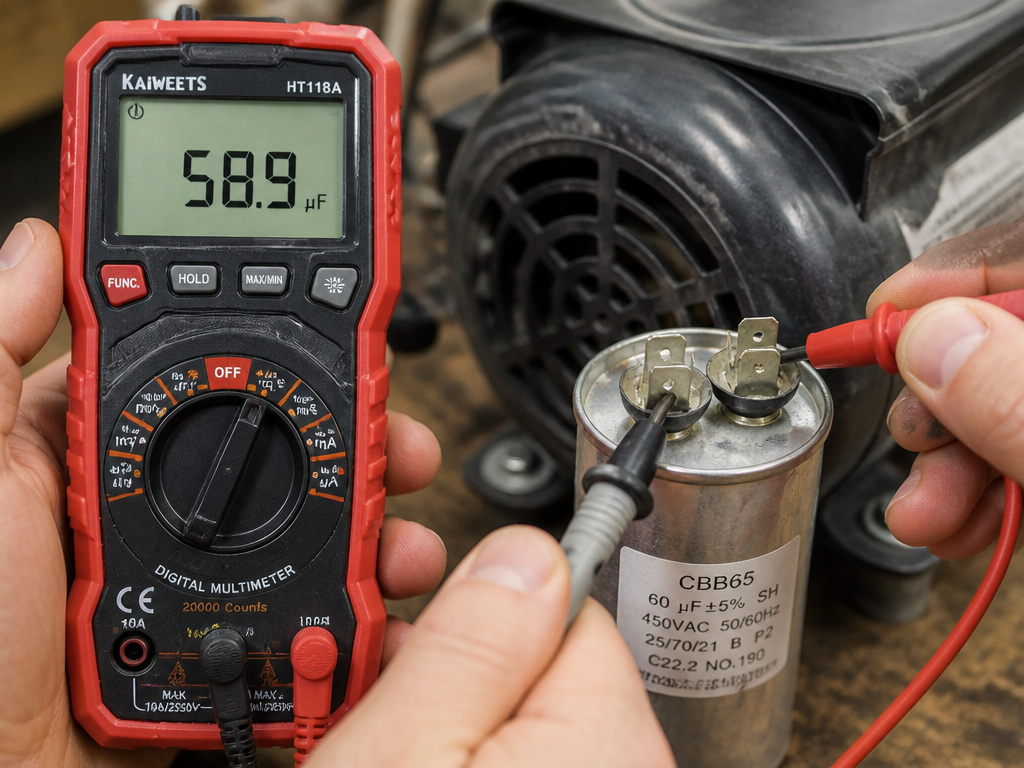
Capacitors fail with age, heat, and electrical stress. A bad capacitor is the leading cause of a compressor that hums loudly but refuses to turn over. Testing it requires a multimeter with a capacitance setting, which even many inexpensive models now have.
Safety First: Capacitors store energy. You must discharge it. Unplug the compressor. Use an insulated screwdriver to bridge between the two metal terminals on the capacitor. You may see a spark. Do this several times.
The Test: Disconnect the capacitor wires (note their positions). Set your multimeter to µF. Touch the probes to the capacitor terminals. Ignore the polarity. The reading should match the number on the capacitor’s label (e.g., 50 µF ±5%). A reading of 30 µF on a 50 µF capacitor is a failure. It’s lost its capacitance and won’t provide the necessary phase shift to start the motor.
Replacement: Buy a replacement with the exact same microfarad (µF) rating and an equal or higher voltage rating (e.g., 50 µF 370V). The physical size can vary. Mount it securely. Reconnect the wires exactly as they were. A wrongly wired capacitor can damage the motor instantly.
| Symptom | Likely Capacitor Issue | Multimeter Test (µF) |
|---|---|---|
| Loud hum, no rotation, trips breaker. | Start capacitor is dead (open circuit). | Reads 0.00 or near 0. |
| Weak hum, slow attempt to turn, then stops. | Start capacitor is weak (lost capacitance). | Reading is 20-40% below rated value. |
| Runs but struggles under load, overheats. | Run capacitor is failing. | Reading is slightly low (10-15% below). |
| Bulging or leaking top casing. | Capacitor has failed catastrophically. | Replace immediately; testing is unsafe. |
Prolonged Inactivity and Humidity Killers
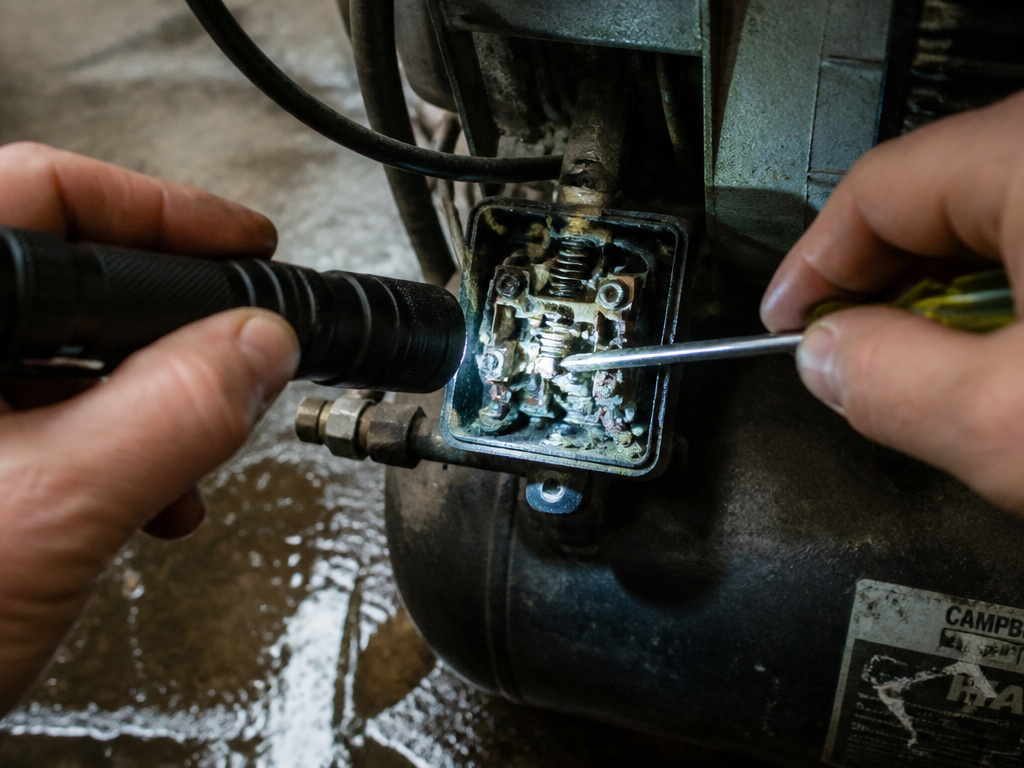
A compressor that sat all winter in a damp garage has three enemies: corroded pressure switch contacts, a varnished check valve, and water in the tank.
The Truper manual has a specific warning for this: “IF THE COMPRESSOR DOES NOT OPERATE AFTER A PROLONGED TIME OF INACTIVITY, turn off the thermal switch as indicated on the label attached to the tank.” This thermal switch is different from the motor overload; it’s a manual reset on the tank itself for some models. If that doesn’t work, the manual says contact a service center. The reason is internal corrosion.
Humidity is the silent killer. The Ingersoll Rand owner’s manual states that locating the unit in a damp, unheated area subject to large temperature changes increases the likelihood of excessive moisture, leading to sludge in lubricant and premature wear. This sludge gums up the check valve and can coat pressure switch contacts.
The recovery procedure:
- Drain the tank completely. Open the manual drain valve at the bottom and leave it open.
- Manually cycle the pressure switch toggle or rocker arm dozens of times. This can scrape minor corrosion off the contacts.
- Remove the air filter and pour a teaspoon of compressor oil into the pump intake. Crank the motor pulley by hand a few rotations (unplugged!) to distribute it.
- Reconnect power and try a start. It may cough to life. If it doesn’t, the internal damage from corrosion likely requires professional service. This is why choosing a dry, ventilated location for your home garage compressor from the start pays long-term dividends.
Model-Specific Voltage and Setting Traps
Not all compressors are generic. Some have hardwired electrical configurations that, if ignored, guarantee a no-start condition.
The C-Aire S275 and S550 series, for example, have a critical spec: “Voltage: 115/230V (must be specified at ordering, cannot be changed after initial build).” If you buy a 230V model and plug it into a 120V outlet, it will not start—it may not even hum. The motor windings are configured for the higher voltage. The fix isn’t a setting change; it requires rewiring the motor or using a step-up transformer, a job for an electrician.
Similarly, factory pressure switch settings are not always adjustable. The Rolair VT20ST comes set from 95 to 125 PSI. If someone has tampered with these settings and set the cut-in pressure too high (say, 120 PSI), the compressor will behave as if the tank is always “full” and won’t turn on. You must verify the cut-in pressure by draining the tank and watching the gauge when the switch clicks. Matching the correct air compressor oil for your model also affects internal friction and starting load, especially in cold weather.
Before You Go: The One Tool You Need
Skip the guesswork. A basic digital multimeter that measures AC voltage, resistance (ohms), and capacitance (µF) is the single most important tool for diagnosing a no-start compressor. It turns a mystery into a checklist.
For the majority of cases, the problem is in the first three steps of the ladder: a dead outlet, a tripped thermal overload, or a failed pressure switch. The capacitor and check valve are the next most common. Seized pumps and burnt motors are rare.
If your compressor starts but then stops pumping air at normal pressure, you have a different set of issues—usually pump wear or intake problems. But for a silent, motionless compressor, follow the voltage. It always tells the truth.
Frequently Asked Questions
Why does my air compressor hum but not start?
This is the classic symptom of a failed start capacitor or a stuck check valve. The capacitor provides the initial torque to spin the motor; without it, the motor just hums. A check valve stuck shut traps pressure in the pump, creating a mechanical load the motor can’t overcome. Test the capacitor with a multimeter first.
Look for a small, round, red or black button on the electric motor’s housing, typically near where the power cord enters. This is the thermal overload reset. Also check the tank itself or near the pressure switch for a separate thermal cut-off switch, which some models have for tank overheating protection.
Can a bad pressure switch prevent an air compressor from starting?
Absolutely. If the internal electrical contacts inside the pressure switch are corroded or burnt, they will not complete the circuit to the motor, even when the tank pressure is zero. Testing for continuity across the switch terminals with a multimeter (with the tank drained) will confirm this.
Is it safe to bypass the pressure switch to test the motor?
No. Never bypass the pressure switch. It is a critical safety device that prevents the tank from over-pressurizing and potentially exploding. Bypassing it removes all automatic shut-off control, creating an extremely hazardous situation. Always diagnose and replace a faulty switch.
My compressor worked last season but won’t start now. What happened?
Prolonged inactivity in a non-climate-controlled space is the likely cause. Humidity causes internal corrosion on the pressure switch contacts and can varnish the check valve shut. Follow the recovery procedure: drain the tank fully, manually cycle the pressure switch, add a small amount of oil to the pump intake, and try again. If it remains dead, internal corrosion may require professional service.
The Bottom Line
Diagnosing an air compressor that won’t turn on is a process of elimination, not magic. Start with the simplest, most common causes: verify power is actually reaching the tool, reset the thermal overload, and drain the tank completely. A multimeter is your best friend for this job, turning electrical guesswork into confirmed facts.
For the persistent cases, the capacitor and check valve are the next suspects. Both can fail silently while the compressor sits. Testing them is straightforward with the right tools. Remember, the goal is to isolate the single faulty component. Replacing parts at random is expensive and often doesn’t fix the root cause. Follow the voltage, listen for the clicks, and you’ll find it.
