
How to Sharpen Drill Bits | The Two Angles That Decide It
This post contains affiliate links. As an Amazon Associate, we earn from qualifying purchases.
Sharpen a drill bit by grinding its cutting edges to restore two specific angles: the point angle (commonly 118° or 135°) and the clearance angle (typically between 7° and eight 14°). The point angle determines the bit’s aggression, and the clearance angle allows the cutting edge to bite into the material. Match these angles to your drill bit’s size and the material you’re cutting.
That clearance angle is the whole game. It’s the difference between a bit that cuts cleanly and one that just rubs itself hot against the workpiece. Most guides mention the point angle but treat clearance as an afterthought. It’s not optional geometry, it’s the reason a sharp bit works.
What follows: a breakdown of the two angles that matter, the tools that get them right (from a file to a $500 machine), and the three-step check to know you’ve nailed it. We’ll also cover why a perfectly sharpened bit can still drill a crooked hole if one detail is off.
Key Takeaways
- The clearance angle (7°–14°) is as critical as the point angle; too small and the bit overheats, too large and it chatters.
- Dedicated sharpeners like the Drill Doctor DD750X lock in geometry for consistency, while a bench grinder with a jig offers more control for experienced users.
- Always cool the bit during grinding. Overheating (signaled by a blue tint) ruins the temper of HSS and cobalt bits, making them soft.
- Test a resharpened bit on scrap material first. If it wanders or makes a chattering sound, the cutting edges are likely unequal in length.
- Split-point bits (135°) are not just for harder metals; they prevent “walking” on any curved or slippery surface, making them a good default for sheet metal or car bodywork.
The Anatomy of a Sharp Drill Bit
Forget “sharp” as a vague idea. A drill bit is a precise cutting tool defined by its geometry. Get that geometry wrong, and the bit is useless no matter how shiny the edge looks.
Two cutting edges converge at the tip, forming the chisel edge. Behind each cutting edge is the relief, or clearance, angle. This is the slope that ensures only the very edge of the bit contacts the workpiece. If this angle is zero, if the heel is as high as the cutting edge, the bit cannot cut. It just spins and generates friction heat.
A drill bit needs to have the right lip clearance angle to cut the material. The clearance angle varies from 7° to 14°. A drill with a larger clearance angle cuts more easily, but if the angle is too large, vibrations will occur and the drill will cut irregularly and quickly become dull. If the clearance angle is too small, the drill will not cut at all, but will become hot and rapidly destroyed.
Source: Tormek DBS-22 Instruction Manual
The other critical spec is the point angle. A 118° point is steeper and more aggressive for soft materials like wood and aluminum. A 135° point is flatter, spreading the cutting force over a wider area for hard materials like stainless steel. Many modern split point bits use a 135° angle.
Where this goes sideways: Assuming both cutting edges are ground equally. If one edge is longer by even half a millimeter, the bit will cut a larger hole and wander off-center. Your eyes won’t see the difference, but the drill press will.
Matching Angles to Your Work
You don’t pick angles at random. The bit’s job decides.
| Material | Recommended Point Angle | Recommended Clearance Angle | Why It Works |
|---|---|---|---|
| Soft Wood & Aluminum | 118° | 12° – 14° | Steeper point penetrates quickly; larger clearance prevents clogging in soft material. |
| Hardwood & Mild Steel | 118° | 9° – 11° | Balanced aggression and edge strength for general-purpose drilling. |
| Stainless Steel | 135° | 7° – 9° | Flatter point distributes force; smaller clearance stabilizes the bit in hard material. |
| Masonry/Concrete | 130° (Carbide Tip) | Not Applicable | Carbide tip geometry is different; sharpening focuses on the sintered carbide, not the steel flutes. |
If you only remember one rule: harder materials get a larger point angle and a smaller clearance angle. Softer materials get a smaller point angle and a larger clearance angle. This is why a one-size-fits-all sharpening approach fails.
The 118 vs 135 degree choice isn’t just about hardness. A 135° split point is also superior for starting a hole without a center punch because it’s less likely to “walk.” For most DIY shops, standardizing on 135° bits isn’t a bad move.
Your Sharpening Toolkit: From File to Machine
You have four main paths, each with a different learning curve and outcome consistency.
Using a File
The most basic hand sharpening method. It requires a good eye, a steady hand, and a fine triangular file. You’ll manually try to replicate the original angles by eye. The result is rarely perfect, but it’s cheap and can salvage a bit in a pinch. It’s a skill worth knowing for quick field repairs.
Bench Grinder
A bench grinder equipped with a coarse grit wheel is the traditional tool. This is a freehand method with a high skill ceiling. The risks are significant: overheating the bit (destroying its temper) and grinding the angles incorrectly. Using a simple shop-made jig, a block of wood with a V-groove set at the correct angle, dramatically improves results. This method is fast and teaches you a lot about tool geometry.
Dedicated Drill Sharpeners
These devices, like the Drill Doctor DD500X or Sealey SMS2008, remove skill from the equation. You clamp the bit, select the angle, and a guided mechanism presents the bit to an internal grinding wheel. They produce consistent, factory-like results every time. The trade-off is cost and bit-size limitations. The Drill Doctor DD750X, for example, sharpens bits up to 3/4″.
Professional Systems
The Tormek DBS-22 attachment turns a slow-speed wet grinder into a precision sharpening station. It handles bits from 1/8″ to 7/8″ and allows fine adjustment of both point and clearance angles. It’s the choice for pros who need to replicate exact geometries and want the coolest possible grind to preserve the bit’s metallurgy.
Dedicated Sharpeners vs. Bench Grinders
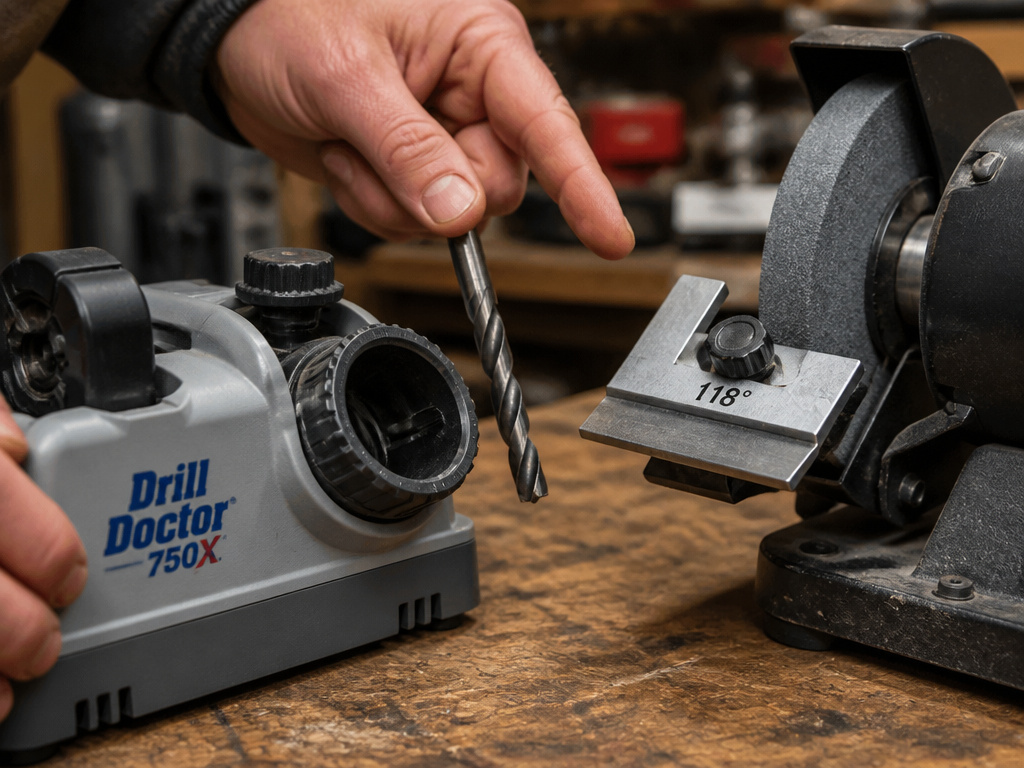
This is the core decision for a home workshop. Do you want consistency or versatility?
| Feature | Dedicated Sharpeners (e.g., Drill Doctor) | Bench Grinder with Jig |
|---|---|---|
| Consistency | High. Geometry is locked in by the machine. | Variable. Depends entirely on user skill and jig quality. |
| Speed | Fast. Set-and-forget operation. | Fast grinding, but setup and measurement take time. |
| Skill Required | Low. Anyone can produce a serviceable edge. | High. Requires practice to judge angles and pressure. |
| Risk of Overheating | Low. Grinding cycles are short and controlled. | High. Easy to overheat the bit on a coarse wheel. |
| Versatility | Low. Only sharpens twist drills within a size range. | High. Can be adapted to sharpen other tools with different jigs. |
| Upfront Cost | Higher. A quality unit is a significant investment. | Lower. Assumes you already own a grinder. |
For the person who just wants bits sharp and doesn’t want to think about it, a Drill Doctor DD750X is the default pick. For the tinkerer who already uses a grinder for other tools and enjoys the process, mastering the grinder technique is more rewarding and flexible.
Step-by-Step: Sharpening with a Dedicated Machine
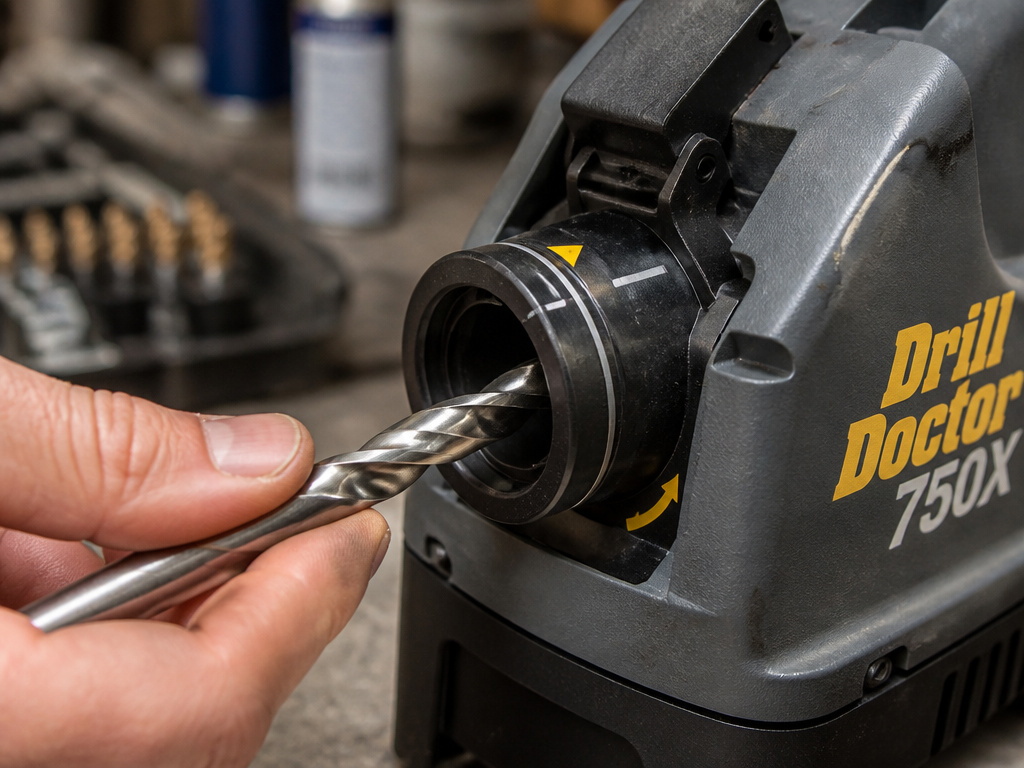
Let’s use the Drill Doctor as the reference, as its process is common to many guided sharpeners. The principles apply even if your model is different.
- Clean and Inspect the Bit. Remove all dirt, grease, and rust. A clean bit clamps securely and allows you to see the cutting edges clearly. This is also the time for rust removal if needed.
- Set the Point Angle. Loosen the adjustment knob on the sharpener and slide the plate to either 118° or 135°. Tighten the knob. Match this to your bit and your intended material.
- Chuck the Bit. Insert the bit into the machine’s chuck up to the alignment line. The most common cause of a bad sharpening is the chuck not being fully seated in the port.
- Align the Bit. The Drill Doctor uses alignment guides that drop into slots. Different size bits may use different slots. The manual explicitly states that incorrect alignment here is the top cause of failure.
- Sharpen. Rotate the chuck until the grinding sound stops. The machine’s manual notes that “different size drill bits may require a different number of rotations.” Don’t just count turns, listen for the sound to diminish.
- Split the Point (Optional for 118°, Mandatory for 135°). Transfer the chuck to the splitting port and repeat the grinding motion. This grinds a small notch at the chisel edge, creating a self-centering tip.
- Inspect and Test. Visually check that both cutting edges are equal in length and that the split is centered. Then, always test on scrap material. A bit that chatters or drifts needs its edges re-equalized.
Common mistake: Not cooling the bit between grinding passes on a bench grinder. On HSS bits, a blue or straw-colored tint means you’ve overheated it and softened the steel. That edge will dull after drilling just a few holes.
Diagnosing a Bad Sharpening Job
Sometimes the bit comes out of the sharpener looking wrong. Here’s what to look for.
| Symptom | Likely Cause | The Fix |
|---|---|---|
| Bit wobbles or drills an oval hole. | Cutting edges are unequal in length. | Re-sharpen, ensuring the bit is inserted to the exact same depth on both sides. |
| Bit chatters or screams while drilling. | Clearance angle is too large (over 14°). | Re-grind with a smaller clearance angle setting. |
| Bit gets hot quickly, smells burnt. | Clearance angle is too small or zero (rubbing). | Increase the clearance angle. Ensure the heel is clearly lower than the cutting edge. |
| Bit won’t start a hole, just skates. | Split point is uneven or missing (on a split-point bit). | Re-split the point, ensuring equal grinding on both sides. |
| Bit dulls after very little use. | Overheating during sharpening (blue tint). | The bit’s temper is ruined. Grind back past the discolored steel and re-sharpen, or discard. |
If your sharpening by hand or on a grinder leads to these issues, it’s a sign to build or buy a jig. Your time and ruined bits quickly outweigh the cost of a simple guide.
Frequently Asked Questions
Can you sharpen a drill bit with a Dremel?
You can, but it’s not ideal. A Dremel lacks the power and stability for consistent material removal. It’s very easy to overheat the bit and destroy its temper. Use it only for tiny bits or as a last-resort touch-up, with a light touch and frequent cooling dips in water.
How many times can you sharpen a drill bit?
It depends on the original bit length and how much material you remove each time. A standard jobber-length bit can be sharpened 10-15 times before the flutes are too short to clear chips effectively. The goal is to remove the minimal amount of steel needed to restore the edge.
Why does my newly sharpened bit drill a bigger hole?
This is almost always caused by unequal cutting edges. One edge is doing more work, causing the bit to swing in a wider arc. Your sharpening setup isn’t presenting the bit to the wheel with perfect symmetry. Check your chuck alignment or jig setup.
Do you need to oil a drill bit after sharpening?
No, and you shouldn’t. Any oil on the bit will attract grinding dust and chips, making a mess. After cleaning your drill bits of all grinding debris with a brush, store them dry in a clean organizer. Oil is for preventing corrosion during long-term storage, not after immediate use.
The Bottom Line
Sharpening drill bits isn’t magic. It’s mechanics. Lock down the point angle and, more importantly, the clearance angle for your material. For most people, a dedicated sharpener like a Drill Doctor is worth the investment, it turns a frustrating art into a repeatable, five-minute task.
If you already own a grinder, spend an afternoon building a simple angle jig. You’ll learn more about tool geometry than any video can teach you. Either way, stop throwing away dull bits. A sharp drill bit is a safe, efficient, and cheap drill bit. You just have to give it the right edges.
