
How to Remove Rivets Without a Drill: A Manual Tool Method
This post contains affiliate links. As an Amazon Associate, we earn from qualifying purchases.
To remove rivets without a drill, you need three basic tools: a center punch, a hammer, and a pin punch. For a standard pop rivet, first drive the internal mandrel out with the center punch and hammer. Then use the pin punch to push the remaining rivet body through the hole. Solid rivets require cutting the head off with an angle grinder or cold chisel before punching out the shank.
This method turns on one fact: a rivet is a mechanical plug, not a fused weld. Its strength comes from the head and swollen body locking into a hole. Break that mechanical lock, and the pieces fall out. The trick is breaking it without power, and without making the hole too big for the next fastener.
What follows is the manual toolkit, the step-by-step for both rivet types, and the two situations where you must stop and find a drill. This is for the shop corner without an outlet, the field repair, or the one rivet you can’t afford to mess up.
Key Takeaways
- Drive the mandrel first. On pop rivets, the hardened steel mandrel is the core lock. Knock it out with a center punch before touching the aluminum body.
- Match your punch to the hole. A pin punch should be the same diameter as the rivet shank. One size smaller binds; one size larger mushrooms the hole edges.
- Grind, don’t hammer, solid rivets. A cold chisel can shear a solid rivet head, but an angle grinder with a 1mm cutting disc is cleaner and won’t bend the sheet.
- Thin sheet metal is a no-go zone. Manual removal on material under 1/16″ (≈1.5mm) almost always dimples or tears it. That’s when you find a drill.
- Wear eye protection every time. A flying mandrel or metal shard travels at bullet speed. Safety glasses are non-negotiable.
The 3-Tool Manual Method for Pop Rivets
A pop rivet is a two-part assembly: a soft aluminum sleeve and a hardened steel mandrel. The mandrel snaps off during installation, leaving a stub locked inside that acts as a plug. Your goal is to eject that plug.
Before you start: Secure the workpiece in a vise or clamp it to a solid bench. A shifting panel turns a precise punch strike into a glancing blow that dents the metal. Wear safety glasses, the mandrel can shoot out with real force.
Tools You Actually Need
You can manage this with tools from a basic mechanic’s set. Here’s what each one does:
- Center Punch: Its sharp, tapered point bites into the mandrel stub, giving your hammer strike a precise target. Don’t use a nail.
- Ball-Peen Hammer: A 16-ounce hammer gives enough mass for control without being so heavy it fatigues your wrist. The rounded peen side is for shaping metal; use the flat face for striking.
- Pin Punch Set: This is your ejector. You need a punch whose shaft diameter matches the rivet’s body size. For a 1/8″ rivet, use a 1/8″ pin punch.
The Step-by-Step Punch-Out
Follow this sequence. Skipping to step three is how you collapse the rivet body inside the hole and create a much bigger problem.
- Locate and Center-Punch the Mandrel. Find the small, round dimple in the center of the rivet head. That’s the broken end of the mandrel. Place your center punch directly in that dimple and give it a firm tap with the hammer. You want to create a small dent to keep the punch from slipping.
- Drive the Mandrel Through. Switch to a pin punch that fits the mandrel’s diameter (it will be smaller than the rivet body). Place it in the dent you just made. Strike it squarely with the hammer. The mandrel will drive through the rivet body and fall out the backside. You’ll hear a change in sound when it breaks free, a dull thud shifts to a higher-pitched ping.
- Punch Out the Rivet Body. Now switch to a pin punch that matches the rivet body’s diameter. Place it against the now-empty rivet head. Strike it firmly. The aluminum sleeve has nothing holding it in place and should push through the hole with a few solid hits.
The mandrel is the lock. Remove it cleanly and the aluminum sleeve is just a loose bushing. Trying to punch out the body with the mandrel still inside spreads the sleeve against the hole wall and seizes it.
| Problem | Likely Cause | Fix |
|---|---|---|
| Mandrel won’t budge | Corrosion or over-sized mandrel | Apply penetrating oil (like PB Blaster) to the head; let sit 15 minutes. |
| Rivet body spins | Hole is already enlarged/worn | Grip the rivet head with locking pliers to hold it steady while punching. |
| Punch slides off head | Rivet head is domed or rounded | Use a center punch to create a flat starting spot, then switch to pin punch. |
The part nobody mentions: If the rivet body is stainless steel, not aluminum, the mandrel is likely stainless too. It’s much harder. You might need a few sharp, heavy blows to get it moving. A standard carbon-steel punch can chip against a stainless mandrel, if you see metal flakes, your punch is losing.
How to Remove Solid Rivets Without a Drill
Solid rivets are a different beast. These are one piece of solid metal, peened over with a bucking bar or hammer to form the second head. There is no mandrel to eject. You must remove the manufactured head.
Where this goes sideways: Using a cold chisel on aluminum or soft steel solid rivets. The chisel can dig into the base material and gouge a trench around the rivet head, leaving a repair that needs filling. For clean work, an angle grinder is the default.
Cutting Tools Compared
You have two main paths for decapitation: abrasion or shearing.
- Angle Grinder with Cutting Disc: This is the fastest, most controlled method. A 4.5-inch grinder with a 1mm-thick cutting disc lets you slice the head off flush without touching the base metal. You must hold the tool perfectly level.
- Dremel Rotary Tool: For tight spaces or smaller rivets (under 1/8″), a Dremel with a reinforced cutoff wheel works. It’s slower and eats through wheels, but the precision is unmatched next to a trim panel.
- Cold Chisel and Hammer: The classic method. It’s messy, loud, and requires a sturdy backup. You place the chisel’s edge against the rivet head’s base and shear it off with hammer blows. Use this only when you can’t get a grinder into the space.
The Grinder Method: A Clean Cut
If you have power for a grinder but not a drill, this is your sequence.
- Secure Everything. Clamp the workpiece. The grinder will try to twist it on contact.
- Mark Your Depth. Wrap a piece of painter’s tape around the cutting disc, leaving only 1/16″ of disc exposed past the tape. This acts as a depth stop to prevent cutting into the base material.
- Cut the Head Off. Hold the grinder guard parallel to the work surface. Gently touch the spinning disc to the side of the rivet head and cut through it. Rotate the workpiece to cut all around. The head should pop off.
- Punch the Shank. Use a pin punch larger than the rivet’s shank diameter to drive the remaining piece out. Supporting the backside directly behind the rivet is critical to prevent bending the sheet.
For a manual hole in metal, this cutting process is similar to using a hammer and punch, but far more precise. The goal is the same: create a clean path for the fastener remnant to exit.
When Manual Removal Fails (And What to Do)
Not every rivet will surrender to hand tools. The material it’s in often decides the fight before you start.
Thin sheet metal is the primary failure mode. The official Cherry Aerospace manual for CherryLOCK® rivets states: “If the rivets have been installed in thin sheets, driving out the locked stem may damage the sheets.” They recommend a drill. When the metal is thinner than the rivet head is wide, the punching force has nothing to resist it. The sheet dimples, stretches, or tears.
| Scenario | Risk of Manual Removal | Alternative Path |
|---|---|---|
| Rivet in body panel (<20ga steel) | Panel distortion, visible dent | Use a drill with a broken drill bit extractor kit ready. |
| Rivet in hardened steel bracket | Tool damage (chipped punch) | Apply heat locally with a propane torch, then try punch. |
| Stripped or spinning mandrel | Impossible to get purchase | Cut a slot in the mandrel stub with a Dremel, use flat-head punch. |
| Blind location (can’t support back) | Rivet body pushes sheet inward | Use a screw extractor in a hand drill to grip and pull. |
Easy to miss: Corrosion welds the rivet to the hole. Aluminum rivets in steel cause galvanic corrosion, a white, crusty powder that acts like cement. Soaking the joint in a 50/50 mix of acetone and automatic transmission fluid for an hour breaks that bond better than any commercial penetrant.
If you’ve snapped a tool in the attempt, the game changes. Now you need to know how to remove a broken drill bit or extract a stuck drill bit from the hole. That’s a separate, more delicate operation.
Tool Deep Dive: Choosing Your Punches and Blades
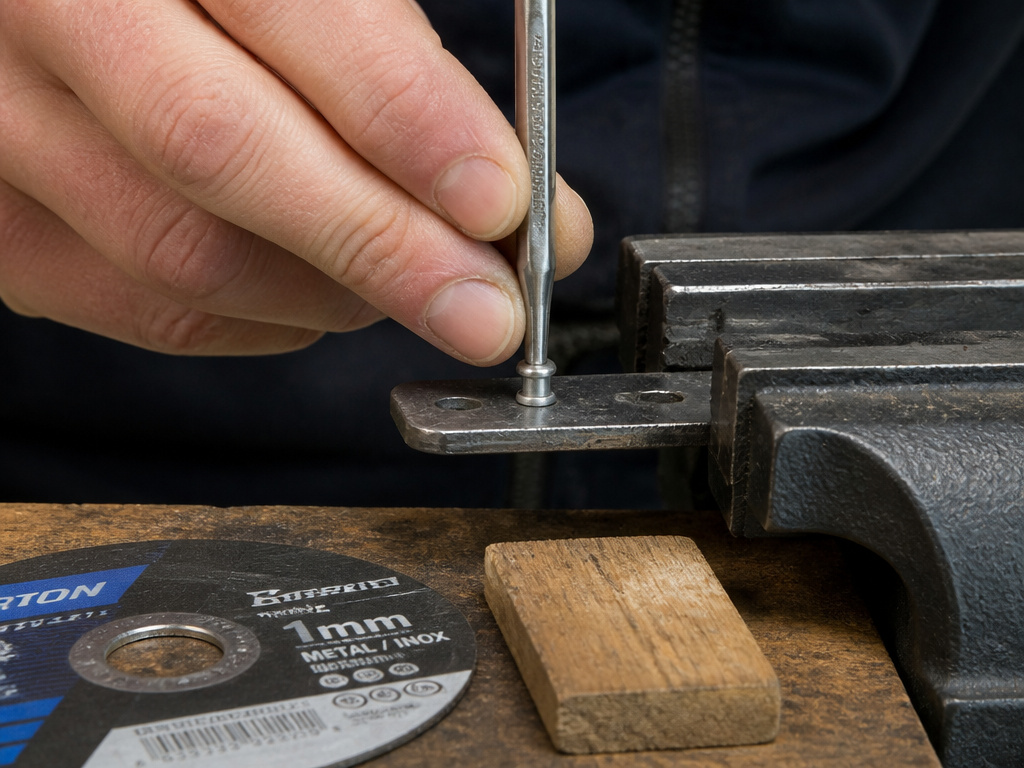
The right tool isn’t just about having it, it’s about the specifics. A generic “punch” from a big-box store is often too soft for repeated use on steel.
Pin Punches: The Diameter Rule
As cited in the CherryLOCK® process manual (CA-1013.pdf), you must use a “pin punch having a diameter equal to the rivet shank.” This isn’t a suggestion. A punch that’s too small cocks sideways and binds. One that’s too large mushrooms the edge of the hole, creating a lip that a new rivet won’t sit flush against.
For common sizes: * 1/8″ (3.2mm) rivet: Use a 1/8″ punch. * 5/32″ (4.0mm) rivet: Use a 5/32″ punch. * 3/16″ (4.8mm) rivet: Use a 3/16″ punch.
Invest in a set of chrome-vanadium alloy steel punches. They resist deformation and are worth the extra few dollars over plain carbon steel.
Cutting Discs: Thickness is Everything
For grinding off solid rivet heads, the disc thickness determines your control. A standard 2.5mm thick grinding disc is for heavy material removal and will chew into the base plate. A 1mm thick cutting disc is for precision. It produces less heat, removes less material, and gives you a fighting chance of keeping the original hole intact.
Brands like DeWalt, Makita, and Diablo make high-quality thin-cut discs. Don’t use a disc that’s cracked, chipped, or worn down below half its original diameter.
The Vise & Backup Block
This isn’t an optional tool; it’s part of the process. A bench vise holds the workpiece. A backup block, a piece of scrap hardwood or dense plastic placed behind the rivet, supports the metal during punching and prevents bend. Without it, you are hammering against air, and the metal will yield.
Frequently Asked Questions
Can you remove rivets and reuse the hole?
Sometimes, but rarely perfectly. The punching process slightly work-hardens and enlarges the hole edges. For a non-structural cover panel, you might get away with using the next rivet size up (e.g., a 5/32″ rivet in a worn 1/8″ hole). For anything structural, the official stance from guides like the blind rivet guide is to drill the hole to the next clean size and use the corresponding oversize rivet.
What’s the difference between removing pop rivets and solid rivets?
The mechanism. Pop rivets have a separate, removable lock (the mandrel). Solid rivets are monolithic, you must destroy a portion (the head) to break the mechanical interference. This is why the pop rivet removal process starts with a punch, while solid rivet removal starts with a cutter.
Is it safe to use an angle grinder on aluminum rivets?
Yes, but with caution. Aluminum melts at a lower temperature and can gum up your cutting disc. Use a lubricant like WD-40 on the cut line to keep things cool and clear. Also, aluminum oxide dust is flammable, keep a fire extinguisher nearby and clean dust frequently.
What if I don’t have a pin punch?
Close-fitting nail set or a hardened steel dowel pin can work in a pinch for aluminum rivets. For steel rivets, using an improper tool will damage it and likely the workpiece. It’s better to wait until you have the right drill chuck removed and can borrow the correct punch.
How do I prevent damaging the paint or surface?
Use a punch guide. You can make one by drilling a hole in a block of metal that fits over the rivet head. The guide surrounds the rivet, directing the punch and preventing hammer slips. For grinding, use painter’s tape around the rivet to protect the finish.
The Bottom Line
Removing rivets without a drill is a test of patience and mechanical sympathy. It is always slower than drilling, and on thin materials, it’s the wrong call. For the majority of shop and DIY scenarios, a steel bracket, a trailer frame, a tool cabinet, the hammer-and-punch method works if you follow the order: mandrel out first, then body.
Keep your punches sharp and sized right, your workpiece locked down, and your safety glasses on. When you meet a solid rivet, reach for the angle grinder, not the bigger hammer. And if the metal starts to dimple under your punch, that’s the signal to put the hand tools away and find a power drill. A clean hole is more valuable than winning the fight with the wrong tools.
