
How to Magnetize Drill Bits Using Your Drill Press Motor
This post contains affiliate links. As an Amazon Associate, we earn from qualifying purchases.
Magnetize a drill bit by stroking it along a strong magnet in one direction 30–50 times. The bit must be ferrous, steel, cobalt, or high-speed steel, and you need a neodymium magnet rated N52 or stronger. Carbide and titanium-coated bits won’t hold a charge.
That last clause is the one that matters. A magnetized bit isn’t a feature you add; it’s a side effect of the metal remembering the magnetic field you run it through. Get the field wrong, and the bit stays dead. Get the metal wrong, and it can’t hold the charge at all.
What follows: the physics of residual magnetism, the one tool you already own that does the job better than a battery, and the three materials where this trick actually works.
Key Takeaways
- Magnetization only works on ferromagnetic metals: high-speed steel (HSS), cobalt, and some alloy steels. Carbide, titanium nitride (TiN), and black oxide coatings are non-magnetic.
- The fastest, strongest method uses your drill press or corded drill’s motor. Running the bit in reverse next to the spinning chuck induces a field that aligns the metal’s domains.
- A proper neodymium magnet (N52 grade) works, but stroking must be unidirectional, back-and-forth rubbing cancels the field.
- Magnetized bits are a liability in aluminum, brass, or stainless steel work. They hold chips, cause inaccurate starts, and accelerate wear.
- Demagnetizing is straightforward: pass the bit through an alternating current (AC) coil or tap it firmly on a non-magnetic surface like a concrete floor.
Why Drill Bits Magnetize (and When You Want Them To)
A drill bit doesn’t pick up a magnetic charge because it wants to. It’s a record of stress.
When you run a ferrous bit through a powerful magnetic field, like the one inside a drill motor, the tiny magnetic domains in the metal align. Stop the field, and most domains snap back. But some stay locked in the new direction. That’s residual magnetism. It’s why a bit that’s been in a magnetic chuck, or pressed against a motor housing, can suddenly start holding screws.
You want this for one job: drilling steel. A magnetized bit will cling to a steel surface, giving you a hands-free start. It’ll also hold a steel screw on the tip for starting in a tight spot. For every other material, aluminum, brass, plastic, wood, a magnetic bit is a nuisance. It attracts swarf, which jams flutes and dulls the cutting edges. It can pull the bit off-center on non-ferrous metals. And it turns your bit into a chip-collecting magnet that you’ll spend more time cleaning drill bits than using.
Where this goes sideways: Using a magnetized bit on aluminum or stainless. The chips weld themselves to the flutes, the bit overheats from friction, and you’ll snap the tip on the next hole in steel.
The 3-Step Magnetization Method (and Why It Works)
Forget the 9-volt battery trick. It’s weak, inconsistent, and a waste of time. The strongest, most reliable field you have access to is inside your drill.
What You’ll Need
- A corded drill or a drill press (cordless works in a pinch, but corded is stronger)
- The drill bit you want to magnetize
- Safety glasses
The Process
- Secure the drill and insert the bit. Chuck the bit into your drill press or corded hand drill. Tighten it normally. Put on your safety glasses. This method uses the drill’s own electric motor as the magnet, you’re not applying external power.
- Run the drill in REVERSE at full speed for 30 seconds. This is the critical step. The electric motor generates a magnetic field when it spins. In reverse, the field orientation often aligns better for magnetizing a bit held near the chuck. Let it run uninterrupted.
- Hold the bit’s shank against the spinning chuck. After 30 seconds, with the drill still running in reverse, gently touch the shank of your bit to the side of the metal chuck. Hold it there for 5–10 seconds. You’ll feel a slight pull if it’s working. Remove the bit and test it on a steel screw.
The science is straightforward. An electric motor is a series of copper windings around a laminated steel core. When current flows, it creates a strong electromagnetic field. By placing your bit in that field while it’s active, you’re doing the same thing an industrial magnetizer does, just with the tool you already own.
The Tools You Already Own (And One You Might Need)
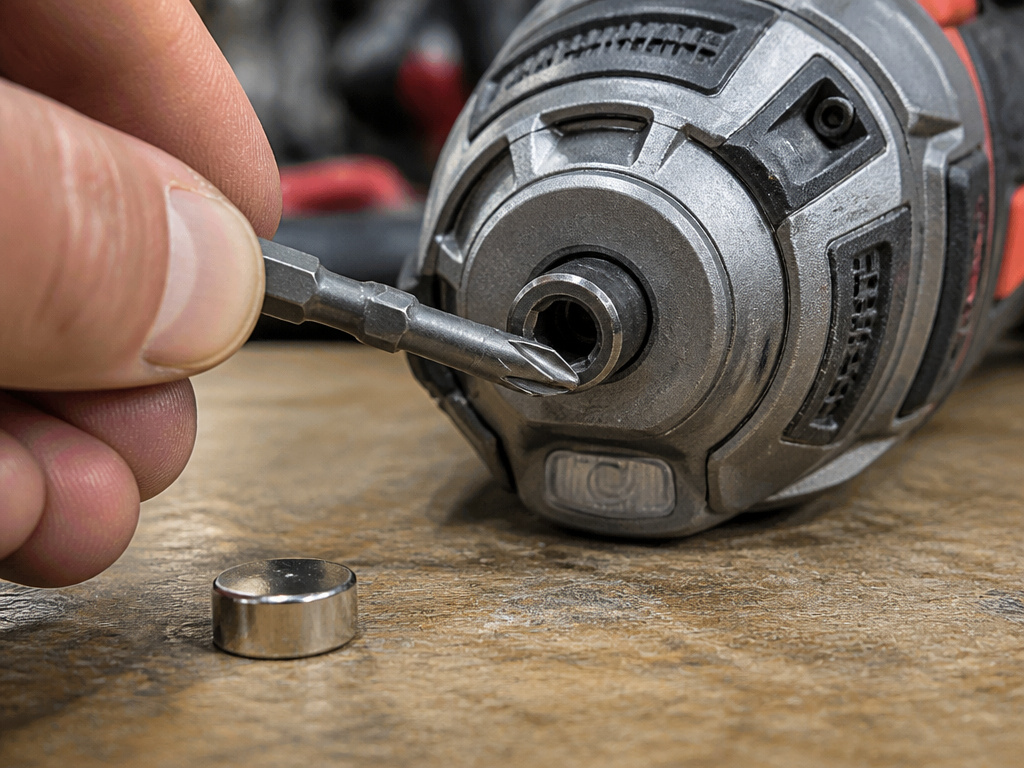
You don’t need a specialized magnetizer. You likely have what you need in your shop.
Your Drill Press or Corded Drill: This is your best tool. As outlined above, the motor provides a strong, controllable field. A Milwaukee M18 FMDP magnetic core drill’s motor, for example, generates a field strong enough to hold 8.89 kN to a steel beam, more than enough to magnetize a bit.
A Neodymium Magnet: If you must use a magnet, get the right one. A small, disc-shaped neodymium magnet rated N52 will work. The key is technique: stroke the bit from the shank to the tip along the magnet, lifting the bit clear between strokes. Do this 30–50 times, always in the same direction. Back-and-forth rubbing creates opposing fields that cancel each other out.
What Doesn’t Work: Weaker ceramic or flexible fridge magnets. They lack the coercive force to realign the metal’s domains. You’ll waste ten minutes for a charge that fades before you finish the first hole.
| Method | Strength | Consistency | Best For |
|---|---|---|---|
| Drill Motor | High | Excellent | Permanent, strong magnetization |
| N52 Neodymium Magnet | Medium | Good | Quick, tool-free jobs |
| 9V Battery Trick | Low | Poor | Demonstration only; not for actual work |
When Magnetization is a Problem (And How to Fix It)

Most of the time, a magnetized bit is a problem you need to solve, not a feature you want to create. It happens accidentally, bits stored on a magnetic tool holder, left on a drill press table, or even just from repeated use in a magnetic chuck.
The symptoms are obvious: the bit attracts a halo of metal filings, making a mess. It pulls off-center when starting a hole in non-ferrous metal. It can even interfere with digital calipers or other sensitive tools.
Common mistake: Trying to demagnetize a bit by hitting it with a hammer. This can shock-harden the steel, making it brittle and more likely to snap.
The right fix is a degaussing coil. Pass the bit slowly through the center of a powered AC coil. The alternating field randomizes the magnetic domains, neutralizing the charge. No coil? Tap the bit sharply on a concrete floor or a heavy steel vise. The mechanical shock can jostle domains out of alignment. It’s less reliable than a coil, but it works in a pinch.
For bits that are both magnetized and dull, you’ll need to address both issues. Sharpening drill bits on a grinder or by hand will often remove the magnetized outer layer, but it’s better to demagnetize first to avoid attracting grit to your grinding wheel.
Drill Bit Materials: Which Ones Can Be Magnetized?
Not all bits are created equal. The ability to hold a magnetic charge depends entirely on the base metal.
| Material | Magnetic? | Notes |
|---|---|---|
| High-Speed Steel (HSS) | Yes | The most common drill bit material; holds a charge well. |
| Cobalt Steel (e.g., M35) | Yes | Even more ferrous than HSS; often used for cobalt bits in hard metals. |
| Carbide (Tungsten) | No | The carbide tip is a ceramic; the steel shank may be magnetic. |
| Titanium Nitride (TiN) | No | This is a coating over HSS. The coating isn’t magnetic, but the HSS underneath is. |
| Black Oxide | No | A surface treatment, not a metal. The underlying HSS or cobalt is magnetic. |
This is why knowing your drill bit materials matters. If you’re trying to magnetize a carbide-tipped masonry bit, you’re wasting your time. If you have a titanium-coated bit, you can magnetize it, the charge will hold in the steel core beneath the gold coating.
Magnetizing for Magnetic Drill Presses: A Special Case
A magnetic drill press, like a Hougen portable mag drill or a Slugger Magforce, uses a powerful electromagnetic base to clamp itself to steel I-beams or plate. The bit itself doesn’t need to be magnetized for the drill to work. In fact, a magnetized bit can be a hazard, attracting swarf up into the spindle.
The real concern with these tools is the workpiece. The manual for the Milwaukee M18 FMDP states it requires material at least 6.35 mm (1/4 inch) thick for the magnet to hold securely. The Hougen guide cites a minimum of 3/8 inch (9.5 mm). Go thinner, and the holding force drops off a cliff.
Before you start: The magnet face must be clean, dry, and free of paint, rust, or debris. A single layer of paint can cut holding power by half. Always use the safety strap. If the cutter dulls and starts to rub instead of cut, it can push the entire drill off the workpiece.
The drill’s power comes from its battery or cord, but that power is useless if the base isn’t stuck fast. It’s a lesson you learn once, loudly.
Frequently Asked Questions
Can you magnetize any drill bit?
No. Only bits made from ferromagnetic metals like high-speed steel (HSS) or cobalt steel can be magnetized. Carbide-tipped bits, solid carbide bits, and those with non-ferrous coatings like titanium aluminum nitride (TiAlN) will not hold a magnetic charge. The steel shank on a carbide bit might hold a weak charge, but the cutting portion won’t.
How long does a magnetized drill bit last?
The magnetism is permanent but can degrade. Heavy impacts, exposure to high heat (like from dull, overheated drilling), or exposure to a strong opposing magnetic field can weaken or erase the charge. For practical purposes, if magnetized properly, it will last for years of normal use.
What’s the fastest way to demagnetize a drill bit?
The most reliable method is using a degaussing coil. Pass the bit slowly through the center of the powered coil. Without a coil, you can try tapping the bit sharply on a hard, non-magnetic surface like a concrete floor several times. This is less consistent but can work for weak magnetization.
Does magnetizing a drill bit weaken it?
No. Magnetization affects the alignment of electrons in the metal’s atomic structure; it does not alter the hardness, temper, or structural integrity of the steel. A properly magnetized bit is as strong as a non-magnetized one. However, the methods used to magnetize (like striking it) could damage it if done incorrectly.
Why did my drill bit become magnetized on its own?
This is almost always caused by exposure to a magnetic field. Common sources include: storage on a magnetic tool holder, contact with the permanent magnets in a drill’s motor housing, or use in a magnetic drill chuck. The bit essentially “remembers” the field it was exposed to.
Before You Go
Magnetizing a drill bit is a thirty-second trick with a corded drill. Demagnetizing one takes a coil or a sharp tap on the floor. Knowing which bits can be magnetized. HSS and cobalt, saves the frustration of trying to charge a carbide bit that will never hold it.
Keep a strong neodymium magnet in your kit for the quick jobs. Use your drill press for the permanent ones. And remember that for everything except steel, a magnetic bit is a problem waiting to happen. The filings it collects will jam the flutes and ruin your finish. For those bits, removing rust and metal dust is a more valuable skill than making them magnetic.
