How to Use a Reciprocating Saw: The Safe, Effective Guide
This post contains affiliate links. As an Amazon Associate, we earn from qualifying purchases.
Using a reciprocating saw correctly requires matching three things: the right blade for your material, a secure workpiece, and a two-handed grip that keeps the shoe pressed firmly against the surface. The blade’s teeth-per-inch (TPI) dictates what it cuts cleanly, the clamps prevent kickback, and the shoe controls vibration and depth.
Most people grab the first blade in the kit and start yanking the trigger. They fight the saw, burn through blades on nail-embedded wood, and wonder why every cut looks chewed. The tool gets blamed for operator error.
This guide walks through the setup most tutorials skip. You’ll learn how to read a blade, adjust the shoe for control, and execute clean cuts in wood, metal, and pipe without wrecking the blade or your wrists. We’ll cover the safety ritual you cannot bypass, advanced techniques like plunge cuts, and how to diagnose when a wobbly cut is the saw’s fault or yours.
Key Takeaways
- Blade selection is everything. A 6-8 TPI wood blade will snag and shatter in metal, and a fine 24 TPI metal blade will just burn and glaze over in wood.
- Always use a two-handed grip. Your dominant hand operates the trigger; your support hand grips behind the chuck to control the shoe and counteract vibration.
- The adjustable shoe is your depth and stability control. Slide it forward so only about a quarter-inch of blade extends past it before starting a cut.
- Let the saw do the work. Forcing it heats the blade, dulls the teeth, and can twist the shank right out of the chuck mid-cut.
- Unplug the saw or remove the battery before changing blades. The trigger can get bumped, and the blade will snap into motion with your fingers in the clamp.
Safety First: The Non-Negotiables
Before you start: Reciprocating saws throw debris, generate significant noise, and can kick back violently if the blade binds. Wear ANSI-rated safety glasses, not just sunglasses. Use earplugs or muffs; 30 minutes of unprotected use at full throttle can cause temporary hearing ringing. Secure your workpiece with clamps, not your foot. A kicking saw will follow the path of least resistance, which is usually toward your leg.
The safety talk isn’t boilerplate. I watched a demo where a pro was cutting a pipe bracket. He skipped the glasses because it was “just one cut.” A hot, quarter-inch metal shard bounced off the pipe and embedded in his eyelid.
He was lucky. The hospital trip took three hours. The lesson took two seconds.
Your gear list is short and non-negotiable. Safety glasses. Hearing protection. Work gloves, preferably with some cut resistance on the palm.
No loose sleeves or dangling cords. Secure your workpiece to a stable surface with bar clamps or a vise. A wobbly piece of plywood will cause the blade to grab and buck the saw back toward your torso. It happens faster than you can react.
Blade Selection: Matching Teeth to the Task
The blade is the only part of the saw that touches the material. Get this wrong and nothing else matters. The primary specification is TPI, teeth per inch.
A blade’s Teeth Per Inch (TPI) determines its cutting action. Low TPI (3-10) means large, aggressive teeth that take big chips out of soft materials like wood. High TPI (14-24) means small, closely spaced teeth that score and shear through hard, thin materials like metal. Using a low-TPI blade on metal causes each tooth to slam into an unyielding surface, overheating and dulling the blade in seconds.
Think of it like sandpaper. You wouldn’t use 40-grit to polish a car, or 2000-grit to strip paint off a deck. The wrong blade doesn’t just cut poorly; it damages the tool and the material.
Here’s the breakdown you need at the hardware store:
| Blade Type | Best For | TPI Range | What Happens If You Use It Wrong |
|---|---|---|---|
| Wood Cutting | Nailed lumber, plywood, drywall, pruning | 6-10 | In metal, teeth snap off; in dense wood, it binds and overheats. |
| Bi-Metal General Purpose | Mixed materials, nail-embedded wood, light metal | 10-18 | The versatile choice, but cuts slower than dedicated blades in pure applications. |
| Metal Cutting | Steel pipe, sheet metal, bolts, rebar | 14-24 | In wood, the gullets clog with sawdust, the blade overheats, and the cut stalls. |
| Carbide Grit / Carbide-Tipped | Tile, masonry, fiberglass, cast iron | No teeth (abrasive grit) | Extremely brittle. Side pressure on wood or metal will snap the tip. |
| Flush Cut | Cutting trim against a wall, removing dowels | Varies | The short, angled design requires a specific shoe setting or it won’t reach. |
Blade length matters too. The blade should be 2-3 inches longer than the thickness of your material. A blade that’s too short forces the shoe into the work, creating excessive friction and vibration. One that’s too long flexes and wanders, making a crooked cut.
For most DIY demolition, taking down a deck, cutting out a wall stud, start with a 9-inch, 8 TPI bi-metal blade. It’s the workhorse. Keep a pack of 6-inch metal-cutting blades for conduit and plumbing.
Setting Up Your Saw: It’s Not Plug-and-Play
You have the right blade. Now install it correctly. This seems obvious, but a loose blade is the number one cause of broken blades and ruined chucks.
- Power Down. For a corded saw, unplug it. For cordless, remove the battery. I don’t care if the switch is off. I’ve seen a saw roll off a bench and land on the trigger. The blade spins, and anything nearby becomes a projectile.
- Understand Your Chuck. Most modern saws use a keyless, tool-free chuck. Pull the collar back, insert the blade shank until it seats, release the collar. You should hear and feel a solid click. Tug on the blade. It should not move. If your saw uses an Allen key or hex wrench, tighten it to the manufacturer’s specified torque, usually just past snug.
- Adjust the Shoe. The metal plate around the blade’s base is the shoe. It’s adjustable. Loosen the knob or lever, slide the shoe forward until only about a quarter-inch to a half-inch of blade extends past it, then retighten. This gives the blade maximum support right at the cutting point, reducing whip and vibration. As the blade wears down, slide the shoe forward again to expose fresh blade.
Skipping step three is like driving a car with loose lug nuts. It might work for a block, but the wobble will destroy the wheel eventually. A poorly supported blade deflects, makes a wider kerf, and fatigues faster.
The Step-by-Step Cutting Technique
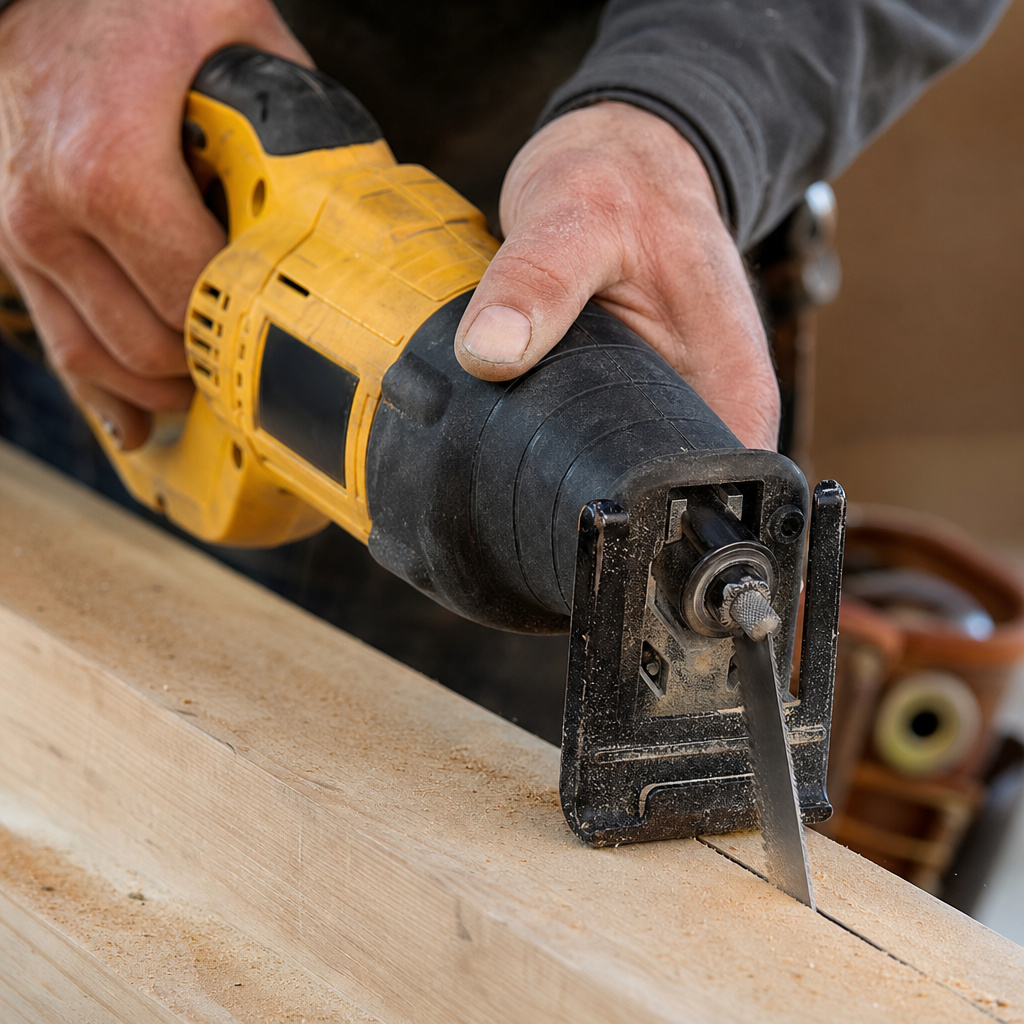
You’re geared up, blade is locked, shoe is set, workpiece is clamped. Now you cut.
Position the shoe flat against the material before the blade touches. Start the saw, let it reach full speed, then ease the blade into the work. For wood, use full speed. For metal, start slow, a high-speed impact can chip teeth immediately.
This is the rhythm most people ignore. They jab the stationary blade into the material and then pull the trigger. The motor groans, the blade twists, and the cut starts off-kilter.
The Correct Sequence:
- Stance and Grip. Stand with your feet shoulder-width apart, slightly offset. Grip the main handle with your dominant hand. Wrap your support hand around the body of the saw, behind the chuck. This is your control hand. Your knuckles will turn white. That’s fine.
- Shoe Contact. Rest the shoe firmly on the material, aligned with your cut line. The blade should be hovering just to the side of the line, not on it.
- Trigger and Feed. Squeeze the trigger. Let the motor spin up. Then, with steady forward pressure, introduce the blade to the material. Don’t push down. Push forward.
- Manage the Cut. Let the saw’s reciprocating action do the cutting. You’re just guiding it. If the saw bogs down, you’re forcing it or the blade is dull. Back off, check for a nail, or change the blade. If you’re cutting metal, a drop of cutting oil every 10 seconds keeps the blade cool and extends its life fivefold.
- Exit the Cut. As you near the end, support the cutoff piece with your free hand (if safe) or ensure it’s clamped so it doesn’t fall and pinch the blade. Let the blade clear completely before releasing the trigger.
The sound tells you everything. A smooth, steady buzzzz means you’re golden. A labored BRAP-BRAP-BRAP means you’re forcing it. A high-pitched screech means you’re cutting metal dry or with a wood blade. Stop immediately.
What About Orbital Action and Variable Speed?
Many saws have an orbital action selector. This adds a slight elliptical motion to the blade’s back-and-forth path. It acts like a slight scoop, throwing chips out of the kerf more aggressively.
- Use Orbital Action For: Fast, rough cutting in wood, especially green wood or thick lumber. It clears chips fast and prevents binding.
- Turn Orbital Action Off For: Cutting metal, making precise cuts, or using brittle blades (carbide, masonry). The elliptical motion puts lateral stress on the blade, which can snap fine metal teeth.
Variable speed is your friend. It’s usually controlled by trigger pressure. For plunge cuts or starting a cut in metal, start with light trigger pressure for a slow speed.
Once the kerf is established, you can increase speed. For wood, you can usually go full throttle. Learning power saw basics like speed control applies directly here.
Advanced Techniques and Troubleshooting
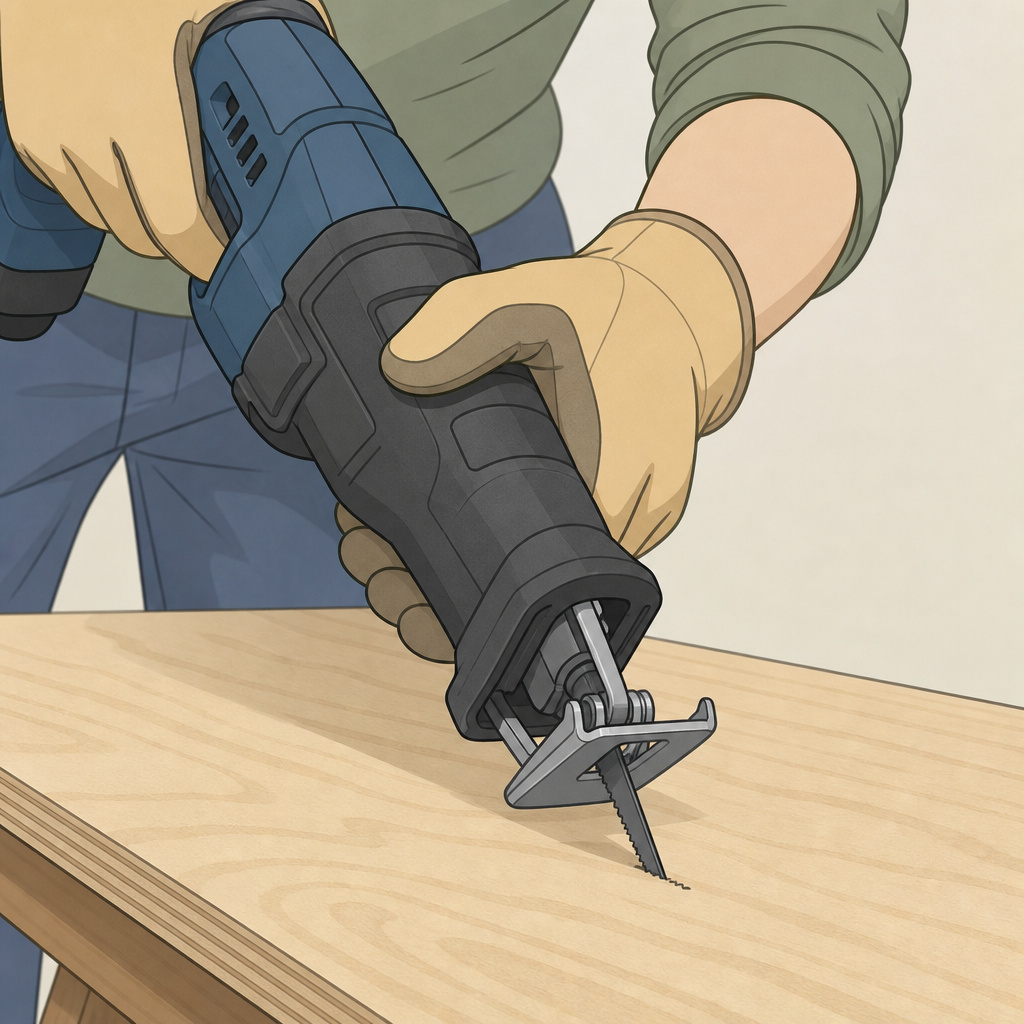
Once the basics are muscle memory, you can tackle trickier jobs.
Plunge Cutting: Need to start a hole in the middle of a sheet of plywood? Tilt the saw so the blade tip contacts the surface at about a 45-degree angle. Start the saw at a slow speed and gently pivot the saw down until the shoe is flat. The blade will chew its way in. Go slow. Too much angle and the blade can skate across the surface.
Flush Cutting: Use a short, flush-cut blade. You often need to retract the shoe fully or even remove it. Rest the saw’s body directly against the surface you’re cutting next to. This technique is similar to the finesse needed for saber saw techniques where guiding the shoe is critical.
Cutting in Awkward Positions: Overhead, in a tight corner, on a ladder. The rules don’t change, but your margin for error shrinks. Secure the workpiece doubly well. Your stance is paramount, keep your balance. Consider a shorter blade for better control. If you’re on a ladder, never overreach. The vibration will pull you off balance.
Diagnosing Common Problems:
| Symptom | Likely Cause | Fix |
|---|---|---|
| Blade wanders, won’t cut straight | Dull blade, wrong TPI, or shoe not adjusted/not pressed firmly. | Replace blade, select correct TPI, reset shoe and maintain pressure. |
| Excessive vibration | Loose blade, badly worn blade, or shoe is too far from material. | Check blade lock, install new blade, adjust shoe closer to work. |
| Blade gets stuck (binds) in cut | Forcing the cut, blade is dull, or kerf is closing on blade. | Stop, back out. Use a wedge to open kerf, use sharper blade, don’t force. |
| Blade overheats and discolors (blue tint) | Cutting metal too fast, no lubrication, or using wood blade on metal. | Slow down, use cutting oil, switch to correct high-TPI metal blade. |
| Broken blade tip | Sideways pressure (like during a plunge cut), or blade hit a hard inclusion (rock in wood). | Use a new blade. For plunge cuts, be more gradual. Inspect material first. |
Most vibration issues trace back to the shoe. If the shoe isn’t tight against the material, the unsupported blade section acts like a diving board, oscillating wildly. This is also why learning proper circular saw operation helps, the base plate on a circular saw serves the same stabilizing function.
Maintenance and Storage
A reciprocating saw is a brute, but it’s not indestructible. After use, especially in dirty or dusty conditions, blow out the vent slots with compressed air. Wipe down the body and shoe. A light spray of silicone lubricant on the shoe channel prevents rust and keeps it sliding smoothly.
Check the blade clamp mechanism periodically for debris or damage. If blades don’t lock in solidly anymore, the chuck may be worn. For corded models, inspect the power cord for nicks. For cordless, follow proper battery care, don’t store batteries on the charger or in extreme heat.
Store the saw in a dry place. Hang it by the handle or keep it in a case. Don’t just toss it in a toolbox where the shoe and blade can get bent. A dedicated blade case or organizer for your different TPI blades saves time and prevents you from using the wrong one in a hurry.
Frequently Asked Questions
Is a reciprocating saw the same as a Sawzall?
Sawzall is a brand name for Milwaukee’s line of reciprocating saws. It’s like saying Kleenex for tissues. All Sawzalls are reciprocating saws, but not all reciprocating saws are Sawzalls. The term is often used generically. For a deeper dive on the distinction, see our article on the reciprocating saw vs Sawzall.
Can I cut tree branches with a reciprocating saw?
Yes, with a pruning blade. These have widely spaced, aggressive teeth and often a slight curve. It’s faster than a hand saw for limbs up to about 6 inches thick. Support the branch so it doesn’t pinch the blade as it falls.
Why does my new blade cut crooked?
It’s almost never the blade. Check your technique. Are you applying sideways pressure with your hands? Is the shoe adjusted correctly and held flat?
Is the workpiece moving? A bent blade is rare from the factory but possible. Try a different blade. If it still cuts crooked, the saw’s chuck or drive mechanism might be misaligned.
How often should I change the blade?
Change it when cutting requires noticeably more pressure, the cut starts to wander, or the teeth look rounded over. For demolition work with nails, you might go through a blade per hour. For clean pine, a blade can last for years. Inspect it before each major job.
Can I use it to cut concrete or brick?
Only with a specialty carbide-grit or diamond-grit blade, and even then, it’s slow and hard on the saw. It’s a last-resort tool for a few bricks or a block. For any real masonry work, a dedicated angle grinder or circular saw with a diamond blade is the right choice.
Before You Go
A reciprocating saw is a destroyer and a liberator. It tears out old plumbing, frees embedded lumber, and slices through problems faster than any other handheld saw. But its power is a direct function of your control.
Match the blade to the job like you’d match a drill bit to a screw. Lock that shoe down tight. Grip it with two hands and let the tool’s weight and action do the cutting.
Remember the sequence: secure, select, set, squeeze, steady. Skip a step, and you’ll spend more time fixing mistakes than making cuts. Keep a variety of blades on hand, a pack of bi-metal demolishers and a pack of fine-tooth metal cutters will handle 90 percent of what you throw at it. Now go cut something.
