How to Cut Straight with a Saber Saw (Jigsaw) in 7 Steps
This post contains affiliate links. As an Amazon Associate, we earn from qualifying purchases.
To cut straight with a saber saw, use a rigid, wide blade with high tooth count, clamp a straight-edge guide for the saw’s shoe to follow, and apply only steady, forward pressure—never force the cut sideways. The blade provides rigidity, the guide provides the path, and your hands provide control.
Most people grab whatever blade is already in the saw, skip the guide, and push hard, hoping the line will hold. The blade bends, the shoe wobbles, and the cut drifts within the first six inches. You end up with a piece that needs a half-inch of sanding or ends up in the scrap pile.
This guide walks through the exact setup and technique to get factory-straight lines from a tool designed for curves. We’ll cover blade specs that matter, how to build foolproof guides, and the muscle memory that keeps the saw on track.
Key Takeaways
- Turn orbital action OFF for straight cuts. The elliptical blade motion that helps with curves creates a rougher, less predictable cut line on long edges.
- A blade’s width matters more than its length for straight-line work. A 1/4-inch wide blade like the Bosch T101B resists deflection three times better than a 1/8-inch scrolling blade.
- The guide isn’t optional. A simple clamped board is more reliable than trying to follow a pencil line freehand. The saw’s shoe must ride against something solid.
- Support the piece you’re cutting off. Letting it drop unsupported tears out the last inch of grain on your good piece, ruining the edge.
- Let the saw cut at its own pace. Forcing it heats the blade, dulls it faster, and almost guarantees the blade will wander off the line.
Before You Start:
Before you start: A saber saw blade is a thin strip of metal moving at high speed. It can snap, especially if it binds. Always wear safety glasses. Secure your workpiece with clamps, a jumping board can pull the saw off course and into your hand. Unplug the saw or remove the battery before changing blades.
What Blade Makes the Biggest Difference for a Straight Cut?
The blade is the foundation. A narrow, fine-tooth blade is for scrolling. A demolition blade is for speed. For a straight line, you need a blade built for tracking.
A blade’s tooth geometry and width determine its tendency to wander. Wider blades, typically 1/4 inch or more, act like a stiffer beam, resisting lateral forces that cause flex. Higher teeth-per-inch (TPI) counts, in the 10-14 range for wood, produce a smoother cut with less aggressive feed, giving you more control.
The first time I tried to cut a shelf panel with a generic 6 TPI blade, the cut started clean but veered inward by 3/8 of an inch over two feet. The blade was too aggressive and too flexible. Switching to a Bosch T101B (1/4-inch wide, 10 TPI) changed the game. The cut stayed true because the blade itself fought the wobble.
Orbital action is your enemy here. That setting makes the blade move in a slight elliptical pattern, throwing chips out faster for plunge cuts and curves. For a straight line, it introduces chatter and reduces blade contact with the material, making the cut harder to control. Always set orbital action to zero.
| Blade Type (Example) | Best For | Why It Fails for Straight Cuts |
|---|---|---|
| Narrow Scrolling Blade (e.g., 1/8″ wide, 6 TPI) | Intricate curves, tight radii | Too flexible, wanders with any side pressure. |
| Demolition/General Purpose (e.g., 5 TPI, 1/4″ wide) | Fast cuts in framing lumber, nails | Aggressive teeth grab and pull the saw off-line. |
| Reverse-Tooth Blade (e.g., Makita T-015A) | Cutting laminate or veneer (cuts on downstroke) | Excellent for clean tops, but the reverse teeth can increase vibration. |
| Wide, High-TPI Blade (e.g., Bosch T101B, DeWalt DW3742C) | Straight cuts in wood, plastics, thin metal | Stiff width resists flex, finer teeth allow controlled feed. |
The Right Setup: Workpiece and Guide
A moving target guarantees a bad cut. Your material must be locked down. Use at least two clamps, positioned so they won’t interfere with the saw’s path or your guide. If you’re cutting plywood, support the entire sheet on sawhorses, letting it overhang and sag will pinch the blade.
The guide is non-negotiable. You are not skilled enough to follow a pencil line freehand with a jigsaw over any real distance. Nobody is. The guide provides a physical boundary for the saw’s shoe.
You have a few options, from simple to pro-grade:
* Clamped Straight Edge: A length of straight 1×3 or 2×4, or a metal ruler. Clamp it parallel to your cut line. The offset is critical: measure from the edge of the saw’s shoe to the blade, then set your guide that distance from the line.
* Commercial Guide Rail: Systems like the Bosch RA1181 or Makita 194369-7 attach to compatible saws. They’re more precise and faster to set up for repeated cuts.
* Circular Saw Guide First: For the absolute straightest edge on a large panel, use a straight cutting guide with a circular saw to get one perfect edge, then use that edge as the guide for your jigsaw cut.
The 7-Step Process for a Perfect Straight Cut
This sequence builds from the ground up. Skip a step, and you’ll see the consequence in the cut.
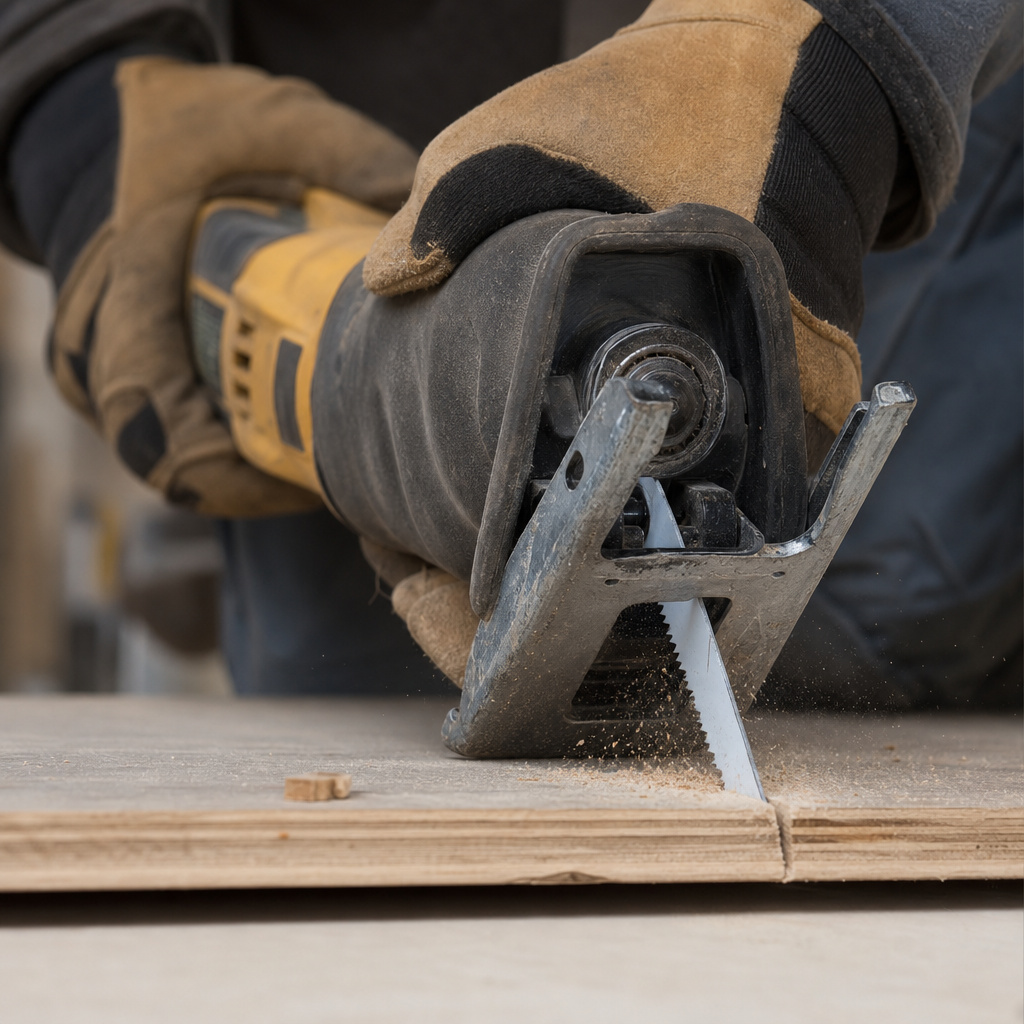
- Install the Correct Blade. Unplug the saw. Loosen the blade clamp, insert your wide, high-TPI blade (teeth facing forward), and tighten firmly. A loose blade will wobble and produce a ragged, wider cut.
- Mark the Line Precisely. Use a sharp pencil or a fine-point marker. A fat pencil line adds ambiguity. For critical cuts, score the line lightly with a utility knife to give the blade a tiny groove to start in. This reduces tear-out on the top surface.
- Secure the Workpiece and Attach the Guide. Clamp your material down. Then, clamp your guide rail or straight board in place. Double-check the offset distance. Run the saw (without the blade touching) along the guide for a dry run to ensure the clamps don’t hit the motor housing.
- Set the Saw. Speed to medium-high for wood, low for metal. Orbital action to ZERO. If your saw has a pendulum setting, turn it off. Set the shoe so it sits flat on the workpiece.
- Start the Cut. Position the saw at the edge of the material with the shoe firmly against the guide. Start the saw, let it reach full speed, then gently ease the blade into the material. Do not start the saw with the blade pressed against the wood, it will jerk.
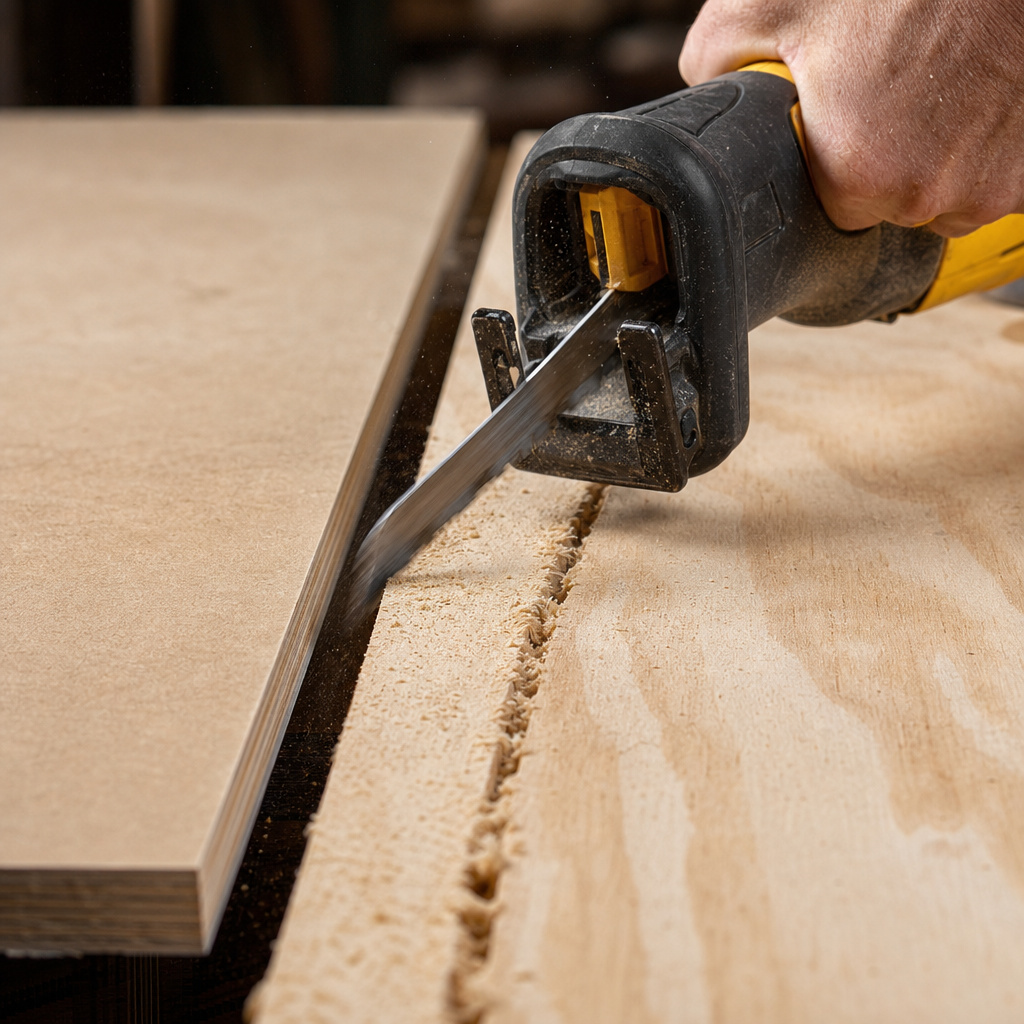
- Feed with Steady, Light Pressure. Keep the shoe flat and pressed fully against the guide for the entire cut. Look ahead at the guide, not at the blade. Your job is to keep the shoe against the fence. Let the blade’s teeth pull the saw forward at their own pace. Forcing it creates heat, dulls the blade, and causes drift.
- Support the Offcut. As you approach the end, use your free hand to support the piece that will fall away. This prevents it from splintering the edge of your good piece or twisting and pinching the blade at the last second.
Why Does My Saber Saw Keep Drifting Off the Line?
If you’re using a guide and the right blade but the cut still wanders, the problem is usually in the feed or the saw itself.
- You’re Pushing Too Hard. This is the number one cause. The blade will deflect away from the pressure. Ease up. The sound of the motor will tell you, a high-pitched whine means you’re forcing it.
- The Blade is Dull or Damaged. A dull blade requires more force, which leads to wandering. Inspect the teeth. If they’re rounded over or chipped, swap it out. A fresh blade cuts more predictably.
- The Shoe is Not Flat. If the saw’s baseplate is not sitting perfectly flat on the workpiece, the blade enters at an angle. The cut will be beveled and can steer off course. Check for debris under the shoe.
- The Guide is Not Secure. If your clamped board has any flex or play, the saw will follow that movement. Use a rigid guide and ensure clamps are tight.
When a Saber Saw Isn’t the Right Tool
You need to know the limits. A saber saw can do a straight cut, but it will never match the speed or flawless edge of a circular saw on a track. If you’re breaking down full sheets of plywood or need a glue-ready edge for cabinetry, use a circular saw basics guide with a track. The jigsaw excels at notching, cutouts, and curves, tasks a circular saw can’t do.
For cuts longer than about four feet, even with a guide, the blade’s inherent flexibility and the saw’s weight distribution make it a struggle. The cut might be straight, but it will be slow, and the edge will likely need sanding or routing. That’s the trade-off for the jigsaw’s versatility.
Frequently Asked Questions
Can I use a saber saw to cut a 2×4 straight?
Yes, but it’s not ideal. Use a fresh, aggressive wood blade (like a 6 TPI demolition blade) and go slow. The thickness will challenge the blade’s rigidity, and the cut will be slower and rougher than with a circular saw. Clamp a guide and expect to clean up the edge with a plane or sander.
What’s the difference between a saber saw and a reciprocating saw (Sawzall)?
They are fundamentally different tools. A saber saw (jigsaw) has a small, short blade that moves up and down, designed for precision cutting on a stationary workpiece. A reciprocating saw has a long blade that moves back and forth aggressively, designed for demolition, pruning, and rough cuts where the tool is moved through the material. Don’t try to make fine straight cuts with a recip saw.
How do I prevent splintering on the top surface when cutting plywood?
Use a reverse-tooth blade (like the Makita T-015A). The teeth cut on the downstroke, shearing the top veneer cleanly. Also, place painter’s tape over your cut line and score it with a knife before sawing. The tape supports the wood fibers.
My cut is straight but the edge is rough and burned. What happened?
The blade is dull, or you’re moving too slowly with too much pressure. A dull blade rubs instead of cuts, creating friction and heat. Burning can also happen with a high TPI blade in thick material if the feed rate is too slow. Increase speed slightly or switch to a blade with fewer, larger teeth for thicker stock.
The Bottom Line
A saber saw will never be the fastest tool for a long straight cut, but with the right blade, a solid guide, and a patient hand, it can be surprisingly accurate. The key is respecting the tool’s design: it’s a master of curves that can be disciplined into straight lines with the right constraints. Start with a Bosch T101B or equivalent blade, clamp down a straight edge, and let the saw’s motor do the cutting.
Your arms are just there for steering. For those times when absolute perfection is needed, that’s what a track saw is for. But for 90% of shop and job-site straight cuts that don’t require a finished edge, the humble jigsaw, set up correctly, is more than capable.
{
“@context”: “https://schema.org”,
“@type”: “HowTo”,
“name”: “How to Cut Straight with a Saber Saw (Jigsaw)”,
“totalTime”: “PT20M”,
“tool”: [
{
“@type”: “HowToTool”,
“name”: “Saber Saw (Jigsaw) with variable speed”
},
{
“@type”: “HowToTool”,
“name”: “Straight edge guide or clamped board”
},
{
“@type”: “HowToTool”,
“name”: “Sharp pencil or fine-point marker”
},
{
“@type”: “HowToTool”,
“name”: “Clamps (at least two)”
},
{
“@type”: “HowToTool”,
“name”: “Safety glasses and hearing protection”
}
],
“supply”: [
{
“@type”: “HowToSupply”,
“name”: “Wider, high-TPI jigsaw blade (e.g., Bosch T101B or DeWalt DW3742C)”
}
],
“step”: [
{
“@type”: “HowToStep”,
“name”: “Choose the right blade”,
“text”: “Install a wider blade with at least 10 TPI. A blade like the Bosch T101B or DeWalt DW3742C provides the stiffness needed to resist flexing off the line.”
},
{
“@type”: “HowToStep”,
“name”: “Mark and secure the workpiece”,
“text”: “Draw a precise cut line with a sharp pencil. Then, clamp the workpiece firmly to your workbench or sawhorses to prevent any movement.”
},
{
“@type”: “HowToStep”,
“name”: “Set up a cutting guide”,
“text”: “Clamp a straight board or metal guide rail parallel to your cut line, offset by the distance from the saw’s shoe edge to the blade.”
},
{
“@type”: “HowToStep”,
“name”: “Set saw speed and orbital action”,
“text”: “Turn orbital action OFF for clean straight cuts. Set the variable speed to medium-high for wood, slower for metal or plastic.”
},
{
“@type”: “HowToStep”,
“name”: “Start the cut”,
“text”: “Position the saw’s shoe firmly against the guide. Start the saw, let the blade reach full speed, then gently feed it forward, keeping the shoe flat and pressed against the guide.”
},
{
“@type”: “HowToStep”,
“name”: “Maintain steady pressure”,
“text”: “Let the blade do the work. Apply consistent, light forward pressure. Do not force or twist the saw.”
},
{
“@type”: “HowToStep”,
“name”: “Support the offcut”,
“text”: “As you near the end of the cut, support the piece that will fall away to prevent it from splintering the workpiece or pinching the blade.”
}
]
}
{
“@context”: “https://schema.org”,
“@type”: “FAQPage”,
“mainEntity”: [
{
“@type”: “Question”,
“name”: “Can I use a saber saw to cut a 2×4 straight?”,
“acceptedAnswer”: {
“@type”: “Answer”,
“text”: “Yes, but it’s not ideal. Use a fresh, aggressive wood blade (like a 6 TPI demolition blade) and go slow. The thickness will challenge the blade’s rigidity, and the cut will be slower and rougher than with a circular saw. Clamp a guide and expect to clean up the edge with a plane or sander.”
}
},
{
“@type”: “Question”,
“name”: “What’s the difference between a saber saw and a reciprocating saw (Sawzall)?”,
“acceptedAnswer”: {
“@type”: “Answer”,
“text”: “They are fundamentally different tools. A saber saw (jigsaw) has a small, short blade that moves up and down, designed for precision cutting on a stationary workpiece. A reciprocating saw has a long blade that moves back and forth aggressively, designed for demolition, pruning, and rough cuts where the tool is moved through the material. Don’t try to make fine straight cuts with a recip saw.”
}
},
{
“@type”: “Question”,
“name”: “How do I prevent splintering on the top surface when cutting plywood?”,
“acceptedAnswer”: {
“@type”: “Answer”,
“text”: “Use a reverse-tooth blade (like the Makita T-015A). The teeth cut on the downstroke, shearing the top veneer cleanly. Also, place painter’s tape over your cut line and score it with a knife before sawing. The tape supports the wood fibers.”
}
},
{
“@type”: “Question”,
“name”: “My cut is straight but the edge is rough and burned. What happened?”,
“acceptedAnswer”: {
“@type”: “Answer”,
“text”: “The blade is dull, or you’re moving too slowly with too much pressure. A dull blade rubs instead of cuts, creating friction and heat. Burning can also happen with a high TPI blade in thick material if the feed rate is too slow. Increase speed slightly or switch to a blade with fewer, larger teeth for thicker stock.”
}
}
]
}