How to Clean a Hedge Trimmer and Prevent Rust Effectively
This post contains affiliate links. As an Amazon Associate, we earn from qualifying purchases.
Most people hose down their hedge trimmer after a big job, wipe it off, and call it clean. That’s how you get rust in the gearbox by October and a blade that binds halfway through next season’s first trim. The real problem isn’t dirt. It’s the sap and plant resin that hardens between the teeth, gluing the moving parts together and attracting moisture.
Cleaning a hedge trimmer requires matching the method to the power source: cordless, electric, or gas. For all types, disconnect the power, brush off debris, apply a dedicated resin solvent to the blades, wipe clean, and lubricate. Gas models need fuel system prep, cordless models need battery care, and electric models need cord inspection. The goal is to remove sap, prevent corrosion, and check for blade alignment issues.
This guide walks through the routine clean you should do after every use, the deep clean for storage, and the specific steps for each type of trimmer. You’ll also learn how to spot the single most common reason a “clean” trimmer still won’t cut.
Key Takeaways
- Sap is the enemy. Water and a rag won’t dissolve it. You need a dedicated resin solvent like STIHL Superclean or a plant-based alternative like Mechanic in a Bottle Blade and Chain Shield.
- Lubricate after every clean. A dry blade will rust and wear prematurely. A light coat of oil after wiping protects the metal and keeps the cutting action smooth.
- Check the blade gap first. If your trimmer seems dull even after cleaning and sharpening, the blades have likely separated. Tightening the locking nuts on the pivot bolts usually fixes it.
- Store batteries at 40-60% charge. A Li-ion battery left fully charged or fully dead for months will permanently lose capacity. Two illuminated green LEDs on most packs is your target.
- Run gas models dry for storage. Stale ethanol fuel left in the carburetor over winter will turn to varnish. It clogs the tiny jets and often requires a carb rebuild to fix.
Before You Start: Safety is Non-Negotiable
Before you start: The blades are under spring tension and can snap shut. Always wear cut-resistant gloves. For gas trimmers, the muffler stays hot enough to cause a serious burn for 20 minutes after the engine stops. For electric and cordless models, the trigger can be accidentally bumped during cleaning if the battery is inserted or the cord is plugged in.
The single biggest mistake is cleaning a “dead” tool that isn’t actually safe. Remove the physical ignition source. For a cordless EGO or Ryobi, that means pulling the battery pack. For a corded electric model, unplug it from the wall outlet—not just the tool. For a gas Stihl or Husqvarna, disconnect the spark plug wire and secure it away from the plug.
Your hands will be close to the cutting teeth. Leather gloves are okay for handling, but for brushing near the blades, a pair of mechanics’ gloves with Kevlar lining is smarter. Safety glasses keep solvent spray and flicked debris out of your eyes. It feels like overkill until you get a drop of STIHL Superclean in your eye. Then it feels essential.
The 3-Part Cleaning Method (By Power Source)
The core process is the same, but the prep and storage steps change dramatically depending on what’s powering your tool. This isn’t a minor detail. Following the gas procedure on a cordless trimmer wastes time. Following the cordless procedure on a gas trimmer ruins the engine.
Cleaning a hedge trimmer effectively requires a solvent capable of dissolving plant resins and sap. Commercial products like STIHL Superclean are formulated for this purpose, breaking down the sticky polymers that water cannot. Application involves spraying the solvent directly onto the blade teeth and joints, allowing a 2-3 minute dwell time for penetration, then agitating with a stiff nylon brush before wiping clean with a dry cloth. This process preserves the factory coating on the blades and prevents abrasive damage from improper scraping.
Here’s the breakdown of what matters for each type. Notice the different priorities.
| Power Source | Critical Pre-Clean Step | Storage-Specific Task | Most Common Post-Clean Issue |
|---|---|---|---|
| Cordless (Battery) | Remove battery pack. Clean battery terminals with a dry brush. | Store battery at 40-60% charge (2 green LEDs). Keep in a dry, room-temperature place. | Blades seem tight but motor strains; often a blade gap or lubrication problem. |
| Electric (Corded) | Unplug from wall outlet. Inspect entire power cord for cuts or fraying. | Simply store in a dry location. Loop cord loosely; don’t wrap tightly around tool. | Poor cutting from worn carbon brushes in the motor, not the blades. |
| Gas (2-Stroke) | Disconnect spark plug wire. Let engine and muffler cool completely (20 min). | Drain fuel tank. Run carburetor dry. Add fuel stabilizer if storing with fuel. | Hard starting from stale fuel or a fouled spark plug, not from dirt. |
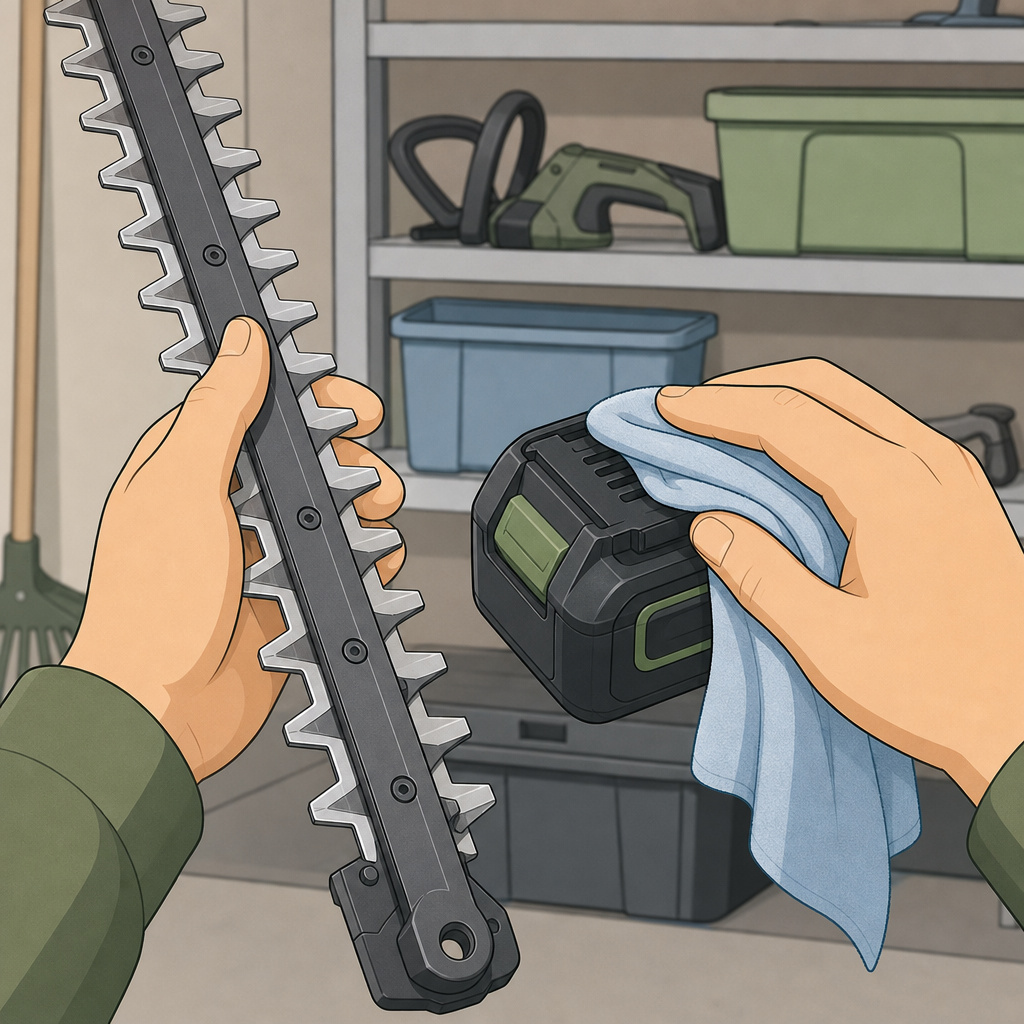
1. Cordless Hedge Trimmer Cleaning
Start by pressing the battery release and setting the pack aside. Wipe the tool’s battery contacts with a dry, soft cloth—no moisture. Brush all loose clippings and dirt from the housing and blade guard. Now apply your resin solvent.
I keep a can of STIHL Superclean on my bench. Spray it along the full length of the blade teeth, getting it into the joints where the moving and stationary blades mesh. Let it sit. After two minutes, use a stiff nylon parts brush (an old toothbrush works) to scrub the teeth. You’ll see the gunk turn from sticky green to a slurry that wipes off easily with a rag.
Dry everything thoroughly. Then apply lubricant. I’ve switched to a plant-based option like Mechanic in a Bottle Blade and Chain Shield for my own tools.
It’s biodegradable and doesn’t harm the plants. A light coat on the blades is all you need. Reinstall the battery, give it a quick one-second trigger pull to distribute the oil, then remove the battery again for storage.
2. Electric Corded Hedge Trimmer Cleaning
The process is identical to the cordless version for the blades and housing. The critical extra step is the cord inspection. As you wipe down the housing, run your hand along the entire length of the power cord. Look for any nicks, cuts, or areas where the inner insulation might be showing. A damaged cord is a shock hazard. If you find damage, the tool needs a cord replacement before its next use.
These motors are often sealed, so there’s no air filter to service. Just make sure the cooling vents on the housing aren’t packed with grass and dust. Use a dry brush or compressed air to clear them.
3. Gas-Powered Hedge Trimmer Cleaning
Safety first. Locate the spark plug, follow the rubber boot to the metal clip, and pull it off the plug. Move the wire aside. Let the tool sit. The exhaust muffler gets dangerously hot.
While it cools, you can brush off the bulk of the debris. Apply solvent and clean the blades as described above. The engine maintenance is what separates this from the others.
Remove the air filter cover and take out the foam or paper filter. Tap it against your hand to dislodge dust. If it’s soaked in oil or fuel, replace it. A clogged filter makes the engine run hot and lean.
Check the spark plug. For a typical homeowner-grade trimmer, replace the plug every season or every 100 hours of use. It’s a $5 part that causes 80% of hard-starting problems.
Finally, look at the fuel. If you’re done for the season, either drain the tank completely and run the engine until it dies (to clear the carburetor), or fill the tank and add the correct amount of fuel stabilizer. Stale gas left untreated will form a gel that clogs the carburetor’s tiny passages.
Deep Cleaning & Blade Removal
Routine cleaning handles surface gunk. Once a season, or if the tool has been neglected, you need to go deeper. This involves removing the blade assembly to clean the drive mechanism underneath.
You’ll need a set of Allen keys or wrenches, typically metric sizes like 5mm or 6mm. Consult your manual for the exact fasteners. There are usually two or three bolts holding the blade assembly to the gearbox or drive mechanism.
- Disconnect all power sources. This is even more critical now.
- Locate and loosen the blade attachment bolts. They’re often recessed. Support the blade as you loosen the last bolt so it doesn’t fall.
- Lift the blade assembly away. You’ll now see the drive shaft, gear teeth, or reciprocating mechanism.
- Clean the exposed drive. Use a dry brush to remove compacted grass and dirt from the gears. A blast of compressed air works well here. Do not hose it down or spray solvent directly into the gearbox unless the manual specifies it.
- Clean the blade assembly off the tool. This is where you can be more thorough. Soak a rag in resin solvent and wipe down both sides of the blade set, paying special attention to the pivot points.
- Inspect before reassembly. Look for excessive play in the blade joints, cracked or chipped teeth, and signs of rust on the drive spline. A light coat of grease on the drive spline before reattaching the blade is a good practice for gas and heavy-duty models.
Reassembly is the reverse. Hand-tighten the bolts first, then tighten them evenly in a criss-cross pattern to the manufacturer’s specified torque. Over-tightening can warp the blade assembly or strip the threads in the gearbox housing—a much more expensive fix.
This is also the perfect time for sharpening a hedge trimmer if you have the right file and know the proper angle. If not, a thorough cleaning and lubrication will restore a surprising amount of performance on its own.
The #1 Reason a Clean Trimmer Still Won’t Cut
You’ve scrubbed every tooth. You’ve oiled the blades. The tool sounds fine, but it mashes branches instead of slicing them. Before you assume the blades are dull, check the gap.
Hedge trimmers cut like scissors. The moving blade must slide tightly against the stationary blade. Vibration from use can loosen the pivot bolts, allowing the blades to separate. A gap of just 1/32 of an inch is enough to render a section useless.
I watched a neighbor nearly buy a new $300 cordless trimmer because his “wasn’t cutting.” He’d even sharpened it. We laid it on a bench, looked from the front, and saw daylight between the blades for a four-inch stretch in the middle. Two locking nuts had backed off. Ten minutes with two wrenches saved him the cost.
How to Check and Fix Blade Alignment:
- Unplug or remove the battery.
- Look straight on at the cutting teeth. Shine a light from behind. Can you see light between the blades along their entire length?
- If yes, locate the pivot bolts. They usually have a nut on top.
- You’ll need two wrenches: one to hold the bolt head underneath, another to tighten the lock nut on top.
- Tighten the nut just until the blades are snug and the gap disappears. Do not overtighten. The blades should still be able to be moved side-to-side with firm hand pressure.
- Once snug, back the nut off a quarter-turn. This allows for thermal expansion and proper movement.
- Apply lubricant and test. The difference is immediate.
If the blades are severely bent or the pivot holes are wallowed out, you need a new blade set. But 9 times out of 10, it’s a simple adjustment. This is a key part of maintaining blade sharpness—alignment is as important as the edge itself.
Lubrication: What, When, and How Much
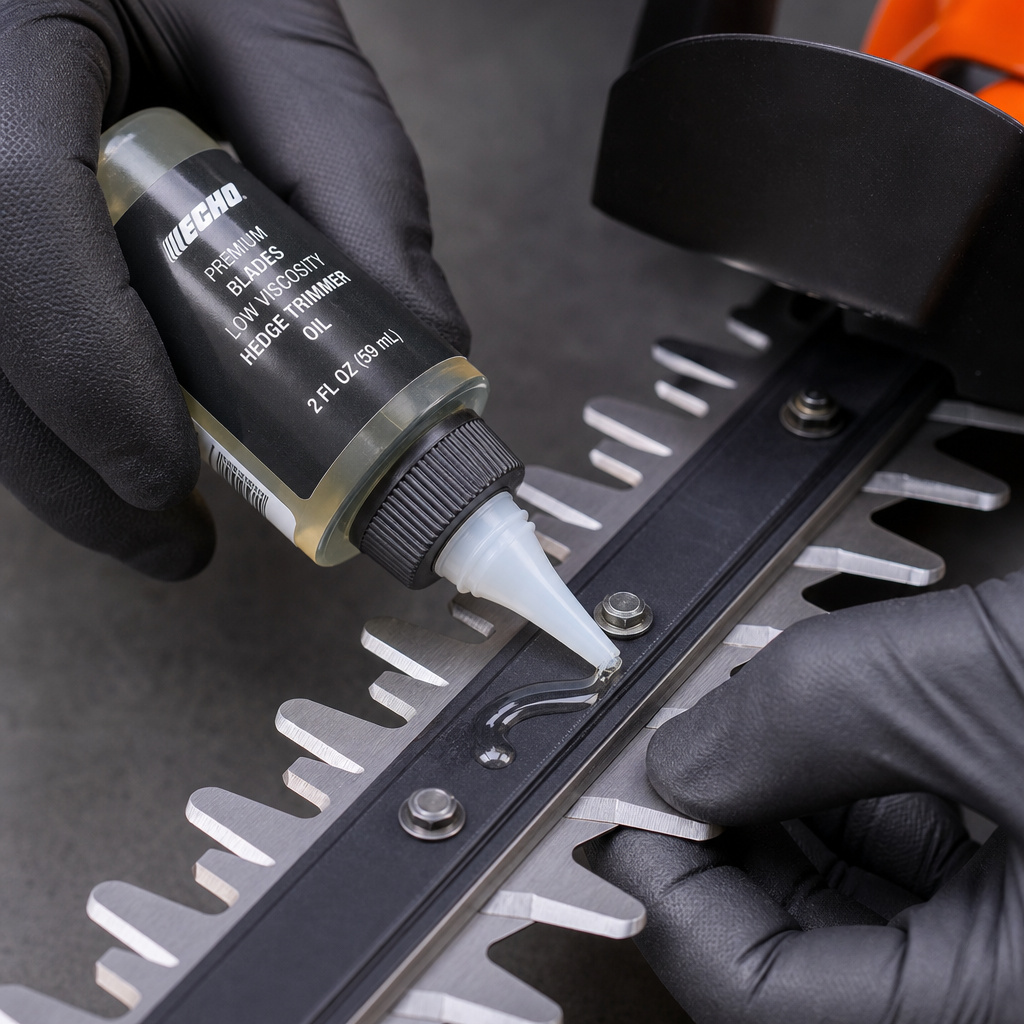
Cleaning strips away protective oils. If you don’t replace them, you invite rust and increase friction. The result is a slower, hotter-running tool that wears out faster.
What to Use:
- Dedicated Hedge Trimmer Oil: Brands like STIHL and Oregon make it. It’s formulated to stick to the blades and resist being flung off.
- Plant-Based Lubricant: Products like Mechanic in a Bottle Blade and Chain Shield are biodegradable. I use these on my own tools because I don’t have to worry about oil spray harming my shrubs.
- 3-in-1 Oil or Light Machine Oil: A decent in-a-pinch option. It’s better than nothing but doesn’t adhere as well.
What NOT to Use:
- WD-40. It’s a water displacer and penetrant, not a lubricant. It evaporates quickly and leaves the blades dry.
- Motor Oil. It’s too thin, attracts dirt, and can damage plastic parts.
- Grease. It’s too thick and will gum up the fine teeth, trapping debris.
The method is simple. After the blades are clean and dry, apply a light, even coat along the length of the cutting teeth. You don’t need a soaking-wet film.
A few drops spread with a rag is sufficient. Then, with the power source connected (safely), pull the trigger for one second to move the blades and distribute the oil. Wipe off any excess. This post-cleaning lubrication step should follow every single cleaning session.
Pre-Storage Checklist: Getting Ready for Winter
A tool put away dirty or wet in the fall is a corroded, problematic tool in the spring. This is more than a cleaning—it’s a preservation ritual.
Follow your deep cleaning guide to remove the blade assembly and clean the drive. Then, address power-specific storage:
For Cordless Trimmers:
- Clean the battery contacts on both the tool and the pack.
- Charge the battery to 40-60%. On most packs, this is two solid green LEDs.
- Store the battery separately from the tool and charger in a dry place with a stable temperature (ideally between 50-77°F / 10-25°C).
- Do not store the battery in a metal shed where temperatures can exceed 100°F (38°C) in summer.
For Gas Trimmers:
- Fuel Decision: Either drain the tank and carburetor completely, or fill the tank and add fuel stabilizer. The empty-and-dry method is best for long-term storage.
- To drain, siphon or pour the fuel into an approved container. Start the engine and let it run until it stalls from fuel starvation.
- Remove and inspect the spark plug. Replace if needed.
- Apply a light oil film to the cleaned blade teeth and any exposed metal on the drive shaft.
For All Trimmers:
- Wipe down the entire housing with a silicone-free cloth.
- Consider a blade protector or sheath to guard the teeth.
- Hang the tool or place it on a shelf in a dry, protected location. Don’t leave it on a damp concrete floor.
These proper storage techniques add years to your tool’s life. The 30 minutes it takes in November saves you three hours of frustration and a $150 repair bill next May.
Frequently Asked Questions
Can I use water and soap to clean my hedge trimmer?
You can, but it’s ineffective and risky. Water won’t dissolve plant sap or resin, which is the primary cause of blade sticking and corrosion. Soapy water can force moisture into the gearbox or motor housing if you’re not extremely careful. It also promotes rust on the blades if they aren’t dried and oiled immediately. A dedicated resin solvent is the right tool for the job.
How often should I clean my hedge trimmer?
Perform a basic clean (brush, solvent, wipe, oil) after every major use, or at minimum, at the end of each gardening day when sap is fresh and easiest to remove. Do a deep clean with blade removal once per season, ideally before long-term winter storage.
My blades are sticky even after oiling. What’s wrong?
You likely didn’t get all the sap off. The oil is mixing with residual resin, creating a gummy paste. Disassemble the blade if possible and use more resin solvent with a stiff brush, focusing on the pivot points between the moving and stationary teeth. Scrape gently with a plastic putty knife if needed. Avoid metal scrapers that can damage the blade coating.
Is it worth sharpening my own hedge trimmer blades?
It can be, if you have a quality mill bastard file, a steady hand, and understand the original cutting angle (usually around 30 degrees). It’s a meticulous, time-consuming job. For most homeowners, professional sharpening every 2-3 years is a better investment of time and money, ensuring an even edge that won’t damage the tool or your plants.
Why does my gas trimmer start fine after cleaning but die under load?
This is almost never a cleaning issue. If the blades are free and lubricated, the problem is engine-related. Likely culprits are a clogged fuel filter inside the tank, a dirty carburetor (especially if old fuel was left in it), or an improperly set carburetor adjustment screw. Cleaning the exterior won’t fix internal fuel delivery problems.
The Bottom Line
Cleaning a hedge trimmer isn’t about making it look pretty. It’s a functional maintenance task that directly determines how long the tool lasts and how well it performs. Skip it, and you’re buying a new trimmer in three years instead of ten. The sequence is simple: disconnect the power, dissolve the sap with the right solvent, wipe it clean, and always finish with a protective coat of lubricant.
Pay special attention to your power source—gas, battery, or cord—because each has a critical storage requirement. Finally, remember that a “dull” blade is often just a loose one. Check the gap before you reach for the file. A clean, tight, and oiled hedge trimmer is a reliable one.