The Right Way to Lubricate a Hedge Trimmer – A Full Guide
This post contains affiliate links. As an Amazon Associate, we earn from qualifying purchases.
Lubricating a hedge trimmer requires two separate tasks: coating the cutting blades with a light, protective oil before and after every use, and periodically servicing the internal gearbox with a specific grease if the manufacturer design allows it. The blade oil prevents friction, reduces wear, and fights corrosion from plant sap. The gearbox grease maintains smooth power transfer and prevents mechanical failure.
Most people grab whatever can is in the garage—WD-40, old motor oil, even penetrating fluid. That works for about ten minutes of cutting. Then the blades start sticking, the cut gets ragged, and by the end of the season the gearbox sounds like it’s grinding gravel. The wrong lubricant attracts dirt, evaporates too fast, or doesn’t protect against the real enemy: sap.
This guide walks through the exact oils and greases that work, the safety steps you cannot skip, and the timing that keeps a hedge trimmer running for years instead of a single season. It covers petrol, battery, and electric models.
Key Takeaways
- Use a dedicated hedge trimmer oil or spray (STIHL Superclean, Husqvarna blade oil) on the blades. 3-in-1 oil or SAE20 engine oil are acceptable backups. WD-40 is a last-resort, short-term option only.
- Clean the blades thoroughly before applying oil. Sap residue left under the oil layer corrodes the steel within two weeks, leaving permanent pits.
- Petrol and some battery models have a serviceable gearbox requiring NLGI-2 Polyurea grease or white lithium grease every 25 hours or three seasons. Many modern electric/battery units are “oiled for life” and sealed.
- Lubricate blades before and after every use. During a long trimming session (over 30 minutes), stop and re-oil halfway through to maintain smooth cutting.
- Always disconnect all power sources—remove battery, unplug cord, remove spark plug—before touching the blades or opening any covers.
Which lubricant should you use on hedge trimmer blades?
The right oil stays on the metal, resists washing off from plant moisture, and provides a slippery barrier that reduces friction between the moving blade teeth. Generic lubricants fail at one or all of these jobs.
Hedge trimmer blade lubricants are formulated with additives for adhesion and corrosion inhibition. STIHL Superclean, for example, combines a light hydrocarbon base with anti-rust compounds that bond to the steel surface. 3-in-1 oil and SAE20 engine oil lack these specific additives but provide adequate lubrication due to their viscosity. WD-40 is primarily a solvent and water displacer with minimal lubricating film; it evaporates within minutes of operation.
Specialized hedge trimmer oil is the best choice. STIHL Superclean and Husqvarna’s own blade oil are designed for this exact application. They cling to the blades, resist being flung off, and contain corrosion inhibitors that combat sap acids.
If you don’t have a dedicated product, 3-in-1 oil or SAE20 engine oil will work. They are thicker and will stay put longer than a spray. Their limitation is they don’t have the same anti-sap chemistry, meaning you need to clean the blades more diligently.
WD-40 is the option you use when nothing else is available. It’s a water displacer and light solvent, not a lasting lubricant. It provides a temporary slickness that vanishes after a few passes through wet foliage. The blades will feel dry and start dragging within ten minutes.
Never use penetrating oil. Those are designed to seep into frozen threads and break corrosion. On blades, they simply evaporate and leave no protective layer.
| Lubricant Type | Best For | Risk If Used Long-Term |
|---|---|---|
| Hedge trimmer oil (STIHL Superclean) | Daily blade lubrication, sap resistance | None – formulated for the task. |
| 3-in-1 oil / SAE20 engine oil | Acceptable alternative, good adhesion | Attracts more dirt; less sap protection. |
| WD-40 | Emergency, short-term use only | Evaporates quickly; blades stick and wear. |
| Penetrating oil | Do not use on blades | No lubrication; promotes rust. |
The smell tells you a lot. Fresh hedge trimmer oil has a light, almost citrus scent. Old motor oil smells like a garage floor. WD-40 smells like a solvent blast. If you smell the latter after applying, you’ve chosen wrong.
Gearbox Grease: When and How
The gearbox transfers motor power to the reciprocating blade mechanism. It’s a set of gears running in a sealed chamber. Some chambers are sealed forever by the manufacturer. Others have a removable cover for periodic greasing.
You need to know which type you have. Check the manual. If it mentions greasing intervals (like “every 50 hours” or “each season”), you have a serviceable gearbox. If it says “oiled for life” or doesn’t mention grease at all, the unit is sealed. Trying to open a sealed gearbox voids warranties and usually breaks a plastic seal.
For serviceable gearboxes, the grease specification matters. Modern battery trimmers like the EGO HTX-5300P specify NLGI-2 Polyurea grease. That’s a specific thickener type that handles temperature swings and lasts longer. White lithium grease is a common generic alternative that works in many older petrol models.
Before you start: The gearbox cover screws are often small Torx or Phillips heads. Over-tightening them strips the soft plastic threads and the cover will never seat tightly again. Use a hand driver, not a power drill. The grease inside is thick; forcing too much into the chamber can clog the gears and cause overheating.
The process is simple if your model allows it.
1. Remove the battery or disconnect power.
2. Locate the gearbox cover – usually a small plastic plate on the side near the motor.
3. Remove the two screws.
4. Pull the cover off gently.
5. Apply a small pea-sized amount of the correct grease to the visible gears.
6. Replace the cover and tighten screws snugly, not forcefully.
Skip this step on sealed models. If you’re unsure, assume it’s sealed. Manufacturers are moving toward permanent lubrication to reduce user maintenance.
Step-by-Step: Lubricating the Blades
This is the core routine. It should happen before you start cutting and after you finish. During a long session, a quick re-oil at the halfway point keeps performance consistent.
Step 1: Disconnect all power.
Remove the battery pack. Unplug the cord from the wall and the trimmer. For petrol models, remove the spark plug wire. This is non-negotiable. A trimmer blade can engage accidentally with a bump or switch flick, and the teeth move fast enough to take off a fingertip. Do it first.
Step 2: Clean the blades thoroughly.
Wipe down both sides of the blade assembly with a damp cloth. Warm water helps dissolve sap. For stubborn gunk, use a soft brush. Avoid harsh chemicals or wire brushes – they scratch the protective coating. The goal is to remove all plant residue. Sap left underneath the oil will etch the steel, and you’ll see tiny pits after a couple of weeks. Dry the blades completely with a separate cloth. Moisture under oil accelerates rust.
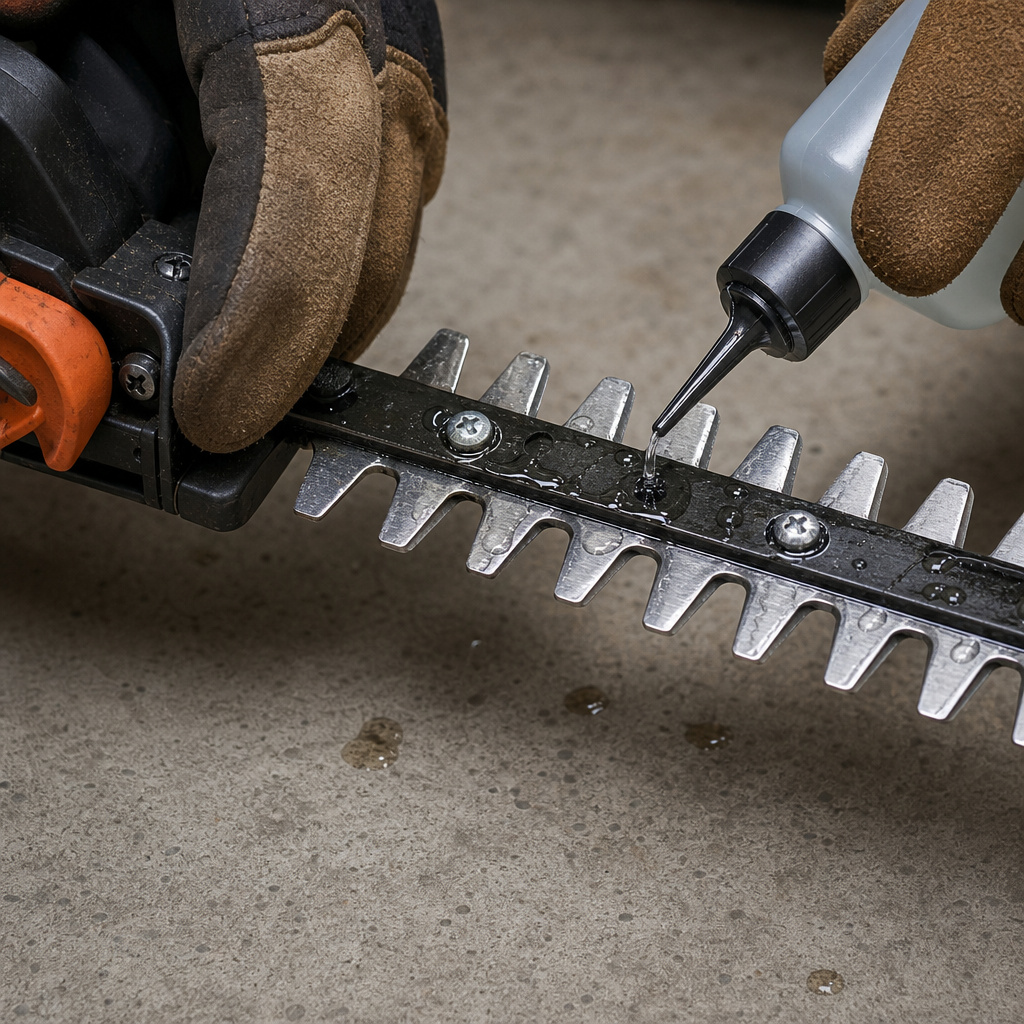
Step 3: Apply oil along the cutting edges.
Hold the trimmer so the blades are horizontal. Run a thin line of oil along the entire length of the cutting edges, both sides. Don’t drown it; a moderate coating is enough. If using a spray, aim carefully to avoid coating the motor housing or electrical contacts. Oil on the motor can attract dust and cause overheating.
Step 4: Distribute the oil.
If safe (power still disconnected), manually move the blade back and forth a few times by hand or gently engage the mechanism for a second. This spreads the oil between the teeth. Don’t run the trimmer at full speed for distribution – that flings oil off.
Step 5: Wipe excess.
Use a cloth to wipe any excess oil from the blade surfaces. A thin film remains; a dripping blade just collects dirt and grass clippings. This keeps the trimmer cleaner.
Step 6: Reconnect power and test.
Reattach the battery or plug. Fire up the trimmer for a few seconds. Listen. The sound should be smooth, not a grinding chatter. The blades should move freely. If they still sound dry, apply a little more oil.
Do this sequence every time. It takes three minutes. Skipping it leads to the blades binding, the cut becoming ragged, and eventually the motor straining against the friction.
How often should you lubricate a hedge trimmer?
The schedule splits into blade oil and gearbox grease. They have different clocks.
Blade Oil Frequency:
- Before every use.
- After every use.
- During extended use (over 30 minutes of continuous cutting), pause and re-oil halfway through.
Plant sap builds up during cutting. It’s sticky and acidic. Oiling before use gives a protective layer. Oiling after use coats the blades for storage, preventing ambient moisture from causing rust.
The mid-use re-oil is something most guides skip. After thirty minutes of work, especially on wet foliage, the oil film wears off. The blades start to drag. You’ll feel the trimmer working harder, and the cut quality declines. A quick re-application restores smoothness.
Gearbox Grease Frequency:
If your trimmer requires it, apply gearbox grease every 25 hours of operation or at the end of every third season. For petrol trimmers, this often aligns with spark plug replacement intervals. For battery models like EGO, follow the manual’s 50-hour guideline. Sealed gearboxes never need grease.
Mark your seasons. If you trim in spring and fall, count that as two seasons per year. After three years, open the cover and check. The grease will have darkened and thickened. Reapply.
Missing a gearbox grease interval doesn’t cause immediate failure. The gears will slowly wear, noise will increase, and eventually the gear teeth can chip. You’ll hear a loud grinding or clicking sound during operation. By then, the gearbox might need replacement.
What happens if you use the wrong lubricant?

Consequences are physical and timed. You can see and hear them.
Using WD-40 regularly:
– The blades feel slick for the first five minutes.
– Then the solvent evaporates.
– The blade teeth start to drag against each other, producing a metallic scraping sound.
– Cutting becomes uneven – you’ll see torn leaves instead of clean slices.
– Within a month, the blade edges show accelerated wear marks.
Using no lubricant after cleaning:
– Sap residue stays on the steel.
– The sap’s organic acids react with moisture and the metal.
– Small corrosion pits appear along the blade edges within two weeks.
– These pits create friction points that worsen binding.
– The blades eventually rust visibly, especially near the teeth.
Using penetrating oil:
– It evaporates within minutes, leaving zero protective film.
– The blades operate dry from the start.
– Immediate increased wear and heat generation.
– Risk of damaging the blade coating.
Using too much grease in the gearbox:
– Excess grease cannot circulate.
– It clogs around the gears, causing them to work against a thick paste.
– The motor overheats because it’s fighting extra resistance.
– Grease can seep out and contaminate the motor housing.
The right lubricant in the right amount prevents all this. It’s a small habit with a large payoff.
Common mistakes and how to avoid them
Even with the right oil, people make procedural errors that undo the benefits.
Cleaning with power connected.
This is the biggest safety error. A trimmer can turn on if bumped, a switch is faulty, or a battery is partially seated. Always remove the power source completely before wiping blades.
Oiling dirty blades.
Applying oil over sap or debris just traps that gunk against the metal. It creates a abrasive paste that increases wear. Clean first, always.
Leaving the trimmer wet before storage.
After cleaning with water, dry the blades thoroughly. Storing a trimmer with moisture on it guarantees rust spots by next season. Dry it with a cloth, then oil it.
If your manual says to grease it, do it. The gearbox is the heart of the cutting motion. Neglecting it leads to gradual failure you won’t notice until it’s expensive.
Over-tightening cover screws.
The screws on gearbox covers and blade guards are often small and thread into plastic. Cranking them down with a power driver strips the threads. Hand-tighten only. If the cover feels loose, the threads are already damaged – you may need a new cover.
Using lubricant as a substitute for sharpening.
Oil makes sharp blades cut smoothly. It does not make dull blades cut better. If your trimmer is struggling despite proper lubrication, the blades are likely dull and need sharpening hedge trimmer blades.
Lubrication for petrol, battery, and electric trimmers
The lubrication steps for the blades are identical across all power types. The differences lie in the gearbox and additional maintenance.
Petrol Hedge Trimmers:
- Blade oil: same as above.
- Gearbox: often serviceable, requiring white lithium grease every 25 hours/3 seasons.
- Additional: Empty the fuel tank before long storage (over 3 months). Old petrol gums up the carburetor. Check the air filter and spark plug annually.
Battery Hedge Trimmers (like EGO, Ryobi):
- Blade oil: same as above.
- Gearbox: many are sealed (“oiled for life”). Some, like the EGO HTX-5300P, specify NLGI-2 Polyurea grease every 50 hours.
- Additional: Keep the battery contacts clean. Store batteries indoors in moderate temperatures.
Electric Corded Hedge Trimmers:
- Blade oil: same as above.
- Gearbox: almost always sealed, no user service.
- Additional: Inspect the power cord for cuts or fraying before each use. Keep the motor housing free of debris.
The takeaway: blade care is universal. Gearbox care depends on your model’s manual. Always check it.
Troubleshooting: signs of poor lubrication
If your trimmer is already showing problems, here’s how to diagnose and fix them.
| Symptom | Likely Cause | Fix |
|---|---|---|
| Blades sticking, jerky movement | No oil or wrong oil (WD-40) | Clean blades, apply proper hedge trimmer oil. |
| Ragged, torn cuts | Dull blades and inadequate lubrication | Sharpen blades, then oil properly. |
| Grinding noise from gearbox area | Lack of gearbox grease (if serviceable) | Apply correct grease to gearbox. |
| Rust spots on blade edges | Blades stored wet, no protective oil | Clean, dry, oil before storage. |
| Trimmer overheats during use | Excess grease in gearbox or oil on motor | Clean motor housing, check grease quantity. |
| Sap residue glued to blades | Not cleaned before oiling | Scrub blades clean, re-oil. |
Most lubrication-related issues are reversible with a proper cleaning and re-application. The exception is gearbox gear wear from long-term neglect – that may require part replacement.
Frequently Asked Questions
Can I use vegetable oil or cooking oil on my hedge trimmer blades?
No. Vegetable oils oxidize and turn rancid. They become sticky and gummy, attracting dirt and eventually hardening. They offer no corrosion protection. Use a proper machinery oil.
How do I know if my gearbox is sealed or serviceable?
Check the user manual. If it has a maintenance section listing greasing intervals, it’s serviceable. If it doesn’t mention grease, or says “permanently lubricated,” it’s sealed. Physically, sealed gearboxes often have no visible screws or covers on the gear housing.
Is it okay to lubricate the blades while the trimmer is running?
Never. Applying oil to moving blades is dangerous and inefficient. The oil will be flung off, and you risk contact with the cutting teeth. Always disconnect power first.
Why does my trimmer still cut poorly after oiling?
Lubrication reduces friction but does not sharpen dull blades. If the cutting edges are worn, oil won’t restore a clean cut. You need to maintaining hedge trimmer blades by sharpening them.
Can I store my trimmer without oiling it after use?
You can, but you’ll regret it. Moisture and residual sap will cause corrosion during storage. The blades will start next season with rust spots and binding. Oiling after use is a five-minute step that prevents this.
What’s the best way to clean sap off the blades?
Warm water and a cloth work for fresh sap. For dried, hardened sap, use a soft plastic brush or a rag dipped in a mild soap solution. Avoid metal brushes or scrapers that scratch the blade surface.
Before You Go
Lubricating a hedge trimmer isn’t a complex ritual. It’s a straightforward cleaning and coating job that takes three minutes before and after each use. The payoff is huge: smooth cutting, reduced wear, and a tool that lasts for years instead of seasons.
Remember the sequence: disconnect power, clean blades dry, apply the right oil, wipe excess. For gearboxes, consult your manual and grease if required. Avoid the common garage substitutes like WD-40 – they evaporate and leave the blades dry.
Stick with a dedicated hedge trimmer oil or a trusted light machinery oil. Do it every time. The trimmer will sound better, cut cleaner, and won’t fight you halfway through the job. That’s the real goal.