Guide: How to Cut Plexiglass With a Circular Saw Properly
This post contains affiliate links. As an Amazon Associate, we earn from qualifying purchases.
Most people grab their wood-cutting blade and crank the saw to full speed. The plexiglass melts before the cut finishes, leaving a jagged, chipped edge that looks like a failed science experiment. You can smell the burnt plastic before you even lift the guard.
Cutting plexiglass with a circular saw requires three matched elements: a carbide-tipped blade with a high tooth count and triple-chip grind teeth, the lowest speed setting on your saw, and a steady feed rate supported by a lubricated cut line. The blade choice dictates everything, heat, chip size, and edge finish.
This guide walks through each element, from picking the exact blade model to clamping the sheet so it doesn’t vibrate, to finishing the edge so it’s clear and smooth. You’ll also learn what to do when the cut starts smoking, which is a sign you’ve missed one of the three rules.
Key Takeaways
- Use only a carbide-tipped blade with 60+ teeth and a triple-chip grind (TCG) design, like the Freud LU85M008 or Diablo D0760C. A standard wood blade will melt and chip the acrylic.
- Set your circular saw to its lowest speed setting. High RPMs generate heat that warps the plexiglass and creates a burnt, cloudy edge.
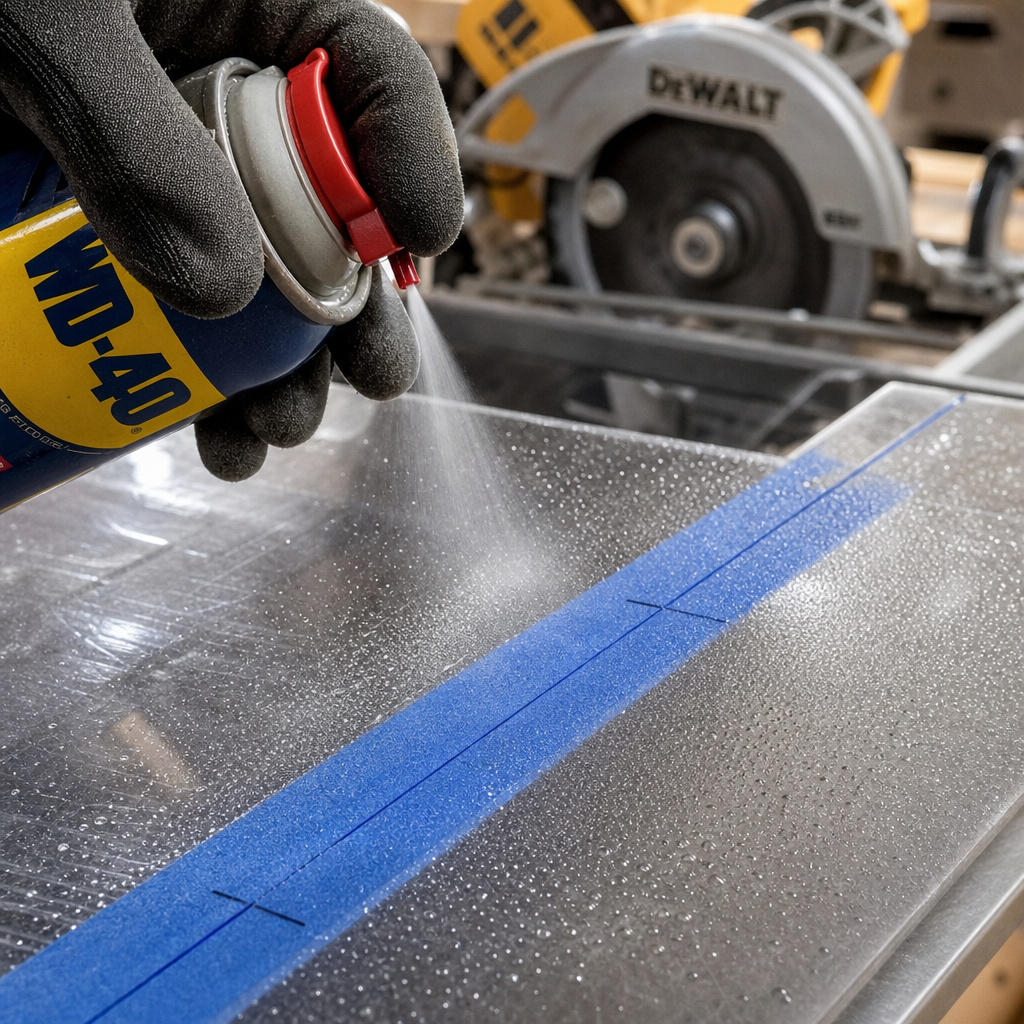
- Lubricate the cut line with WD-40 or a light machine oil. This reduces friction and heat, preventing the blade from gumming up with melted plastic.
- Keep the protective film on during cutting and finishing. Remove it only after you’ve sanded and polished the edge to a clear finish.
- For sheets thinner than 1/4 inch (6mm), consider scoring and snapping instead. The circular saw’s aggression can crack thin material even with the right blade.
Before You Start: Safety & Setup
Before you start: The blade throws fine acrylic dust that can irritate lungs and eyes. Wear a NIOSH-rated N95 dust mask and sealed safety goggles, not just glasses. Also, plexiglass can crack and shard if inadequately supported; clamp it fully to a stable surface with the cut line overhanging the bench edge. If the sheet vibrates during the cut, it will chip along the entire length.
Your work area needs to be clean, stable, and organized. A cluttered bench leads to a misplaced clamp, and that leads to a ruined sheet.
Gather these items first:
– Your circular saw (corded or cordless, but ensure it has variable speed control).
– The correct blade (covered next).
– A straightedge guide or the saw’s factory guide fence.
– Clamps, at least two, preferably four.
– Lubricant (WD-40, 3-in-One oil, or a dedicated cutting fluid).
– A fine-tip marker or pencil.
– Safety gear: dust mask, goggles, hearing protection, and gloves.
– A stable workbench or pair of sawhorses with a solid plywood top.
The plexiglass sheet should have its protective film intact. If it’s peeled, you’ll scratch the surface during handling. Leave it on.
Which blade should I use to cut plexiglass?
The blade is not just a cutting tool; it’s a heat management device. Plexiglass softens around 160°C, and a standard blade with aggressive rake angles and low tooth count generates that heat in seconds.
A carbide-tipped blade with triple-chip grind (TCG) teeth and a high tooth count (60 or more) produces a clean cut in plexiglass. The TCG design alternates between a flat-top tooth and a beveled tooth, which shears the material cleanly instead of tearing it. This reduces friction and heat buildup, preventing melting and chipping.
You need to look for three specs on the blade package: carbide-tipped, triple-chip grind (or labeled “for plastic/acrylic”), and a tooth count of at least 60. Two proven models are the Freud LU85M008 (80 teeth, 7-inch diameter) and the Diablo D0760C (60 teeth, 6.5-inch diameter). Both are carbide-tipped with TCG design.
Using a general-purpose 24-tooth framing blade is the most common mistake. That blade pulls and tears the acrylic. The cut edge will be cloudy, chipped, and often melted into a blob that gums up the blade teeth. You’ll spend an hour cleaning the blade afterward, and the sheet is trash.
Here’s a quick comparison to show why the specialty blade matters:
| Blade Type | Tooth Count | Best For | Result on Plexiglass |
|---|---|---|---|
| Standard Framing Blade | 24 | Rough lumber cuts | Melted edge, heavy chipping, blade gumming |
| Fine-Finish Wood Blade | 40–50 | Plywood, veneers | Moderate chipping, some melting |
| Carbide TCG Plastic Blade | 60+ | Acrylic, PVC, plastics | Clean, nearly chip-free edge, minimal heat |
If your saw doesn’t have variable speed, the blade choice becomes even more critical. You’ll rely entirely on the TCG teeth to manage heat.
How do I set up the saw and sheet?
Now that the right blade is installed, and you’ve confirmed it’s spinning in the correct direction, you need to adjust the saw and secure the sheet.
First, set the blade height. The blade should protrude only about 1/8 inch (3mm) above the plexiglass surface. This limits the exposed teeth, reducing vibration and the chance of the material lifting. A higher blade height makes the cut more aggressive and increases chipping.
Second, set the saw speed. Find the lowest setting on your dial. If your saw has a single speed, you’re forced to rely on feed rate and lubrication. Most homeowner-grade saws have a single speed around 5,000 RPM, which is too high. You’ll need to move very slowly and lubricate generously.
Third, clamp the sheet. Use at least two clamps on the waste side of the cut line. The entire sheet must be supported; if the plexiglass hangs off the bench unsupported, it will flex and crack. Place the sheet so the cut line extends just past the edge of your workbench. This gives the blade a clean exit and prevents binding.
Mark your cut line with a fine-tip marker on the protective film. Use a straightedge guide clamped to the sheet as a fence for the saw base. This ensures a straight cut. Without a guide, even a steady hand will wander, and plexiglass doesn’t forgive wandering cuts.
Step-by-Step Cutting Process
Follow this sequence exactly. Skipping lubrication or rushing the feed rate is the difference between a professional edge and a ruined sheet.
Step 1: Apply lubricant along the cut line. Spray a light coat of WD-40 or drip a line of light machine oil directly on the marked line. This isn’t just for lubrication; it cools the blade teeth marginally. Do not use water, it doesn’t reduce friction effectively and can cause the blade to slip.
Step 2: Position the saw at the start of the line. Hold the saw firmly, align the blade guide with your straightedge, and start the saw at its lowest speed. Let it reach full rotation before contacting the material.
Step 3: Begin cutting with steady, gentle pressure. Push forward slowly. You should hear a crisp cutting sound, not a high-pitched whine or a grinding noise. If you hear grinding, you’re going too fast or the blade is dirty. A good feed rate takes about 10 seconds to cut one foot of 1/4-inch plexiglass.
Step 4: Maintain the line and watch for heat signs. Keep the saw base flush against the guide. If you see smoke or the cut line starts looking melted and cloudy, stop immediately. Back the saw out, apply more lubricant, and let the blade cool for a minute. Continuing while smoking will weld melted plastic onto the blade teeth.
Step 5: Complete the cut and release the saw. Once the cut is finished, let the saw stop completely before lifting it. The blade will be hot. Do not touch it.
What happens if you skip a step? If you forget lubrication, the blade heats up within the first 6 inches. By the end of a 4-foot cut, the plexiglass edge will be so melted it’s translucent and warped. If you clamp inadequately, the sheet vibrates and chips the underside along the entire length, the chip line will mirror your cut line on the back side.
I tried cutting a 3-foot pane of 1/2-inch plexiglass for a garage window with a 40-tooth “finish” blade and no lubricant. Halfway through, the cut smoked and the edge turned opaque. The blade gummed up so badly I had to soak it in solvent to clean the melted plastic off the teeth. The sheet was unusable. Now I keep a dedicated Freud LU85M008 blade in a separate case labeled “Plastic Only,” and I spray the line twice during a long cut.
How do I finish the cut edge?
The cut edge will be rough and possibly slightly cloudy. That’s normal. The protective film is still on, so the surface is safe.
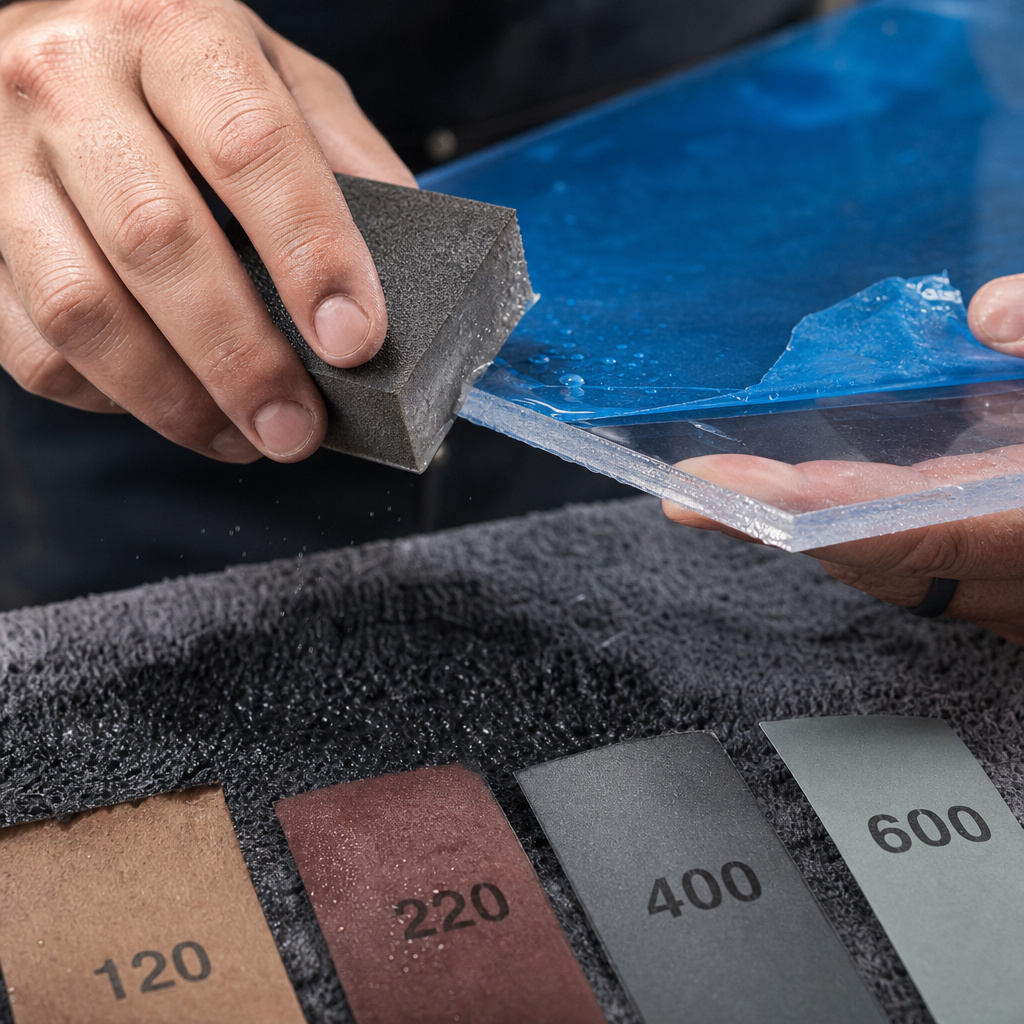
Finishing involves sanding and polishing, always with the film on.
First, sand the edge. Use wet sanding to keep heat down. Start with a 120-grit sanding block, then progress to 220, then 400, and finally 600 grit. Sand evenly along the entire edge. Dry sanding generates heat that can soften the acrylic and deform the edge.
Second, polish for clarity. Use a plastic polish compound (like Novus #2) or a buffing wheel on a low-speed drill. Apply the polish with a soft cloth and work it along the edge until it becomes clear. This removes the fine scratches from sanding.
Finally, remove the protective film. Peel it off slowly. The surface should be pristine, and the edge should be clear and smooth.
If you remove the film before sanding, you’ll scratch the visible surface with the sanding block. Those scratches are permanent.
When should I not use a circular saw?
The circular saw is excellent for sheets 1/4 inch (6mm) and thicker. For thinner material, the saw’s vibration and aggression can crack the pane even with a perfect setup.
If your plexiglass is thinner than 1/4 inch, consider scoring and snapping. Use a sharp utility knife and a straightedge to score a deep line multiple times. Then snap the sheet along the score line over a table edge. This yields a cleaner edge on thin material.
Also, avoid the circular saw for intricate curves. Use a jigsaw with a fine-tooth plastic-cutting blade instead. The circular saw is for straight lines only.
Here’s a decision table based on thickness:
| Plexiglass Thickness | Recommended Tool | Reason |
|---|---|---|
| Less than 1/4 inch (6mm) | Utility knife (score & snap) | Circular saw vibration risks cracking thin material. |
| 1/4 inch to 1/2 inch (6–12mm) | Circular saw with TCG blade | Provides clean, controlled straight cuts. |
| More than 1/2 inch (12mm) | Circular saw (multiple passes) | Single pass may overheat blade; two shallow passes reduce heat. |
| Curved cuts | Jigsaw with plastic blade | Circular saw cannot follow curves. |
Maintaining Your Blade After Use
The blade will have acrylic dust and possibly slight gumming. Clean it immediately after the cut.
Use a soft brush and a solvent like acetone or a dedicated blade cleaner. Spray the solvent on the blade, let it sit for a minute, then brush the teeth gently. Do not use abrasive scrapers, they can damage the carbide tips.
Store the blade separately. Label it “Plastic” so you don’t accidentally use it on wood. Wood resin and plastic residue mixed together will ruin the blade’s performance.
After three plexiglass projects, my Freud blade started leaving faint melt lines on the cut edge. I cleaned it with acetone and found a nearly invisible film of plastic welded to the side of the teeth. That film was causing enough friction to generate extra heat. A clean blade cut cleanly again.
Frequently Asked Questions
Can I use the same blade for plexiglass and wood?
No. The plastic residue will coat the blade teeth, and when you cut wood, that residue heats up and smears onto the wood surface. It also reduces cutting efficiency. Keep a dedicated blade.
What if my circular saw doesn’t have a speed control?
You must rely on feed rate and lubrication. Move the saw very slowly, about half your normal wood-cutting speed. Apply lubricant every 12 inches along the cut line. The blade will still get hot, so pause every few feet to let it cool.
Is WD-40 the best lubricant?
WD-40 works well because it’s light and evaporates, leaving minimal residue. Other options include light machine oil (3-in-One) or dedicated cutting fluid for plastics. Avoid heavy oils; they can stain the plexiglass if they seep under the film.
How do I dispose of plexiglass dust and scraps?
Plexiglass dust is not biodegradable. Sweep it up and dispose of it in your regular trash. Do not burn scraps, acrylic releases toxic fumes when burned. Large scraps can be recycled at some plastic recycling centers.
Why does my cut edge look cloudy even with the right blade?
Cloudiness is usually due to heat. You might be feeding too fast or the blade is dirty. Sand and polish the edge; the cloudiness often resides in the top layer and can be removed with 400-grit wet sanding.
Can I cut colored or tinted plexiglass the same way?
Yes. The cutting process is identical. The colored layer is embedded within the acrylic, so the blade cuts through it cleanly. However, tinted plexiglass sometimes contains different plastic formulations; test a scrap piece first to check for melting behavior.
The Bottom Line
Cutting plexiglass with a circular saw is a precise operation, not a brute-force task. Match the three elements: a carbide-tipped TCG blade with high tooth count, the lowest saw speed, and a lubricated, steady feed. Clamp the sheet fully to prevent vibration cracking.
Keep the protective film on until the edge is fully sanded and polished. Store your plastic-cutting blade separately and clean it after each use. For thin sheets under 1/4 inch, score and snap instead.
The method works for straight-line cuts on medium to thick acrylic. For curves, switch to a jigsaw. Remember that the blade is the heat manager, pick the right one, and the rest follows.