How to Keep Trimmer Blades Sharp (3-Step Maintenance Plan)
This post contains affiliate links. As an Amazon Associate, we earn from qualifying purchases.
Keeping trimmer blades sharp requires a three-part regimen: daily cleaning and oiling after every use, a monthly deep clean and disinfect, and a yearly sharpening session using a fine-grit whetstone or diamond file while maintaining the original blade bevel angle.
Most people think a dull blade needs sharpening immediately. The real problem is usually gunk. Hair, skin oil, and moisture form a paste that acts like sandpaper on the cutting edge, wearing it down faster than actual use. You can sharpen a blade perfectly and have it feel dull again in a week if you don’t clean off that abrasive paste first.
This guide breaks down the daily, monthly, and yearly routines that keep blades cutting crisply for years. We’ll cover the specific tools you need, the exact angles for sharpening, and how to troubleshoot the most common issues like hair pulling and uneven cuts.
Key Takeaways
- Clean and oil the blades after every single use. Skipping this lets hair and skin oils harden into an abrasive paste that dulls the edge.
- Use only specialized clipper oil or pure mineral oil. Kitchen oils like olive or vegetable oil polymerize and turn into a sticky varnish that gums up the mechanism within two weeks.
- Sharpen blades at their factory bevel angle, usually between 30 and 45 degrees. Changing this angle alters the blade geometry and causes pinching or an uneven cut.
- Store the trimmer in a dry place, not on a humid bathroom counter. Condensation forms on the steel overnight, and surface rust can start in as little as 48 hours.
- Alignment matters more than sharpness after honing. If the top blade’s teeth aren’t set 1/32″ behind the bottom blade, it will pull hair no matter how sharp it is.
What’s the Daily Routine for Sharp Trimmer Blades?
This isn’t a weekly thing. The two-minute habit you do immediately after trimming makes the difference between blades that last a season and blades that last a decade.
First, unplug or remove the battery. Take the stiff brush that came with the trimmer, if you lost it, a small, clean paintbrush or a dedicated clipper brush works, and brush out all the hair from between the blade teeth, the side vents, and the attachment ports. Tap the trimmer head against your palm to dislodge stuck clumps.
For cordless, waterproof models, a quick rinse under cool running water is fine. Don’t use hot water. It can warp thin blade metal and melt lubricant out of the pivot points.
After-use cleaning removes the microscopic skin oils and moisture that, when left on steel, initiate oxidation. The hair itself is mostly inert, but the organic film it carries is corrosive. Brushing interrupts this process before the chemistry starts.
Now, oil. Apply two or three drops of clipper oil directly onto the cutting edge of the blade. Turn the trimmer on and let it run for 10 to 20 seconds. You’ll see the oil thin out and spread across the blade surface.
This does two things. It displaces any residual moisture from cleaning, and it creates a protective film that prevents the bare steel from reacting with oxygen. Wipe off the excess oil with a paper towel before storing. That leftover oil attracts dust and hair.
If you skip this, the blade doesn’t just get dull. It starts to rust at a microscopic level along the cutting edge. That rusted edge is brittle. When you next use the trimmer, those microscopic rust particles fracture off, leaving a jagged, uneven apex that pulls and tears hair instead of slicing it. You’ll notice the tugging sensation within three to four uses after skipping the oil.
The Monthly Deep Clean and Disinfect
The daily brush-and-oil handles surface debris. Once a month, you need to address what’s underneath and inside. This is also the time to check blade tension and alignment, which naturally shifts with use.
Before you start: Ensure the trimmer is powered off and the battery is removed. Wear cut-resistant gloves if handling detached blades, the edges are sharp enough to slice skin even when dull. Have a clean, dry workspace.
- Remove the blades. Most trimmers have one or two screws holding the top moving blade to the chassis. Use the correct size screwdriver, usually a Phillips #0 or a small flathead. Stripping these screws is a nightmare. Place the screws in a small container so they don’t roll away.
- Soak and scrub. If the blades are detachable and not part of a sealed motor unit, soak them in a bowl of warm water with a drop of mild dish soap for five minutes. This loosens the hardened gunk that brushing misses. Scrub gently with an old toothbrush. Rinse under cool water. If the blades aren’t removable, use a cotton swab dipped in isopropyl alcohol to scrub the accessible areas.
- Disinfect. This is the step home users almost always skip, but barbers do it every day. Spray the blades and the head assembly with a barber-grade disinfectant like Clippercide. It kills bacteria and fungi that can cause skin irritation or acne. Let it sit for the time specified on the can, usually about 10 minutes.
- Dry completely. This is critical. Use a lint-free cloth and then let the parts air-dry for another 15 minutes. Any trapped moisture leads to rust.
- Reassemble and oil. Put the blades back, snug the screws (don’t overtighten), and give it a fresh round of oil. Run the trimmer to distribute.
This monthly reset prevents the slow creep of performance loss. It’s also your chance to inspect the blades for chips or uneven wear you might miss during daily use.
How Do You Know When Blades Need Sharpening?
Sharpening is a last resort, not a regular chore. If you’re cleaning and oiling properly, a good set of blades might only need honing once a year, or even less.
The signs are physical and unmistakable. The trimmer will start to pull hairs instead of cutting them cleanly. You’ll feel a tugging sensation on your skin, and you’ll need to make multiple passes over the same spot to get a clean cut. Visually, the cut ends of the hair will look mashed or bent, not sharply sliced. Another sign is increased vibration or a change in the motor sound, it may strain or bog down.
Dullness is often mistaken for misalignment or dirt. Here’s a quick diagnostic table:
| Symptom | Likely Cause | Test & Fix |
|---|---|---|
| Pulling hairs, tugging skin | Dull edge or misalignment | Clean and oil thoroughly. If tugging persists, check alignment, then sharpen. |
| Uneven cut, longer patches | Blade misalignment | Inspect if one side of the blade set is higher or more forward than the other. |
| Motor strains, slows down | Gunk in mechanism | Perform the monthly deep clean. Often resolves without sharpening. |
| Visible nicks or chips | Impact damage | Sharpening can fix small chips. Deep nicks may require blade replacement. |
If everything is clean, oiled, and aligned, but it still pulls, it’s time to sharpen.
Tools and Supplies You Actually Need
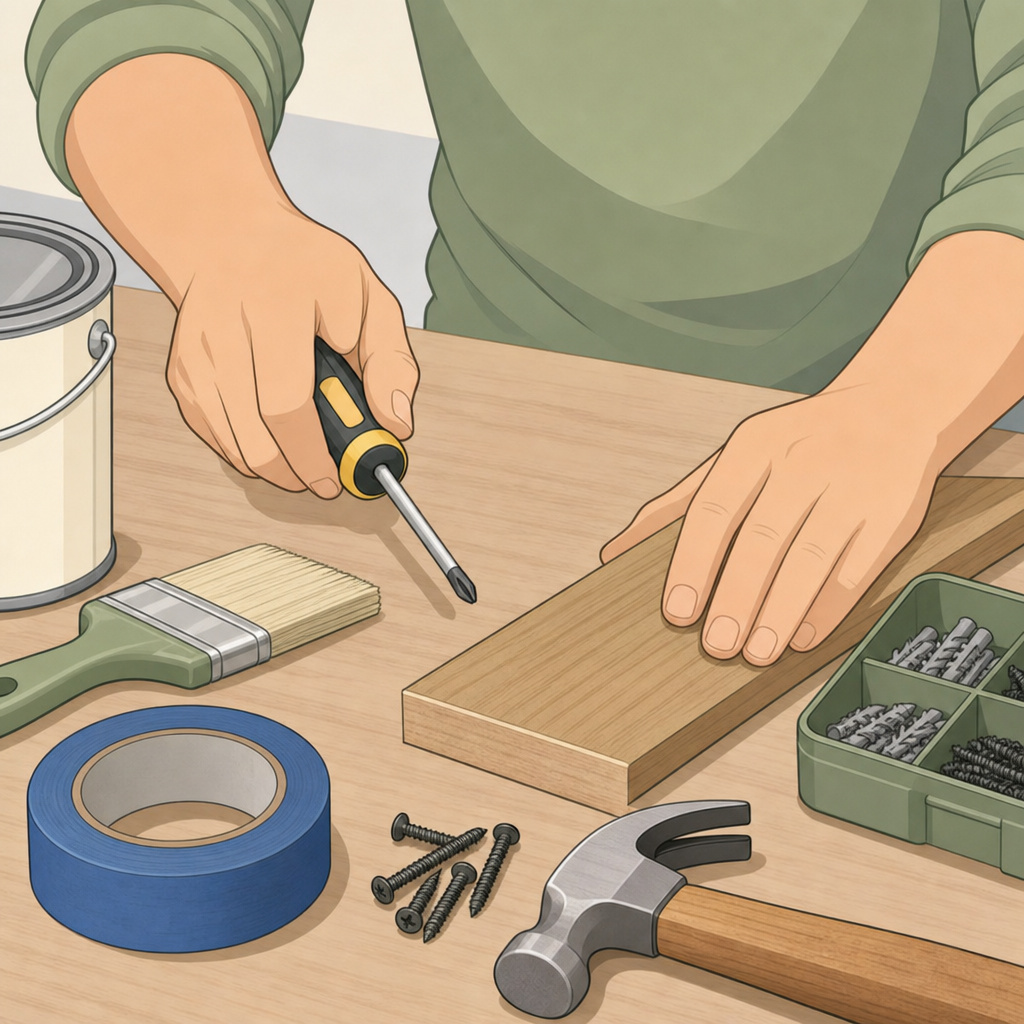
You don’t need a professional sharpening rig. But you do need the right basic tools. Generic substitutes will ruin your blades.
- Cleaning Tools: A stiff-bristle brush (metal or nylon). Isopropyl alcohol (70% or higher) in a spray bottle. Cotton swabs and lint-free cloths.
- Lubrication: Specialized clipper oil (like Wahl Clipper Oil) or pure mineral oil. That’s it. Do not use WD-40, 3-in-1 household oil, or any cooking oil. They leave residues that attract more gunk and can damage plastic housings.
- Sharpening Tools: For most DIYers, a fine-grit diamond flat file (like the EZE-LAP D-193F) is the most forgiving tool. For a finer edge, a dual-grit whetstone (Shapton 1000/6000 grit combination stone) is excellent. You’ll also need a way to hold the blade steady, a bench vise with soft jaws or a simple hand-held blade holder.
- Alignment Tool: A feeler gauge from an automotive store is perfect. You need to measure the thousandths-of-an-inch gap. The 0.03″ (roughly 1/32″) blade is your target.
I tried using a generic hardware-store flat file on an old Oster 76 blade once. The file was too coarse and cut at a different angle. It took off too much metal, left a ragged edge, and the blade never cut smoothly again. I had to replace it. The five dollars I saved on the file cost me thirty-five dollars for a new blade set.
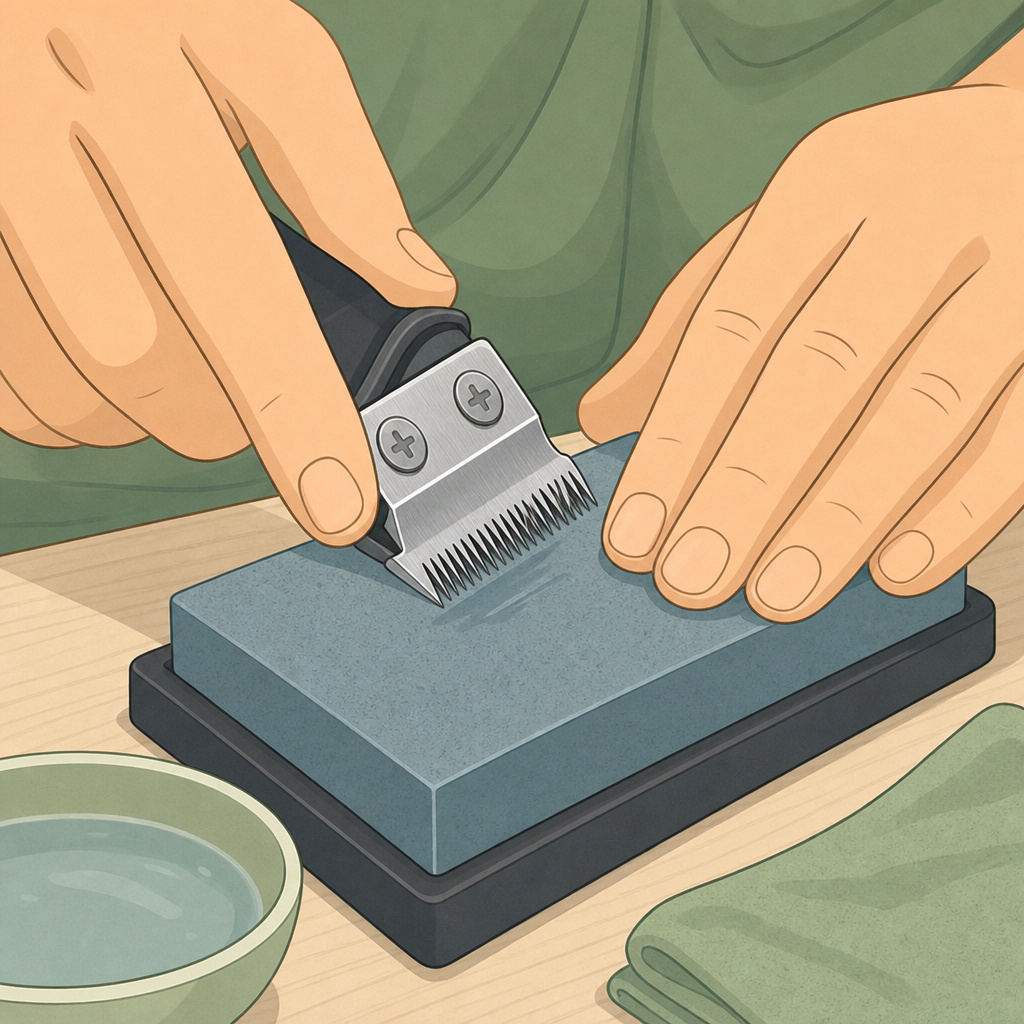
How to Sharpen Trimmer Blades
This is the careful part. Rushing here wastes all your prior maintenance.
Before you start: Secure the blade firmly. A slipping blade can cut you deeply. Work in a well-lit area. Wear safety glasses, metal filings can fly. Have a magnifying glass or strong light to inspect the edge.
- Remove and clean the blade. Take the blade off the trimmer. Give it a final clean with alcohol to remove all oil. Any oil on the stone will clog it (this is called “glazing”) and reduce its cutting ability.
- Identify the bevel angle. Hold the blade under a light and look at the cutting edge. You’ll see a narrow, shiny facet, that’s the factory bevel. Your goal is to replicate that exact angle, typically between 30 and 45 degrees. Don’t guess. If you change the angle, the blade won’t mate correctly with its counterpart.
- Hone the edge. Place the blade’s bevel flat against your sharpening stone or file. Using light pressure, push the blade away from you along the stone in a straight line, as if you’re trying to shave off a thin layer of the stone. Repeat this motion 10-15 times per blade section, maintaining the angle. Use the 1000-grit side first to establish the edge, then the 6000-grit side to polish and refine it.
- Check your work. Wipe the blade clean. The entire length of the cutting edge should have a uniform, shiny new bevel. If there are still dull spots, focus a few more strokes on those areas. Run your fingernail lightly across the edge (not along it). It should catch slightly, not slide off.
- Remove the burr. Sharpening creates a tiny, fragile flap of metal on the opposite side of the edge called a wire burr. Lay the blade perfectly flat on the stone and make two or three very light passes. This knocks off the burr without dulling the edge.
The sharpening motion isn’t about force. It’s about consistency. Let the abrasive do the work. Pressing too hard creates an uneven edge and overheats the steel, which can soften it.
Setting Blade Alignment and Tension
A sharp blade that’s misaligned is worse than a slightly dull one that’s aligned. It will pinch skin and cut unevenly.
After sharpening and reassembly, you must set the “lag.” The top, moving blade’s teeth should sit slightly behind the teeth of the stationary bottom blade. The industry standard is 1/32″ to 1/16″ of an inch. You can eyeball this, but a feeler gauge is accurate.
Slide the 0.03″ (1/32″) feeler gauge blade between the two sets of teeth at the front. You should feel a slight drag. If it’s loose, the top blade is too far back, loosen its mounting screws and tap it slightly forward. If you can’t fit the gauge in, the blades are too tight and will bind. Loosen the screws and gently tap the top blade back.
Once aligned, tighten the screws incrementally and in a criss-cross pattern to ensure even pressure. Do a paper test. Hold a single sheet of paper and try to slice through it with the running trimmer. A well-aligned, sharp blade will cut it cleanly. A misaligned one will tear it or fail to cut.
Frequently Asked Questions
Can I use a knife sharpener on my trimmer blades?
No. Most knife sharpeners use preset angles around 20 degrees, which is wrong for trimmer blades. They also often use coarse abrasives that remove too much metal. You’ll ruin the blade geometry in one pass.
How often should I replace trimmer blades instead of sharpening them?
Replace blades if they have deep chips or cracks, or if the metal is visibly worn thin from repeated sharpening. A quality steel blade from Wahl, Andis, or Oster can be sharpened 10-15 times over many years before replacement is needed.
Why do my blades feel dull again just a week after sharpening?
This almost always points to a neglected cleaning routine. You’ve restored a sharp edge, but you’re not cleaning off the daily abrasive paste (hair + skin oils). That paste wears the new edge down rapidly. Commit to the post-use brush and oil.
Is professional sharpening worth it?
For high-end clippers like Oster 76 or Andis BGRC, yes. A pro uses a jig and whetstone system that guarantees a perfect, consistent bevel. For a $15 home beard trimmer, the cost of professional sharpening may approach the price of a new unit.
What’s the best oil for trimmer blades?
Specialized clipper oil is formulated to be thin enough to penetrate and viscous enough to stay put. Pure mineral oil (USP grade) is a perfect, inexpensive alternative. Both are non-toxic and won’t gum up.
The Bottom Line
Sharp trimmer blades aren’t about heroic, once-a-year sharpening sessions. They’re about the boring, two-minute discipline of brushing and oiling after every single use. That habit prevents 90% of the wear that leads to dullness. The monthly deep clean handles the other 9%. Actual sharpening is the final 1%, a rare corrective measure for when all that maintenance has preserved the blade through years of service.
Start with the daily routine tonight. Get the right oil. Keep the trimmer out of the bathroom humidity.
Do that, and your blades will outlast the motor. They might even outlast your interest in the tool itself. It’s a small ritual that pays off in a cleaner cut, less skin irritation, and the quiet satisfaction of a tool that works exactly as it should, every time.
{
“@context”: “https://schema.org”,
“@type”: “HowTo”,
“name”: “How to Keep Trimmer Blades Sharp with a 3-Step Maintenance Plan”,
“totalTime”: “PT30M”,
“tool”: [
{
“@type”: “HowToTool”,
“name”: “Small stiff-bristle brush”
},
{
“@type”: “HowToTool”,
“name”: “Diamond flat file or 1000/6000 grit whetstone set”
},
{
“@type”: “HowToTool”,
“name”: “Blade alignment tool or feeler gauge”
},
{
“@type”: “HowToTool”,
“name”: “Screwdriver set for blade removal”
}
],
“supply”: [
{
“@type”: “HowToSupply”,
“name”: “Specialized clipper oil or mineral oil”
},
{
“@type”: “HowToSupply”,
“name”: “Disinfectant spray like Clippercide”
},
{
“@type”: “HowToSupply”,
“name”: “Mild dish soap and water”
}
],
“step”: [
{
“@type”: “HowToStep”,
“name”: “Clean after every use”,
“text”: “Brush away all hair clippings from the blade teeth and housing. For waterproof trimmers, rinse under cool water. This prevents abrasive buildup and bacterial growth.”
},
{
“@type”: “HowToStep”,
“name”: “Oil the blades daily”,
“text”: “Apply 2-3 drops of clipper oil along the blade edge. Run the trimmer for 10-20 seconds to distribute the oil, preventing rust and reducing friction.”
},
{
“@type”: “HowToStep”,
“name”: “Perform a monthly deep clean”,
“text”: “Remove detachable blades if possible. Soak in warm, soapy water for 5 minutes, scrub, rinse, dry thoroughly, and disinfect with a clipper spray.”
},
{
“@type”: “HowToStep”,
“name”: “Sharpen when pulling occurs”,
“text”: “Remove the blades. Using a whetstone or diamond file, hone the cutting edge at its factory bevel angle (typically 30-45 degrees) with light, consistent strokes.”
},
{
“@type”: “HowToStep”,
“name”: “Realign after sharpening”,
“text”: “Reattach the top blade so its teeth sit 1/32\” to 1/16\” behind the bottom blade’s teeth. Test for smooth operation without pinching.”
}
]
}
{
“@context”: “https://schema.org”,
“@type”: “FAQPage”,
“mainEntity”: [
{
“@type”: “Question”,
“name”: “Can I use a knife sharpener on my trimmer blades?”,
“acceptedAnswer”: {
“@type”: “Answer”,
“text”: “No. Most knife sharpeners use preset angles around 20 degrees, which is wrong for trimmer blades. They also often use coarse abrasives that remove too much metal. You’ll ruin the blade geometry in one pass.”
}
},
{
“@type”: “Question”,
“name”: “How often should I replace trimmer blades instead of sharpening them?”,
“acceptedAnswer”: {
“@type”: “Answer”,
“text”: “Replace blades if they have deep chips or cracks, or if the metal is visibly worn thin from repeated sharpening. A quality steel blade from Wahl, Andis, or Oster can be sharpened 10-15 times over many years before replacement is needed.”
}
},
{
“@type”: “Question”,
“name”: “Why do my blades feel dull again just a week after sharpening?”,
“acceptedAnswer”: {
“@type”: “Answer”,
“text”: “This almost always points to a neglected cleaning routine. You’ve restored a sharp edge, but you’re not cleaning off the daily abrasive paste (hair + skin oils). That paste wears the new edge down rapidly. Commit to the post-use brush and oil.”
}
},
{
“@type”: “Question”,
“name”: “Is professional sharpening worth it?”,
“acceptedAnswer”: {
“@type”: “Answer”,
“text”: “For high-end clippers like Oster 76 or Andis BGRC, yes. A pro uses a jig and whetstone system that guarantees a perfect, consistent bevel. For a $15 home beard trimmer, the cost of professional sharpening may approach the price of a new unit.”
}
},
{
“@type”: “Question”,
“name”: “What’s the best oil for trimmer blades?”,
“acceptedAnswer”: {
“@type”: “Answer”,
“text”: “Specialized clipper oil is formulated to be thin enough to penetrate and viscous enough to stay put. Pure mineral oil (USP grade) is a perfect, inexpensive alternative. Both are non-toxic and won’t gum up.”
}
}
]
}