
How to Change Blade on Reciprocating Saw – 5-Step Guide
This post contains affiliate links. As an Amazon Associate, we earn from qualifying purchases.
Changing a reciprocating saw blade requires matching three things: your saw’s clamp type (quick-release lever or twist-lock chuck), the correct blade for your material, and a strict safety-first sequence of unplugging, swapping, and testing.
Most people rush the clamp. They don’t wait for the audible click on a quick-release system, or they skip the final tug test. The blade feels seated, but a half-second into a cut it slips, wobbles, and ruins the material, or worse, flies loose. That wobble also transfers straight into the saw’s motor, wearing out the bearings months ahead of schedule.
This guide walks through the two main clamp systems, the actual five-step swap, and how to pick the right blade so your next cut is clean and controlled.
Key Takeaways
- Always disconnect power first, remove the battery or unplug the cord. This isn’t a suggestion.
- Know your clamp: quick-release levers are tool-free; twist-lock chucks require a hex key (usually included).
- Seat the new blade fully until it clicks or stops. Teeth should point away from the saw’s handle for standard cutting.
- After securing, pull hard on the blade. If it moves, the clamp isn’t locked. Never skip this test.
- Match the blade’s TPI (teeth per inch) to your material: low TPI (3-6) for wood, high TPI (18-24) for metal.
Before You Start: Safety Is Non-Negotiable
Before you start: A reciprocating saw blade is under tension in the clamp. If you skip the power disconnect, the tool can kick on the moment you press the release. The blade is also sharp enough to slice through a glove. Wear safety glasses to stop metal fragments from the old blade, and use cut-resistant gloves. Work on a stable surface, not your lap.
The single biggest mistake is treating the blade change like a battery swap. It’s not. The mechanism is under spring pressure. I’ve seen a buddy get a deep gash across his palm because his thumb slipped off a sticky release lever and the blade snapped back.
He was lucky. The second most common error is not verifying the lock. A blade that seems tight at rest can work loose under the violent back-and-forth motion. That leads to a ruined cut, a broken blade, or a projectile.
Blade Clamp Types: Quick-Release vs. Twist-Lock
Modern saws use one of two systems. Identifying yours is the first real step.
Quick-Release Lever: This is the most common system on consumer and prosumer models from brands like DeWalt, Ryobi, and Milwaukee. A prominent lever sits near the blade clamp. Pressing it disengages the locking jaws, allowing you to pull the blade straight out. No tools are needed. The mechanism relies on a spring-loaded collet or a set of locking balls.
Twist-Lock Chuck (Hex Key): Older models and some heavy-duty industrial saws use this system. A collar surrounds the blade insertion point. To unlock it, you insert the supplied hex key (Allen wrench) into a socket on the collar and turn it counterclockwise. This opens the jaws. You then pull the blade out. Tightening is the reverse: insert the blade and turn the hex key clockwise to clamp down.
The quick-release is faster, but the twist-lock often provides a more positive, vibration-resistant lock, useful for prolonged demolition work. If you’re unsure, check your saw’s manual. If the manual is gone, look for a lever. No lever? Look for a small hexagonal socket near the blade hole.
Choosing the Correct Replacement Blade
Grabbing any blade from your toolbox is a shortcut to a bad time. The blade must match the material you’re cutting. The wrong blade dulls instantly, overheats, and can shatter.
| Blade Type | Best For | Key Spec | What Happens If Wrong |
|---|---|---|---|
| Wood w/ Nails (Bimetal) | Demolition, old lumber, pallets | Low TPI (3-6), flexible | Cutting clean metal will overheat the blade, causing the teeth to soften and strip off within seconds. |
| Metal Cutting | Sheet metal, pipes, bolts | High TPI (18-24), rigid | Cutting wood gums up the fine teeth, causing immediate friction and binding. The cut stalls and smokes. |
| Carbide-Grit | Masonry, tile, fiberglass | No teeth, abrasive grit | Used on wood or metal, the grit loads up and becomes smooth, rendering it useless. The cut goes nowhere. |
| Pruning | Green wood, tree branches | Medium TPI (7-10), curved tip | Cutting dry, seasoned wood or anything with nails will chip the teeth and snap the thinner blade body. |
The code is in the teeth. Teeth Per Inch (TPI) dictates cut speed and finish. Low TPI (few, big teeth) bites aggressively for fast, rough cuts in soft material. High TPI (many, small teeth) makes slower, smoother cuts in hard material. For a deeper dive on this spec, our guide on blade TPI selection breaks it down.
Blade length matters too. Standard blades are 6 inches. For deeper cuts, like through a wall, you need a 9-inch or 12-inch blade. Using a short blade on a deep cut causes the saw’s shoe to bump against the material before the cut is complete.
Step-by-Step Blade Change Process
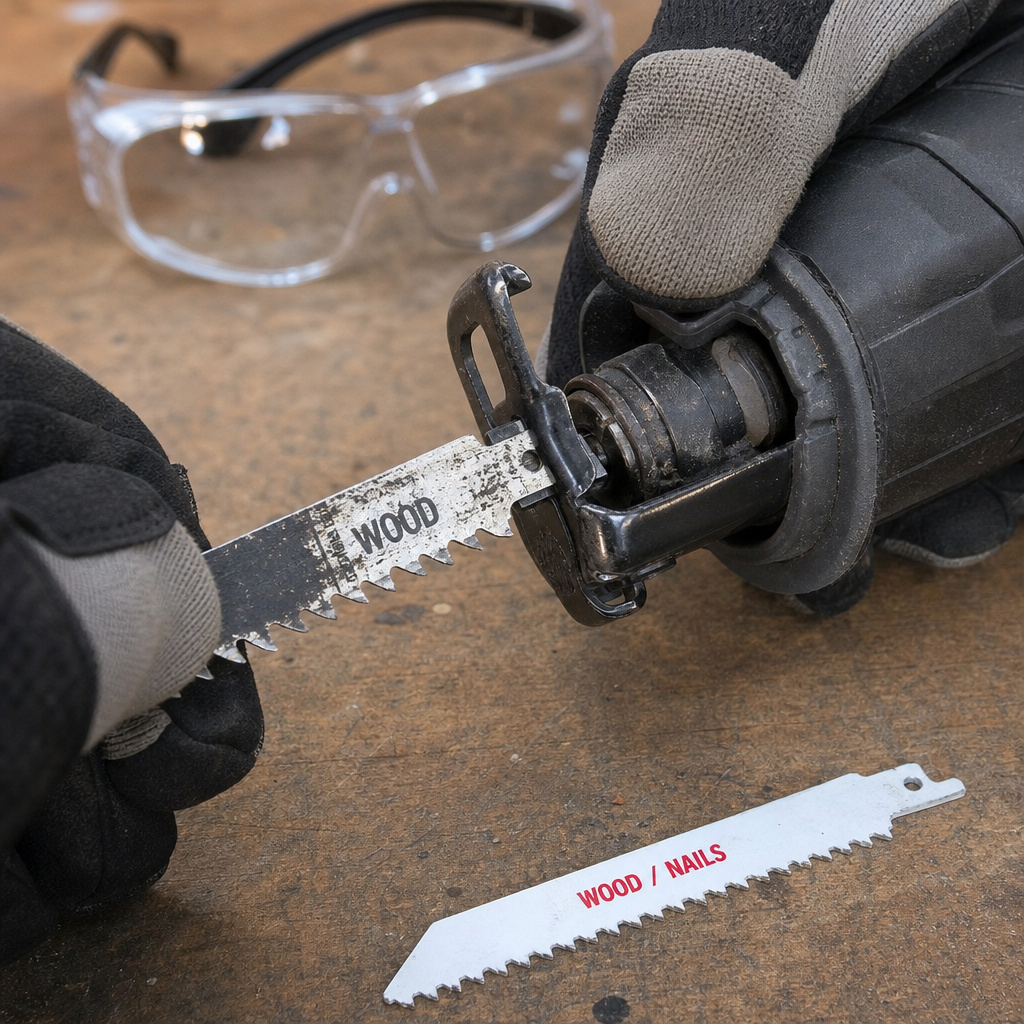
Follow this sequence exactly. Do not deviate.
Step 1: Power Down and Prep
Unplug the saw if it’s corded. For cordless, remove the battery pack. I mean physically set it aside, out of reach.
Do not just switch the tool off. Place the saw on a bench or sturdy table. Put on your safety glasses and gloves. Have your new blade ready.
Step 2: Identify and Activate the Release
Locate the clamp. For a quick-release saw, find the lever. It’s often black or red. Press it firmly all the way. You should feel it depress and hear a faint click or metallic snap.
Hold it down. For a twist-lock chuck, find the hex socket. Insert the correct size hex key. Turn it counterclockwise about a quarter to a half turn. You’ll feel resistance release.
Technical Snippet: The quick-release lever typically actuates a spring-loaded pin that retracts from a detent in the blade shank. Holding the lever compressed fully retracts the pin, allowing the blade to slide freely. In twist-lock systems, the hex key rotates a cam inside the chuck that spreads or contracts the clamping jaws.
Step 3: Remove the Old Blade
With the release engaged (lever held down or hex key turned), grip the old blade firmly and pull it straight out. Do not wiggle it side-to-side. Pull directly along the axis of the blade. If it’s stuck, don’t force it.
See the troubleshooting section below. Once out, inspect the clamp jaws. Use a dry cloth or a brush to wipe out any sawdust, rust, or debris. Grit in the jaws prevents the new blade from seating fully.
Step 4: Insert the New Blade
Look at your new blade. The teeth have a direction. For 99% of cuts, the teeth should face away from the saw’s handle. This means the blade cuts on the push stroke. Some specialty techniques use reverse orientation, but for general reciprocating saw operation, this is the rule.
Align the blade’s shank with the clamp opening. Push it in firmly and steadily until it stops. You should feel it seat against the back of the clamp. On quick-release models, you’ll often hear a solid click as the locking mechanism engages the shank’s hole. For twist-lock, it will simply stop moving inward.
Step 5: Secure the Clamp and Test
For quick-release: slowly release the lever. Let it snap back to its original position under its own spring force. Do not help it. For twist-lock: turn the hex key clockwise until it is firmly tight. Do not overtighten; snug is enough.
Now, the critical test. Grab the blade with your gloved hand and try to pull it back out. Tug hard.
It should not move. If it pulls out even a millimeter, the clamp is not locked. Re-seat the blade and repeat the locking step.
Finally, make a test cut on a piece of scrap material. Listen. The cut should sound smooth, not chattering or grinding. If the blade vibrates excessively, stop. It’s likely not seated correctly or is the wrong type for the material.
Troubleshooting Common Blade Change Problems
The blade is stuck and won’t come out.
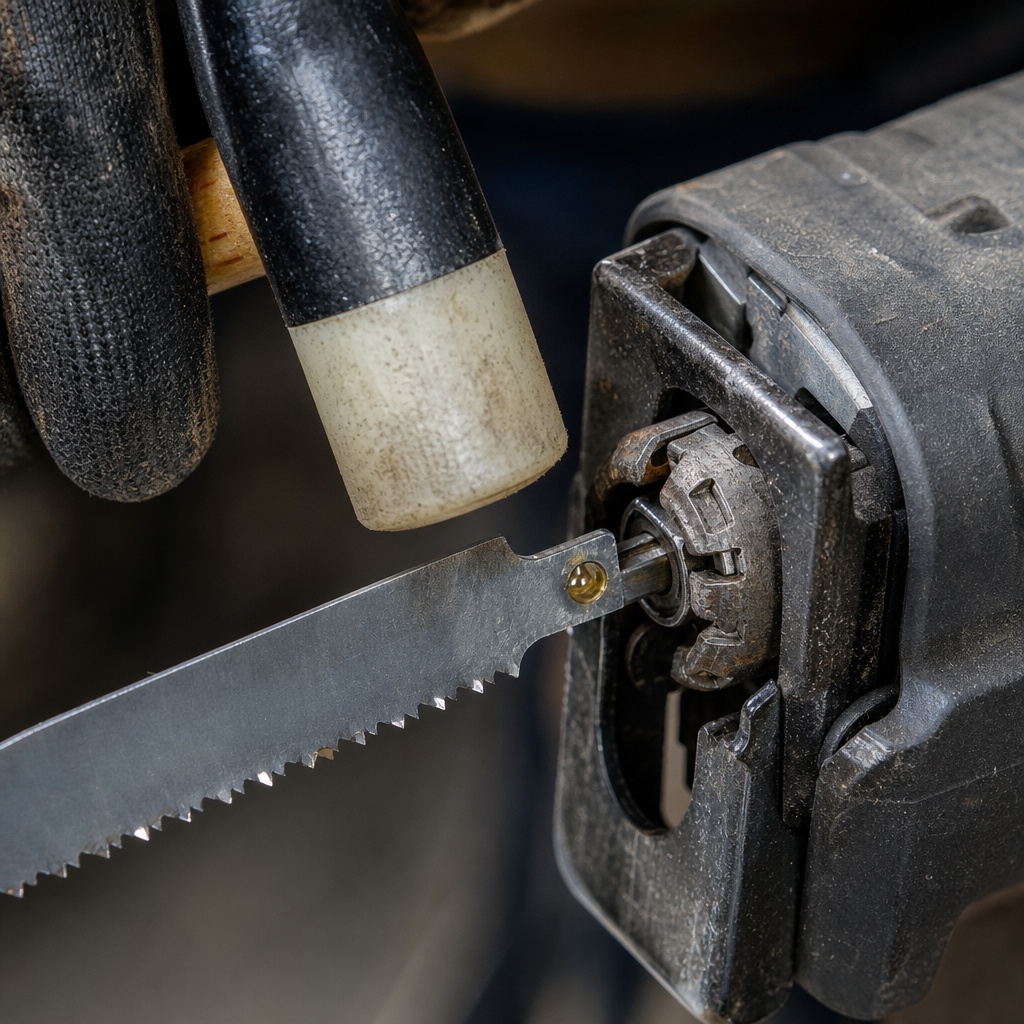
This happens often with saws used for demolition. Grit and resin jam the mechanism. First, ensure the release is fully activated. On a quick-release, press the lever harder. If it still won’t budge, tap the end of the blade shank (the part sticking out) gently with a mallet or hammer to shock it loose. As a last resort, apply a drop of penetrating oil like WD-40 to the shank where it enters the clamp, wait five minutes, and try again. Avoid excessive side force, you can bend the clamp.
The new blade wobbles during the test cut.
The blade isn’t fully seated. Remove it, clean the clamp jaws again, and re-insert with more force until it positively stops. Also, ensure you’re using the correct shank type. Most modern saws use a universal 1/2-inch shank, but some older models differ. A mismatch causes play.
The lever doesn’t snap back or feels loose.
The internal spring may be broken or the mechanism gummed up. You can often access it by removing a couple of screws on the clamp housing. Clean any debris and check the spring. If it’s broken, you’ll need a replacement part from the manufacturer.
The hex key turns but doesn’t tighten the chuck.
The internal cam in a twist-lock system might be stripped. This is a less common but serious failure. The fix usually requires replacing the entire blade clamp assembly, a job best left to a service center if you’re not comfortable disassembling the tool.
Blade Maintenance and Care
A clean blade lasts longer and cuts better. After use, especially in sappy wood or metal, wipe the blade down with a rag dampened with mineral spirits or a dedicated blade cleaner. This prevents rust and buildup that can affect future cuts. For a thorough clean, our page on saw blade cleaning has detailed methods.
Store blades in a dry place. A simple rack or an original plastic sleeve prevents them from knocking against each other, which dulls the teeth. A dull blade forces you to push harder, overheating the saw and increasing the risk of kickback.
Know when to retire a blade. If it takes more than twice as long to cut through the same material it used to slice easily, it’s done. Learning sharpening saw blades can extend life for some types, but most reciprocating saw blades are considered disposable wear items.
Frequently Asked Questions
Which way do the teeth face on a reciprocating saw blade?
For almost all cutting, the teeth face away from you, pointing forward, away from the saw’s handle. This creates a cutting action on the push stroke. The only exception is for specific plunge cuts or when cutting upwards from below a surface.
Can I use any brand of blade in my saw?
Yes, as long as the shank size matches. The vast majority of modern reciprocating saws use a universal 1/2-inch shank. Blades from DeWalt, Milwaukee, Diablo, Bosch, etc., are all interchangeable. Focus on the blade’s TPI and material specification, not the brand.
How often should I change the blade?
Change it when it gets dull. There’s no set time. A blade cutting clean pine might last for hours of runtime. The same blade hitting nails every few seconds might be done in minutes. Listen to the cut and feel the effort. Increased vibration, burning smells, and slower progress are all signs.
My Ryobi/Milwaukee/DeWalt saw has a lever, but the blade won’t release. What now?
First, press the lever harder and hold it. Sometimes a layer of grime makes it feel engaged when it’s not. If that fails, try pulling the blade out while simultaneously tapping the back of the saw’s shoe (the metal plate) against a wooden surface. The impact can free a stuck mechanism. If it remains stuck, consult the manual for your specific model.
Is a Sawzall different?
Sawzall is Milwaukee’s trademarked name for their reciprocating saws. The blade change process is identical to other quick-release saws. For a fun look at the history, check out our piece on the Sawzall vs reciprocating saw terminology.
The Bottom Line
Changing a reciprocating saw blade is a fundamental skill. Get it wrong, and you risk a poor cut or an accident. Get it right, and the tool performs predictably every time. Remember the chain: disconnect power, know your clamp, seat the blade fully, lock it, test it.
Match the blade’s teeth to your project. Keep the clamp clean. That’s it. No secrets, no magic, just a few minutes of focused attention that saves you hours of frustration on the job.
