Your Guide on How to Use a Chop Saw Safely and Effectively
This post contains affiliate links. As an Amazon Associate, we earn from qualifying purchases.
Using a chop saw requires three things: wearing full safety gear (eyes, ears, lungs), plugging it into a dedicated 15-amp circuit, and verifying the blade is perfectly square to the fence before you make a single cut. Get those right, and the actual cutting is the easy part.
Most beginners get this wrong. They focus on the cutting motion and forget that the tool’s accuracy lives or dies in the ten minutes of setup before the blade ever spins. A chop saw that isn’t square will ruin every piece of lumber you feed it, and a shared power circuit will stall the motor at the worst possible moment.
This guide walks through that critical setup, the safe cutting sequence, and the blade choices that separate a clean cut from a splintered mess. We’ll also clear up the constant confusion between a basic chop saw and its more versatile cousin, the miter saw.
Key Takeaways
- Never operate a chop saw without safety glasses, hearing protection, and a dust mask. The combination of flying debris, 100+ decibel noise, and fine dust is a guaranteed health hazard.
- Your saw must be on a dedicated 15-amp circuit. Plugging it into a circuit shared with lights or other tools will cause a voltage drop, tripping the breaker mid-cut and potentially damaging the motor.
- Check blade-to-fence squareness with a metal combination square, not by eye. A blade off by even half a degree will produce gaps in joints that filler can’t hide.
- For clean cuts in finished wood, use a carbide-tipped blade with 60-80 teeth and an Alternate Top Bevel (ATB) tooth grind. A general-purpose 40-tooth blade will tear out the grain on trim and molding.
- Let the blade stop completely before raising it after a cut. Lifting a spinning blade can catch the offcut and hurl it across the shop.
Safety First: Non-Negotiable Prep
Before you start: A chop saw’s blade spins at over 3,000 RPM and can throw a wood chip through safety glasses if they aren’t ANSI Z87.1 rated. The noise exceeds 100 dB after two seconds, permanent hearing damage starts at 85 dB over an 8-hour exposure. The dust is fine enough to penetrate deep lung tissue. Mitigate these with certified glasses, over-ear muffs (not just plugs), and a respirator or N95 mask.
This isn’t a drill. The first time you see a 3-inch splinter of oak fired like a dart into a wall six feet away, the gear stops feeling optional. I learned this running a Dewalt DWS780 for a deck project without a mask; I coughed up grey phlegm for two days. Now the mask goes on before the saw gets plugged in.
The electrical setup is just as critical. A standard chop saw pulls 15 amps at full load.
A 15-amp chop saw running on a shared 20-amp circuit with a shop light and a radio will trip the breaker the moment the blade bites into dense pressure-treated lumber. The motor stalls, the workpiece can bind, and you’re left resetting a breaker instead of finishing a cut.
Plug it into an outlet that’s the only thing on that circuit. If you’re using an extension cord, make it a 12-gauge cord no longer than 50 feet. A skinny 16-gauge cord will overheat.
Chop Saw vs. Miter Saw: What Are You Actually Using?
This confusion wastes money and causes project errors. Here’s the breakdown you need at the store.
| Tool Type | Primary Function | Best For | Common Mistake |
|---|---|---|---|
| Basic Chop Saw | 90-degree crosscuts only. Blade moves straight down. | Cutting metal conduit, rebar, PVC pipe (with abrasive blade), or repetitive 90-degree lumber cuts. | Trying to cut baseboard angles. It can’t. |
| Miter Saw | Crosscuts AND angled cuts (miters) in the horizontal plane. | Picture frames, door/window trim, any project requiring angles other than 90 degrees. | Assuming it can cut bevels (angled cuts through the board’s thickness). A basic miter saw cannot. |
| Compound Miter Saw | Miters AND bevels (usually in one direction). | Crown molding, complex trim work where the cut angle isn’t a simple 90. | Forgetting to adjust the fence back for bevel clearance, causing a crash. |
| Sliding Compound Miter Saw | Miters, bevels, AND a sliding arm for wider cuts. | Wide boards (like 2x12s), large crown molding, cutting down wide shelving. | Sliding the arm away from the fence, which can cause deflection and a less accurate cut. |
If your tool has a table that rotates left and right, you have a miter saw, not a basic chop saw. The operating principles are identical, but your capabilities are greater. Most DIYers actually need a compound miter saw for its versatility. The sliding feature, like on a Bosch GCM12SD, is for width, not just convenience.
Setting Up for Success: Blade and Square
You can have a $600 saw and still get garbage cuts. The blade and alignment are everything.
Choosing the Right Saw Blade
Throw away the stock blade that came with the saw. It’s usually a 24-tooth general-purpose blade designed to cut everything poorly. For wood, you want carbide-tipped teeth. Look at the tooth grind.
A blade with an Alternate Top Bevel (ATB) grind has teeth that are angled left, then right, like a series of sharp points. It slices through wood fibers cleanly, making it ideal for finished lumber, trim, and plywood. A blade with a Flat Top Grind (FTG) has teeth that are flat across the top, designed for aggressive ripping in a table saw, not clean crosscuts. Using an FTG blade in a chop saw will tear out the back side of your workpiece every time.
For most DIY work, a 10-inch, 60-tooth ATB blade is the sweet spot. Need to cut aluminum trim? Get a non-ferrous metal cutting blade with about 80 teeth and a negative hook angle. Never use a wood blade on metal or a metal blade on wood.
The One-Minute Squaring Test
Your saw left the factory square. Shipping, a single drop, or regular use knocks it out. Check it every few months or if your cuts start fitting poorly.
- Unplug the saw.
- Retract the blade guard and lower the blade fully.
- Place a metal combination square against the saw’s fence and touch the blade body (not a tooth) near the front.
- Look for light between the square and the blade. No light means it’s square.
- Repeat at the back of the blade.
If you see light, you need to adjust the saw’s 90-degree stop. Consult your manual, it’s usually a simple Allen key adjustment on a bolt near the pivot. Don’t just trust the pointer on the saw’s scale.
The Cutting Process: Step by Step
This sequence builds muscle memory for safe, accurate cuts. Rushing any step is how mistakes happen.
Step 1: Measure, Mark, and Position
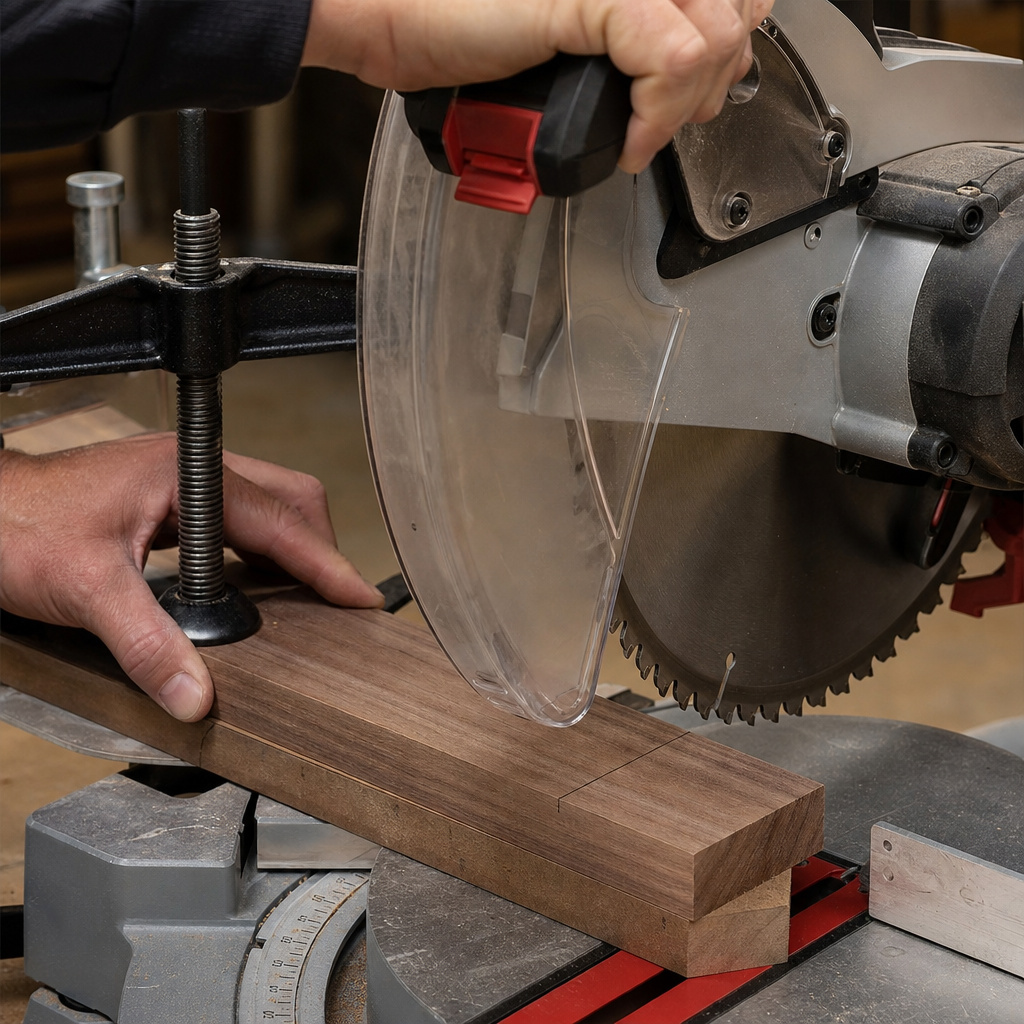
Measure twice, mark once with a sharp pencil or a knife line for ultra-fine work. Position the workpiece firmly against the fence with the waste side of the line facing away from you. Your hand should be at least 6 inches from the blade path. For pieces shorter than 12 inches, use a clamp. The force of the blade can twist a small piece right out of your grip.
Step 2: The Dry Run
This is the step everyone skips and immediately regrets on expensive hardwood.
Lower the unpowered blade onto your workpiece. The blade’s teeth should land exactly on your mark. If they don’t, adjust the workpiece or the saw’s angle. This two-second check prevents cutting a $50 piece of cherry an inch too short.
Step 3: Making the Cut
Start the saw. Let it reach full speed, you’ll hear the pitch stabilize. Lower the blade smoothly and steadily into the material. Don’t push down.
Let the teeth do the cutting. For thicker stock, a slight pause halfway through can help clear chips. Once the cut is complete, release the trigger but keep the blade down. Wait for it to stop spinning completely, about three seconds. Then raise it.
Why this order? Lifting a spinning blade can catch the newly cut-off piece (the “offcut”) and turn it into a projectile. I’ve seen a 6-inch block of pine punch through drywall. Let it stop.
What Can You Cut with a Chop Saw?
A basic chop saw is limited but powerful within its lane. A miter saw guide covers the wider range of angled cuts.
- Lumber & Timbers: 2x4s, 4x4s, deck boards. Maximum cutting depth is limited by the blade diameter (a 10-inch blade cuts a 2×4 at 90 degrees, a 2×6 at 45 degrees).
- Trim & Molding: Only if you only need 90-degree cuts. For crown or baseboard, you need a miter saw.
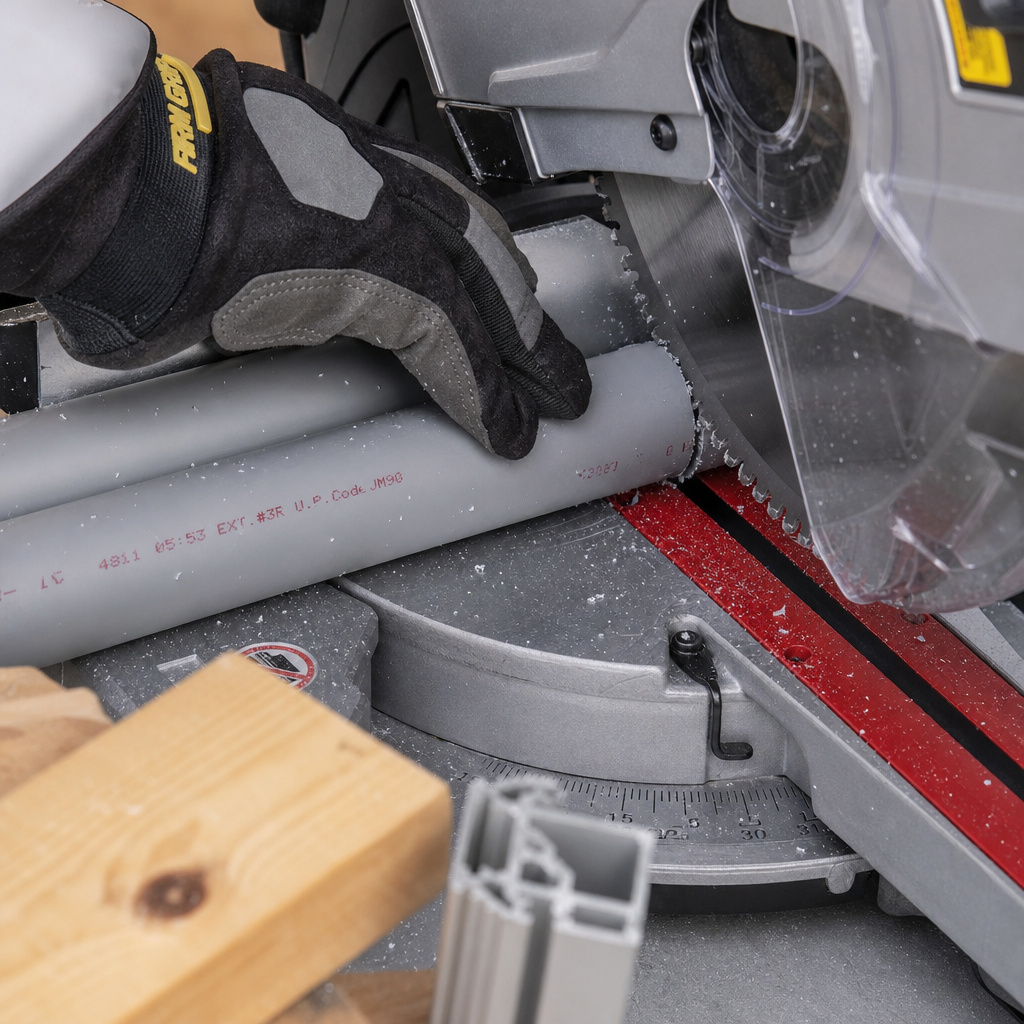
- PVC & Plastic Conduit: Use a fine-tooth (80+ tooth) blade or a dedicated plastic-cutting blade.
- Aluminum & Non-Ferrous Metals: Only with a proper non-ferrous metal cutting blade. A standard wood blade will shatter.
What it absolutely cannot cut: Steel, stone, brick, or large sheets of plywood. For steel, you’d need an abrasive cut-off saw, which is a different beast often called a “chop saw” in metal shops.
Troubleshooting Common Problems
Even with perfect setup, things go wrong. Here’s how to diagnose the usual suspects.
| Problem | Likely Cause | Immediate Fix | Long-Term Solution |
|---|---|---|---|
| Ragged, torn cut on the bottom | Dull blade or wrong tooth grind (FTG). | Slow your cut speed. | Replace blade with a sharp 60-80T ATB blade. |
| Burn marks on the wood | Blade is dirty with pitch or cutting too slowly. | Clean blade with pitch remover or simple green. | Let the blade cut at its own pace; don’t force it. |
| Saw “binds” or stalls in the cut | Workpiece is not supported, pinching the blade. | Ensure offcut is free to fall away. Support long pieces. | Check for a warped blade or misaligned fence. |
| Motor hums but blade won’t spin | Drive belt is broken or loose. | Unplug saw. Inspect belt under housing cover. | Replace belt following a saw blade replacement guide. |
| Inconsistent cut lengths | Workpiece is moving during the cut. | Use a clamp or a dedicated stop block. | Attach a sacrificial fence and install a permanent stop block system. |
If you encounter persistent burning or binding, the issue might be beyond a simple fix and require sharpening a saw blade or professional service.
Frequently Asked Questions
What’s the difference between a chop saw and a miter saw?
chop saw typically only makes straight 90-degree cuts, with the blade moving in a strict vertical arc. A miter saw has a rotating table that allows you to make angled crosscuts (miters). All miter saws can function as chop saws, but not vice-versa. Most tools sold for home use are actually miter saws.
Can I cut metal with my chop saw?
You can cut soft metals like aluminum, brass, or copper, but only if you install a blade specifically designed for cutting non-ferrous metal. These blades have a special tooth geometry and often a negative hook angle. Never use a standard wood-cutting blade on metal, the teeth can snap off and become dangerous projectiles. For cutting steel, you need an abrasive cut-off saw.
How do I support long pieces of wood?
This is critical for safety and accuracy. Use a roller stand, a makeshift table at the same height as your saw table, or even a stack of scrap wood. The goal is to prevent the long end of the board from sagging, which can bind the blade or cause the cut to close up and pinch the blade.
Why does my saw blade wobble?
Some visible wobble at the very tips of the teeth is normal due to the set (alternating bend) of the teeth. A true wobble in the blade body or flange indicates a problem: a warped blade, debris on the mounting flanges, or a bent arbor. Unplug the saw, remove the blade, clean all mounting surfaces, and re-install. If the wobble persists, replace the blade.
Is a sliding miter saw worth the extra cost?
For a homeowner, usually not. A fixed 10-inch or 12-inch compound miter saw will handle 99% of trim, framing, and decking tasks. The sliding feature is necessary for cutting wider boards (like a 2×12 at 90 degrees). If you regularly work with wide material, it’s essential. If not, the savings can buy a great blade and a solid stand.
The Bottom Line
Using a chop saw isn’t about strength or speed. It’s about respecting the tool’s power and understanding that accuracy is built before the cut. Spend the ten minutes to gear up, square up, and set up.
That discipline turns a intimidating power tool into the most reliable, repeatable cutter in your shop. Listen to the saw, a smooth, steady whine means you’re doing it right. A labored groan means stop, reassess, and let the tool do the work. Now go make some dust.
{
“@context”: “https://schema.org”,
“@type”: “HowTo”,
“name”: “How to Use a Chop Saw Safely and Accurately”,
“totalTime”: “PT15M”,
“tool”: [
{
“@type”: “HowToTool”,
“name”: “Chop saw or miter saw”
},
{
“@type”: “HowToTool”,
“name”: “Combination square or speed square”
},
{
“@type”: “HowToTool”,
“name”: “Pencil and tape measure”
},
{
“@type”: “HowToTool”,
“name”: “Clamp or hold-down (optional)”
}
],
“supply”: [
{
“@type”: “HowToSupply”,
“name”: “Carbide-tipped saw blade appropriate for material”
},
{
“@type”: “HowToSupply”,
“name”: “Hearing protection (earmuffs or plugs)”
},
{
“@type”: “HowToSupply”,
“name”: “Safety glasses”
}
],
“step”: [
{
“@type”: “HowToStep”,
“name”: “Put on safety gear and inspect the saw”,
“text”: “Wear safety glasses, hearing protection, and a dust mask. Check that the blade is sharp, tight, and clear of debris. Unplug the saw before any inspection.”
},
{
“@type”: “HowToStep”,
“name”: “Set up on a dedicated circuit”,
“text”: “Plug the saw into a 15-amp outlet on a dedicated circuit. Using a shared circuit can trip the breaker mid-cut.”
},
{
“@type”: “HowToStep”,
“name”: “Square the blade to the fence”,
“text”: “Unplug the saw. Retract the blade guard and lower the blade. Use a combination square to check the blade is 90 degrees to the fence at the front and rear. Adjust the saw’s stop if needed.”
},
{
“@type”: “HowToStep”,
“name”: “Mark and align your workpiece”,
“text”: “Measure and mark your cut line clearly. Place the workpiece firmly against the fence, aligning the mark with the blade path. Support long pieces with a stand.”
},
{
“@type”: “HowToStep”,
“name”: “Perform a dry run”,
“text”: “Without power, lower the blade to ensure it aligns perfectly with your mark. This confirms your setup and prevents a costly mistake.”
},
{
“@type”: “HowToStep”,
“name”: “Make the cut”,
“text”: “Start the saw, let the blade reach full speed, then lower it smoothly through the material. Do not force it. Let the blade stop completely before raising it.”
},
{
“@type”: “HowToStep”,
“name”: “Clear the area and inspect”,
“text”: “Remove the cut piece and offcut. Inspect the cut for smoothness and accuracy before making your next cut.”
}
]
}
{
“@context”: “https://schema.org”,
“@type”: “FAQPage”,
“mainEntity”: [
{
“@type”: “Question”,
“name”: “What’s the difference between a chop saw and a miter saw?”,
“acceptedAnswer”: {
“@type”: “Answer”,
“text”: “chop saw typically only makes straight 90-degree cuts, with the blade moving in a strict vertical arc. A miter saw has a rotating table that allows you to make angled crosscuts (miters). All miter saws can function as chop saws, but not vice-versa. Most tools sold for home use are actually miter saws.”
}
},
{
“@type”: “Question”,
“name”: “Can I cut metal with my chop saw?”,
“acceptedAnswer”: {
“@type”: “Answer”,
“text”: “You can cut soft metals like aluminum, brass, or copper, but only if you install a blade specifically designed for cutting non-ferrous metal. These blades have a special tooth geometry and often a negative hook angle. Never use a standard wood-cutting blade on metal, the teeth can snap off and become dangerous projectiles. For cutting steel, you need an abrasive cut-off saw.”
}
},
{
“@type”: “Question”,
“name”: “How do I support long pieces of wood?”,
“acceptedAnswer”: {
“@type”: “Answer”,
“text”: “This is critical for safety and accuracy. Use a roller stand, a makeshift table at the same height as your saw table, or even a stack of scrap wood. The goal is to prevent the long end of the board from sagging, which can bind the blade or cause the cut to close up and pinch the blade.”
}
},
{
“@type”: “Question”,
“name”: “Why does my saw blade wobble?”,
“acceptedAnswer”: {
“@type”: “Answer”,
“text”: “Some visible wobble at the very tips of the teeth is normal due to the set (alternating bend) of the teeth. A true wobble in the blade body or flange indicates a problem: a warped blade, debris on the mounting flanges, or a bent arbor. Unplug the saw, remove the blade, clean all mounting surfaces, and re-install. If the wobble persists, replace the blade.”
}
},
{
“@type”: “Question”,
“name”: “Is a sliding miter saw worth the extra cost?”,
“acceptedAnswer”: {
“@type”: “Answer”,
“text”: “For a homeowner, usually not. A fixed 10-inch or 12-inch compound miter saw will handle 99% of trim, framing, and decking tasks. The sliding feature is necessary for cutting wider boards (like a 2×12 at 90 degrees). If you regularly work with wide material, it’s essential. If not, the savings can buy a great blade and a solid stand.”
}
}
]
}