How to Sharpen Hedge Trimmer Blades: A Step-by-Step Guide
This post contains affiliate links. As an Amazon Associate, we earn from qualifying purchases.
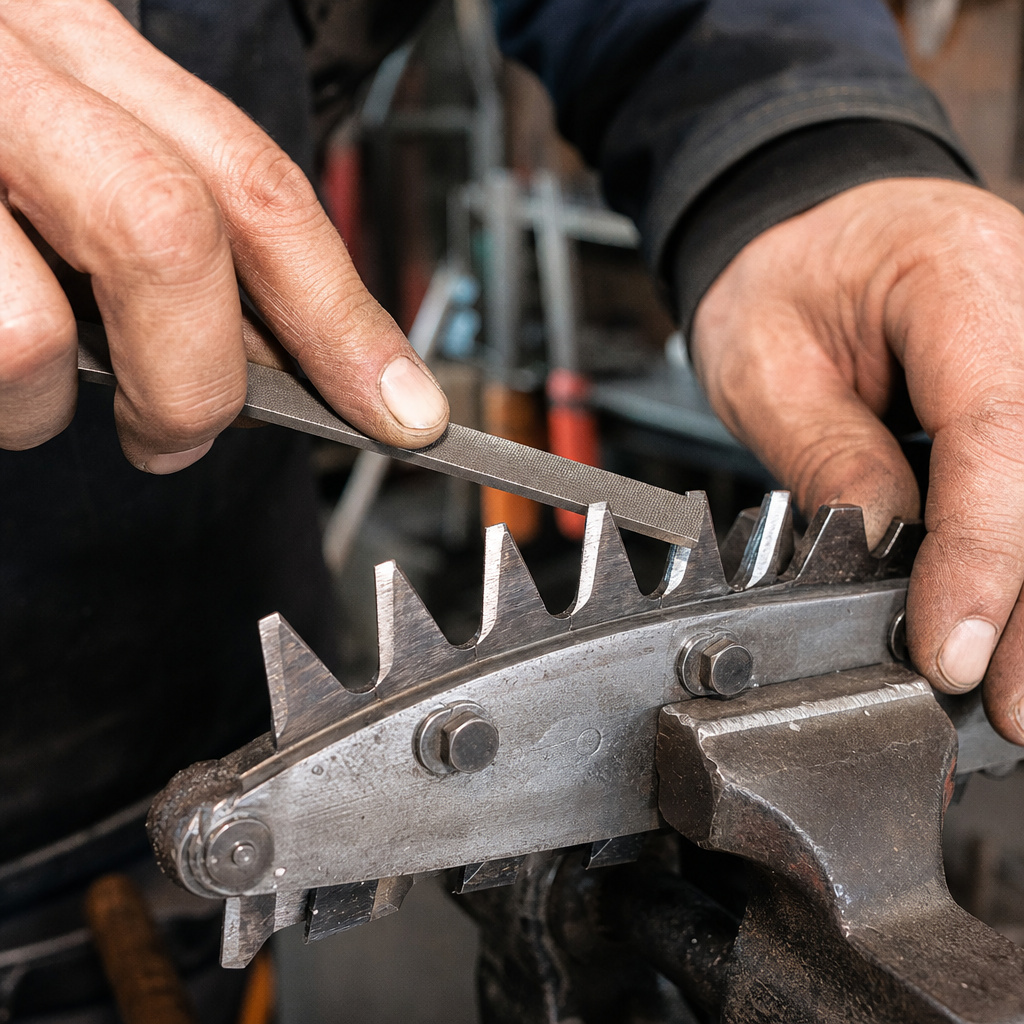
Sharpening hedge trimmer blades requires matching three things: the right file, the original bevel angle on each tooth, and a consistent, forward-only stroke. A flat mill file held at the factory bevel (usually 30-45 degrees) with 3-5 even strokes per tooth will restore the cutting edge. Skipping burr removal or lubrication guarantees a grabby, inefficient cut that returns to dull within a few uses.
Most people think a trimmer that tears leaves needs sharpening. Often, the blades just have a gap. They’ve worked loose and no longer scissor together. You spend an hour filing, reassemble it, and it still cuts like a butter knife. The noise is awful.
This guide walks through the real sharpening process from safety to the final test cut. You’ll learn how to diagnose a truly dull blade, clean off hardened sap, and file without changing the tooth geometry. We’ll also cover the one mistake that ruins blades faster than neglect.
Key Takeaways
- Sharpening is not always the fix. A 1/8-inch gap between the moving and stationary blades causes more ragged cuts than dullness. Tighten the mounting bolts and check alignment first.
- File in one direction only. A back-and-forth sawing motion dulls the file and rounds over the tooth’s sharp corner. Push forward, lift, reset.
- Clean before you sharpen. Sap and grit act like sandpaper on your new edge. Use a dedicated resin solvent, not just water.
- Match the original bevel. Filing at a steeper angle weakens the tooth; a shallower angle won’t bite. Find the existing angle and replicate it exactly.
- Lubricate with oil, not WD-40. WD-40 displaces water but evaporates. A light machine oil or lithium grease protects the metal and reduces friction between the blades.
Before You Start: Safety is Non-Negotiable
Before you start: The teeth are sharp even when dull, and the tool can still be energized. Always remove the battery or spark plug wire. Clamp the trimmer head securely, a slipping blade will slice through a glove. Wear safety glasses; a broken file chip or metal burr flies straight toward your eyes.
This isn’t a casual bench task. That trimmer head wants to move. I once tried to steady a lightweight electric model with my hand while filing.
The file skipped off a tooth, and the blade jerked sideways. It opened a half-inch gash in my leather glove. The cut was shallow, but the shock of seeing sliced leather an inch from my fingers was lesson enough. Use a vise or a heavy-duty clamp every single time.
What You’ll Need to Sharpen Hedge Trimmer Blades
Gathering the right tools first prevents mid-job frustration. You don’t need a professional sharpening jig.
- Flat Mill File: A 6-inch or 8-inch single-cut file. The Nicholson 8-inch flat mill file is a standard for a reason, it’s stiff and the teeth are aggressive enough for trimmer steel. A “bastard” cut is fine.
- Safety Gear: Leather-palm work gloves and ANSI-rated safety glasses. Not optional.
- Cleaning Agents: A resin solvent like Goo Gone or WD-40 Specialist Degreaser. A wire brush or old toothbrush.
- Vise or Clamp: A bench vise is ideal. A sturdy C-clamp and a scrap wood block can work if you’re careful.
- Lubricant: Light machine oil (3-in-1 oil) or lithium-based grease. Avoid aerosol sprays that attract dust.
- Burr Removal Tool: A fine-grit whetstone, a small diamond file, or the corner of your flat file.
A rotary tool with a grinding stone seems faster. It is. It’s also a great way to overheat the blade steel, drawing out its temper so it goes soft and dulls again after ten minutes of cutting. Stick with the file.
Is It Dull, or Is Something Else Wrong?
You notice brown, shredded leaf tips instead of clean green cuts. The motor strains and the trimmer vibrates excessively. It’s tempting to grab a file immediately.
Check the blade gap first. Look at the trimmer from the front. Slowly move the throttle or push the moving blade by hand.
Watch where the teeth of the moving blade pass the teeth of the stationary blade. They should overlap slightly, with virtually no daylight between them. If you see a consistent gap wider than a credit card thickness along any section, the blades are out of alignment.
| Symptom | Likely Cause | Immediate Fix |
|---|---|---|
| Ragged, torn cuts on one section only | Blade gap due to loose mounting bolts | Tighten the bolts securing the blade assembly. Check for worn blade guides. |
| Motor bogs down constantly, even on soft growth | Blunt cutting edges from hitting wire/fence | Proceed with sharpening. |
| Cuts cleanly in some spots, tears in others | Uneven tooth wear or damaged individual teeth | Sharpen, focusing on the worn teeth. Inspect for chips. |
| Excessive vibration and loud rattling | Worn blade bushings or bent cutting bar | This often requires professional repair or part replacement. |
If the blades are tight and aligned but still tear, then they’re truly dull. Time to sharpen. The process is the same for gas models like the Husqvarna 122HD60, corded electric, or battery-powered trimmers. The metal is similar.
The Step-by-Step Sharpening Process
This isn’t a race. Rushing creates an uneven edge that cuts worse than a uniformly dull one. Plan for about 30 minutes of focused work.
Step 1: Disconnect Power and Secure the Tool
Remove the battery pack. For corded models, unplug them. For gas trimmers, disconnect the spark plug wire and move it away from the plug. This is your single most important step. Clamp the trimmer’s cutting bar firmly in a vise, ensuring the blades are stable and accessible. You should not be able to wiggle it.
Step 2: Clean the Blades Thoroughly
Spray the entire blade set with resin solvent. Let it soak for five minutes to break down the sticky, hardened sap. Scrub vigorously with a wire brush, getting between every tooth. Wipe clean with a rag. Starting the blade sharpening process on dirty blades embeds abrasive grit that will ruin your file and your new edge.
Step 3: Identify the Cutting Bevel and Angle
Look closely at a tooth. One side is flat. The other side has a sloping face, that’s the cutting bevel. Your job is to refresh that slope, not create a new one. The angle is usually between 30 and 45 degrees from the flat side.
Hedge trimmer teeth are ground with a single primary bevel, typically between 30 and 45 degrees. The flat back of the tooth acts as a guide during the scissoring action. Sharpening only the beveled face maintains this geometry and cutting clearance, while filing the flat side reduces the gap between the blades and causes binding.
Hold your file against the bevel. It should sit flush. If it rocks, you’re at the wrong angle. This is the moment that separates a good sharpening from a hack job. Take ten seconds to get this right for the first tooth.
Step 4: File Each Tooth with Consistent Strokes
Place the file on the bevel of the first tooth. Push the file forward along the angle, following the direction of the cutting edge. Apply firm, even pressure. Lift the file off, return to the start, and push again. Do not drag the file backward, that dulls the file.
Give each tooth the same number of strokes, 3 to 5 is usually sufficient. Count them. This ensures even metal removal and keeps the blade balanced. Work your way down the entire blade, then repeat for the other blade if it’s a double-sided model.
What happens if you skip this: Inconsistent strokes create teeth of slightly different heights. The taller teeth take all the cutting force, wear faster, and the trimmer develops a choppy, uneven action.
Step 5: Remove the Burr (De-burring)
After filing, a thin, razor-sharp wire of metal, a burr, will form on the flat back edge of each tooth. You can feel it with your fingernail. This burr will fold over during use, making the blade feel dull immediately.
Lightly drag a fine whetstone or the corner of your file across the flat back of each tooth once or twice. You’re not sharpening this side; you’re just knocking off the burr. A clean, sharp tooth should feel crisp on both sides.
Step 6: Lubricate the Blades
Blade metal is now bare and vulnerable to rust. Apply a light coat of machine oil or a smear of lithium grease along the entire cutting bar and between the moving blades. This is a critical part of post-sharpening lubrication that prevents corrosion and ensures smooth movement. Wipe off excess.
Step 7: Check Alignment and Test
Unclamp the trimmer. Manually move the blades back and forth. They should glide smoothly, parallel to each other, and close without the teeth touching. If they rub, the blades may be slightly bent or there’s still a burr. Reconnect the power source. Find a sacrificial branch and make a few test cuts. It should slice cleanly with minimal vibration.
How Often Should You Sharpen Hedge Trimmer Blades?
There’s no fixed schedule. It depends on what you’re cutting and how often.
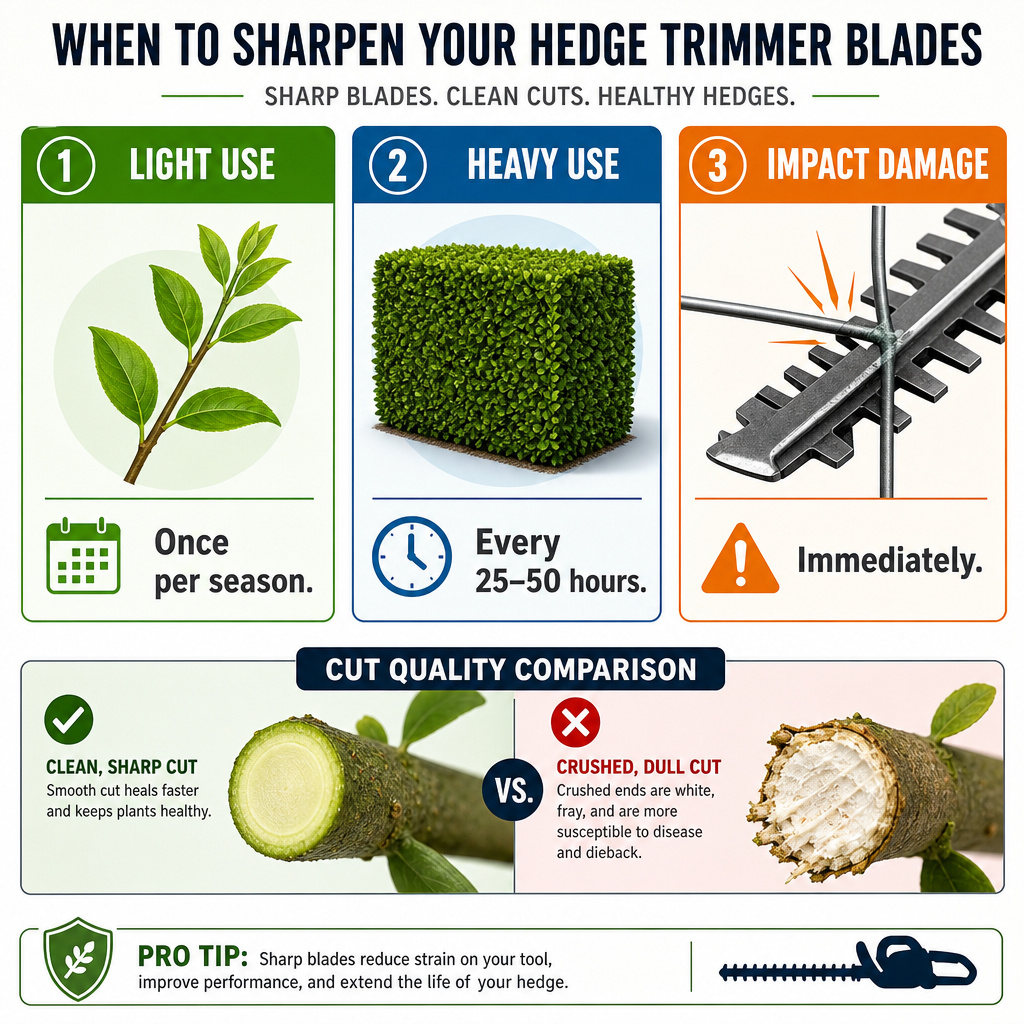
- Light residential use (soft, new growth): Once per season, at the start.
- Heavy use or formal hedges: Every 25-50 hours of runtime.
- After hitting wire, fencing, or rock: Immediately. That impact rolls the edge over.
The best indicator is performance. When the tool requires more pressure, leaves more debris, and the cut ends look white and crushed instead of green and clean, it’s time. A quick visual check helps too.
Shine a light across the teeth. A sharp edge will reflect a thin, bright line. A dull edge looks rounded and reflects a wider, diffuse band of light.
Common Sharpening Mistakes to Avoid
I’ve made the first one. It’s costly.
- Using a Dremel or angle grinder. The speed generates heat that turns the hardened steel blue and soft. The edge might feel sharp, but it won’t last. The file is slow, cool, and controlled.
- Sharpening the flat side of the tooth. This destroys the scissor clearance. The blades will pinch and bind, overloading the motor. Only ever file the beveled side.
- Sawing back and forth with the file. File teeth are designed to cut on the push stroke. Dragging it back blunts the file’s own teeth and makes your work harder.
- Skipping the cleaning step. Filing over sap and grit is like sanding your blade. You’ll get a rough, weak edge filled with microscopic fractures.
- Forgetting to lubricate. The fresh steel will develop surface rust within a day or two in a humid garage, pitting your new edge.
When to Replace Blades Instead of Sharpening
Sharpening can’t fix everything. Know when to stop.
- Visible chips or cracks in multiple teeth.
- Excessive play or wobble in the blade assembly that tightening doesn’t fix (worn bushings).
- A bent cutting bar. If it doesn’t sit flat on your bench, it’s done.
- Severe wear where the teeth have lost over a third of their height.
Replacement blades for common models are often available from the manufacturer. For an old or cheap trimmer where blades cost more than half a new tool, replacement might be the more economical choice. For maintaining sharp blades on a quality tool, regular filing will extend its life for years.
Frequently Asked Questions
Can I use a sharpening stone instead of a file?
You can, but it will take much longer. A diamond sharpening stone will work for light touch-ups. For reshaping a dull edge, the aggressive cutting action of a mill file is far more efficient. The stone is better suited for the final de-burring step.
Do I need to sharpen both blades?
It depends on your trimmer’s design. Most have one stationary blade with straight teeth and one moving blade with double-beveled teeth. You only sharpen the beveled teeth on the moving blade. If both blades move and have bevels, sharpen both. Check your manual.
Why does my trimmer still vibrate after sharpening?
Vibration usually points to a mechanical issue, not sharpness. The most common cause is a blade gap or misalignment. Re-check that the blades are parallel and the mounting bolts are tight. Worn blade drive gears or a bent shaft can also cause this.
What’s the best lubricant after sharpening?
light machine oil or a dry-film lubricant like lithium grease. Avoid thick, sticky greases that attract plant debris. WD-40 is a water displacer and degreaser, not a lasting lubricant, it will evaporate and leave the metal unprotected.
How can I tell if I’ve sharpened at the wrong angle?
The tooth will have a wider or narrower bevel than its neighbors. Visually, it will look different. In use, that tooth may snag or skip because it’s not meeting its counterpart correctly. Consistency is key; match what’s already there.
The Bottom Line
Sharpening hedge trimmer blades is a straightforward, satisfying maintenance task that saves money and keeps your plants healthy. The core of it is simple: secure the tool, clean it, match the existing angle with a file, and lubricate. The real skill is in the diagnosis, knowing when to tighten bolts instead of reaching for the file. A sharp blade cuts cleanly, reduces strain on the motor, and makes the job quieter and faster. Do it once, follow these steps, and you’ll never pay for a professional sharpening again. Your hedges will thank you.