
Your Guide on How to Drill in Aluminum Without Chip Welding
This post contains affiliate links. As an Amazon Associate, we earn from qualifying purchases.
To drill in aluminum cleanly, you need three things matched: a drill bit with a high helix angle (35–45°) and polished flutes, a feed rate high enough to cut rather than rub, and a method to evacuate the stringy, gummy chips before they weld to the tool. For 6061-T6, start at 300 surface feet per minute with a 0.007″ feed per revolution; for harder 7075-T73, drop to 200 SFM and 0.005″ feed. Going slower than this lets heat build, the aluminum tears, and you’ll hear a high-pitched squeak before the bit jams.
That squeak is aluminum tearing. It’s the sound of soft metal smearing and adhering to the cutting edge because the feed rate is too low for the spindle speed. The chip isn’t shearing off cleanly; it’s getting dragged, heated by friction, and then welding itself to the drill’s flutes. Once that happens, the hole walls get scored, the diameter runs oversize, and the next chip has nowhere to go.
What follows is a breakdown of the alloy you’re actually holding, the bit geometry that clears its chips, and the two proven systems for getting those chips out of a deep hole. By the end, you’ll know whether to reach for a parabolic-flute HSS bit or a coolant-through solid carbide drill, and exactly how fast to run it.
Key Takeaways
- Aluminum alloy hardness dictates your starting speed and feed. 6061-O (soft) can run at 700+ SFM with carbide; 7075-T73 (hard) needs to stay under 275 SFM with HSS to avoid burning the edge.
- Feed rate is your primary defense against squealing and welding. A high feed forces a thick chip that carries heat away; a low feed lets the bit rub, generating friction heat that softens the aluminum and makes it stick.
- Use peck drilling for holes deeper than 4x the drill diameter if you don’t have coolant-through capability. Each peck pulls the long chip out of the flutes before it can wrap around the shank.
- A coolant-through drill, like the Guhring RT 100 T AL, eliminates pecking for holes up to 25x diameter. Pressurized fluid pushes chips out the flutes from the bottom, but it demands a compatible machine and proper coolant pressure.
- Polished flutes and a high helix angle (over 35°) are non-negotiable for aluminum. They reduce the friction that causes chip welding. A standard 25° helix bit for steel will clog within the first inch.
What Drill Bit Works Best for Aluminum?
The best drill bit for aluminum has a high helix angle, polished flutes, and a sharp, uncoated cutting edge. You’re fighting chip evacuation, not wear. Aluminum is soft, so extreme hardness isn’t the goal; slickness is.
For drilling aluminium, the drill used must take the deviation of diameter caused by the expansion of the material on one hand, and the differing amounts of expansion of tool and workpiece on the other into consideration. Twist drills are classified into three groups: N, H and W types. The type W with a point angle of 140⁰ and a helix angle between 30⁰ and 40⁰ is suitable for aluminium.
The European Aluminium Association specifies the Type W geometry. That 30–40° helix is critical, it’s a steeper spiral that acts like a conveyor belt, pulling chips up and out of the hole aggressively. A standard bit for steel has a helix around 25°; its shallower spiral can’t generate enough lifting force for aluminum’s long, stringy chips. They pack in the flutes and jam.
Solid carbide bits offer the best performance for diameters under 20mm, especially in harder alloys like 7075. Their rigidity minimizes deflection, which keeps holes straight and on-size. High-speed steel (HSS) with a high helix is the cost-effective workhorse for most general-purpose drilling in 6061 and 2024 alloys. Avoid titanium nitride (TiN) or black oxide coatings here. While great for steel, these coatings can increase friction against aluminum, encouraging the very chip welding you’re trying to prevent. A polished, uncoated HSS bit often works better.
For repetitive production work or deep holes, a dedicated aluminum drill is worth the investment. The Guhring RT 100 T AL is a solid carbide, coolant-through drill designed specifically for aluminum and its alloys. Its flute design and internal coolant channels are engineered to solve the chip evacuation problem at the source.
The part nobody mentions: The point angle matters, but not as much as the helix. A 135° split point is excellent for starting without walking, but if that bit has a low helix, it will still clog. Always check the helix spec first.
Speed and Feed: The Numbers That Prevent Squealing
Running the correct surface speed and feed rate is what separates a clean cut from a torn, squealing mess. The numbers aren’t guesses; they’re based on the alloy’s hardness and the tool material. Too slow, and you rub. Too fast, and you burn a HSS bit.
Here’s the hard data. These starting points come from aggregated manufacturer specs for common alloys.
| Aluminum Alloy & Condition | Typical Hardness (BHN) | HSS Drill (SFM) | Carbide Drill (SFM) | Feed Rate (Inches per Revolution) |
|---|---|---|---|---|
| 6061-O (Annealed) | 30 | 250–400 | 700–1200 | 0.005–0.012 |
| 6061-T6 | 95 | 200–350 | 600–1000 | 0.004–0.010 |
| 2024-T3 / T4 | 120 | 175–300 | 500–850 | 0.004–0.009 |
| 7075-T73 | 135 | 175–275 | 550–900 | 0.003–0.009 |
Feed rate is your control against heat. Think of it this way: a higher feed rate forces the cutting edge to take a thicker chip. That chip acts as a heat sink, carrying the friction energy away from the cut zone. A low feed rate lets the cutting edge skate over the material, generating intense localized heat through rubbing. That heat softens the aluminum further, it smears, and you get the telltale squeal followed by a welded bit.
Where this goes sideways: Drilling 7075-T73 at 300 SFM with a 0.003″ feed. The speed is too high for the hard alloy, the feed is too low to cut cleanly, and the bit will overheat and dull within a few holes. Drop to 200 SFM and bump the feed to 0.006″ to hear a clean cutting sound instead of a squeak.
Start at the middle of the range and adjust. If the chips are turning blue or the aluminum is smearing, reduce the speed. If the drill is chattering or breaking, reduce the feed. For a 1/4″ HSS drill in 6061-T6, a good starting point is 3000 RPM (approx. 200 SFM) and a hand-fed pressure that yields a steady, curly chip.
Lubrication and Coolant: It’s Not (Just) About Cooling
The primary job of lubricant or coolant when drilling aluminum is chip evacuation, not temperature control. A steady stream washes chips out of the hole and off the flutes, preventing them from re-cutting or packing.
The European Aluminium Association recommends an emulsion blend of 10–12% for general drilling. This thin fluid is excellent for flushing. For manual drilling in a home shop, a simple cutting oil or even WD-40 is vastly better than dry. The oil reduces the friction that causes aluminum to gall and stick to the bit. It turns a snarled, welded mess into a manageable stream of chips.
For deep holes or production work, coolant-through drills change the game. Tools like the Guhring RT 100 T AL have internal channels that deliver pressurized coolant directly to the cutting edges. This serves two functions: it cools the cut and uses the fluid pressure to push chips out of the flutes from the bottom up. The AAM manual states this is the most efficient chip-removal method for deep holes.
If you don’t have coolant-through capability, your alternative is peck drilling. Retract the drill frequently, every 1-2 times the diameter for deep holes, to break the chip and clear the flutes. This adds cycle time but saves tools and ensures a clean hole.
The Peck Drilling vs. Coolant-Through Trade-Off
Your method for drilling a hole deeper than four times its diameter comes down to one choice: peck with a standard drill, or invest in a coolant-through system and run straight to depth. One costs time, the other costs tooling and machine capability.
| Method | Best For | How It Works | The Catch |
|---|---|---|---|
| Peck Drilling | Low-volume work, any drill press or hand drill. | Drill a short depth (e.g., 1xD), retract fully to clear chips, repeat. | Adds significant time. Risk of work-hardening the hole bottom if you re-cut chips. |
| Coolant-Through Drill | High-volume, CNC, or dedicated deep-hole work. | Pressurized coolant flows through the drill, pushing chips out the flutes continuously. | Requires a compatible machine, higher coolant pressure, and a more expensive tool. |
The Guhring RT 100 T AL is a classic example of a dedicated coolant-through drill for aluminum. Its product sheet emphasizes observing coolant pressure and recommends its RT 100 Al, Series 5768 for piloting holes. This isn’t a casual suggestion. Using a pilot hole with these systems ensures straighter, more accurate deep holes and protects the expensive carbide drill.
Common mistake: Using peck drilling with a mist coolant spray. The blast of air and coolant from the mist system can blow the cleared chips right back into the hole as you retract. If you’re pecking, retract completely away from the workpiece to let chips fall clear, or use a flood coolant setup that washes them away.
So, which wins? For a one-off hole in a motorcycle frame, peck with plenty of oil. For drilling 100 holes in an aluminum fixture plate, a coolant-through carbide drill pays for itself in saved time and consistent quality.
Drilling Different Aluminum Alloys: From Soft to Stubborn
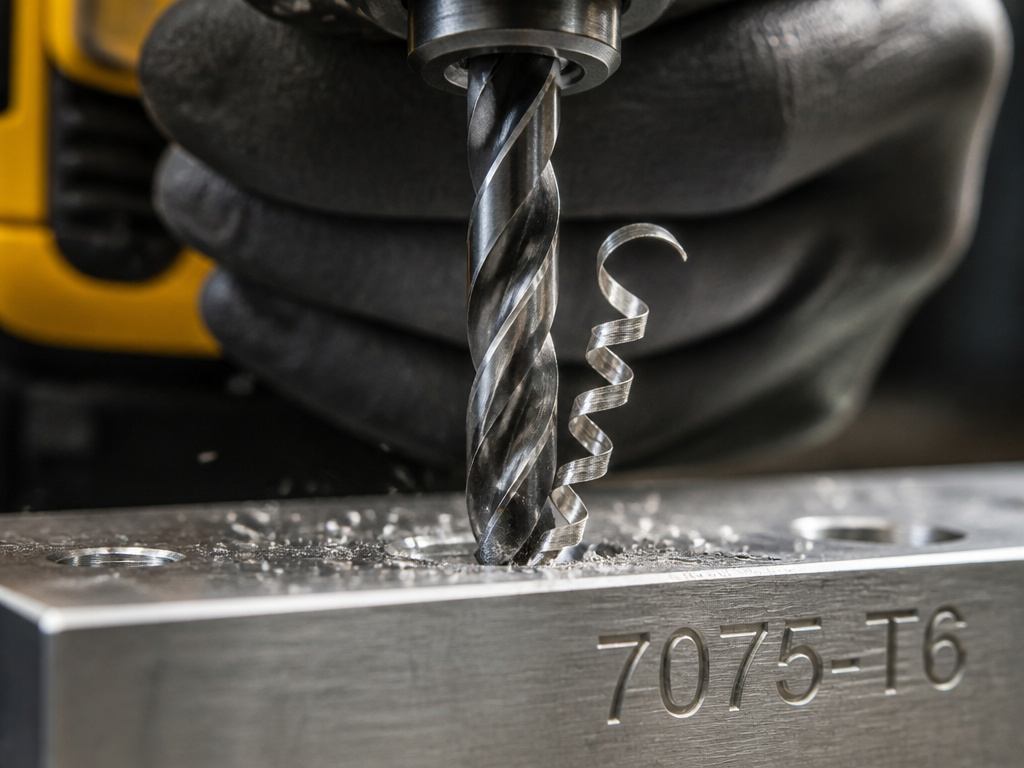
Not all aluminum is created equal. Treating 6061-O like 7075-T73 is a direct path to broken tools and bad holes. The key variable is hardness, which directly dictates your speed, feed, and tool material choice.
Soft Alloys (e.g., 6060, 6061-O, 1100): These have a Brinell hardness under 40. They’re gummy and have a strong tendency to weld. Use the highest feeds and speeds your tool can handle, carbide excels here. The high feed produces a thick chip that shears cleanly, minimizing smearing.
Medium-Strength Alloys (e.g., 6061-T6, 6082, 2024-T3): This is the sweet spot for most DIY and professional work. The AAM manual notes that even medium-strength wrought automotive alloys like forging alloy 6082 require close control over cutting parameters, tool design, and lubrication for satisfactory surface quality and productivity. In other words, you can’t just wing it. Follow the speed/feed table, use a sharp, high-helix bit, and lubricate.
High-Strength Alloys (e.g., 7075-T6, 7075-T73): These approach the hardness of mild steel. Treat them with more respect. Reduce speeds, use positive rake angles, and consider solid carbide for durability. Drilling these dry is asking for premature tool failure.
I learned the alloy lesson the hard way on an aircraft rudder pedal project. I was blasting through 6061-T6 with a cheap HSS bit, no problem. Switched to 7075-T7351 for the brackets, used the same settings, and smoked a brand-new bit in three holes. The chips went from silver curls to blue dust. Now I always check the alloy stamp first.
The takeaway: Identify your material. A “T6” temper is vastly different from an “O” temper. That one letter changes everything.
Step-by-Step: Drilling a Clean Hole in Aluminum
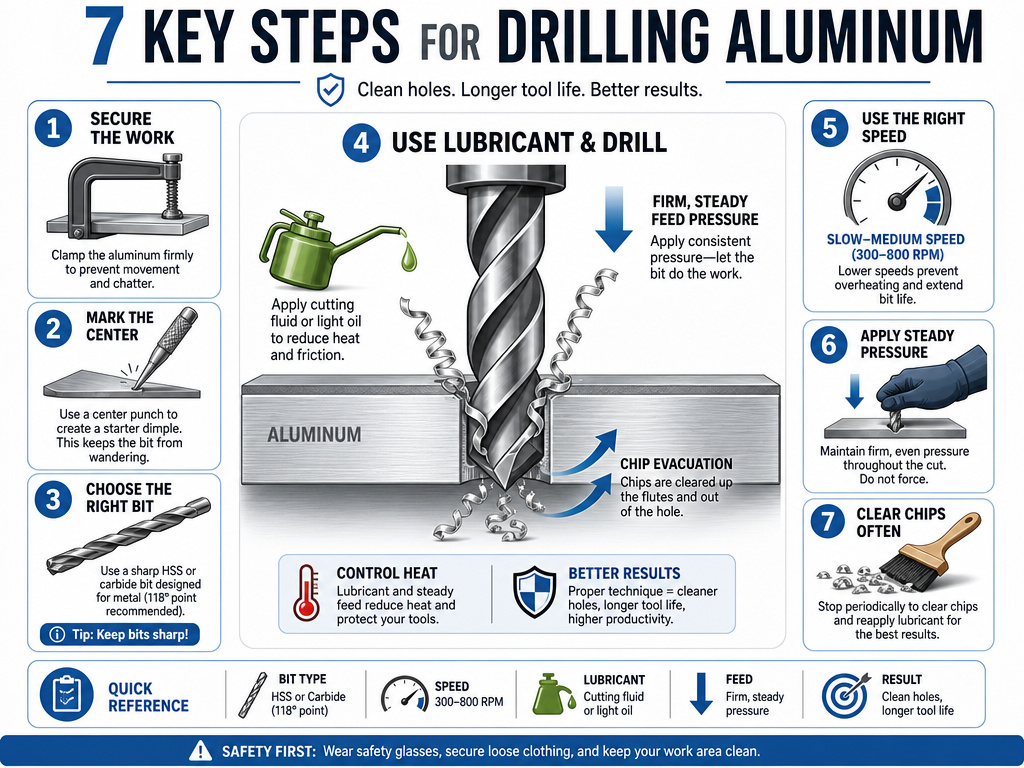
Follow this sequence to avoid the common pitfalls. The goal is a hole that’s on-size, with a smooth finish, and no welded-on aluminum.
- Secure the workpiece. Use clamps or a vise with soft jaws. Aluminum is soft and will grab the drill bit if it spins, ruining the hole and potentially causing injury.
- Center punch and pilot drill. For holes over 1/8″, a small pilot drill (e.g., 1/8″ for a 1/4″ final hole) guides the larger bit and reduces the cutting force needed. This is especially helpful for hand drilling.
- Select the correct bit. Use a sharp, high-helix (35°+) drill bit. For one-off holes, a polished HSS bit is fine. For many holes or hard alloys, step up to solid carbide.
- Apply lubricant. Flood the area with cutting oil, mist coolant, or even a spray lubricant. Reapply frequently.
- Set your machine. Dial in the RPM based on the bit diameter and your alloy’s SFM from the table. For a drill press, set the feed stop for consistent pressure.
- Drill with firm, steady pressure. You must feed the bit. Letting it “self-feed” or applying too little pressure causes rubbing, heat, and welding. Listen for a consistent cutting sound, not a squeal.
- Clear chips aggressively. For holes deeper than 4xD, peck. For through-holes, slow the feed just before breakthrough to prevent the bit from grabbing and tearing the exit side.
Skip step 6 at your peril. Insufficient feed pressure is the root cause of 80% of aluminum drilling problems. The bit must be cutting, not polishing.
Frequently Asked Questions
Can I use a standard drill bit for steel on aluminum?
You can, but you’ll fight it. Standard bits have a lower helix angle (around 25°) and rougher flutes designed for the shorter chips of steel. In aluminum, they will clog faster, generate more heat, and produce a poorer finish. A dedicated high-helix bit for aluminum is a small investment that pays off immediately in cleaner holes and less frustration.
Why is my aluminum squealing when I drill?
The squeal is the sound of tearing, not cutting. It happens when your feed rate is too low for your spindle speed. The cutting edge is rubbing and smearing the aluminum instead of shearing a clean chip. The friction heat softens the metal, it adheres to the bit, and the vibration creates the noise. Increase your feed pressure or reduce your RPM to eliminate it.
How deep can I drill without pecking?
The rule of thumb is 4 times the drill diameter. Beyond that depth, chip evacuation becomes too difficult for a standard drill, and pecking becomes necessary. If you have a coolant-through drill and system, you can drill much deeper, the Guhring RT 100 T AL is rated for depths up to 25 times its diameter.
Is WD-40 a good lubricant for drilling aluminum?
Yes, for occasional drilling, WD-40 is an excellent choice. Its primary benefit is its light oil content, which reduces the friction and adhesion between the aluminum and the drill bit. It’s far superior to drilling dry. For extensive work, a dedicated cutting oil or mist coolant is better, as WD-40 can evaporate and doesn’t cool as effectively.
What’s the difference between drilling 6061 and 7075 aluminum?
6061-T6 is a medium-strength, general-purpose alloy. It’s forgiving and can be drilled at higher speeds and feeds. 7075-T73 is a high-strength aerospace alloy, nearly twice as hard. It requires lower speeds, sharper tools, and more care to avoid burning the cutting edge. Always use lubricant with 7075, and consider a carbide bit for anything more than a few holes.
Before You Go
Drilling aluminum cleanly isn’t about brute force or the most expensive tool. It’s about understanding the material’s gummy, sticky nature and outsmarting it with geometry and mechanics. Match a high-helix bit to your specific alloy’s hardness, run it with a feed rate high enough to hear a clean cutting sound, and have a plan to get the chips out of the hole before they cause trouble.
For most home shop projects in 6061-T6, a sharp HSS parabolic flute bit, some cutting oil, and confident feed pressure will give you perfect holes. When you step up to harder alloys, deeper holes, or production work, that’s when the specifics, coolant-through drills, precise SFM tables, and the distinction between a 6082 and a 6060, start to pay for themselves. The difference is in the details, and now you know them.
