
How to Drill Out a Bolt Safely Using the Key 12mm Depth Rule
This post contains affiliate links. As an Amazon Associate, we earn from qualifying purchases.
Drilling out a broken bolt requires matching three things: a left-hand drill bit, a depth limit of 12mm, and a carbide burr for hardened steel. The 12mm depth stops you before you hit the threads, and the left-hand rotation can spin the bolt out before you even need an extractor. Most people drill too deep and ruin the threads, then wonder why the new bolt won’t hold.
That depth limit is the distance between a clean repair and a ruined part. Tesla’s service bulletin for broken liftgate ball studs specifies a 3.5mm drill bit to a depth of 12mm.Jaguar’s procedure for sheared exhaust manifold bolts calls for a 3mm pilot hole, also to 12mm, before opening it up. The reason is mechanical, not arbitrary. A bolt’s threads start about 12mm into the hole. Drill past that, and you’re cutting into the parent material’s threads. The fix goes from a bolt replacement to a time-sert or heli-coil job.
What follows is the sequence that works on everything from a snapped exhaust stud to a sheared sub-frame bolt. You’ll need a specific set of tools, a clear understanding of bolt grades, and the patience to stop at 12mm.
Key Takeaways
- Stop drilling at 12mm. This is the standard depth before threads begin in most automotive and machinery applications. Drilling deeper destroys the threads in the hole, turning a simple extraction into a major repair.
- Use a left-hand drill bit. A standard right-hand bit spins clockwise and can tighten the broken piece further into the hole. A left-hand bit spins counterclockwise and often backs the bolt out before you even switch to an extractor.
- Identify bolt grade before you start. A bolt marked “8.8” is a medium-strength steel bolt and may require heat for removal. A bolt marked “10.9” or “12.9” is a high-strength or Torque-to-Yield (TTY) bolt; hammering on it first is mandatory to break the friction bond.
- Carbide beats hardened steel. For broken exhaust manifold bolts, suspension bolts, or any bolt that feels unusually hard, a standard HSS drill bit will skate and dull. You need a solid carbide bit or a carbide burr to start the hole.
- Never reuse a Torque-to-Yield (TTY) bolt. These bolts are designed to stretch once. Reusing them is a documented cause of failure, as noted in the NHTSA recall for BMW rear sub-frame bolts.
The 12mm Rule That Saves Threads
The single most important number in this process is 12mm. Drill your pilot hole deeper than that, and you are almost guaranteed to damage the internal threads of the hole. This measurement is printed in OEM service bulletins for a reason.
Where this goes sideways: Drilling until the bolt “feels loose.” The threads in the casting or block typically start between 12mm and 15mm down. If your drill bit breaks through the bottom of the bolt shank and enters the threaded portion of the hole, it will instantly grab and tear the threads. The repair now requires a thread insert, which is a more precise, frustrating job.
The 1972 patent for a broken-stud removal method hinges on this same principle. The inventor, Wise J. Hardin, designed a drill bit that expands in diameter after a set depth. The goal was to increase torque on the bolt shank to force it out, explicitly to avoid “damage to the threads of the tapped bore.” The modern interpretation is simpler: just stop drilling.
| Application | Pilot Drill Size | Max Depth (Stop Here) | Source |
|---|---|---|---|
| Tesla Model Y Liftgate Ball Stud | 3.5 mm | 12 mm | Tesla Service Bulletin |
| Jaguar XK8 Exhaust Manifold Bolt (8.8 Grade) | 3 mm (1/8″), then 6 mm (1/4″) | 12 mm (1/2″) | Jaguar Technical Bulletin |
| General Automotive Bolt (M8-M12) | 3-4 mm | 12-15 mm | Common Machinist Practice |
Mark your drill bit with a piece of tape or a stop collar. Do not eyeball it. Your depth perception fails under a drill press or in a tight engine bay. That 12mm mark is your finish line.
What You’re Actually Drilling: Bolt Grades and Why They Matter
Not all broken bolts are created equal. The numbers stamped on the bolt head tell you what you’re up against. This determines your entire approach.
A bolt marked 8.8 is a medium-carbon steel bolt, common on exhaust manifolds and non-critical brackets. It’s tough but drillable with a quality HSS bit. A bolt marked 10.9 or 12.9 is a high-strength or alloy steel bolt. These are often Torque-to-Yield (TTY) bolts, used in cylinder heads and main bearing caps. They are hardened. A standard drill bit will skate off the surface like it’s glass.
The GM engine technical bulletin for 2002-2009 2.8L-4.2L engines is blunt about TTY bolts: “the friction between a TTY bolt and threads may cause the bolt to bind or break upon removal attempts.Their prescribed fix is hammering.
Before you start: Put on safety glasses. Metal shavings are sharp and travel fast. If you’re using heat or an extractor that could snap, a face shield is better. Gloves protect your hands from sharp edges and heat, but never wear them near a rotating drill chuck.
For any high-strength bolt, take a punch and a hammer and rap the center of the broken stub several times. This vibration can break the friction bond and loosen corrosion. For an 8.8 bolt stuck with thread locker, you’ll need heat. Jaguar’s procedure for their problematic 8.8 exhaust bolts specifies applying a small torch flame to the bolt shank, not the aluminum head, to melt the locking compound.
The 3-Tool Setup You Can’t Skip
You need more than a drill and a prayer. The right three tools make the difference between a 20-minute fix and an afternoon of profanity.
- A Center Punch. This isn’t optional. Without a solid dimple to start, your drill bit will wander off-center. Once it’s off-center, you cannot recover. You’ll drill into the side of the hole and ruin the threads. Hit the punch hard enough to make a definitive crater.
- A Left-Hand Drill Bit. This is your first extractor. Standard drill bits rotate clockwise (right-hand). A left-hand bit rotates counterclockwise. As it cuts into the bolt, that counterclockwise torque can actually spin the broken piece out before you finish the hole. Start with a small size, like 3mm (1/8″). The left-hand drill bit is the single most underrated tool in this process.
- A Solid Carbide Bit or Burr. For hardened 10.9 or 12.9 bolts, high-speed steel (HSS) is useless. You need carbide. A cobalt bit is a middle ground, but for truly hardened steel, only solid carbide will cut. The Matco Tools Bust-N-Out Kit (ZB312) includes carbide burrs designed specifically for flattening the broken surface and locating the center point on sub-surface broken bolts.
Skipping the center punch guarantees a wandering drill. Skipping the left-hand bit throws away a 30% chance of easy removal. Skipping carbide on a hardened bolt means you’ll burn through three bits and make zero progress.
The Step-by-Step Drill-Out (And the Step Everyone Rushes)
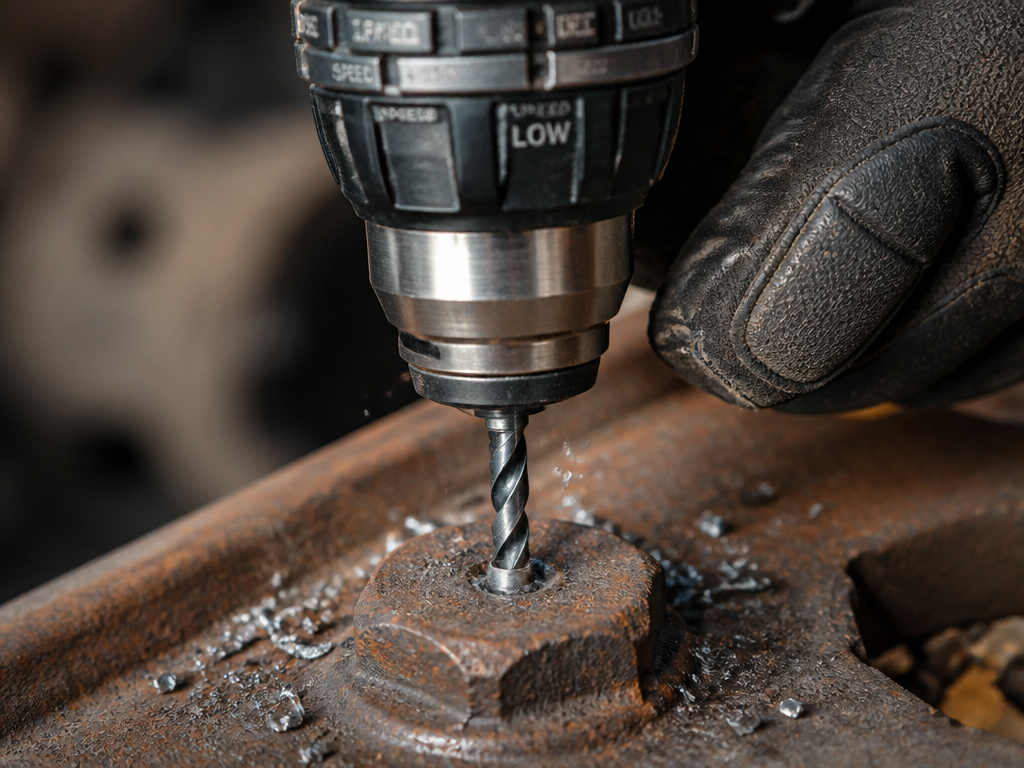
The process is linear, but one step has no visual feedback. That’s where people rush and break things.
Step 1: Clean and Punch. Brush away any debris and spray the area with a penetrating oil. Let it sit. Then, place your center punch exactly in the middle of the broken bolt and strike it firmly. Do this two or three times. The dimple must be deep and clear.
Step 2: Start the Pilot Hole. Use a small left-hand drill bit (3mm or 1/8″). Set your drill to a low speed with high torque. Place the bit in your punch mark and apply steady, firm pressure. Let the bit cut. If it’s a hardened bolt and the bit skates, switch immediately to a carbide burr or bit to create a starter divot.
Step 3: Drill to 12mm. This is the critical step. Drill straight in, keeping consistent pressure. Clear the chips often by pulling the bit out. Drill until your tape mark hits the surface of the workpiece. Stop. Do not drill further. You have now created a pilot hole that ends in the bolt shank, not the threads.
Step 4: Upsize or Extract. If the bolt hasn’t backed out from the left-hand drilling, you have two paths. For softer bolts, you can often use the next size left-hand bit (e.g., 4.5mm). For harder bolts or if the extractor is your plan, switch to a standard right-hand bit that matches the inner diameter of your extractor. Drill again to the same 12mm depth.
Step 5: Drive the Extractor. Tap your screw extractor into the hole by hand. Do not hammer it in, as this can expand the bolt and lock it tighter. Use a tap wrench or a small adjustable wrench on the extractor. Turn it counterclockwise with steady, increasing pressure. If it stops, don’t force it. Back it out, clear the chips, and try again.
Step 6: Clean the Threads. Once the bolt is out, you must clean the threads. Use a dedicated thread chaser, not a tap, to clear any debris. Follow with compressed air. Installing a new bolt into a dirty hole is how you create the next broken bolt.
I learned the hard way on an old truck manifold. I drilled what felt like “deep enough,” threaded in a new bolt, and it seized halfway. The bottom threads were mangled from my drill bit. The time I saved by not measuring cost me two hours drilling out the threads and installing a helicoil.
When a Standard Extractor Will Fail
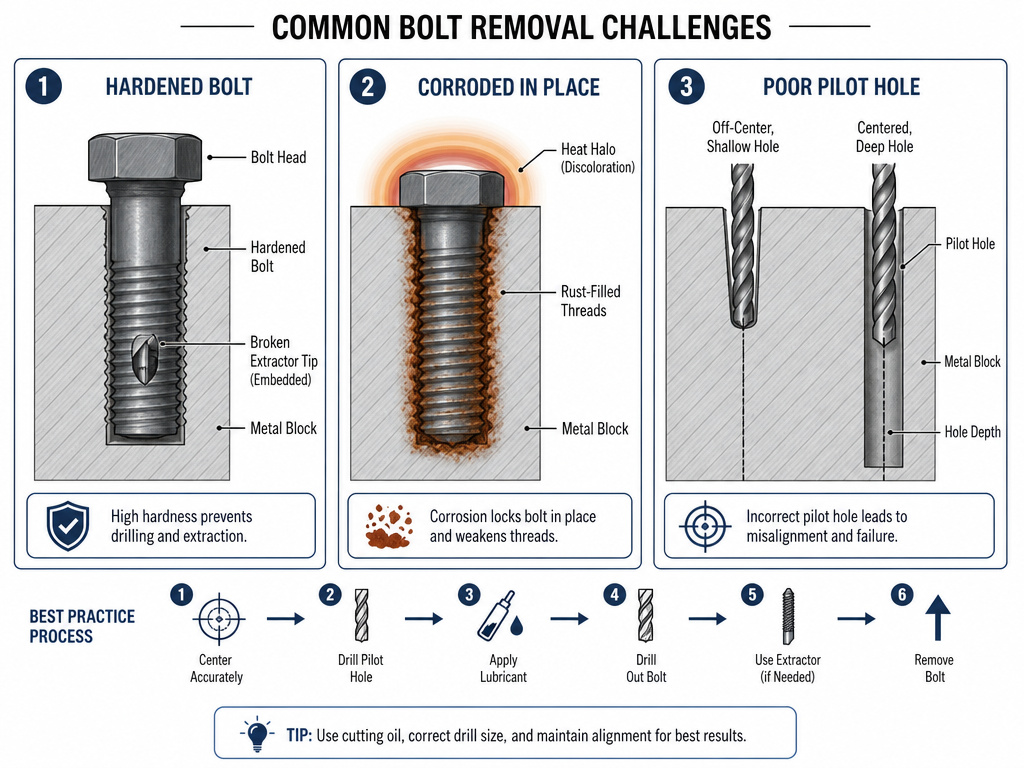
The classic spiral fluted “easy-out” works great on a soft bolt in a forgiving application. It fails predictably in three scenarios, and knowing them saves your extractor and your sanity.
The bolt is hardened. A standard extractor is made of tool steel, but it’s not harder than a grade 12.9 bolt. When you apply torque, the extractor’s flutes can shear off inside your pilot hole. Now you have hardened tool steel embedded in hardened bolt steel. The Matco ZB312 kit exists for this reason, its carbide burrs can grind through the extractor remnant.
The bolt is corroded in place. Corrosion welds the bolt threads to the parent material. The extractor applies inward pressure as it turns, which can expand the bolt shank and increase the grip of the corrosion. This is when left-hand drilling combined with heat and penetrating oil is the only non-destructive path.
The pilot hole is off-center or too shallow. An extractor needs a centered, deep enough hole to grip the sides of the bolt. If your hole is crooked, the extractor will engage unevenly and likely snap. If the hole is too shallow, the extractor doesn’t have enough purchase and will strip out. This is why the initial center punch and the 12mm depth are non-negotiable.
For these cases, a bolt extractor set with square, tapered flutes is better than a spiral easy-out. The square design bites harder and is less likely to expand the bolt. In the worst case, you drill out the entire bolt and re-tap the hole one size larger. That’s a last resort, but it’s a known exit.
Drilling Out vs. Other Methods
Drilling is the default because it’s controlled. Other methods have their place, but they come with higher stakes.
| Method | Best For | Risk If Chosen Wrong |
|---|---|---|
| Drilling & Extraction | Bolts broken flush or below surface, any bolt grade. | Damaging internal threads if you drill too deep (past ~12mm). |
| Welding a Nut | Bolts broken with a stub protruding. | Heat warping thin or aluminum components; poor weld won’t hold torque. |
| Slotting with a Dremel | Soft bolts broken flush where you can cut a slot for a flat-head screwdriver. | Slipping and gouging the surrounding material, making the hole oval. |
| Left-Hand Drill Bit Only | Smaller, non-corroded bolts where left-hand torque might spin it out. | Bit walking off-center if not punched properly, requiring the full drill-out anyway. |
Welding a nut is fantastic, if you have a welder, if the stub is accessible, and if the base metal can handle the heat. For a broken exhaust stud on an aluminum head, the heat from welding can distort the head. Drilling is a colder, more precise operation.
Slotting works only if you have the clearance for a rotary tool and a steady hand. One slip and you damage the sealing surface. Drilling is slower but safer for the surrounding part.
The One Bolt You Shouldn’t Drill (Yet)
Torque-to-Yield bolts change the game. They are designed to be stretched to their yield point during installation, creating immense clamping force. That stretch also means they are under tremendous tension and are often corroded into their threads.
The official GM technical bulletin for broken head bolts on their 2.8-4.2L engines doesn’t start with drilling. It starts with a hammer. “Using an appropriately sized punch and hammer, rap on the head of each bolt several times. The vibration produced by this procedure will assist in successful removal.”
This is a required step to break the friction bond before you even reach for a drill. The bulletin then specifies using a dedicated broken bolt extractor kit (GM part EN-47702) or a reverse twist drill bit.
The NHTSA rear sub-frame bolt recall for certain BMW M models highlights another critical rule with TTY bolts: never reuse them. The recall was issued because a repair procedure error led to these one-time-use bolts being reinstalled. Over time, they loosened. The corrective action was to “drill out screw remnants” and install new bolts. If a manufacturer designs a bolt for one installation, drilling out its broken remnant is just step one. Installing a new, correct-grade bolt is the step that keeps the vehicle safe.
Frequently Asked Questions
Can you drill out a broken bolt without an extractor?
Yes, if you use a left-hand drill bit. The counterclockwise rotation can catch the broken piece and back it out as you drill. This works best on smaller, less-corroded bolts. For larger or stuck bolts, you’ll usually still need an extractor, but the left-hand bit does most of the work.
What is the best drill bit for drilling out a hardened bolt?
Solid carbide drill bit is the best choice. High-speed steel (HSS) bits will dull immediately. Cobalt bits are tougher than HSS and can sometimes work, but for bolts graded 10.9 or 12.9, carbide is the only reliable option. The Matco ZB312 kit uses solid carbide drills for this exact reason.
Why did my screw extractor snap off?
Extractors snap for two main reasons. First, the bolt was harder than the extractor, causing the extractor’s flutes to shear. Second, too much torque was applied when the extractor was already stuck. A snapped extractor, especially if it’s hardened steel, is a major problem. You may need to use an EDM machine or carefully grind it out with a carbide burr.
How do you remove a bolt that is broken below the surface?
You follow the same procedure but start with a carbide burr to flatten the broken surface. Once it’s flat, use a center punch to mark the exact center. Then proceed with a left-hand drill bit. Kits like the Matco Bust-N-Out are designed specifically for these “sub-surface” broken bolts.
What’s the difference between a left-hand drill bit and a reverse drill bit?
They are the same thing. A left-hand drill bit has flutes that are cut to remove material when the drill is spinning counterclockwise (reverse). This is the opposite of a standard drill bit. The reverse rotation provides the extracting torque.
Before You Go
Drilling out a bolt is a test of patience, not strength. The 12mm depth limit is your guardrail. A left-hand drill bit is your first and best tool. And knowing whether you’re facing an 8.8 or a 10.9 bolt decides if you reach for a standard bit or a carbide one.
The goal is to leave the threads in the hole completely intact. When you thread in the new bolt and it spins down smoothly by hand, you’ve won.That’s the feeling, the clean pull of undamaged threads, that makes the setup and the measuring worth it. Keep your center punch sharp, your depth stop set, and your drill speed slow. The bolt will come out.
