
What Drill Bit for 8 Screw | The Two Numbers That Decide
This post contains affiliate links. As an Amazon Associate, we earn from qualifying purchases.
For a standard #8 wood screw into softwood like pine, use a 7/64″ (2.8mm) drill bit for the pilot hole. For hardwood like oak, step up to a 1/8″ (3.2mm) bit. The clearance hole for the screw shank is 11/64″ (4.4mm). Self-drilling #8 screws for metal, like the Daggerz SDZ08 series, require no pilot hole but must be driven at or below 2500 RPM.
That answer covers 80% of jobs. The other 20% is where projects go wrong, when the wood splits, the screw head strips, or the fastener shears off inside the metal. The difference between a solid joint and a failed one isn’t guesswork. It’s two numbers: the root diameter of the screw and the thickness of the material you’re driving into.
What follows is a breakdown of those two numbers across common scenarios, the ASME standard that governs clearance fits, and the specific product lines that let you skip the drill bit entirely. By the end, you’ll be able to match any #8 screw to its correct bit in under ten seconds.
Key Takeaways
- The pilot hole diameter must match the screw’s root diameter (the solid core beneath the threads), not its shank diameter. For a #8 wood screw, that’s roughly 0.164″.
- A clearance hole is different, it lets the screw’s shank pass through freely so the head can pull two pieces tight. The ASME B18.2.8 standard specifies a #9 drill (0.196–0.203″) for a “normal” fit.
- Self-drilling screws like the Daggerz SDZ08 or multi-material screws like the Lawson P60912 are engineered to penetrate thin metal and wood without a pilot hole, but they have strict RPM limits (2500 max) and require three full threads to protrude past the metal.
- Overdriving a screw gun past 2500 RPM on self-drilling fasteners causes immediate heat buildup. The point dulls, the threads gall, and the fastener either strips out or snaps under torsion.
- Always drill a pilot hole in hardwood, near edges, or with screws longer than 1.5 inches. In softwood away from edges, you can often drive shorter #8 screws without one.
The #8 Screw Specs You Actually Need
You don’t need to memorize a table. You need to understand what the numbers on the chart are measuring. A #8 screw has a major diameter (the widest point of the threads) of 0.164 inches. The root diameter, the solid metal at the core of the screw, is smaller, typically around 0.108″ to 0.116″ for a traditional wood screw.
The ASME B18.2.8 standard provides clearance hole sizes for imperial fasteners. For a #8 screw, a “Normal Fit” calls for a #9 drill bit, which produces a hole between 0.196 and 0.203 inches in diameter. This allows the unthreaded shank to pass through without binding, ensuring the screw head can clamp materials together.
Your pilot hole should be sized to this root diameter, not the major diameter. Drill a hole that’s only slightly smaller than the root, and you’re asking the screw to split the wood as it forces its way in. Drill a hole that’s larger than the root, and the threads have nothing substantial to bite into, the joint will be weak.
Here’s the quick-reference table that translates this into bit sizes:
| Hole Type | Drill Bit Size | Diameter (Inches) | Used For |
|---|---|---|---|
| Pilot (Softwood) | #44 / 7/64″ | 0.086″ / 0.109″ | Creating a guide for the screw threads in pine, cedar, fir. |
| Pilot (Hardwood) | #32 / 1/8″ | 0.116″ / 0.125″ | Preventing split in oak, maple, walnut. |
| Clearance Hole | #9 / 11/64″ | 0.196″ / 0.171″ | Letting the screw shank pass freely through the top piece of wood. |
| Countersink | 5/16″ | 0.312″ | Recessing a flat-head screw flush with the surface. |
Notice the pilot hole for hardwood is larger than for softwood. Dense hardwood fibers resist displacement; a bigger hole removes material to reduce splitting stress. Softwood fibers compress more easily around the threads, allowing a smaller hole for better grip.
Where this goes sideways: Using the softwood pilot size in a hardwood like white oak. The wood doesn’t compress, it cracks. You might not see the split until you drive the screw home and a hairline fracture runs across the board.
Pilot Hole vs. Clearance Hole: Why You Need Both
Most DIYers know about pilot holes. Far fewer use clearance holes, and that’s why assembled projects often have gaps between boards or wonky joints. The two holes serve completely different mechanical functions.
A pilot hole is drilled into the piece that receives the screw threads. It’s smaller than the screw, allowing the threads to bite and grip. A clearance hole (sometimes called a shank hole) is drilled through the top piece. It’s larger than the screw’s shank, so the screw passes through it freely.
When you drive the screw, the head catches on the top piece and pulls it down tight against the bottom piece. If you skip the clearance hole and the screw threads into both pieces, it can’t pull them together, it just acts like a bolt through a loose nut. The joint stays sloppy.
For a #8 screw, that clearance hole is 11/64″. If you don’t have that exact bit, a #9 drill (0.196″) is the ASME-specified standard fit and works perfectly.
Common mistake: Drilling the pilot hole all the way through both boards. The clearance portion should be the same diameter as the shank, not the threads. If your pilot bit is the same size as your clearance bit, you’ve drilled two oversized holes and the screw has nothing to hold onto.
This is where a basic understanding of drill bit selection pays off. Matching the bit to the task is more than just diameter; it’s about the hole’s purpose in the joint.
When the Standard Rules Don’t Apply
The 7/64″ and 1/8″ rule is for standard tapered-shank wood screws. The world of fasteners has moved on, and so should your drill index. Two categories of #8 screws change the game entirely: self-drilling screws for metal and multi-material screws.
Self-Drilling Screws (e.g., Daggerz SDZ08, Grabber Scavenger Head): These have a drill-point tip designed to penetrate metal. They do not require a pre-drilled pilot hole in sheet steel up to about 14-gauge (0.0713″). The Daggerz spec sheet is explicit: installation speed must not exceed 2500 RPM. Overdriving causes fastener failure or “strikeout”, where the screw spins in place without drilling deeper, melting the surrounding metal and ruining the point.
Multi-Material Screws (e.g., Lawson Products P60912): These feature a double-angled tapered point and serrated threads. They’re designed to drill into wood and sheet metal (up to 24-gauge) without a pilot hole. The catch? The manufacturer states longer lengths may require a pilot in hardwoods, and a 1/8″ pilot is mandatory for masonry.
| Screw Type | Brand/Model Example | Pilot Hole Needed? | Critical Limitation |
|---|---|---|---|
| Self-Drilling for Metal | Daggerz SDZ08 Series | No | Max 2500 RPM; must penetrate metal with 3 threads protruding. |
| Multi-Material | Lawson P60912 | No (wood/thin metal), Yes (masonry) | 1/8″ pilot for masonry; longer screws need pilot in hardwood. |
| Structural/Wood | GRK RSS #8 | No (softwood), Yes (dense hardwood) | Pilot recommended near edges or in ultra-dense woods like ipe. |
| Standard Wood | Generic #8 Flat Head | Yes | Always use pilot per wood type (7/64″ soft, 1/8″ hard). |
The mechanical why-layer here is heat. A self-drilling screw’s point is a cutting tool. Exceed 2500 RPM, and friction heat softens the steel. The point dulls instantly, the threads gall, and you either strip the head or snap the screw. It happens in under three seconds.
How to Drill the Holes Correctly
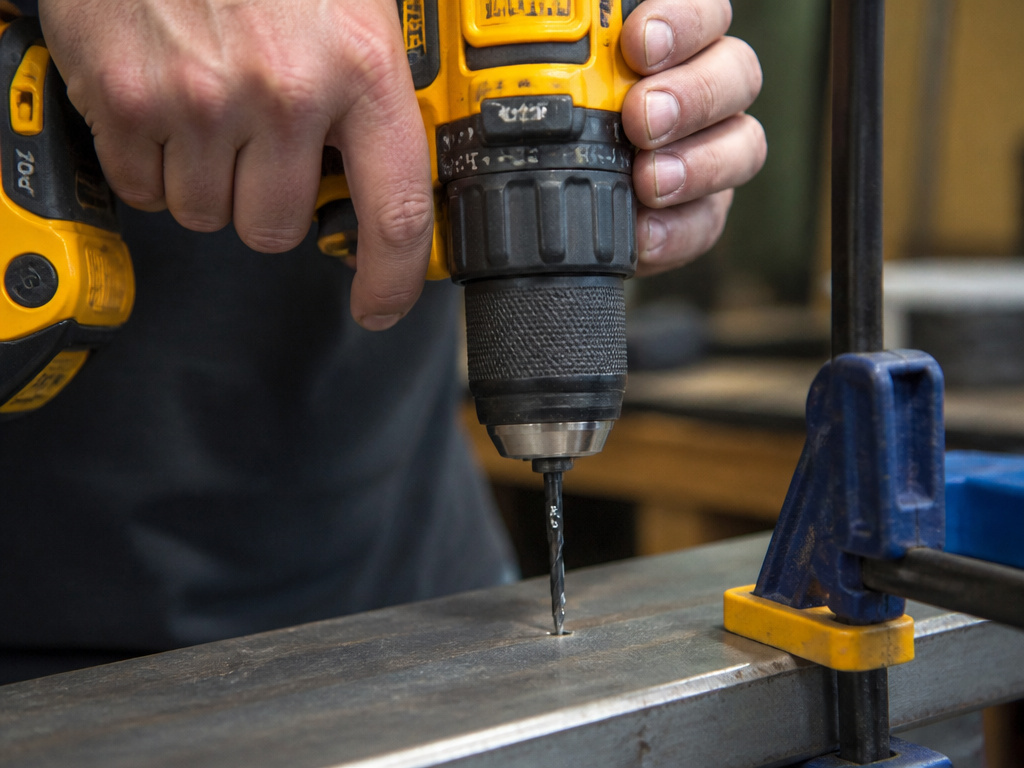 Selecting the right bit is half the battle. Driving it correctly is the other half. The wrong technique can burn the bit, tear the wood, or produce an oversized hole that defeats your careful sizing.
- Mark and Punch. Use a center punch on metal or an awl on wood to create a small dimple. This keeps the drill bit from wandering as it starts.
- Secure the Workpiece. Clamp it down. Hand-holding is for pros on a production line, not for a one-off joint in your garage.
- Select the Correct Drill Speed. For holes up to 1/8″ in metal, run your drill at high speed (2000+ RPM) with firm, steady pressure. In wood, a medium speed (1000-1500 RPM) prevents tear-out. Refer to your fundamental steps for using a drill bit for more on technique.
- Use a Cutting Fluid on Metal. If possible, apply a drop of cutting oil or even WD-40. It extends bit life and keeps the hole clean. As the Bosch drilling guide notes, this isn’t always feasible with hand-held drills, which is why their HSS bits are designed for quick swarf removal.
- Drill Perpendicular. Keep the drill straight. A angled hole changes the effective diameter and weakens the joint.
- Blow Out the Chips. Clear debris from the hole before driving the screw. A screw driving into packed sawdust can split the wood.
Skip step 3 at your peril. High speed in wood burns the bit and hardens the fibers around the hole, making it tougher to drive the screw. Low speed in metal work-hardens the surface, causing the bit to skate and dull.
The part nobody mentions: Drill bits get hot. After drilling three or four pilot holes in succession, let the bit cool for a minute. A hot bit expands slightly, drilling an oversized hole. That’s why your fourth screw always feels looser than your first.
For more on creating clean, precise holes, see our guide on the proper technique for drilling a pilot hole.
The Right Tools for the Job
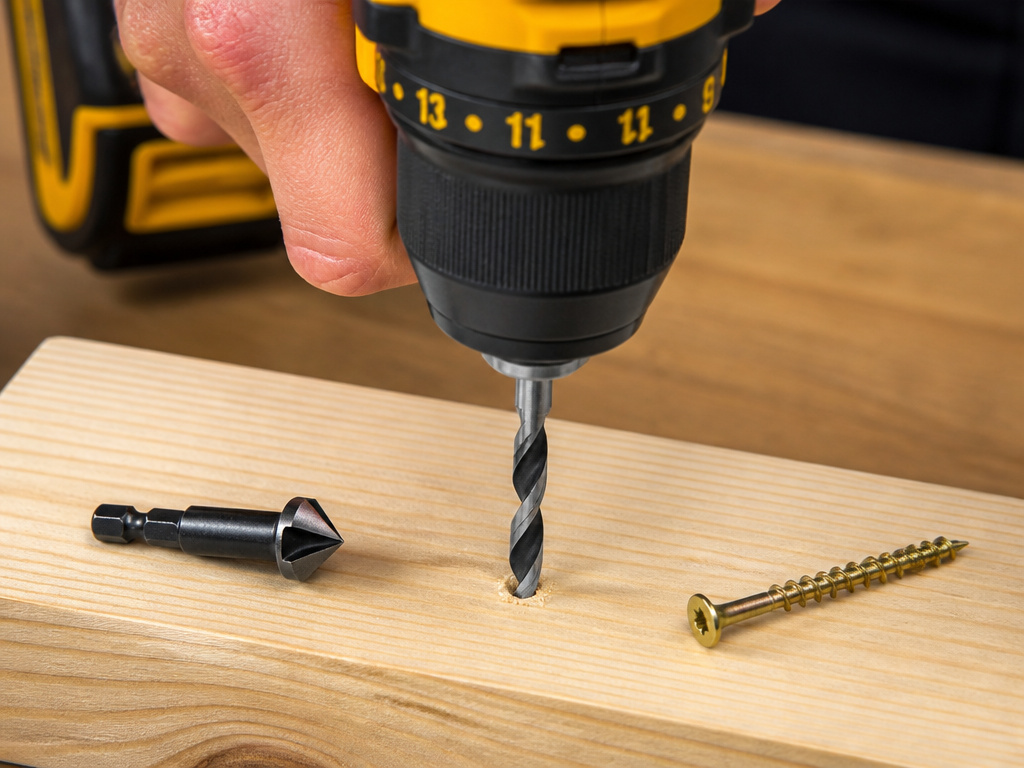 You can manage with a cheap HSS twist bit, but the job gets harder and the results less consistent. For frequent work, invest in bits designed for the material.
- Wood: Brad-point bits. The sharp center spur keeps the bit from wandering, and the outer spurs score the wood fibers for a clean hole. A DeWalt DW1360 set covers the essential sizes.
- Metal: Cobalt or titanium nitride-coated HSS bits. They withstand higher heat and last longer. Bosch Cobalt bits are a standard for a reason.
- Masonry: Carbide-tipped masonry bits. Don’t try to drill into brick or block with a standard bit; you’ll ruin it.
A countersink bit is non-negotiable for flush finishes. A combination drill-and-countersink bit lets you drill the pilot and recess the head in one step, guaranteeing perfect alignment. The Makita B-50026 set includes a #8 pilot with a matching countersink.
A depth stop is your best friend. It prevents you from drilling too deep, which is especially critical for pocket holes or when you don’t want the point to exit the back side of your work. Most drills have an adjustable stop collar; use it.
Identifying the exact size of a bit from a jumbled set is its own skill. If you’re unsure, review methods for identifying the size of a drill bit.
Frequently Asked Questions
Can I use a 5/32″ drill bit for a #8 screw?
You can, but you shouldn’t for a pilot hole. A 5/32″ bit (0.156″) is larger than the root diameter of a #8 screw. The threads will have very little to grip, resulting in a weak joint. It is, however, a passable substitute for a clearance hole if you don’t have an 11/64″ or #9 bit.
What if I don’t have a 7/64″ drill bit?
The next closest standard size is 1/8″ (0.125″). It’s slightly larger than the ideal 7/64″ (0.109″), so use it with caution in softwood, drive the screw slowly to avoid splitting. For hardwood, 1/8″ is the recommended size anyway.
Do I need a pilot hole for a #8 screw in plywood?
Yes, especially near the edges. Plywood’s cross-grain layers are prone to splitting. Use the softwood pilot size (7/64″).
What size drill bit for a #8 screw in metal?
For a standard #8 machine screw into metal, you need a clearance hole. According to ASME B18.2.8, a #9 drill (0.196″) provides a “normal” fit. For a tapped hole (where the screw cuts its own threads), you need a smaller tap drill size, for a #8-32 thread, that’s a #29 drill (0.136″).
Can I use an impact driver to install self-drilling screws?
Manufacturers like Grabber advise caution. Impact drivers have significantly higher torque output, which can lead to screw failure or spin-out. If you must use one, set it to a low torque setting and be prepared to stop immediately once the head seats.
Before You Go
For most wood-to-wood projects, remember two numbers: 7/64″ for softwood, 1/8″ for hardwood. Keep a separate 11/64″ or #9 bit marked for clearance duty. When working with metal, reach for a dedicated self-drilling #8 screw like a Daggerz and respect the 2500 RPM limit.
The right hole is the difference between a joint that holds for decades and one that fails before the paint dries. Measure the screw’s root, match the material, and let the bit do the work. Your finished project will show the difference.
