Step-by-Step Guide: How to Wind Trimmer Line on a Spool
This post contains affiliate links. As an Amazon Associate, we earn from qualifying purchases.
Winding trimmer line correctly requires matching three things: the line diameter printed on the head, the winding direction indicated by the arrow on the spool, and a tight, even wind that prevents the strands from crossing. For a standard bump-feed spool, this means cutting about 20 feet of line, folding it in half, and winding both strands simultaneously against the arrow’s direction until you have 6-8 inches left to thread.
Most people jam their trimmer because they ignore the arrow or let the line overlap. They wind haphazardly, the lines cross inside the spool, and the next bump just grinds the mechanism instead of feeding fresh line. The head gets hot, the line melts, and you’re back to square one in ten minutes.
This guide walks through the exact steps for bump-feed, fixed-line, and automatic-feed heads. You’ll learn why soaking the line isn’t just an old wives’ tale, how to spot a faded direction arrow, and when to just buy a pre-wound spool instead of fighting with bulk line.
Key Takeaways
- Soak new trimmer line in water for at least 30 minutes before winding. The nylon absorbs water and becomes more flexible, which drastically reduces mid-job breakage, especially in hot, dry conditions.
- The winding direction arrow on the spool is non-negotiable. Winding against it causes the line to immediately unspool when you start the trimmer. If the arrow is worn off, the line must unwind from the bottom of the spool when installed.
- For bump-feed heads, wind both lines tightly and evenly, keeping them parallel. Let them cross even once, and they’ll fuse together under heat and vibration, locking the spool.
- On fixed-line heads, never force a thicker line into the eyelets. It will swell with friction heat, seize in the hole, and you’ll have to cut it out with a knife.
- Pre-wound spools for models like the EGO Power+ Line IQ are worth the premium if you go through line fast. The time and frustration saved outweigh the extra dollar per spool.
What Tools and Parts Do You Need?
Gather everything before you start. Hunting for scissors with greasy hands while your trimmer is in pieces is how small parts get lost in the grass.
You need the correct replacement line. This isn’t a suggestion. The diameter (like .065″, .080″, .095″, or .130″) is stamped on the trimmer head or in the manual.
Using a thicker line strains the motor and jams the head. A thinner line snaps instantly and wastes your time. You’ll also need a pair of scissors or a line cutter, and a pair of gloves, the cut ends of nylon line are sharp enough to slice a fingertip.
A flathead screwdriver helps with prying open certain bump-feed head covers, and a container of water is for the pro move: soaking the line. Keep your owner’s manual handy. If the head has a model number, a quick search for “[brand] [model] trimmer head diagram” will find you an exploded view that shows the exact threading path.
For bump-feed heads, the correct line diameter is critical for torque and feed mechanism function. A line that is too thick increases rotational mass and drag, overworking the motor. A line that is too thin lacks the centrifugal force to swing out to cutting length and wears down after minutes of contact with abrasive surfaces like fence posts or concrete.
Before You Start: Safety First
Before you start: Disconnect all power. For corded trimmers, unplug them. For battery models, remove the battery. For gas trimmers, let the engine cool completely for at least 15 minutes, the muffler and head can cause second-degree burns. Always wear gloves; a fresh-cut line end is as sharp as a plastic knife and will slice skin if it whips across your hand during threading.
How to Wind a Bump-Feed Spool (The Most Common Type)
Bump-feed heads are on ninety percent of homeowner trimmers. The concept is simple: you tap the head on the ground to release more line. The execution fails when the spool is wound wrong.
First, get the spool out. Turn the trimmer over so the head faces you. Most heads have two plastic tabs on the sides. Press them in simultaneously and pull the spool assembly straight out. Some older models require you to hold the head steady and turn a locking knob on the bottom. If it’s stuck, a flathead screwdriver gently wedged into the seam can pop the cover off. Don’t hammer it.
Clean the housing while it’s open. Grass clippings and dirt packed inside the head create friction. Blow it out or brush it clean. A clean chamber lets the spool spin freely.
Now, the main event.
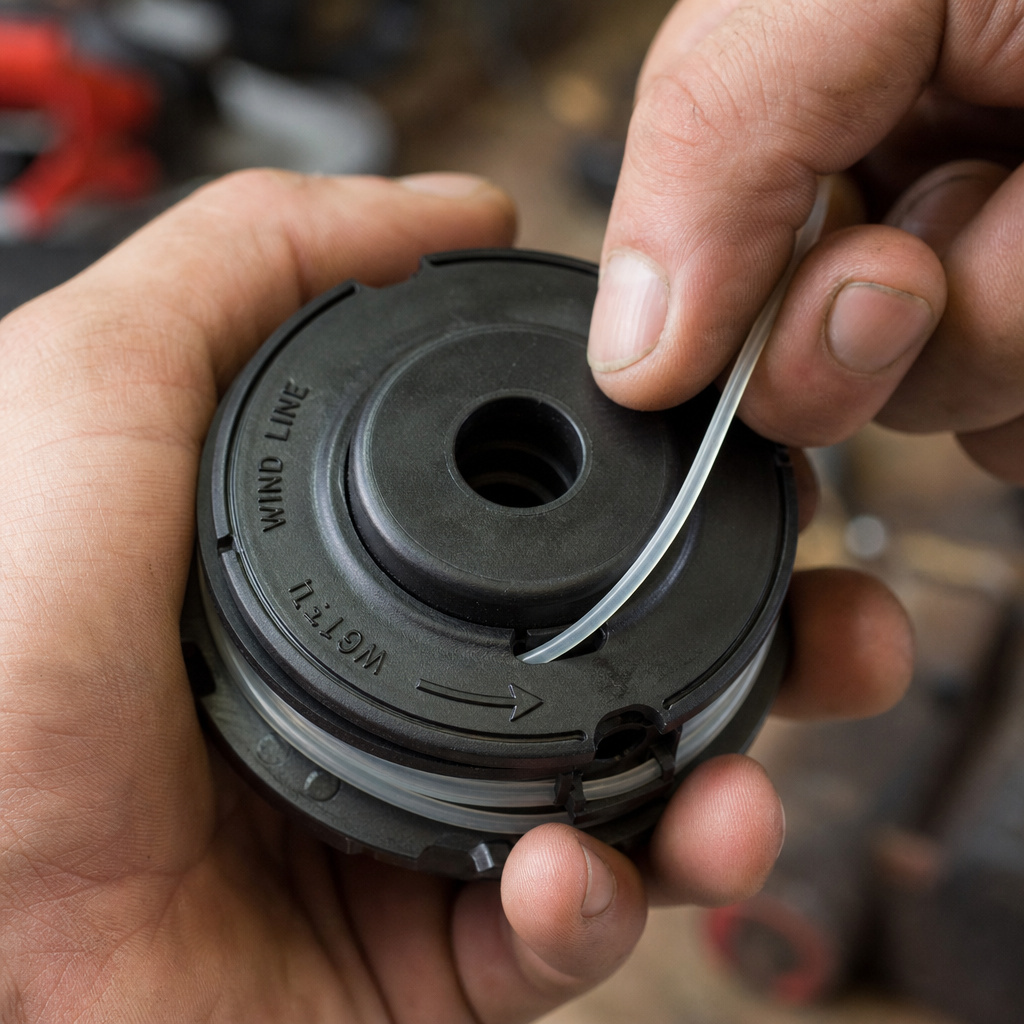
- Find the arrow and the starting points. Look at the center of the spool. There is an arrow molded into the plastic, often with the words “Wind Direction” or a simple “This Way.” Next to it, you’ll see two small holes or notches, usually marked “A” and “B.” These are where the ends of the line get anchored. If the arrow is faded, remember this: when the spool is installed in the head, the line must unwind from the bottom of the spool. Visualize it.
- Prepare the line. Cut about 20 feet of line. Fold it exactly in half to find the center point. Hook that center loop into the small notch or post in the middle of the spool. You should now have two 10-foot strands.
- Wind with tension. This is where patience pays. With the spool in one hand, use your thumb to pin the center loop in place. With your other hand, start winding the two strands together in the direction the arrow points. Keep them parallel and tight. Don’t let them cross. If they cross, they will bind. Wind until you have about 6-8 inches of line left on each strand.
- Secure the ends. Most spools have small notches or slots on the outer rim. Hook each line end into its respective slot. This keeps everything tight for the next step.
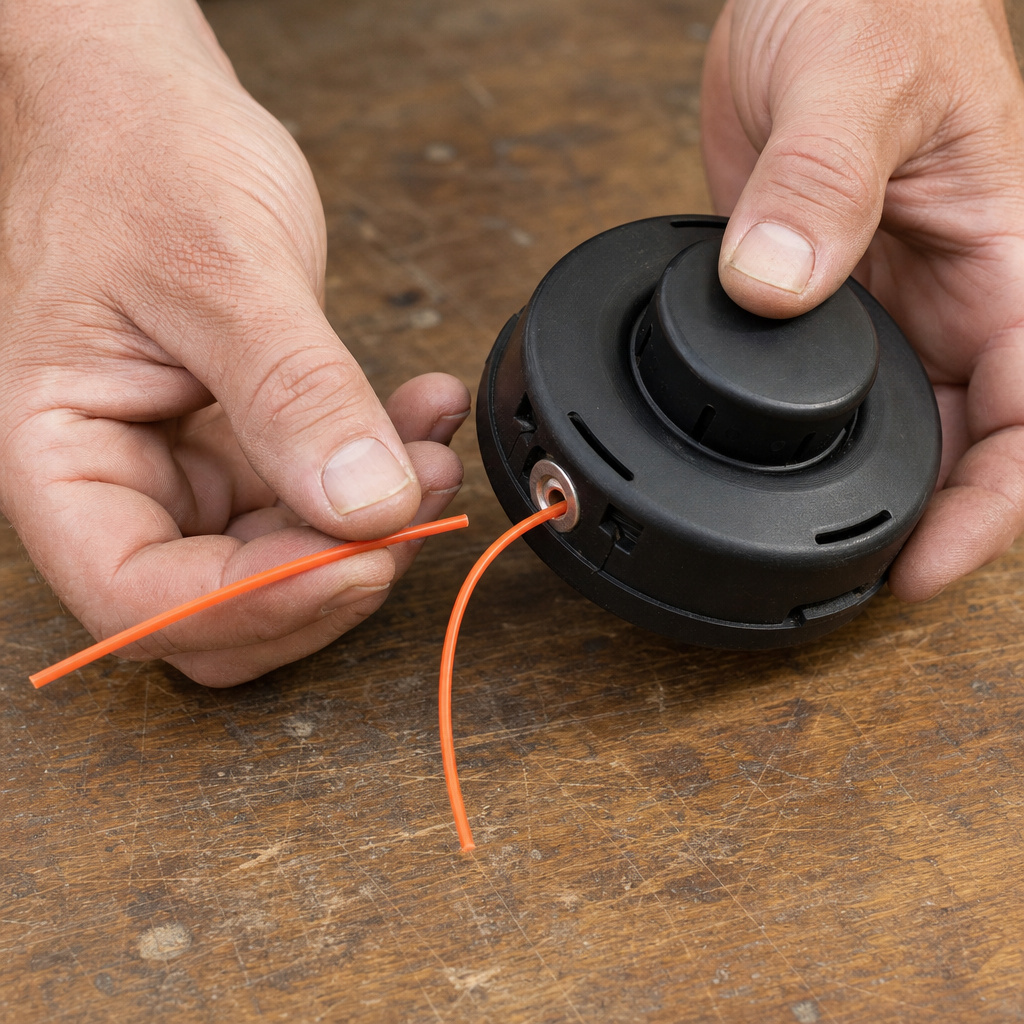
- Reassemble and thread. Place the spool back into the head housing, making sure it sits flat. Pull the two line ends out through their respective exit holes in the head’s rim. Pull firmly until you feel them release from the retention slots. You should now have two equal lengths of line, about 6 inches each, sticking out. Snap the cover back on until it clicks. If the cover doesn’t seat, the lines are likely pinched. Open it, reseat the spool, and try again.
The most common mistake here is winding in the wrong direction. I did it on a Husqvarna 128LD three summers ago. Wound it clockwise because it felt natural. Started the trimmer, gave it a test spin, and all 20 feet of line shot out in a tangled mess around the guard in two seconds. The arrow was pointing counter-clockwise.
How to Wind a Fixed-Line Spool
Fixed-line heads, common on many Ryobi and some Troy-Bilt models, don’t use a wound spool. They use short, pre-cut lengths of line that you poke through eyelets. It’s simpler but has its own pitfalls.
You don’t wind anything. You measure and insert. The head will have two or four holes (eyelets) around its rim. The manual specifies the exact length, often 10 to 12 inches per line. Don’t guess.
Cut two pieces of line to the specified length. Don’t soak these. Pushing a wet, swollen line through a tight eyelet is nearly impossible.
Feed one line through an eyelet until an equal length protrudes from each side. Repeat for the other eyelet. Then you simply screw the retaining cap back on. The cap’s internal mechanism grips the lines.
The failure point is forcing a line that’s too thick. If the line diameter is wrong, it will be a tight fit. When you run the trimmer, friction heat makes the nylon expand.
It can weld itself inside the eyelet. I’ve had to use a utility knife to cut a seized .095″ line out of a head designed for .080″. The replacement head cost more than the line.
How to Wind an Automatic-Feed Spool
Automatic or “auto-feed” heads, like those on some STIHL models or the infamous EGO Power+ Line IQ system, are designed for convenience. They often use proprietary, pre-wound spools that you just click in.
For these, winding your own spool is usually more trouble than it’s worth. The mechanism that senses line length and auto-feeds is calibrated for the factory-wound tension and length. A homemade wind can upset that balance. The official guidance for most is to buy the pre-wound cartridge.
However, some auto-feed heads can be manually reloaded if you’re determined. The process is identical to a bump-feed head, find the arrow, wind tightly in that direction, anchor the ends, but you must be meticulous about line length. Too much line and the auto-feed mechanism jams; too little and it won’t feed at all. Consult your specific model’s manual. There’s a reason the restringing process for these is its own dedicated topic.
Which Line Diameter Should You Use?
The line diameter is not a suggestion. It’s an engineering specification tied to your trimmer’s power output and the head’s feed mechanism.
| Line Diameter | Best For | What Happens If You Use the Wrong Size |
|---|---|---|
| .065″ (1.65mm) | Light-duty electric & battery trimmers, young grass, weeds. | Too thick: Motor bogs down, head overheats. Too thin: Line wears to a nub in minutes against hard surfaces. |
| .080″ (2.0mm) | Mid-power gas & cordless trimmers, mixed grass and light brush. | Industry standard for a reason. Balances durability and power demand for most homeowners. |
| .095″ (2.4mm) | High-power gas trimmers, clearing thick weeds, briars, and tough vegetation. | On a weak trimmer, it won’t spin up to full speed. Can jam in heads not designed for it. |
| .105″ (2.7mm) & .130″ (3.3mm) | Commercial-grade brush cutters, heavy clearing. | Will stall a residential trimmer. Can damage the drive shaft or shear pins. |
The diameter is printed on the head. If it’s worn off, check the manual or look up your trimmer model online. Guessing wrong costs you more in broken parts and time than buying the right line.
Soaking Trimmer Line: Does It Actually Help?
Yes, but not for the reason most people think. Soaking nylon trimmer line in water for 24 hours (or a minimum of 30 minutes) rehydrates the plasticizer in the material.
Fresh line straight from the package is often brittle, especially if it’s been on a shelf for a year. When you spin it at 7,000 RPM, it hits a stiff blade of grass and shatters. Soaked line is more flexible and elastic. It bends instead of breaking, which means it lasts longer and feeds more reliably. The water absorption also adds a tiny amount of mass, which can help with cutting momentum.
Don’t soak fixed-line heads’ pre-cut pieces. It makes them too floppy to thread. This trick is for the long lengths you wind onto a spool. Keep a dedicated yogurt container in your garage, drop the new line in, add water, and let it sit overnight. The difference in longevity on a hot July afternoon is noticeable.
Troubleshooting Common Winding Problems
Your trimmer is reassembled. You pull the trigger, and something’s wrong. Here’s what to check.
Problem: The line won’t feed when I bump the head.
- Likely Cause: The line is wound in the wrong direction. It’s trying to unwind into the spool, not out of it.
- Fix: Take it apart. Verify the arrow direction and rewind. This is the fix 80% of the time.
Problem: The line feeds out in huge, uncontrolled loops.
- Likely Cause: The line wasn’t anchored in the spool’s retention slots, or the spool isn’t locked into the head properly.
- Fix: Open the head. Ensure the line ends are hooked in the slots on the spool’s rim. When reassembling, listen for a solid click as the spool seats.
Problem: The head makes a grinding noise and gets hot.
- Likely Cause: The lines crossed over each other inside the spool during winding. They’ve now fused together under heat and pressure.
- Fix: This is a full redo. You must cut the line out, remove the spool, clean any melted nylon debris from the housing, and start fresh with a tight, parallel wind.
Problem: The line breaks off instantly, barely touching anything.
- Likely Cause: You’re using old, brittle line or the wrong diameter. Alternatively, you didn’t soak new line and it’s dry and fragile.
- Fix: Use fresh line of the correct diameter. Soak it. Also, check the cutting guard for sharp burrs that might be slicing the line.
For more detailed fixes, our guide on trimmer line replacement dives into motor and clutch issues that can mimic feed problems.
When to Buy a Pre-Wound Spool Instead
Winding your own spool from bulk line is cheaper. It’s also messier, more time-consuming, and prone to error. For some trimmer models, the convenience of a pre-wound spool is worth every penny.
This is especially true for proprietary auto-feed systems like the EGO Power+ Line IQ. Users on forums are vocal about the factory spools being more reliable than hand-wound attempts.
The mechanism is finicky. For a standard bump-feed head on a Stihl or Echo, winding your own is fine. But if you have a trimmer that eats line, you’re clearing acres of dense weeds, the time saved by popping in a $5 pre-wound spool versus spending 10 minutes wrestling with tangled nylon can add up over a season.
Consider it a tax on your sanity. I buy pre-wounds for my dedicated edging trimmer because I use it hard every week. For the lighter-duty trimmer that touches up the fence line, I wind from a bulk spool.
Frequently Asked Questions
How much line do I put on a trimmer spool?
For a standard bump-feed spool, about 20 feet of line, folded in half to create two 10-foot strands, is the sweet spot. This gives you enough line for multiple feeding sessions without overfilling the spool. Overfilling creates tension and prevents the bump mechanism from working.
Which way do you wind trimmer line on a spool?
You wind the line in the direction indicated by the arrow molded into the spool. If the arrow is gone, remember this rule: when the spool is installed in the head, the line must come off the bottom of the spool. Visualize the rotation, the head spins clockwise, so the line must unwind from the bottom outward.
Can you put two lines on a trimmer spool?
Yes, almost all modern trimmer heads are designed for two lines. You fold your length of line in half, anchor the center, and wind both strands simultaneously. Single-line heads are rare and usually specified as such. Using two lines balances the head and improves cutting efficiency.
Why does my trimmer line keep breaking?
Brittle, old line is the first culprit. Sun and time degrade nylon. Soak new line before use. The second cause is a worn or sharp edge on the cutting guard or exit hole that acts like a knife. File down any burrs. Finally, you might be using too thin a line for the material you’re cutting. Switch to the next diameter up.
Before You Go
Winding trimmer line boils down to three non-negotiable rules: match the diameter on the head, follow the arrow on the spool, and keep the wind tight and parallel. Soak your line overnight in a bucket of water, it’s a five-minute prep that doubles line life. If you have an auto-feed trimmer, seriously consider the manufacturer’s pre-wound spools; they’re calibrated for that specific mechanism.
And always pull the battery or spark plug wire before you touch the head. A trimmer that kicks on while your fingers are near the spool is a life-altering event you don’t want. Now go cut something.