How to Use a Scroll Saw: The Complete Step-by-Step Guide
This post contains affiliate links. As an Amazon Associate, we earn from qualifying purchases.
**
Using a scroll saw correctly requires matching three things: the correct blade for your material and design, proper blade tension, and a feed speed that lets the tool cut without forcing. Master these fundamentals to make precise, intricate cuts in wood, plastic, or metal.**
Using a scroll saw requires matching three things: the correct blade for your material and design, proper blade tension, and a feed speed that lets the tool cut without forcing. Get those three right, and you can turn a sheet of plywood into lace.
Most people get this wrong by treating it like a jigsaw. They shove the wood, crank the speed, and snap blades. The scroll saw blade is thin. It wants to follow a path, not be bullied through one. Force it, and it bends, wanders, or shatters.
This guide walks through setting up your saw, picking blades that actually work, and the techniques for curves, interior cuts, and stacked projects. You’ll learn how to listen to the blade, feel the right feed pressure, and fix the wobble that ruins precision.
Key Takeaways
- Blade selection is everything. Use fine, narrow blades (like #2/0 or #3) for intricate curves in thin wood, and wider blades (#5 or #7) for faster, straighter cuts in thicker stock.
- Correct blade tension sounds like a high “ping” when plucked and allows only about 1/8 inch of side-to-side deflection. Too loose causes wandering; too tight snaps blades mid-cut.
- Let the blade do the work. Your job is to steer the wood, not push it. If you smell burning wood or hear the motor bog, you’re feeding too fast or the blade is dull.
- For interior cuts, you must drill a starter hole, unthread the blade, pass it through, and rethread it. Trying to plunge-cut will destroy the blade and your workpiece.
- Safety is non-negotiable. Always wear eye protection. Secure long hair and loose sleeves. The hold-down foot is there for a reason, use it to prevent the workpiece from lifting and vibrating.
Before You Start: Safety First
Before you start: The scroll saw’s blade reciprocates up and down thousands of times per minute. It will grab loose clothing, hair, or jewelry in an instant. Always wear safety glasses, wood dust and a broken blade fragment travel straight toward your eyes. Use the hold-down foot. Without it, a thin piece of wood can chatter, lift, and shatter the blade on the upstroke. That sends sharp metal pieces flying.
The other big one is hearing. A scroll saw isn’t a chainsaw, but the high-pitched whine in a small shop will damage your hearing over time. Wear ear protection. It’s a quiet habit that pays off for decades.
Know Your Machine
Every scroll saw has the same core parts, but their quality varies wildly. You need to know what you’re touching.
The table is the flat surface where your wood rests. It should tilt, usually up to 45 degrees, for bevel cuts. The blade mounts vertically between an upper and lower chuck.
The tension knob, typically on the rear or top of the arm, tightens the blade. The speed control dial sets strokes per minute (SPM). The hold-down foot, a small metal arm with a shoe, presses lightly on your workpiece to keep it from jumping. And there’s usually a dust port on the back to connect a shop vacuum.
Cheaper saws, like the Ryobi, often have a lot of plastic in the blade chucks and tension mechanism. They work, but they flex. That flex translates to blade drift. Mid-range models from DeWalt or Porter Cable use more metal. High-end saws like Pegas or Excalibur have cast-iron arms and precision tension gauges, they feel solid, and the blade stays where you point it.
What Blade Type Should You Use?
This is the single most important choice. Pick wrong, and your project is ruined before you turn the power on.
The blade’s teeth-per-inch (TPI) and width determine its capability. A #5 skip-tooth blade (about 15 TPI) is a general-purpose workhorse for 1/2-inch to 3/4-inch stock. A #2/0 reverse-tooth blade (about 30 TPI) leaves a nearly sanded finish on the bottom of 1/4-inch plywood. Spiral blades cut in any direction without turning the wood, but they leave a rough, rounded kerf best suited for rough silhouettes.
Blades aren’t generic. Olson and Pegas make the ones I trust for fine work. The cheap 100-packs on Amazon are inconsistent, some teeth are set improperly, some are brittle. You’ll break three times as many.
Here’s how to match the blade to the job:
| Blade Type | Best For | What Happens If You Use It Wrong |
|---|---|---|
| Skip-tooth (e.g., #5) | General cutting in 1/2″ to 1″ wood. Fast removal. | In very thin wood, it tears out the bottom grain. |
| Reverse-tooth | Veneers, plywood, acrylic. Clean bottom cut. | In thick hardwood, it loads with dust and overheats. |
| Spiral | Cutting complex shapes without turning workpiece. | Leaves a wide, ragged kerf. Unsuitable for tight-fitting joints. |
| Crown-tooth | Hardwoods and exotic woods. Stays sharp longer. | Overkill and expensive for soft pine or MDF. |
The numbers refer to blade width. A #2 blade is about 0.028 inches wide, good for 3/8-inch radius curves. A #7 blade is 0.042 inches wide, for 1-inch radius curves or straight cuts. For letters or extremely tight curves, you go down to #2/0 or #3/0.
The physics are simple: a narrow blade can turn a tighter corner because there’s less metal to bend. A wider blade resists deflection, so it cuts straighter. Force a wide blade through a small radius, and it either breaks or pushes the wood off the line.
How to Install and Tension a Blade Correctly
First, unplug the saw. Always.
Loosen the tension knob on the back until the upper arm goes slack. Open the blade clamps, some have thumb screws, some require an Allen key. The teeth must point down and toward the front of the saw.
Insert the blade into the lower clamp first and tighten it. Then fit the top into the upper clamp. It should be straight.
Now tighten the tension knob. Turn it until the blade is taut. The old rule is to pluck it like a guitar string.
It should produce a clear, high ping. Deflect it sideways with your finger, it should move about 1/8 inch and spring back. If it flops around, it’s too loose. If it feels like a steel rod and makes no sound, it’s too tight.
Too loose, and the blade will wander during cuts, giving you wavy, inaccurate lines. Too tight, and the constant stress fatigues the metal. It will snap, usually at the worst moment, often taking a chunk of your workpiece with it.
A personal failure: I once rushed tensioning on a DeWalt saw, thinking “tight is right.” I was cutting 3/4-inch oak. Halfway through a curve, the blade snapped with a loud crack. The broken end whipped up, nicking the hold-down foot and leaving a deep gouge in the oak that ruined the piece.
The lesson wasn’t just about tension; it was about listening. A properly tensioned blade has a specific sound. Now I tune by ear every time.
Setting Up Your Workspace and Workpiece
 **
**
Your bench needs to be solid. A wobbly table transfers vibration to the blade, causing drift. Bolt the saw down or use heavy clamps.
Lighting is critical. Shadows hide your pencil line. Use a flexible LED lamp aimed directly at the cutting area.
For the workpiece, start with something manageable like 1/4-inch or 1/2-inch poplar or pine. Hardwoods like oak or maple are rewarding but demand sharper blades and slower feeds.
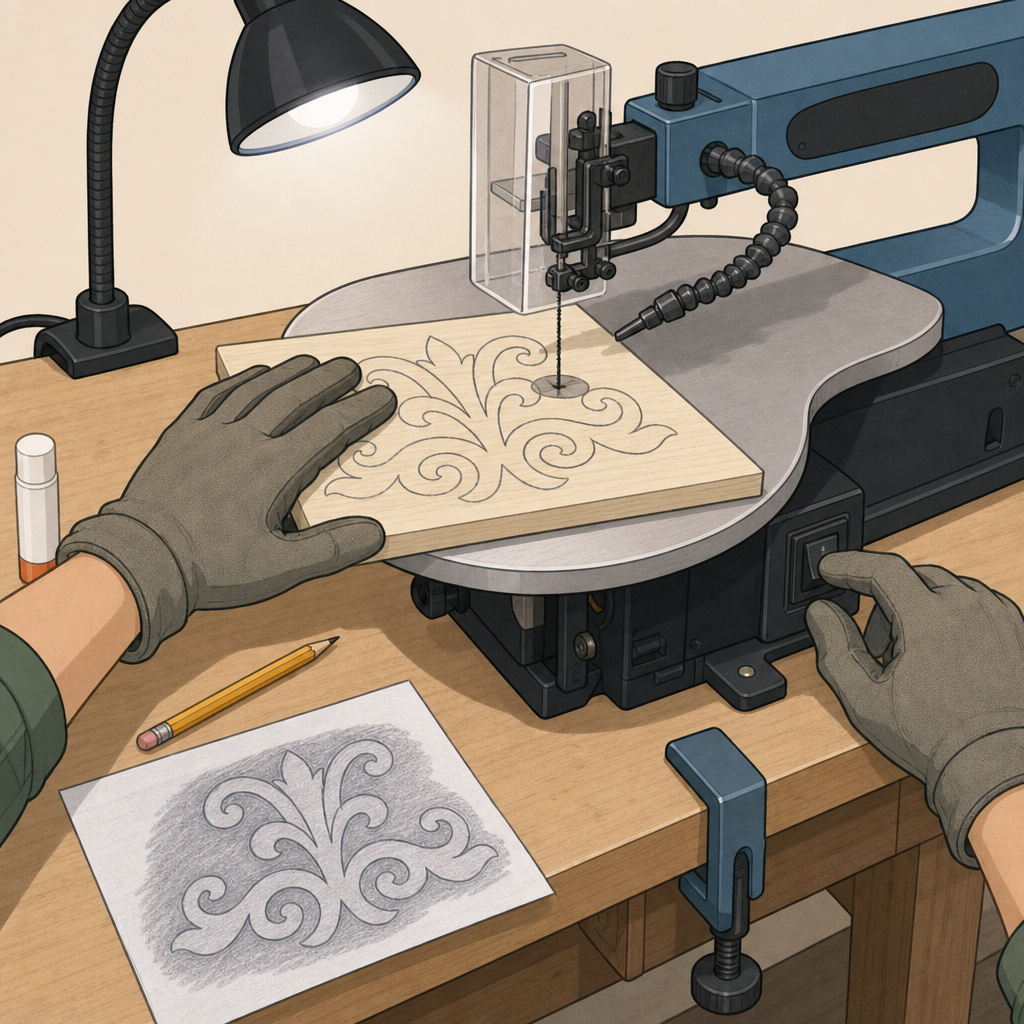
Transfer your pattern. You can draw directly, use carbon paper, or spray-adhesive the paper pattern to the wood. I prefer a glue stick, it holds well, and the paper peels off cleanly after cutting. If the pattern is complex, consider making a photocopy and using that as a sacrificial layer; the blade will cut through it.
If you’re cutting a piece for a precise joint, cut on the outside of the pencil line. The blade kerf removes about 0.020 to 0.030 inches of material. Cutting on the line leaves the piece undersized. Cut outside, then sand to the line for a perfect fit.
How to Make Your First Cut
Plug in the saw. Set the speed. For your first cuts in softwood, start at a medium speed, around 1200 SPM. For intricate details or hardwoods, drop to 800 SPM or lower.
Lower the hold-down foot so it just rests on the workpiece. It should provide slight pressure, not clamp the wood down.
Position your hands. Your dominant hand guides and feeds the wood from the side. Your other hand can support from behind, but keep all fingers clear of the blade path. The blade is thin and hard to see when running.
Turn on the saw. Let it reach full speed.
Gently push the wood into the blade. You should feel the teeth biting and pulling the material down slightly. Your job is to steer. To follow a curve, turn the wood as you feed. It’s a simultaneous push-and-rotate motion.
If you need to turn a sharp corner, you can “pivot” on the blade by stopping the feed, rotating the wood to the new direction, and then continuing. Don’t force the rotation while cutting, that’s how blades snap.
Listen and feel. The sound should be a steady zzzt-zzzt-zzzt. If it becomes a low groan, you’re feeding too hard or the blade is dull. If you smell burning, you’re either too fast or the blade is too fine for the material. Stop. Reassess.
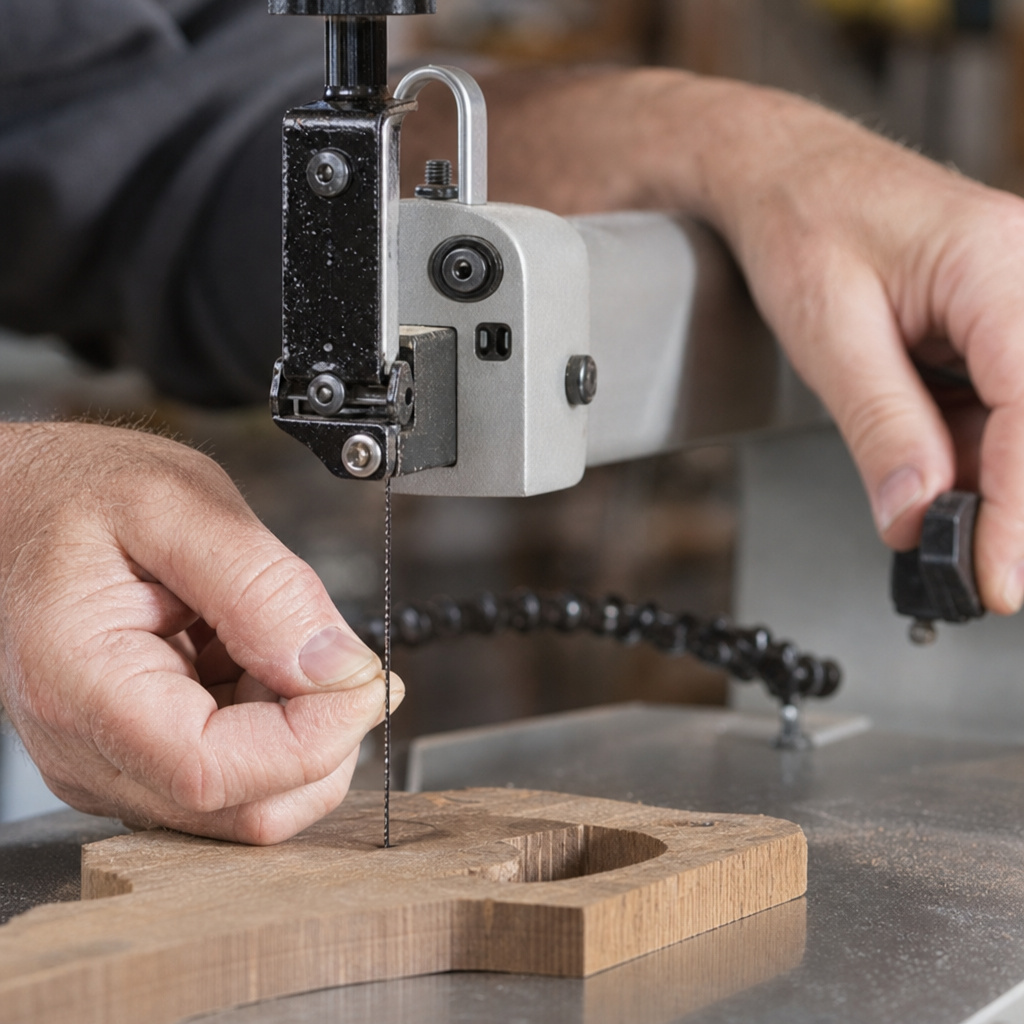
How to Make Interior Cuts (Piercing)
This technique unlocks fretwork, letters, and any design where you need to remove material from the middle of a piece.
- Drill a starter hole. Use a drill press or handheld drill with a 1/8-inch bit (or slightly larger than your blade width). Drill a hole inside the area you want to remove, not on the line.
- Unthread the blade. Turn off and unplug the saw. Loosen the tension knob and open the upper blade clamp. The blade will drop free.
- Thread the blade through the hole. Pass the blade up through the drilled hole from below. Re-clamp it in the upper chuck.
- Retension and cut. Re-tighten the upper clamp and apply tension. Now you can cut out the interior shape. The blade is trapped inside the workpiece.
- Remove the piece. Once the interior shape is cut free, you must reverse the process: unthread the blade to release the cutout, then rethread it to continue with the rest of the project.
Never try to “plunge cut” a scroll saw by pushing the blade down into the wood to start an interior cut. The thin blade will flex, buckle, and snap instantly, often kicking the workpiece back at you.
This process feels fiddly at first. Your first few attempts will take ten minutes. By the fifth, it’s a two-minute routine. The key is a sharp drill bit for a clean hole, a ragged hole can snag and break the blade as you thread it.
What Speed Should You Run?
Speed isn’t about going fast. It’s about control.
| Material & Cut Type | Recommended Speed Range | Reason |
|---|---|---|
| Thin plywood (1/4″) / intricate | 800 – 1000 SPM | Slower speed gives you more control for tight turns; reduces tear-out. |
| Softwood (pine, poplar) / general | 1560 – 1800 SPM | Faster speed clears sawdust efficiently for a smoother cut. |
| Hardwood (oak, maple) / curves | 1000 – —1200 SPM | Hardwood requires more force per stroke; slower speed prevents overheating. |
| Plastic or acrylic | 600 – 800 SPM | Slow speed prevents melting and gumming up the blade teeth. |
| Stacked cutting (multiple layers) | 1200 – 1500 SPM | A medium speed balances cutting power with control through increased thickness. |
The variable speed dial is your friend. Start slower than you think. You can always speed up. If the blade seems to be laboring or the cut is slow, increase the speed slightly. If the blade is wandering or the wood is burning, slow down.
Advanced Technique: Stacked Cutting
Want to make multiple identical pieces? Stack cutting is the way.
Take two or three pieces of wood of the same thickness. Apply a thin, even layer of spray adhesive between them, or use double-sided tape at the corners. Clamp the stack around the edges to ensure no movement. Now cut through the entire stack as if it were one piece.
The blade must be sharp and appropriate for the total thickness. A #7 skip-tooth blade is good for a stack of three 1/4-inch pieces. Feed slower. The blade is cutting through more material per stroke.
The risk here is layer slippage. If the adhesive fails, the layers will shift and your pieces won’t match. That’s why clamping or taping the perimeter is non-negotiable. I learned this the hard way cutting a set of six wooden leaves from 1/8-inch birch.
I only used spray adhesive. The third leaf came out skewed. All six were scrap. Now I always add a strip of painter’s tape around the edges.
Troubleshooting Common Problems
Even with the right setup, things go wrong. Here’s how to diagnose and fix them.
Problem: Blade drifting, cutting a curved line when you’re trying to cut straight.
- Likely Cause: Blade is dull, incorrectly tensioned (usually too loose), or installed backwards (teeth pointing up).
- Fix: Stop. Check tooth direction. Re-tension. If the blade has been used for more than two hours of cutting, replace it. A dull blade will always wander.
Problem: Excessive vibration and chatter.
- Likely Cause: Workpiece isn’t secured under the hold-down foot, saw isn’t bolted to the bench, or blade tension is far too low.
- Fix: Lower the hold-down foot to apply firm pressure. Ensure the saw is mounted solidly. Increase blade tension to the proper “ping.”
Problem: Blade breaking frequently.
- Likely Cause: Forcing the wood (feeding too fast), turning the wood too aggressively while cutting, excessive blade tension, or using a blade too fine for the material thickness.
- Fix: Slow your feed rate. Let the blade cut. Make smoother, slower turns. Check tension. Switch to a wider, more robust blade (e.g., from a #3 to a #5).
Problem: Burn marks on the cut edge.
- Likely Cause: Feeding too slowly with a dull blade, or feeding too fast causing friction heat. Also, speed set too high for the material.
- Fix: First, try increasing your feed rate slightly to clear sawdust. If that doesn’t help, reduce the speed. Lastly, install a new, sharp blade.
Maintenance is part of the process. After each session, unplug the saw and release the blade tension. Brush out sawdust from the table, blade chucks, and mechanism. A drop of light oil on the tension screw threads once a year keeps it smooth. For more involved upkeep, like checking arm bearings, our guide on table saw blade maintenance follows similar mechanical principles for precision tools.
Frequently Asked Questions
How is a scroll saw different from a jigsaw?
jigsaw is a handheld tool where you move the tool through the wood. A scroll saw is stationary, you move the wood through the tool. This gives the scroll saw far greater control for intricate, delicate work. The scroll saw blade is also much thinner, allowing for tighter curves.
Can a scroll saw cut metal?
Yes, but with major caveats. You need special metal-cutting blades (often labeled for “jewelers” or “metal”) and must run at very low speeds. It’s only suitable for thin sheet metal (up to 1/16-inch thick), brass, or aluminum. For anything thicker, use a different tool like a circular saw guide with a metal-cutting blade.
Why does my wood keep vibrating and lifting?
The hold-down foot isn’t adjusted properly. It should apply consistent downward pressure. Also, ensure you’re not trying to cut a piece that’s too small to be held safely. For very small parts, use a sacrificial backing board.
How often should I change the blade?
It depends on the material. A sharp blade in soft pine might last 3-4 hours of cutting. In hard maple or MDF, it might be dull after 90 minutes. The signs of a dull blade are increased effort to feed, wandering cuts, and a tendency to burn the wood. When in doubt, change it. Blades are cheap; ruined projects are not.
What’s the best scroll saw for a beginner?
mid-range, 16-inch saw with variable speed is the sweet spot. The DeWalt DW788 or a Porter Cable equivalent offers good reliability without a professional price tag. Avoid the absolute cheapest models; their vibration and imprecise tensioning will frustrate you as you try to learn.
Can I cut shapes freehand without a pattern?
Absolutely. This is called “free-form scrolling.” It’s great for making organic shapes like clouds or leaves. It requires a confident feel for steering the wood. Practice on scrap first to develop the muscle memory.
The Bottom Line
The scroll saw rewards patience and a light touch. Its magic isn’t in raw power, but in precision. Success hinges on the marriage of the right blade, tuned tension, and a feed rate that trusts the tool to do its job.
Start with simple patterns in softwood. Get the feel for steering. Master the blade-change and tensioning ritual until it’s second nature. Then move to harder woods and complex designs. The skills you build on the scroll saw, patience, precision, reading the feedback from the tool, translate directly to other stationary tools, like mastering table saw techniques for angled joinery.
Keep your blades sharp, your workspace clean, and your safety gear on. Listen to the saw. It will tell you everything you need to know.
{
“@context”: “https://schema.org”,
“@type”: “HowTo”,
“name”: “How to Use a Scroll Saw: The Complete Step-by-Step Guide”,
“totalTime”: “PT30M”,
“tool”: [
{
“@type”: “HowToTool”,
“name”: “Scroll saw with variable speed control”
},
{
“@type”: “HowToTool”,
“name”: “Assorted scroll saw blades (skip-tooth, reverse-tooth)”
},
{
“@type”: “HowToTool”,
“name”: “Safety glasses and cut-resistant gloves”
},
{
“@type”: “HowToTool”,
“name”: “Drill with 1/8-inch bit for interior cuts”
}
],
“step”: [
{
“@type”: “HowToStep”,
“name”: “Set Up Your Work Area”,
“text”: “Secure the scroll saw to a sturdy bench in a well-lit area. Ensure the power cord is out of the way and you have a clear space for feeding material.”
},
{
“@type”: “HowToStep”,
“name”: “Select and Install the Blade”,
“text”: “Choose a blade based on material thickness and cut intricacy. Install it with teeth pointing down and forward, then tighten the tension knob until the blade deflects about 1/8 inch when plucked.”
},
{
“@type”: “HowToStep”,
“name”: “Adjust Speed and Position Workpiece”,
“text”: “Set a slower speed for intricate cuts or hardwoods, a faster speed for softwoods. Place your workpiece on the table, lower the hold-down foot, and ensure your hands are clear of the blade path.”
},
{
“@type”: “HowToStep”,
“name”: “Make the Cut”,
“text”: “Turn on the saw. Gently feed the wood into the blade, letting the teeth do the work. Steer the piece by turning it as you push, keeping the cut just outside your pencil line.”
},
{
“@type”: “HowToStep”,
“name”: “Perform an Interior Cut”,
“text”: “Drill a 1/8-inch hole inside the shape you want to remove. Unthread the blade, pass it through the hole, rethread and tension it, then cut out the interior shape.”
}
]
}
{
“@context”: “https://schema.org”,
“@type”: “FAQPage”,
“mainEntity”: [
{
“@type”: “Question”,
“name”: “How is a scroll saw different from a jigsaw?”,
“acceptedAnswer”: {
“@type”: “Answer”,
“text”: “jigsaw is a handheld tool where you move the tool through the wood. A scroll saw is stationary, you move the wood through the tool. This gives the scroll saw far greater control for intricate, delicate work. The scroll saw blade is also much thinner, allowing for tighter curves.”
}
},
{
“@type”: “Question”,
“name”: “Can a scroll saw cut metal?”,
“acceptedAnswer”: {
“@type”: “Answer”,
“text”: “Yes, but with major caveats. You need special metal-cutting blades (often labeled for \”jewelers\” or \”metal\”) and must run at very low speeds. It’s only suitable for thin sheet metal (up to 1/16-inch thick), brass, or aluminum. For anything thicker, use a different tool like a circular saw guide with a metal-cutting blade.”
}
},
{
“@type”: “Question”,
“name”: “Why does my wood keep vibrating and lifting?”,
“acceptedAnswer”: {
“@type”: “Answer”,
“text”: “The hold-down foot isn’t adjusted properly. It should apply consistent downward pressure. Also, ensure you’re not trying to cut a piece that’s too small to be held safely. For very small parts, use a sacrificial backing board.”
}
},
{
“@type”: “Question”,
“name”: “How often should I change the blade?”,
“acceptedAnswer”: {
“@type”: “Answer”,
“text”: “It depends on the material. A sharp blade in soft pine might last 3-4 hours of cutting. In hard maple or MDF, it might be dull after 90 minutes. The signs of a dull blade are increased effort to feed, wandering cuts, and a tendency to burn the wood. When in doubt, change it. Blades are cheap; ruined projects are not.”
}
},
{
“@type”: “Question”,
“name”: “What’s the best scroll saw for a beginner?”,
“acceptedAnswer”: {
“@type”: “Answer”,
“text”: “mid-range, 16-inch saw with variable speed is the sweet spot. The DeWalt DW788 or a Porter Cable equivalent offers good reliability without a professional price tag. Avoid the absolute cheapest models; their vibration and imprecise tensioning will frustrate you as you try to learn.”
}
},
{
“@type”: “Question”,
“name”: “Can I cut shapes freehand without a pattern?”,
“acceptedAnswer”: {
“@type”: “Answer”,
“text”: “Absolutely. This is called \”free-form scrolling.\” It’s great for making organic shapes like clouds or leaves. It requires a confident feel for steering the wood. Practice on scrap first to develop the muscle memory.”
}
}
]
}