
How to Use a Drill to Strip Copper Wire Correctly & Safely
This post contains affiliate links. As an Amazon Associate, we earn from qualifying purchases.
To strip copper wire with a drill, you need the right stripping tool attachment, not a makeshift blade. Match the tool’s size range to your wire’s gauge, set the blade depth or select the correct bushing, and run your drill at a slow, controlled speed, under 200 RPM for most professional kits. Using an impact driver or the wrong attachment will damage the conductor.
The “under 200 RPM” spec isn’t a suggestion. It’s the ceiling printed in the Ripley US21-7200 manual because faster rotation generates heat that melts insulation onto the copper, leaving a gummy residue that solder won’t stick to. That residue takes a chemical cleaner to remove, which adds a step and cost you were trying to avoid.
What follows is the breakdown of the two main tool types, the non-negotiable safety steps, and the specific settings that turn a frustrating, blade-snapping chore into a five-minute job. You’ll also see where the common DIY hacks fail and what a real electrician reaches for instead.
Key Takeaways
- Impact drivers are banned for this task by multiple OEM manuals; the hammering action destroys the tool’s internal bearings and shreds insulation.
- Wire type dictates tool choice: Tools like the Milwaukee 48-32-6404 series are for solid core wire only; using them on stranded wire crushes and unravels the conductors.
- Speed kills the strip: Operate at a “moderately slow” pace, specifically under 200 RPM. High speed melts insulation.
- The cable end must be clean and round. A deformed end from dull cutters will jam the tool, potentially breaking blades or twisting the cable.
- Strip length is a set-and-forget adjustment on pro tools like the Ripley kits; guessing by eye leads to inconsistent, often too-short strips that fail inspection.
The Two Types of Drill-Powered Strippers
You have two mechanical paths: bushing-style strippers and adjustable-blade strippers. Picking the wrong one for your wire type is the fastest route to ruined copper and a stalled project.
Bushing-style tools, like the Ripley US21-7200 THHN All-In-One Kit, use interchangeable, color-coded bushings. Each bushing is precision-machined for a specific range of conductor sizes. Inside, a dynamic spring-loaded cable positioner compensates for slight variations in wire diameter. This system is built for reliability on a jobsite, stripping #2 AWG to 400 MCM THHN cable.
The Ripley US21-7200 instruction sheet (US21-6003 rev1) explicitly states: “Do not use an impact drill with the US21 stripping tool. Run the drill moderately slow, up to 200 RPM.” This 200 RPM limit is a sourced spec, not a guess.
Adjustable-blade strippers, like the Greenlee G2090/03560 or the StripMeister Original, have a depth knob you turn to set the blade. You match the blade to the wire’s outer diameter, not the conductor size. This style is versatile for mixed scrap or DIY shops, handling #18 AWG to 250 MCM.
| Tool Type | Best For | Key Limitation | Mechanism |
|---|---|---|---|
| Bushing-Style (e.g., Ripley) | Consistent, high-volume work with known cable types (THHN) | Requires correct bushing on hand; less flexible for random scrap. | Pre-set blade depth in a spring-loaded bushing. |
| Adjustable-Blade (e.g., StripMeister, Greenlee) | Variable scrap, DIY recycling, small shops | Blade depth must be calibrated by hand; can drift with vibration. | User-adjusted blade depth via a knob or screw. |
The Milwaukee 48-32-6404 represents a third, narrower category. Its manual states it is for solid gauge wire only. If you feed stranded wire into it, the blades catch individual strands, pulling and deforming the entire conductor. That wire is now garbage for any termination.
What You Absolutely Need Before You Start
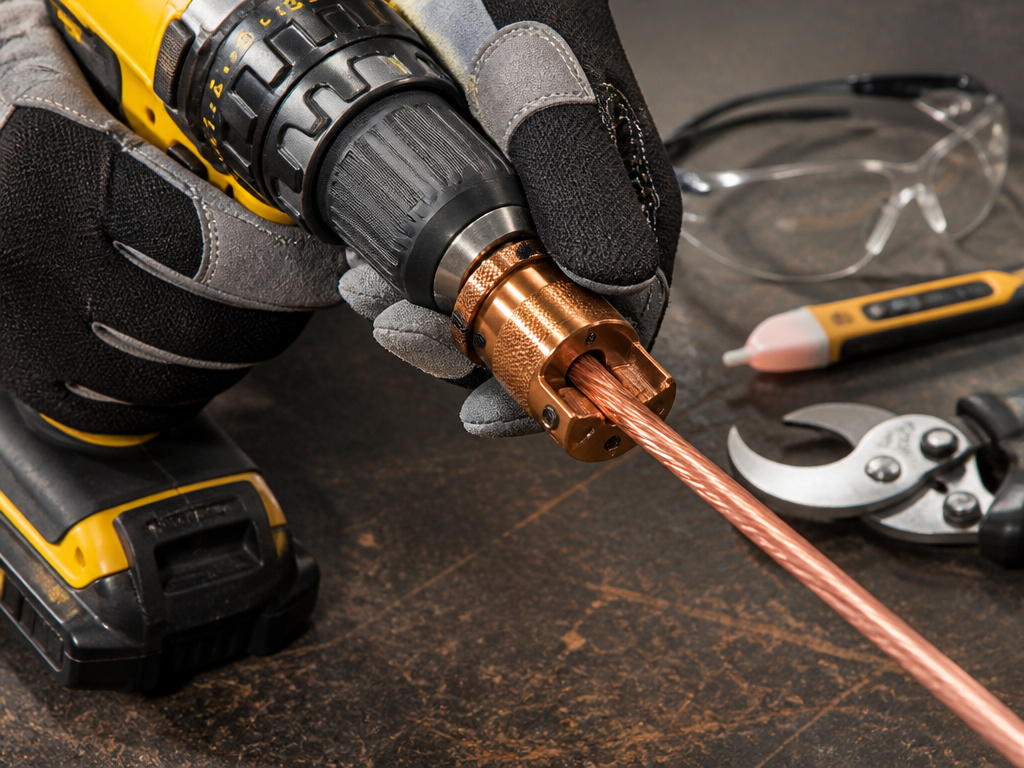 This isn’t just about having a drill. The supporting tools prevent the most common failures.
Before you start: You are working with sharp blades under rotational force. Wear ANSI-approved safety glasses. Gloves protect your hands from sharp insulation edges and minor blade nicks. Assume every wire could be live until you verify with a non-contact voltage tester.
A Variable-Speed Drill: Corded or cordless is fine, but it must have a low-speed trigger control. A drill with only high-speed settings will violate the 200 RPM rule immediately.
Wire Cutters: Not just any cutters. You need curved blade cable cutters or a hacksaw. The Ripley WS-22A manual is specific: “For best results, the cable end… Should be cut with a hack saw or curved blade cable cutter. Injury or tool damage may occur with a badly deformed cable end.” A crushed, oval end won’t feed into the stripper’s guide.
A Tape Measure or Strip Gauge: If your tool has an adjustable stop, you’ll set it. Guessing leads to strips that are too short for your connector or too long, wasting wire.
The Correct Stripping Attachment: This is non-negotiable. Confirm its size range includes your wire. For bushing tools, have the correct color-coded bushing ready.
Step-by-Step for a Bushing-Style Stripper
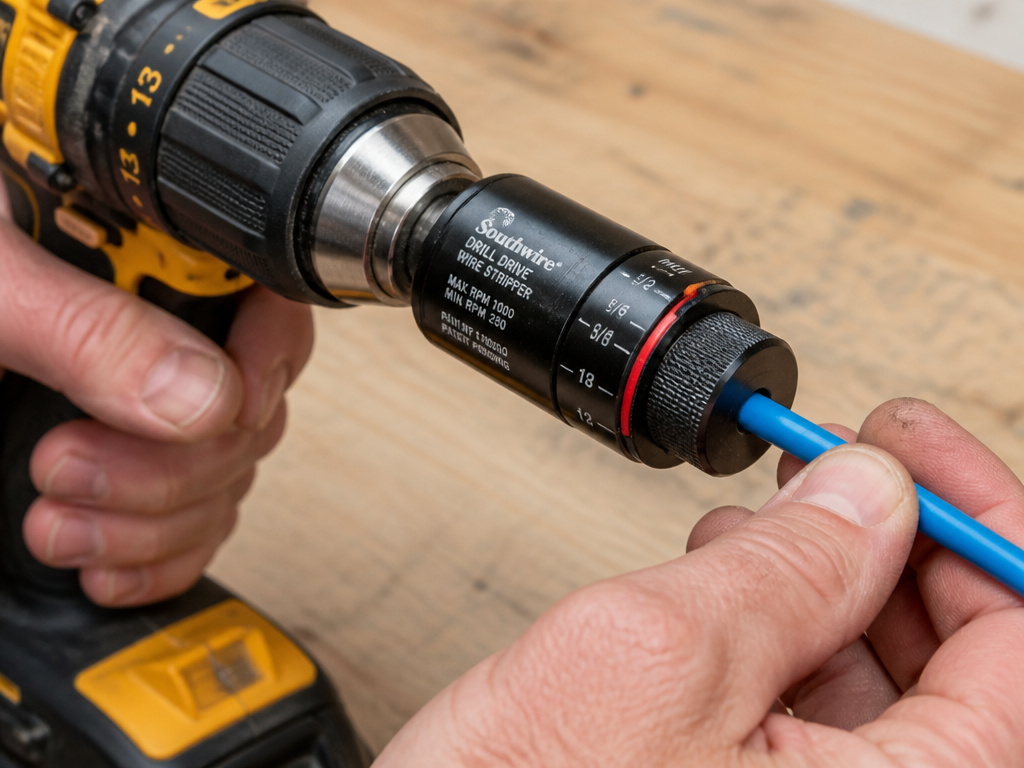 This process uses the Ripley US21-7200 as the model. The principles apply to any similar kit.
1. Match the Bushing to the Wire
Pull the conductor sizing chart. For THHN, the printed gauge on the insulation is reliable. For unknown scrap, use a wire gauge tool. Select the bushing whose range includes your wire. Using a bushing that’s too large will not strip cleanly; one that’s too small simply won’t fit.
2. Lock the Bushing and Set the Strip Length
Insert the bushing into the tool body and rotate until it audibly snaps into the collar. Then, loosen the lock screw on the stop assembly. Slide the stop so the red O-ring aligns with your desired length on the scale, common lengths are 1/2″, 3/4″, or 1″ for terminals. Retighten the screw firmly.
3. Attach Your Drill and Prepare the Wire
Chuck the tool’s drive shaft into your drill. Set your drill to its lowest speed setting. Now, cut your wire end cleanly with your cable cutters. A clean, round cut is the single biggest factor in smooth feeding.
4. Insert, Engage, and Strip
Hold the drill with both hands. Insert the wire into the bushing until you feel it hit the blade. You’ll feel resistance, especially on larger copper. That’s the spring-loaded ramp engaging, this is normal. Pull the trigger slowly. The tool should begin to self-feed. Maintain gentle forward pressure.
5. Remove the Tool Correctly
When the wire hits the internal stop, the insulation chip will break off. Stop the drill motor completely. Only then should you pull the tool back off the wire. Pulling it off while the drill is still spinning will twist and damage the conductor strands.
Step-by-Step for an Adjustable-Blade Stripper
The sequence here is different. Calibration is everything.
1. Set the Blade Depth with a Test Piece
Cut a short, 6-inch piece of the exact wire you want to strip. Loosen the blade depth adjustment knob. Place the wire in the largest guide hole it fits through without force. Lower the blade until it just kisses the insulation. Tighten the knob slightly.
2. Test and Adjust
Run the test piece through slowly. Examine the copper. If insulation remains, lower the blade a hair, think one-eighth of a turn. If you see shiny scratches or nicks on the copper, raise the blade immediately. A nicked conductor has a reduced cross-sectional area and is a point of future failure.
Where this goes sideways: Setting the blade by eye without a test strip. The difference between a clean strip and a scored conductor is less than half a millimeter. That mistake isn’t visible until you’ve ruined twenty feet of wire.
3. Set Your Guide and Strip in Batches
Once your test piece is clean, note your settings. If you’re stripping a long run, use a table or helper to support the wire coil so it feeds smoothly. For a tool like the StripMeister, use the built-in ROMEX adapter if you’re stripping sheathed cable, it splits the outer jacket before the inner wires hit the blade.
Why Your First Attempt Probably Failed
The usual suspects have specific, mechanical causes.
The wire won’t feed. The cable end is deformed. It’s not round, so it jams against the entrance of the bushing or guide hole. The fix is to cut it again, cleanly. A dull cutter causes this every time.
The insulation is melting, not cutting. Your drill speed is too high. You’re generating friction heat. Drop your speed dramatically. If you’re already on the lowest setting and it’s still melting, your drill’s “low” is too high for this task. You need a drill with better low-speed control.
The blade skips or chews the insulation. This is often a blade depth issue on adjustable tools or using the wrong bushing. On a bushing tool, it can mean the bushing isn’t fully locked in, allowing it to wobble.
The tool gets violently jerked. You are using an impact driver. The hammering action is destroying the precision parts inside the stripper. Stop. Use a standard drill/driver.
The Tools That Actually Work
For most DIYers stripping miscellaneous scrap, the StripMeister Original is the default. Its aircraft aluminum body handles the abuse, and the adjustable range covers the wire you’re likely to find. It pairs with any standard drill.
For electrical work with new THHN or similar cable, a Ripley US21-7200 kit is what the pros use. The bushings make it foolproof for consistent, undamaged strips. It’s an investment for frequent use.
Remember the Milwaukee 48-32-6404 only if you are exclusively stripping solid core wire from house wiring or similar. It’s a specialist.
Your drill choice matters too. A cordless drill and impact driver combo kit gives you the right tool for each job. For heavy-gauge wire, ensure your drill bits are sharp for cutting clean ends, and understand the difference between a brushless drill and a brushed model when considering torque at low RPM.
Frequently Asked Questions
Can I use my impact driver to strip wire?
No. Multiple manufacturer instruction sheets, including Ripley’s, explicitly prohibit it. The impact mechanism’s hammering creates uneven torque that damages the stripper’s internal components and produces a ragged, torn strip on the wire.
What’s the largest wire gauge I can strip with a drill?
With industrial kits like the Ripley US21-7200, you can strip up to 400 MCM cable, which is about 0.82 inches in diameter. For adjustable tools like the StripMeister, the limit is typically 250 MCM. Always check the specific tool’s capacity.
Why is my stranded wire getting frayed?
You are likely using a tool designed for solid wire, like the Milwaukee 48-32-6404 series. Its blades are designed to score and snap insulation on a solid core. On stranded wire, those blades catch and pull individual strands. You need a tool with a bushing or guide system that surrounds and supports the stranded bundle as it’s cut.
How do I strip the outer jacket from Romex cable?
Many adjustable strippers, including the StripMeister, have a built-in ROMEX adapter. It’s a small, hooked blade or slot. You slide the Romex into this adapter first to slice the outer plastic sheath lengthwise before feeding the individual conductors through the main stripping blade.
Is it worth buying a dedicated wire stripping machine?
For processing hundreds of pounds of scrap copper, yes, a dedicated machine like the StripMeister E350X is faster and hands-free. For occasional use or job-site electrical work, a drill-powered attachment is far more cost-effective and portable. The right wire crimping tools are a more important investment for finishing your connections properly.
The Bottom Line
Stripping copper wire with a drill isn’t about force. It’s about precision and the right attachment. Match the tool to your wire type, bushing kits for known electrical cable, adjustable tools for mixed scrap. Honor the 200 RPM speed limit and never use an impact driver. Start with a clean, round cut on the wire end.
The goal is bare, undamaged copper. A nicked conductor from a mis-set blade or a melted, gummy residue from high speed defeats the entire purpose. Do it once with the correct drill and driver sets and proper technique, and you’ll never go back to hand strippers for anything bigger than a phone charger.
